
|
vulturesrow posted:Properly installed fan box 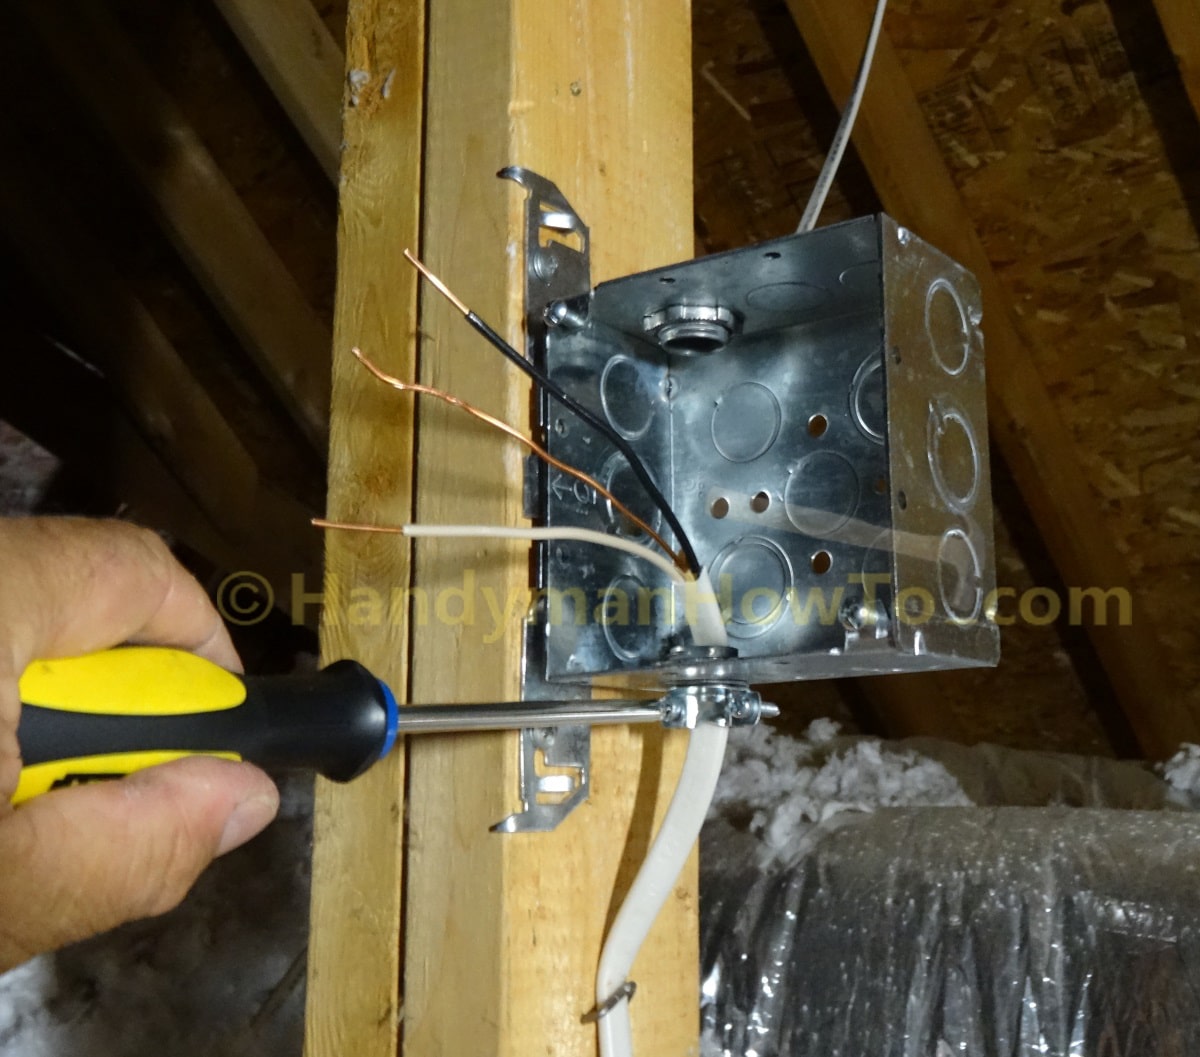 or  e:fb HycoCam fucked around with this message at 19:18 on May 15, 2017 |
 #
¿
May 15, 2017 19:15
#
¿
May 15, 2017 19:15
|
|


|

|
| # ¿ May 2, 2024 23:01 |
|
|
Elendil004 posted:I wonder if I can make them magnet the grounds under penalty of paying for bobcat repairs if they leave a nail. Don't worry about the skid steer tires--they are tough. More likely to push the nail in the dirt than the tire. Plus most operators have a $5 patch kit in their truck if a nail does get in the tire and air actually leaks. Gravel driveways and roof replacements is when it gets ugly. Car tires seem to find the nails better. There are roller magnets which do a decent job of finding the nails. Four or five passes over an area and you'll find all sorts of stuff. ($25 version Others) HycoCam fucked around with this message at 05:41 on May 16, 2017 |
|
#
¿
May 16, 2017 05:38
|
|
|
Squashy Nipples posted:Anyway, why would he mix the cables? Just what he had on hand?
|
|
#
¿
Jul 13, 2017 00:59
|
|
|
And if you don't already use occupancy/vacancy switches in your bathrooms--might want to think about getting one if you install a quiet fan. The WhisperQuiets and higher end Broans really are soundless--very hard to tell if they are on and they will get left on.
|
|
#
¿
Jul 14, 2017 04:59
|
|
|
SouthShoreSamurai posted:I don't know if there's a small motor thread. If there is I can't find it. Disconnect your mower deck and flip it over. I'm guessing bent blade. If you busted a pulley mount you'd most likely have the mower belts coming off.
|
|
#
¿
Jul 14, 2017 18:54
|
|
|
SoundMonkey posted:it's gonna be on a whole lot, my house is an elaborate rube goldberg machine of ventilation and touching one thing sets off a butterfly-effect where now it's too hot to sleep upstairs Depending where you live, whole house fans can be awesome. If you have cool nights with low humidity a whole house fan can make a house very comfortable with much less electricity than air conditioning. But someone is heading into the attic to if you went with a whole house solution and you need to have a well vented attic (which isn't always the case with older homes.) Bathroom fan 110CFM ($30-$150) Whole House fan 6000CFM ($300 to $500)
|
|
#
¿
Jul 14, 2017 19:46
|
|
|
CharlieWhiskey posted:Bought a house. Removing 30-40 year old wallpaper and prepping for paint. Across a built-in from the fireplace in an alcove, we found the OO installed cement board over drywall and blended it quite well with mud. Removed it and wall seems straight. Why would it have been there? Some heat retention around the fireplace? How close to the fireplace? quote:Can James Hardie products be used around a masonry fireplace?
|
|
#
¿
Jul 20, 2017 07:32
|
|
|
CharlieWhiskey posted:before converting to gas
|
|
#
¿
Jul 20, 2017 18:19
|
|
|
Omne posted:My loving jerkoff neighbors have allowed kudzu vines to grow rampant in their yards. I've been cutting them back whenever they creep through the fence, but I've noticed they have started making their way from tall trees over to my roofline. They're way too high up for me or my 18' ladder to reach. Any ideas other than pouring bleach or burning their yards to the ground? I don't want these vines destroying things up there. If kudzu is a problem in your area and you live in a residential area, I'd bet you have building codes specifically addressing kudzu infestations. that would make the "correct" answer to your problem--call your municipal code enforcement office and register a complaint. They will send someone out with a badge to either ask your neighbor to take care of the problem or send a town maintenance crew with lots of experience removing kudzu. With that said--the rural method for kudzu removal always works: glyphosate and triclopyr are the herbicides to look for. Find concentrates of both (https://www.amazon.com/Agri-Star-Triclopyr-Herbicide-Gallon/dp/B004S70RK4 https://www.amazon.com/Glyphosate-Plus-Herbicide-Surfactant-Gallon/dp/B004QPXY9Y) mix them up super strong. Use diesel fuel instead of water for the coup de grace. While your shopping on Amazon might as well pickup ninja suit--get a couple of ladders ready for a moonless night and spray the crap out of kudzu at the roots. Just don't get shot...
|
|
#
¿
Jul 20, 2017 19:04
|
|
|
MeKeV posted:I'm looking at creating a semi-temporary narrow table, to make a better use of space near a doorway. But in a few years, you'll hate having a higher table. Your no-longer-needing-highchair kids will have a hard time getting into chairs/pulling the chairs up to a 36" table until they are 10yro. i.e. when your kids start sitting in chairs and feeding themselves--you'll want a 24" table. ") If you are going to use the table for meals frequently--my recommendation would be go for standard table height and keep your eyes peeled for a shorter highchair. If you are going to use the table for meals frequently--my recommendation would be go for standard table height and keep your eyes peeled for a shorter highchair.
|
|
#
¿
Jul 20, 2017 19:06
|
|

|
kid sinister posted:Ugh. I'd rip that all down and put up proper cement board and tile. And interior insulation is mostly for soundproofing.
|
|
#
¿
Aug 3, 2017 21:10
|
|
|
DrBouvenstein posted:So it's either that, or bathroom vanity style. I'm just not sure what I'm looking for even exists...might have to just run the romex up the wall inside some conduit and put in a pendant or recessed lighting. If you stick with wall mount, maybe something flush might not be such a sore thumb? https://www.amazon.com/Justice-Design-Group-Lighting-CER-0940W-BIS/dp/B0050A7NTQ https://www.amazon.com/Philips-57910-31-48-Adjustable/dp/B0045Y1GIM https://www.amazon.com/Progress-Lighting-P5712-30-Non-Metallic-Non-Corrosive/dp/B000K2GEX0 e: another wall mount: https://www.wayfair.com/Nuvo-Lighting-Latitude-1-Light-Wall-Sconce-OUV4540.html My first thought was some kind of deck/step light, but can't seem to find one with a enough wattage to be useful in the kitchen. http://www.homedepot.com/p/Lithonia-Lighting-White-Integrated-LED-Square-Step-and-Stair-Deck-Light-OLSS-WH-M6/204718171 HycoCam fucked around with this message at 21:41 on Aug 23, 2017 |
|
#
¿
Aug 23, 2017 21:24
|
|
|
TooMuchAbstraction posted:I bought a new shower curtain, which is taller than my old one. I raised the curtain bar to compensate, but this had the effect of narrowing the amount of space that air had to pass over the curtain by a factor of 3 or so. Net result, when I turn the exhaust fan on, the curtain blows into the shower stall, making things a little claustrophobic. Opening the window helps a bit, but not enough. Another method is to increase the space in the shower with a curved shower rod: https://smile.amazon.com/Bennington-Adjustable-Double-Curved-Curtain/dp/B01CUF3IEC https://smile..amazon.com/E35604SS-NeverRust-Aluminum-Curtain-72-Inch/dp/B00NXZQJQ8
|
|
#
¿
Aug 28, 2017 19:05
|
|
|
The replacement timer switch would be WE4M533? (http://www.ebay.com/itm/Genuine-OEM-GE-Dryer-Timer-WE4M533-WE4M364-AP5780508-PS8690648-/361048442891) https://www.youtube.com/watch?v=WNcqdcPjICU Not too bad to access and remove. Maybe take out the busted switch and see if you can tear it down to repair the shaft? Take pictures of where the wires connect for the re-install. (And be prepared to buy a new switch if the tear down doesn't go smoothly.)
|
|
#
¿
Aug 28, 2017 20:18
|
|
|
Mirabelle, Miseno, and ProFlow are all the same brand--Furgeson Plumbing imports from Asia. Or more plainly put--house brands for Faucet.com. If you are looking for something high-end and exotic online is often the only place to find it. If you are looking at something more traditional, shop for price online and then check out your local big box hardware stores and local plumbing supply houses. I've found the pricing to be similar, but delivery and any kind of return should there be a problem is much easier. You nailed the search criteria for your tub--fits in your space, has the drain located where it can connect to your drainage, and is the right color. Pay attention to the size of the capacity too--the Mirabelle you listed holds 40gallons versus 60 gallons of the others. Going to be a squishier tub, but is going to fill a lot quicker and easier to keep hot.
|
|
#
¿
Sep 1, 2017 20:01
|
|
|
Jerk McJerkface posted:So I was drilling a small hole in my basement floor to anchor my laundry sink, and on the fourth hole the masonry drill bit broke off about 1/2 in below the surface. Ugh. What can I do? I figure maybe I can just drill it out with a smaller bit, is that the only option? What kind of bit should I get to drill out another bit. Snapped in concrete sucks. Chipping away so you can get vise grips on the bit then patch and redrill...
|
|
#
¿
Sep 1, 2017 20:03
|
|
|
LawfulWaffle posted:So I tested out a semi-hidden spigot on the side of my house and the, uh, handle snapped off? The screw that attaches the handle to the spigot snapped and I'm not 100% sure how to proceed. I know how to turn my house's water off but I don't know if I need to replace the whole spigot or if there'd be a way for me to just replace the handle to the valve. What is on the other side of the wall? Can you easily access the other side of the wall? i.e. crawl space or unfinished basement? Looking at all that rust makes me want to replace the sillcock with a new one that has more brass/less metal that oxidizes.
|
|
#
¿
Sep 5, 2017 18:49
|
|

|
Sub Par posted:So I gutted most of my bathroom this weekend, and it's time to start installing poo poo. First, there is a small amount of mold damage in two places behind the shower walls. The shower wall was decently-installed slate tile. The wood was not wet when I pulled off the backer board, and this shower was redone fairly recently (last 10 years). The house was built in 1949 and it's entirely possible that this mold is from the original shower install and was just ignored when they did the newer one. If the mold has been dormant for a decade, you should be able to encapsulate the wood. Get some liquid mold cleaner. Scrub the area down. Let it dry throughly. And cover everything with mold encapsulation paint. Mold encapsulation won't work in areas with moisture and active mold--think a basement wall with bad waterproofing. Mold encapsulation is the wrong way to fix about 95% of the mold problems that show up in houses--but I think in your case--mold encapsulation is all you need to do.
|
|
#
¿
Sep 5, 2017 23:19
|
|
|
Picture won't embed, but this is the general idea to ensure your basin is vented: http://www.diychatroom.com/attachments/f7/41418d1321971221-draining-laundry-sink-into-washer-stack-new-bitmap-image2.jpg e: the air admittance valve: http://www.homedepot.com/p/STUDOR-1-1-2-in-or-2-in-PVC-Mini-Vent-Adapter-20341/202275238 You shouldn't need a pump, appears everything is downhill from your washing machine.
|
|
#
¿
Sep 6, 2017 19:29
|
|
|
Vermont varies by municipality on the use of AAV's (air admittance valves). Safest bet, call your local Permitting and Inspection office and ask an inspector. Our inspectors have designated office hours before 9:30AM and after 3:30PM when they are available to answer questions. e:If your local codes follow the above--AAV's are fine to use with your laundry sink. HycoCam fucked around with this message at 21:26 on Sep 6, 2017 |
|
#
¿
Sep 6, 2017 21:21
|
|
|
eddiewalker posted:I mean, even the primer isn't sticking great. I can scratch it back to the green PCB fairly easy. Maybe: http://www.homedepot.com/p/Plasti-Dip-14-5-oz-Black-Plasti-Dip-11603-6/202196703
|
|
#
¿
Sep 8, 2017 03:47
|
|
|
Tres Burritos posted:Yeah, seems that way. I want to make something instead of buying though, so maybe I'll do some pipe fitting shelving. I think I will try hanging some stuff off the joists at some point but it'll be something light like a diy whiteboard type deal. https://www.thisoldhouse.com/how-to/build-it-black-pipe-bookshelf or a bit better looking: https://www.thisoldhouse.com/how-to/build-it-black-pipe-bookshelf
|
|
#
¿
Sep 22, 2017 18:31
|
|
|
Josh Lyman posted:Water enters the dishwasher from a hole in the left, collects at the reservoir in the bottom, then gets sprayed up. I'm not sure if this is how all dishwashers work, but the water is coming in fine. It's the spraying up part that's failing, which I would assume is a pump issue. http://www.ebay.com/itm/4681EA2002H-for-LG-Washer-Washing-Machine-Dishwasher-Pump-PS3523285-AP4438603-/381444939938 http://www.ebay.com/itm/5221DD1001A-Dishwasher-Water-Valve-Inlet-5221DD1001F-Fits-LG-PS9495756-AP5810251-/152356567259 HycoCam fucked around with this message at 02:07 on Sep 24, 2017 |
|
#
¿
Sep 24, 2017 01:03
|
|
|
Josh Lyman posted:The pump motor assembly is $183 and literally requires disassembling the entire dishwasher, so I've mostly convinced the homeowner to replace the washer. Can you remove the pump from the sump assembly? The pump alone is $30. But would suck to have a blockage somewhere inside the sump assembly that is the cause of the water restriction.  As a renter, you've already gone above and beyond trying to fix the thing. Should be on your landlord to replace or repair.
|
|
#
¿
Sep 25, 2017 17:52
|
|
|
raej posted:I have some Ikea LED strips lighting up some shelving. Right now there are two sets of 4 strips, requiring two power plugs and two switches. Ideally, I would like all 7 strips to be on one power plug/switch. Has anyone had any luck with this, or am I going to burn my house down? Can you give us an HTML link for the lights? Length tends to be the problem with LED lights--too long and your voltage is going to drop causing the lights to be dimmer toward the end if you aren't driving with enough amps. Connecting the LEDs in combination of series (i.e. two sets four strips one after the other, like you have now) and parallel (connect the two sets of four lights to your power supply) is the way to go. i.e. you have a Y connection coming from your power supply that powers the two sets of four strips (versus all eight strips connected one after another)
|
|
#
¿
Sep 25, 2017 18:54
|
|
|
 Where is the on/off switch--on the long cord going to the outlet or on the white square? Hoping the switch is on the cord with the outlet plug. If that is the case, the wiring is pretty easy, cut the outlet cord so you have two switch cords not attached to anything--make sure you leave enough wire between the switch and the white box/LED driver. Throw away one of the switch cords. Splice the two white boxes/LED drivers to your remaining outlet cord. Be wary your splice will be carrying 110v/220v and use white heatshrink to cover your splices. fe: and if you paid $140 for each set of lights--put them back in the box and send them back! (The $20-$30 price range is more reasonable)
|
|
#
¿
Sep 25, 2017 20:03
|
|
|
EAT FASTER!!!!!! posted:I really have to disagree, but as seemingly sensible as these kinds of warranties are, they're mostly not worth the paper on which they're printed. The programs have high deductibles, pay for inferior replacements when needed and send bad service people. ^^This. Warrant companies make their money based on how fast and how cheaply they repair the various claims. When you buy the warranty and mention you have older Lennox systems and want to make sure they will be replaced with the same--they answer is always yes. But when those Lennox systems do die, inevitably you're getting a Goodman or worse as a replacement. When buying a house you'll often get a chance to compare a house with a owner that stays on top maintenance to a house that has been under a home warranty for a decade.
|
|
#
¿
Sep 28, 2017 22:34
|
|
|
Steve French posted:Any great suggestions? This video gives you an idea of what to do. (But don't copy that video--there are no cleanouts/ways to clear leaves.) https://www.thisoldhouse.com/how-to/how-to-extend-downspout 4" to 6" PVC tied into 8" to 12" black corrugated piping would be my recommendation--but that too is going to variable based on how much roof square footage you have and your climate/location.
|
|
#
¿
Sep 30, 2017 03:19
|
|
|
Where do you live? Do you have very little rain? The leaves in your picture have me thinking you're not in a desert. You also mentioned this was an added downspout, which makes me wonder why you added a downspout? If the problem was water gurgling out the top of your gutters--I think I know why. A 2" drain won't handle the runoff from a shed roof, much less a house roof. The other issue would be clogs. The best gutter guards don't stop all debris and constricting a drain (going from multiple 2x3 downspouts to a 2" pipe kind of constricting) is only going to exacerbate clogging in your buried drain lines. Also, might be a good idea to have one these around before you cut into anything--just in case. https://smile.amazon.com/ER-Emergency-Ready-8SP-Multi-Use/dp/B008DEYYAC or https://www.walmart.com/ip/Orbit-53266-28-in-Curb-Key/21903040 e: you posted as I was typing they are indeed drain lines!
HycoCam fucked around with this message at 18:12 on Sep 30, 2017 |
|
#
¿
Sep 30, 2017 18:10
|
|
|
https://www.lowes.com/pd/InvisaFlow-StealthFlow-29-in-Black-Vinyl-Downspout-Extension/3501756 These will keep the water away from your foundation and out of your perimeter beds. Not very attractive long term, but they will get your through the winter. I can understand a bit why you are using multiple, smaller drain lines--depending on your roof size and rain volume, combining the drain lines into one outflow can produce a torrent that rivals an open fire hydrant. Your neighbors would probably not be big fans of your outflow launching into the middle of the street.
|
|
#
¿
Sep 30, 2017 18:19
|
|
|
Are you trying to run flexible duct for 20+ feet and inside a wall? You typically don't want to run a dryer vent more than 25'. And when you are calculating length--every 90 degree angle adds 5' to the length. i.e. your picture has 15' for length in the bends before adding the straight lengths. Having too long a dryer run results in condensation happening before the air can get out of your house. Long vertical runs exacerbate the condensation problem. There are booster fans you can add to long runs, but those should be a last resort. You also do not want to be using flexible duct work anywhere you can't see it, especially for a dryer. Is there anyway to reroute your dryer vent to come out the side of the house? How far is the dryer from the attic roof?
|
|
#
¿
Oct 2, 2017 19:12
|
|

|
The Dave posted:Now the other room I wanted to get to has some weird vinyl flooring on it that I�m not touching until I get it tested for asbestos, hoping the glue isn�t a nightmare to get off. The vinyl tiles aren't so bad, but the stuff you are taking up in that picture doesn't look like a wood product. And does look to be friable. e: (and a bitch to get up!) HycoCam fucked around with this message at 03:30 on Oct 9, 2017 |
|
#
¿
Oct 9, 2017 03:26
|
|
|
Elysium posted:I am attempting to acquire a roll of artificial turf. All this requires is for me to show up with a truck and they will forklift it in. Driving the pallet off is going to be smooth for the first 1/3. It is the last 1/3 that is going to tear apart your truck. Grease the bed before you put the pallet in and take off your tailgate. And think band-aide--the quicker it is out the better. tangy yet delightful posted:Also make sure you know which way it will unroll so you yank it off your truck in the correct orientation. I read it as hoping to yank the entire pallet off the truck. Which I don't think would go well... cakesmith handyman posted:Sounds fine but video it for us please, just in case.
|
|
#
¿
Oct 11, 2017 04:08
|
|
|
A few toothpicks and some carpenter's glue--stuff them in the screw holes. Viola! Use the wood chisel you'll need to move the strike plate to smooth over the old screw holes.
|
|
#
¿
Oct 26, 2017 04:03
|
|
|
E-Money posted:I bought this cord channel kit for cord management and babyproofing: https://www.amazon.com/gp/product/B0015EDVVU/
|
|
#
¿
Nov 3, 2017 19:04
|
|
|
Cheesus posted:I'm looking for some online or offline guides to insulating. Squirt this stuff into any of the holes. Required in new construction in any penetration that goes between floors. Meant to slow down the progression of fire between levels and used by electricians everywhere. 2) https://www.lowes.com/pd/Dow-GREAT-STUFF-Fireblock-12-oz-Spray-Foam-Insulation/3052753 The foam can be used interchangeably with the caulk, but the caulk covers a much larger space and can be trimmed easily after it cures. i.e. if you wanted to seal around a box. 3) https://www.lowes.com/pd/Johns-Manville-49-7-sq-ft-Unfaced-Mineral-Wool-Batt-Insulation-with-Sound-Barrier-15-25-in-W-x-47-in-L/50133328 How big are the gaps? If you have huge gaps--use the rock wool. If they are slivers, you can use the fire caulk. Spray foam works too, just don't use too much--the expanding foam can sometimes do more damage than you'd think.
|
|
#
¿
Nov 11, 2017 20:52
|
|
|
melon cat posted:Our over the range microwave (Panasonic, crappy new build appliance) broke down. Is there any point in replacing it? Because it did a poo poo job venting out cooking odours even when it did work. Are we better off just getting a proper range hood and a separate microwave? Was the under microwave vent connected to duct work leading outside? Or was it simply recirculating the air through a filter?
|
|
#
¿
Nov 17, 2017 06:48
|
|
|
melon cat posted:Looks to be connected to outside ducting:  Yeah, I can see why it never worked too well. If you have space for the microwave somewhere else, putting in a hood will be fairly straightforward--you already have the hole to outside and power. Yeah, I can see why it never worked too well. If you have space for the microwave somewhere else, putting in a hood will be fairly straightforward--you already have the hole to outside and power. The exhaust fans attached to microwaves never seem to work as well as dedicated hoods, but depending on how much clearance you have behind the microwave, you might be able to replace the microwave with a vent on the bottom. But it will be more work, probably because you'll have to build the plenum (think rectangular duct thin enough to fit behind the microwave) from the lower part of the microwave to the existing hole in your wall. The microwave attached vents always seem to be higher CFM. 150 to 250CFM are the range for the typical hoods, when you get into the 300cfm range for hoods, they cost more than microwave vent combos.
|
|
#
¿
Nov 17, 2017 08:31
|
|

|
Looking at the staining on your soffits, not so clear the drip edge is the culprit. I'd start by removing the soffits and looking under the eave to see the water damage. Most likely you're going to need to replace a few shingle courses--at which point it would be a great time to fix the drip edge. (You don't have any brown marks on the ceiling or walls inside, do you?)
|
|
#
¿
Nov 30, 2017 21:52
|
|
|

|
| # ¿ May 2, 2024 23:01 |
|
|
Shop towels--the blue ones, they make for a nice poor mans leak detector. Easy to see when they get wet. When fixing/cleaning a trap, Murphy has me always leave some laying flat under the plumbing to check later. Can also use them around accessible pipes to help narrow down what gets wet first and follow back to the cause.
HycoCam fucked around with this message at 04:59 on Dec 5, 2017 |
|
#
¿
Dec 5, 2017 04:12
|
|