


|
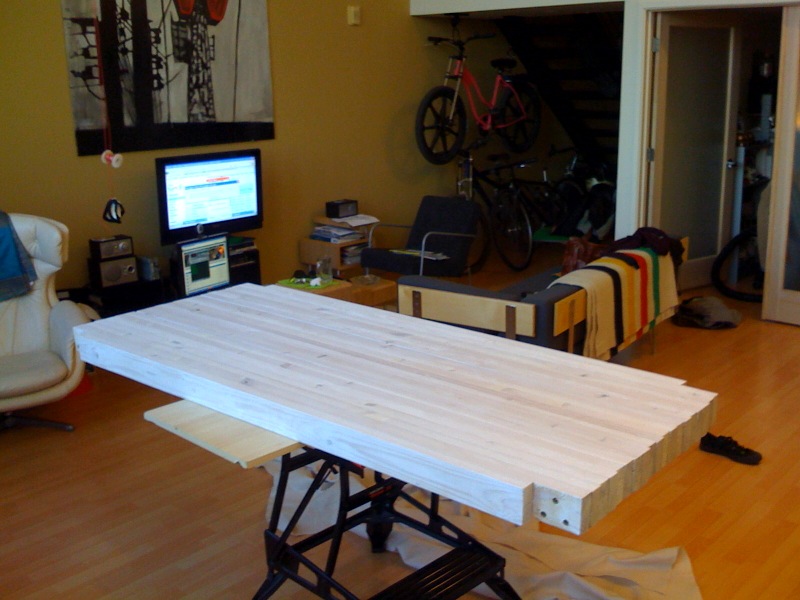
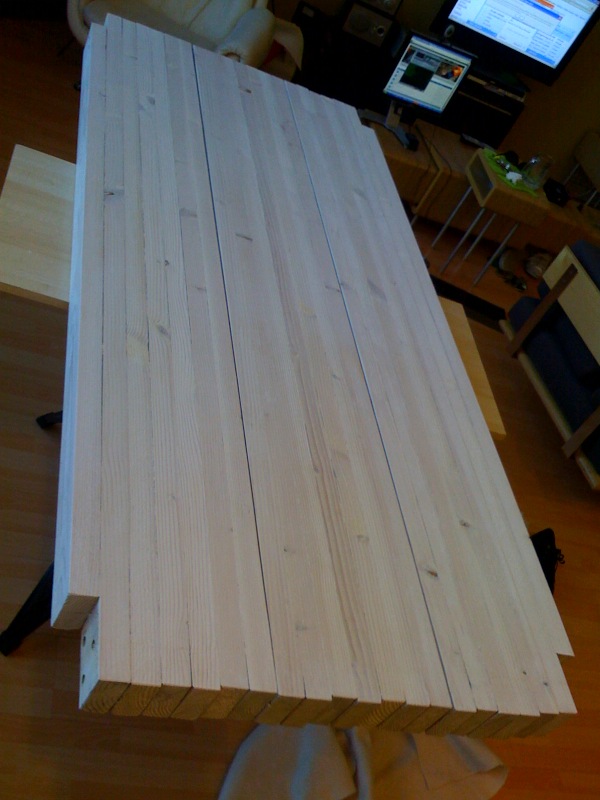
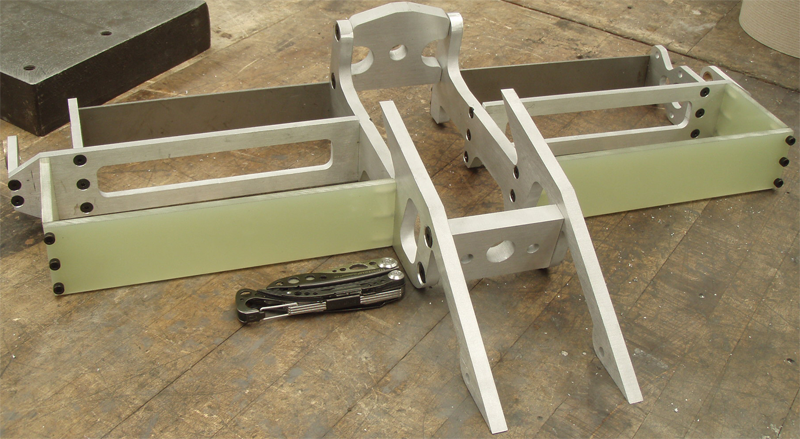
Started documenting this in the woodworking thread, which was probably a mistake since basically no woodworking techniques or tools were used in the making of this piece aside from a planer. Where I last left off: Blooot posted:Two layers of "white oak" stain later. Going to start laying on clear tomorrow. Onto some metal parts. 4x1.5" .125" wall hot rolled steel tube, some plate and round stock from online metals plus a few hours in the machine shop. Adjustable feet from Misumi (check these guys out -- awesome project supplies here http://www.misumiusa.com -- order a catalog, it is seriously amazing) 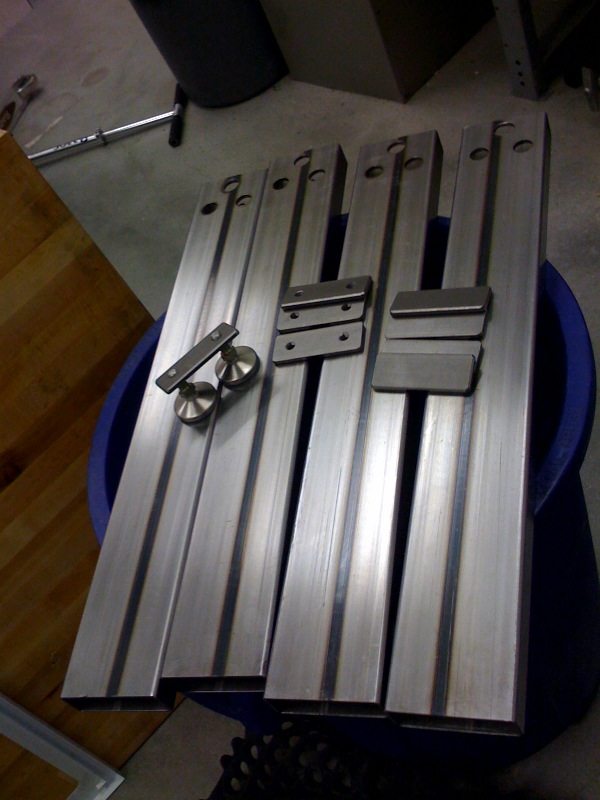  Get yer MIG on. Ran out of shielding gas half way through, so I switched to flux core -- which actually produced better welds due to its ability to penetrate deeper into the thick steel. 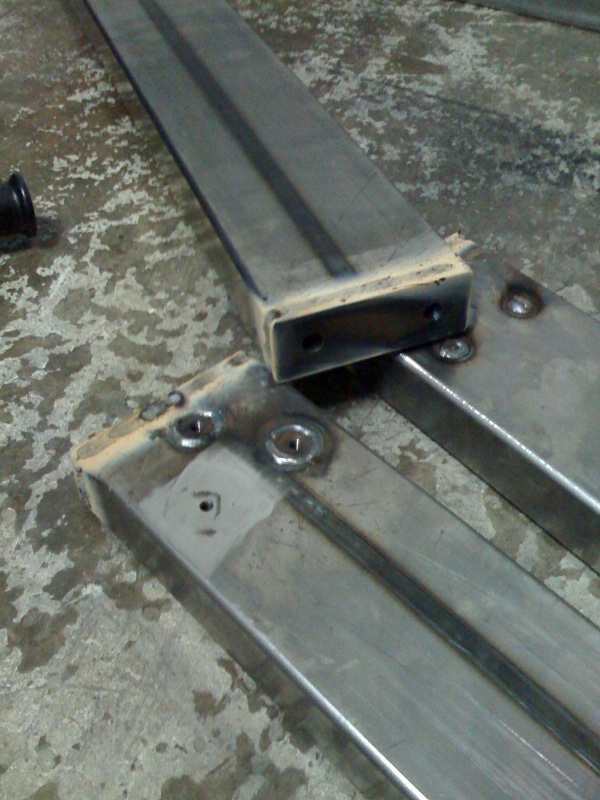 I spent another short evening grinding welds and the first full assemble happened! 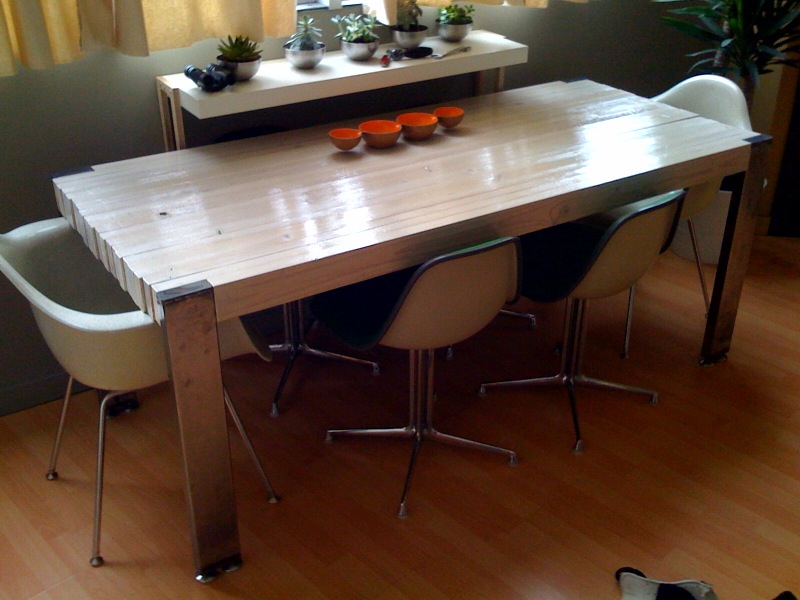 This is where I am at now. All I need to do now is finish the legs somehow (likely paint), and do final assembly where I square everything up and crank all the bolts down. Overall table dimensions 72x32x29.5, weighs ~200lbs -- solid! Seats 6 normally and hopefully 8 in a squeeze as we are planning on having friends over for a Canadian Thanksgiving dinner party as its debut event. Working on some other stuff for my apartment for then too, namely a chandelier, an ottoman and a stool. A sneak peek at a Chandelier component: 
|
 #
¿
Sep 20, 2008 20:34
#
¿
Sep 20, 2008 20:34
|
|


|

|
| # ¿ May 1, 2024 05:45 |
|
|
Thanks dude. Going to leave the ends all snaggletoothy -- nothing else on the table is highly refined so it works IMO. Plus it is easy, which I am always striving for.
|
|
#
¿
Sep 20, 2008 22:03
|
|
|
How has this thread been dead for a month? Lazy mother fuckers, that's how. Some poo poo around the house: Finally finished some pieces in time to host a Canadian Thanksgiving party (pics are a little old, but I did host it 2 weeks late). Laminated 2x4 dining table finished with paint for the legs and some aluminum spacers between the wood segments. This allowed me to trim in the table as flat as possible.  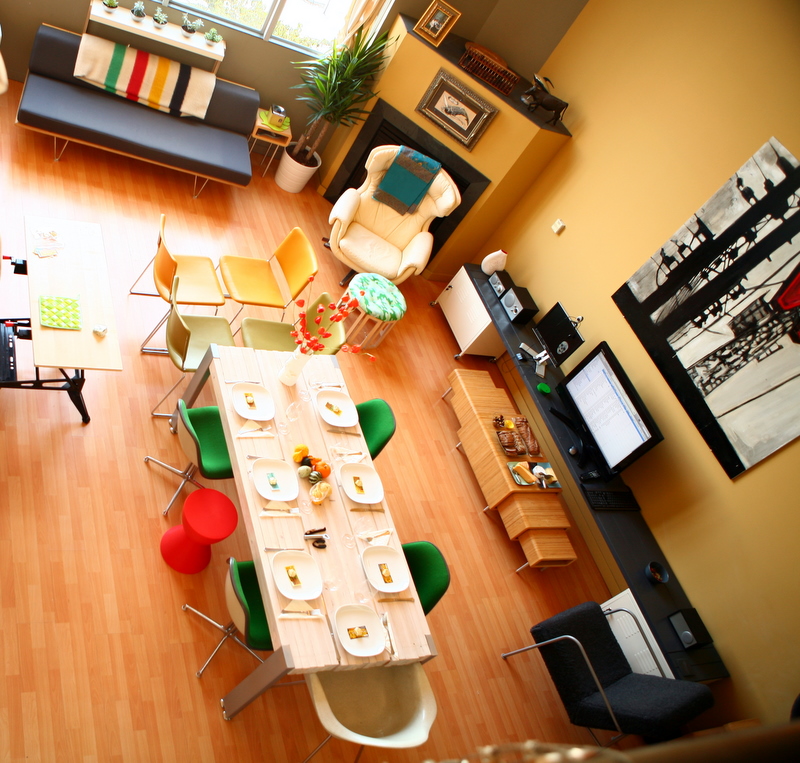 The layout of our apartment is wacky in these pics to accommodate 12 people eating together. Usually it is where the couch is. Also visible is the new chandelier turned Ottoman. My first shot at fabric anything. Pretty straight forward -- sewing with staples. The seat is a piece of 1/2 MDF that I cut on a bandsaw and then cut 1" dense foam to match to go on top. The fabric covered buttons were super easy to do to, which was a pleasant surprise. 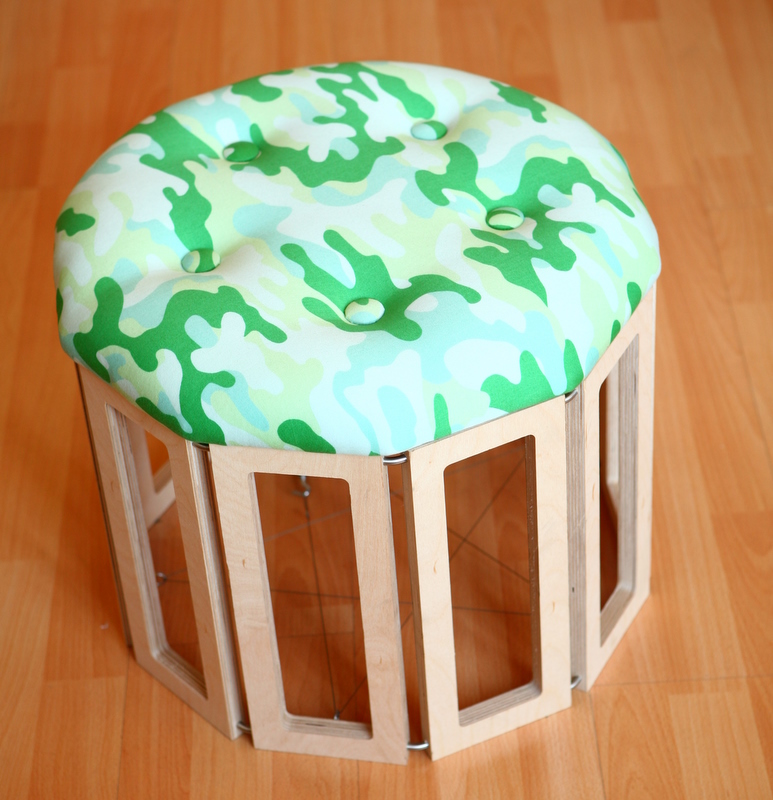 poo poo camera phone detail of the bottom fabric (red corduroy) and the attaching brackets. You can also see a closer look at the dining table and some decorative gourds. I also made a 5 sided and taller stool in the same manner.  Another quicky project was this badly needed entertainment center. I run my PC from the comfort of my couch and wanted to conceal it so I built this out of three 10' 2x6s ($10 for the wood and $20 to rent the home depot monster truck to get it home), some scrap 2x4 from the dining table and two $50 Ikea PS rolling cabinets. I modified the cabinets by not installing the back walls for better access, and on the left I removed half the inner deck panel to allow my tower to fit inside. All cabling is zip ties to screwed in cable tie mounts along the underside and nothing visible until you crouch down. Painted with a grey I mixed from cans of satin black and white latex. Start to finish time was 3 evenings. Cost approx $150 -- a new low budget record for me.  Back at the dinner party..... look at this, the guests aren't even using the new furniture! 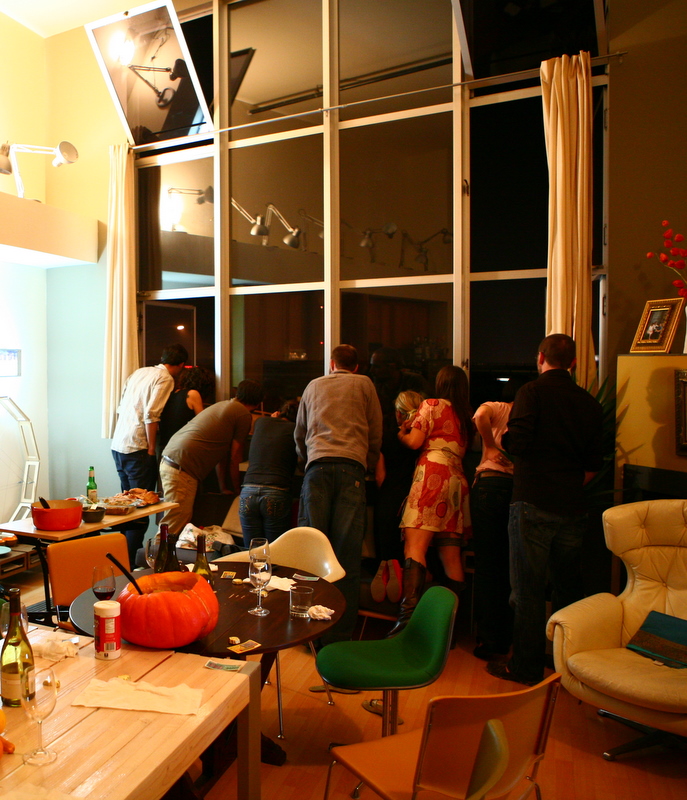 Oh snap! 
|
|
#
¿
Nov 7, 2008 05:59
|
|
|
Those surfboards are really great. Gotta love them robots! How do you break the glue apart, and how does it get hollowed out? I have to also ask what CAD package is industry standard for surfboard designers? Finally got around to working on my chandelier. Took it all apart and drilled another set of 40 1/4" holes in the wood pieces. I then cut down some 1/4" acrylic rod to make an approximate sphere (diameter is ~42") and plugged it all together. I then hung it up to keep it out of the way and think some more about where I was going with the project.  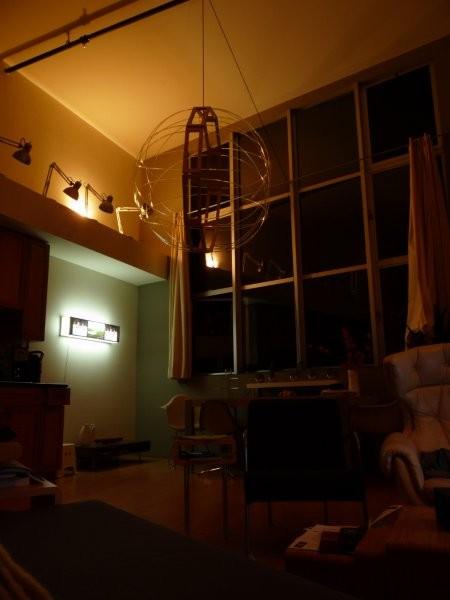 After noticing it was sort of lop sided, I decided to hang it using an assembly I built up when I first put the ring together. The original intention was to hang the ring horizontally, but after building the plastic sphere shape, I thought it'd be nice (and easier) to put it at a jaunty Saturn like angle. I lowered it to the ground and while moving it I broke one of the acrylic rods off in its hole. gently caress. I decided to then pull all the rods from the other side so I could repair that one. In the process I manged to break about 6 more rods. In contrast yesterday I built and rebuilt the structure a couple of times breaking only 1 rod. It reinforced my hatred of acrylic and burned me for not springing for polycarbonate or at least PETG. The whole thing needs to come apart again to re-drill the holes for new material. I went ahead and hung it up again anyway, with half the dome missing and a couple of broken rods -- looks promising. I like it with the core part, and will use it going forward through the repair, finishing details and lighting. 
|
|
#
¿
Nov 14, 2008 08:22
|
|
|
Chandelier update I got my replacement plastic (5/16" diam 1/16" wall PET-G tubing) in and finally got around to putting it together. I moved locations of the holes while I was at it. Raw wood  Plug it together with bent 2"x1/4" stainless dowel pins  This looks familiar  My handy tool for getting ropes and wires over the exposed pipe 18' up in the air. Soft frisbee on some thin wire.  Tensioning the wires with turnbuckles. [img] http://lh4.ggpht.com/_v2R_CrGkPN8/SS8yN6ohLAI/AAAAAAAADpM/04dAsTjsIWg/s640/P1010763.JPG[/img] Dome top done  And she's up!    Next up is getting the lighting figured out. Good idea on the cold cathode Slung Blade. I was initially thinking LED, but I'll look into it. I want to keep the power consumption low as I plan on using battery power -- avoiding running wires up to it.
|
|
#
¿
Nov 28, 2008 01:00
|
|
|
Goldaline posted:That's really amazing--are you an industrial designer, or just really creative and industrious? Thanks man. I guess the latter. I'm an engineer who's done lots of design and fab work; 5 years designing and building props for movies and now I design products for laboratory automation. I also have my own furniture line that is in licensed production. The wood in this piece was leftovers from when I was building it myself.
|
|
#
¿
Dec 8, 2008 02:40
|
|
|
groucho posted:for my final project in the class i will be casting a "banana gun." its a banana where the skin is peeled back to expose a 44 revolver complete with trigger and trigger guard. Is this going to be full scale? You'd be better off making 10-20 of them and selling them for $400 each, a more realistic price for what you've described. Don't undervalue your work if it is any good. If it sucks, be honest with yourself and keep it out of galleries until you are ready.
|
|
#
¿
Dec 8, 2008 17:11
|
|

|
MikeNCR posted:
That 30lb robot looks great. It would shred my Botbash 2001 30lb champion robot if they were to ever meet. It is cool to see the evolution of the fighting robot. The range of competitive designs has certainly distilled down. My robot from nealry 8 years ago, Mr Smashy 2001: Wacky pneumatically loaded surgical tubing sprung over head cold chisel axe thing, assembled in 3 days from parts from my larger robot. 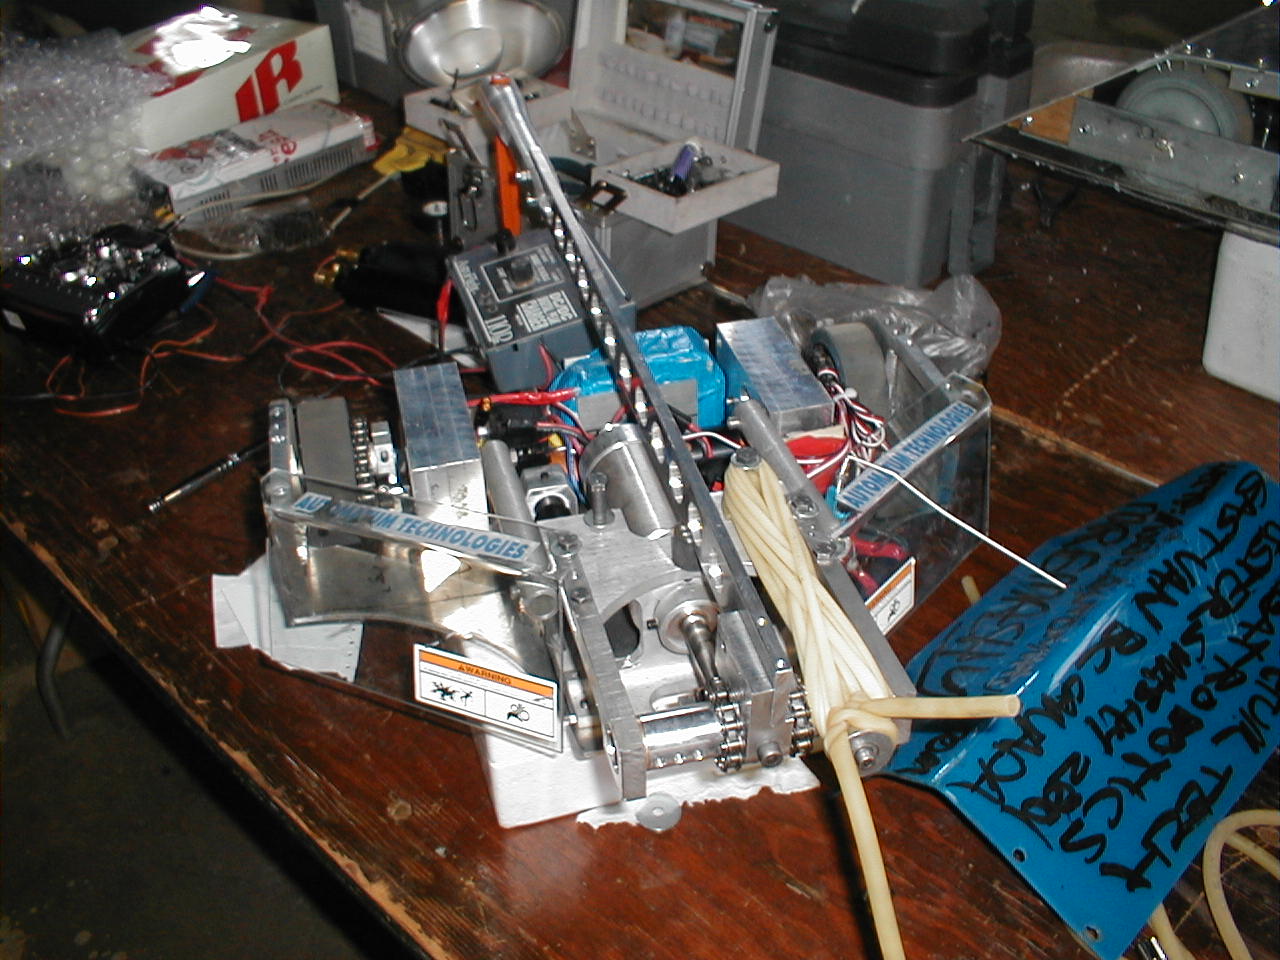 Click here for the full 1280x960 image. 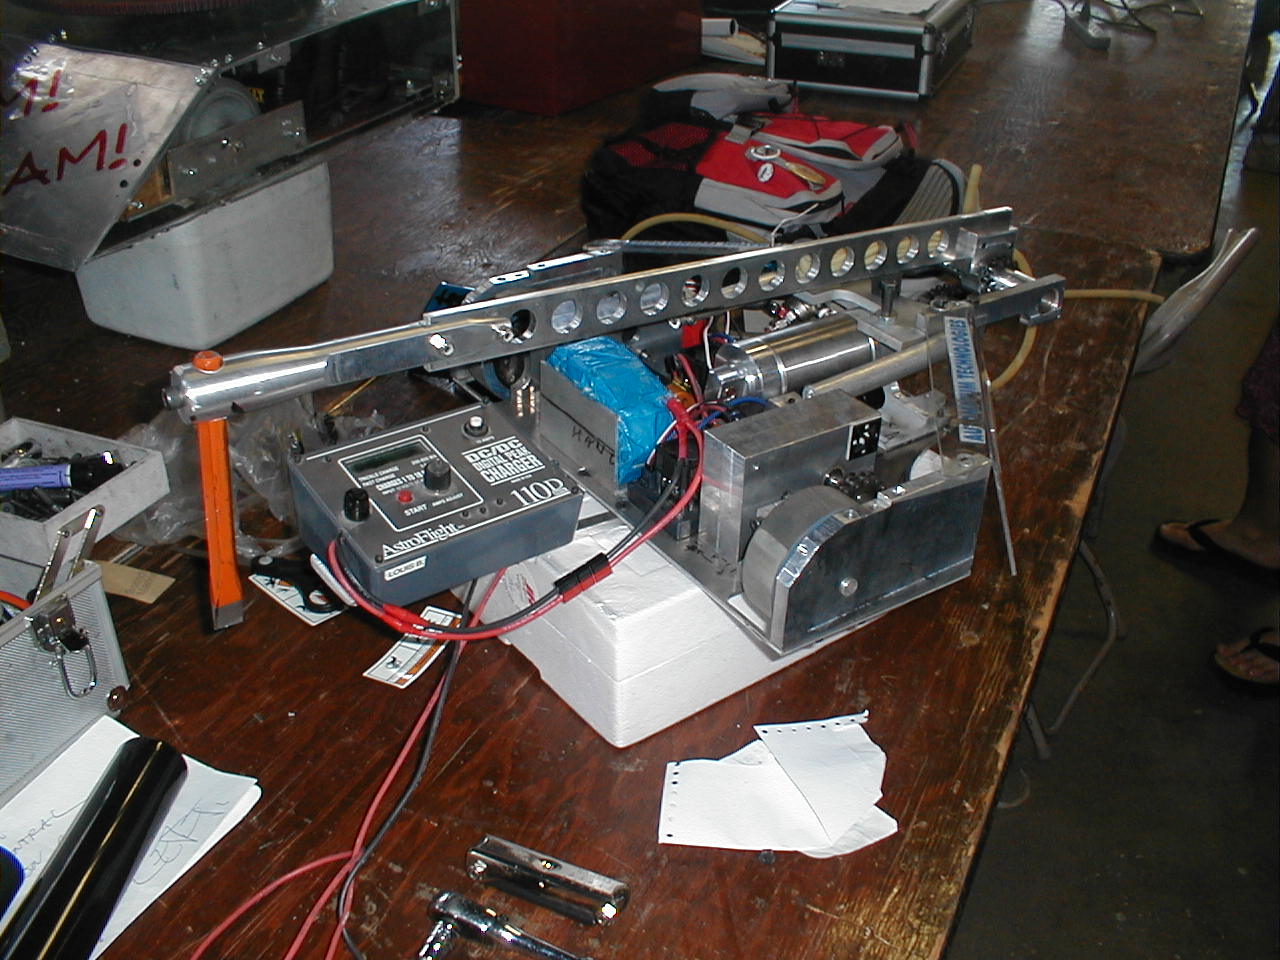 Click here for the full 1280x960 image.
|
|
#
¿
Apr 13, 2009 04:24
|
|
|
Why would you give up a sweet ramp into your house?? The next time you're moving something heavy or leaving the house on your skateboard, you'll be bummed.
|
|
#
¿
May 8, 2010 17:51
|
|
|
This is my second attempt at building an amplified portable speaker box utilizing Makita Li-Ion drill batteries. The first was quick and dirty using a small briefcase (similar to http://theboomcase.com/ ) and a couple of kit amps, which was fun and useful for a moment but the limitations were very apparent -- the enclosure was way too floppy, and there was not enough enclosure volume for the drivers. Round two -- a single 6.5" "full range" Dayton neodymium magnet (light - 2.9lbs & efficient - 94.7 dB 1W/1m) driver from Parts Express bought on black Friday, a 2x100w (@ 30V) amp also from PE, and a Belkin Bluetooth RX. Looking for light and stiff, I built up a plywood-foam-plywood laminate and taking numbers from another PE user's project with the same speaker I built an appropriately sized box. End plates and speaker rings are made of 3/4" marine ply from McMaster Carr. Once the ply arrived, and I saw the awful red-brown color I wish I had just gone with Baltic Birch, but McMaster is just SO convenient. In the name of forward progress I decided to build it anyway and paint/stain any hint of red-brown out of it. Here is is mocked up with the natural clashing woods:  End plates were tablesaw/mill and the speaker ring was made with a jigsaw and a metal lathe I was intending on doing more of a wash or stain on the wood to keep some of the grain, but it ended up being very muted. Dark grey finish is paper towel applied latex and then satin clear. The white was paper towel applied latex and then satin, but it ended up yellow, so I just shot it with Krylon white satin. Finished product:    Toggles for power, Bluetooth power, and mute. Volume control is done from the source device  2x5" Port It ended up weighing 11.2lbs with a battery. Which is pretty respectable, especially when compared to similar storebought devices (TDK 2 Speaker Boombox = 16lb + 10 D batteries) Nothing to see here! Note I still haven't committed to buying a Makita setup yet, and have been borrowing batteries from work as needed. Testing with an old 12V Dewalt nicad pack here. There is a Makita battery adaptor integrated into that lower cavity.  Oh and it's pretty loving loud. Sadly the speaker rolls off heavily down low, so pt 2 will be the accessory subwoofer that will use the amp's second channel to help fill in the bottom end. iPhone RTA screenie of a sine sweep 
Blooot fucked around with this message at 18:12 on Feb 8, 2013 |
|
#
¿
Feb 8, 2013 18:09
|
|
|
Base Emitter posted:What are you doing with the 2nd channel if you've only got the one driver? Or does the amp behave without the 2nd channel loaded? Thanks. It seems to be fine running only one channel. With nothing hooked up, it doesn't have to do anything. My plan is to run the 2nd channel output to a second box with a low pass and a sub in it. Flipperwaldt posted:So, do you have to open it up if you wanted to bluetooth-pair it with another device, or does it automatically go into pairing mode on power on or what? I'm using an off-the-shelf Belkin unit that doesn't auto-pair, just power it up and then pair your device with it. No opening required.
|
|
#
¿
Feb 9, 2013 21:37
|
|
|
After recently un-earthing the 12 year old Solidworks models of my Battlebot, Complete Control, I decided to make a 1:8 scale model of it using the modern magic of 3d printing and laser cutting. Tweaked, combined and scaled in Solidworks, I sent parts out to print through Shapeways and had a local laser cutter do the 1/32" polycarbonate armor.   Add in some M1 & M1.6 thread forming screws and 1/16" dowels.    Call me a revisionist, but I'm a sucker for personal nostalgia. Paint/color to follow maybe.
|
|
#
¿
Oct 24, 2013 07:52
|
|
|
Laminator posted:Oh man, I haven't thought about Battlebots in years, what an awesome show. Just had some good nostalgia on YouTube: https://www.youtube.com/watch?v=0L_Gj3jdNTo That is a good one. Here it is the raw without all the TV poo poo: https://www.youtube.com/watch?v=igl-EXLC2ws I don't think I've actually watched this recently -- lol'in at "let's roll"... Blooot fucked around with this message at 05:44 on Oct 25, 2013 |
|
#
¿
Oct 25, 2013 05:38
|
|
|
Baby on the way, time to make storage. I had a large section of my apartment taken up by a low slung useless 12' long bench and some dumb art when that space could be filled with handy furniture to store STUFF. Nothing new appealed to me unless it was $1k+ so I dove into craigslist for a weekend with the company Sprinter van and procured 4 sweet cast offs for $120 total. A $20 fancy wood thing w upside down doors from a dude in my neighborhood  An ugly rear end entertainment center for the 36" tube TV everyone has put on the street corner out of the garage of a gay guy living the suburban dream (filled with nice DWR furniture) in Santa Rosa. Now a coat closet.  A fuckin' clock from a Napa estate sale.  And some other piece from the clock estate sale (not pictured, but the highest quality of the bunch) Apply primer and paint. Pay dudes hanging outside Uhaul to move it upstairs. Mix in some middle school quality coping and joinery using recycled trim and picture frames. Mount a trim router in a work mate and make some handles. Get yer laser bro to cut up some MDF. Add in Montana Black in Tiffany, Mermaid, Space and Slate for some trompe l'oeil to finish it off.       
|
|
#
¿
Feb 1, 2014 11:21
|
|
|
Bad Munki posted:Okay, I gotta ask: why not turn the two doors right side up? Honestly I didn't even realize they were not supposed to be like that until I was doing the final applique and noticed the magnetic catches and steel plates were on opposite ends.
|
|
#
¿
Feb 1, 2014 18:42
|
|
|
Mofette posted:I am so in love with that. I can only HOPE that I can find something that neat to modify when we get a house! Thanks! lovely wood furniture is SO easy to find. This was the result of literally 2 days of Craigslisting. Entertainment centers designed around CRTs are now essentially worthless, so they are a great starting point for something like this.
|
|
#
¿
Feb 1, 2014 23:12
|
|
|

|
| # ¿ May 1, 2024 05:45 |
|
|
I did this thing http://www.facebook.com/completecontrolrobot It was a lot of work (1200h between 4 people) for just minutes of action. Take a look through the albums on FB to see the build process.
|
|
#
¿
Jul 2, 2015 16:49
|
|