


|

|
| # ¿ May 14, 2024 16:20 |
|
|
Character List Chilblain's character: Faye the Monk  A lady with a burning sense of justice that just doesn't stop, she's looking to bulldoze through the labyrinth on determination alone. She'd try to walk through a brick wall if you told her she didn't have the willpower to do so. theshim's character: Cassandra the Hoplite  Mature, sensible, and straightforward, Cassandra got into adventuring out of a desire to keep her friends from doing truly stupid things. Times have changed and people have moved on, but she still retains that protective streak, though some might call her overly conservative (or, behind her back, a coward). Though generally levelheaded, she is secretly extremely excited to explore new places and make discoveries, and works to build friendships and trust with her guildmates...which can lead to friction with people she thinks are "irresponsible" or who "lack commitment". Has somewhat unreasonable standards. Likes cats. Dislikes fish. Level Seven's character: Sidney the Arbalist  As a hunter of monsters, he decided to pick Armoroad's unexplored labyrinth as his next territory to conquer. Currently looking for a new guild to join as the last one didn't work out. Suicidally overconfident, he'll challenge every enemy he runs into given the chance. He's doing this to get some bragging rights against another hunter who had some fame slaying some wrathful dragons. Endorph's character: Akatsuki the Ninja  Far across the eastern sea, on a small island shrouded by mist, there exists a tiny, insular clan: the KUROI KIBA (Translator's Note: Kuroi Kiba means Black Fang). Masters of ninjitsu, assassinations, and illusion, the Kuroi Kiba have had a small hand in every war known to history... though the Kiba themselves aren't mentioned in any texts. Born with no memories of his parents and no family to his name, Akatsuki was adopted, named, and trained by a disgraced 'failure' of an assassin - a one eyed, no-armed killer named HAYABUSA-SENSEI (Translator's Note: Sensei means teacher). He came to look to Hayabusa-sensei as a father, but the man's advanced age meant he wasn't long for this world. On his death bed, as the sakura petals fell (translator's note: sakura means cherry blossom), Hayabusa-sensei made one final request of his student. "Go to the west," he croaked. "Across the sea. See the world that I was never able to explore. Help those I was never able to help." His surrogate father's words clinging to his ears, Akatsuki fled in the night, carrying only his katana and a kokoro wish. (Translator's note: Kokoro means heartfelt.) Related GIFs:   cdyoung's character: Asteria the Zodiac  An aspiring astrologist and scholar, Asteria always looked to the stars for guidance and inspiration. She hails from a kingdom that has been known to have severely unstable weather and as a result, Asteria has dedicated a bit of her studies into learning about phenomena related to the sky and clouds, resulting in a preference for Volt based magic. She's not an idealist, or a pessimist, she considers herself a realist and generally has an analytical or sophomoric response to questions and likes making weather based puns. Tyty's character: Scott the Buccaneer  Decided to be a pirate, but turned away from the life while he was still getting his sea legs to make a more honest living when he heard of the treasures of the labyrinth. Despite his very brief stint in piracy he knows quite a few sea shanties and is more than capable of manning a ship. Somewhat cocky and arrogant, with a bit of a silver tongue, as to be expected of a pirate. Likes rum. blizzardvizard's character: Alice the Farmer   Alice never asked for this. She was just tending to her garden when she fell into a hole and found herself trapped on an alien island. She went to this building full of tough-looking people, trying to find someone who can help her go home and also to look for shelter, since christ she almost got killed by a butterfly, the hell's wrong with this place but she was mistaken for an aspiring adventurer. Alone and homeless, she decided to stay so she can at least get a bunker to sleep in, and tag along adventurers while trying to find her way home. Alice never asked for this. She was just tending to her garden when she fell into a hole and found herself trapped on an alien island. She went to this building full of tough-looking people, trying to find someone who can help her go home and also to look for shelter, since christ she almost got killed by a butterfly, the hell's wrong with this place but she was mistaken for an aspiring adventurer. Alone and homeless, she decided to stay so she can at least get a bunker to sleep in, and tag along adventurers while trying to find her way home.Orange Fluffy Sheep's character:  The daughter of a relatively well-to-do fish salesman, she knows exactly two things: 1) how fishing works 2) she wants to be the Grand Matriarch of the Entire Universe Seeing the labyrinth as a chance to recruit some fine servants, as she'll naturally take the role of person who tells them what to do, and to expand her sphere of influence from just her family's allowance to the known cosmic reaches, she joins the guild. She insists being referred to by her suitably dramatic title that she plans to use when she rules all creation, and says that must be yelled at all times in deference. MEGAQUEEN is not actually all that bad of a boss, and can't help but see her peons as human beings, rather than the disposable pawns her position would demand. She's just been told to chase her dreams and was never told that ruling the entire universe is perhaps somewhat implausible of a dream. Her real name is Susan, a name she laments as being far too dull for the future-greatest ruler to ever live. W.T. Fits' character: Rose the Gladiator  Having grown bored with fighting other people, Rose has journeyed to Armoroad to test herself against some of the most deadly enemies in existence - the monsters of the Yggdrasil Labyrinth. Tends to be a bit reckless, but tries to reign it in when things start getting serious. Has a very competitive personality, constantly seeking to establish a friendly rivalry with anyone who'll put up with her doing so. Scared of bees and other stinging insects. Arcade Rabbit's character: Fang the Wildling  A young boy from the tribe of Wildlings from some far off, unexplored lands. His love for animals is unmatched even by the others of his tribe, but he soon grew to wonder about the other amazing animals living elsewhere in the world. Stowing away on the nearest ship, he quickly makes for the Labyrinth to learn all about the wonderfully horrifying monsters that live there. Fun, personable, but has never been to a city as big as this one. He's fascinated by the monsters of the maze and quickly tries to make friend with every horrifying monster they meet. But when the creatures inevitably bite back, he's quick to call on reinforcements. He loves everything the monsters do, no matter how horrible or violent it is and is always there to give words of encouragement to them. Even if its the enemy monsters who are doing it to the rest of the guild. Ragnar Homsar's character: Charlotte the Shogun  Charlotte insists that she's the child of Etrian nobles, taken and raised by the Duchy of High Lagaard due to "ancient dragon powers." ...she was raised by people from Lagaard, that much is true. However, everything else is patently false; she was raised by a well-off but not noble family after having been adopted from an orphanage. From an early age, Charlotte demonstrated an aptitude for tactics: she would routinely best her adoptive father at chess, and preferred studying archives of maps and battle plans to language and mathematics. She's terse in communication and not that fantastic with numbers, but her ability to pinpoint even the smallest weak point in an enemy's strategy is only matched by Lagaard's highest military minds. Her actual combat abilities are less than ideal, but still passable enough that she could realistically participate in a battle while also leading it. Charlotte's also an absolute sucker for romance. Not a quality you'd exactly expect in someone well-versed in military tactics, but she is absolutely enamored with seeing other people fall in love. She routinely tries to play matchmaker for people who are close to her, and keeps a massive journal of the current happenings between the would-be couples...which also consists of her eavesdropping in on their conversations. She even rates the current status of each of her gambits, giving them ranks of C to S. She believes fully in something she calls "the power of bonds;" essentially an idea that soldiers who feel affection for one another perform better on the battlefield than those trained to be mindless drones of war. Whether her fascination with romance is derived from this philosophy or the other way around is up for debate. Charlotte began her career as an explorer training as a Ronin in Etria; however, the profession lacked two crucial things for her. The first was a focus on cooperating with one's allies; the other was modest clothing. She wasn't that big a fan of the chestwraps that seemed to be common among Ronin her age. She eventually travelled to Armoroad, where she studied to be a Shogun, finally finding a profession she excelled at. However, she found herself out of work for a long while, due to the Senatus's strict rules about what guilds could recruit Shoguns. A commander without an army is akin to a brain without a body, after all. Months passed, almost a year, before word reached her of a guild finally authorized by the Senatus to recruit Shoguns: Guild Tidehunt. An excellent opportunity...after all, she'd already been studying Tidehunt's members while at the Butterfly Bistro. Mr. Vile's character: Smith the Yggdroid  It turns out that when a giant telepathic tree tells you how to make robot supersoldiers and you have an underwater city that needs cleaning, knowledge of how to make said robot supersoldiers tends to get co-opted. One of the results of which is Smith. Armed only with his trusty cyber-mop, Smith was tasked with cleaning and maintaining the Deep City, which is no small task even for an untiring robot - the roof tends to leak, see. Despite many attempts to join the Yggdroid army, Smith was always denied his rightful calling and pointed straight back to that stubborn stain in the hallway carpet. So when he happened to overhear a conversation about a guild on the surface looking for robot recruits, Smith quietly finished cleaning up the latest spillage, slung his mop bucket over his back and headed straight for Armoroad. As a janitor, Smith does not have the array of lasers and blades that come standard on most Yggdroids, but he's hoping to pick up a few combat tips from the guild members and put his natural robotic strength to use. Thanks to being repeatedly rejected from the army, Smith has cultivated an amiable, easygoing personality just to spite those uptight military droids and their synthesised "AFFIRMATIVE" barks. Everyone knows they only do that to show off anyway. While he's generally amiable enough to get on with just about anyone (outside the Deep City military, anyway), don't let him see you littering or generally making a mess. Just don't. Fanart MShadowy shows how MEGAQUEEN plans to conquer the universe.  Not necessarily fanart, but Orange Fluffy Sheep came up with a very apt writeup for the post-game superboss. (Well, everything before the "AI Script." Everything past that point was my own writing.) Orange Fluffy Sheep submitted this in regards to the censorship of the almighty MEGAQUEEN in one update.  Orange Fluffy Sheep also submitted this in regards to her gun-toting prowess.  Soundtrack for your Listening Pleasure Araxxor fucked around with this message at 02:00 on Nov 1, 2017 |
 #
¿
May 18, 2015 16:34
#
¿
May 18, 2015 16:34
|
|
|
Update 1: A Stormy Adventure Begins   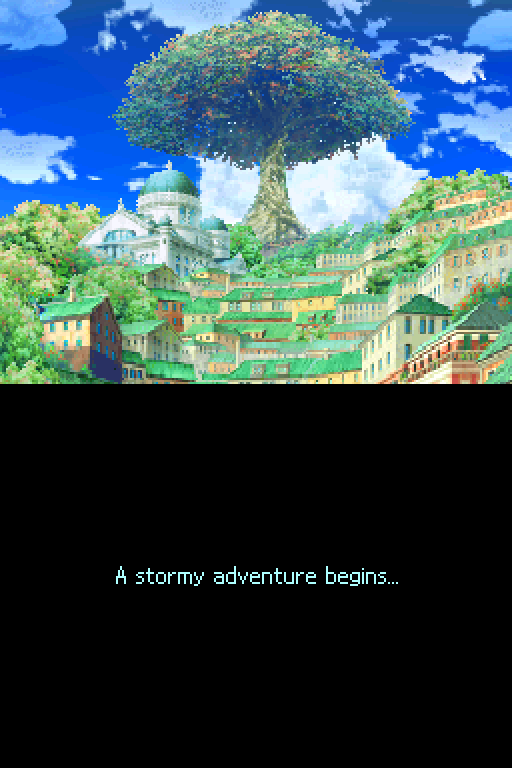  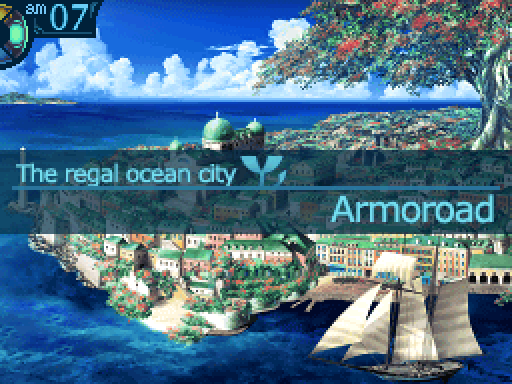 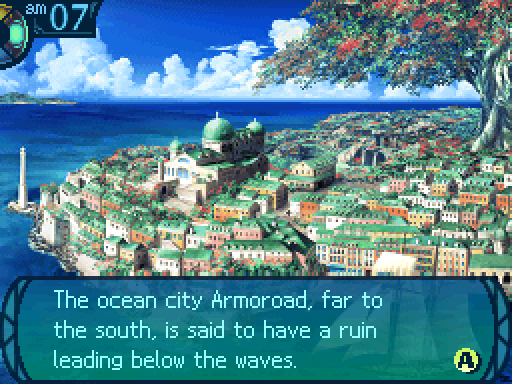 As if tacitly admitting it, the Senatus ruling over Armoroad have invited explorers to their city. The invitation drew throngs of eager explorers who gathered to traverse the undersea maze. But none of the throngs who came to challenge that maze were strong enough to master it. The impenetrable ruins came to be known as the Yggdrasil Labyrinth, and its legend spread further... You yourself are an explorer who has heard its legend and now sail to Armoroad to investigate. Your only objective: to challenge the Labyrinth and win fame and fortune. Your hour is at hand! 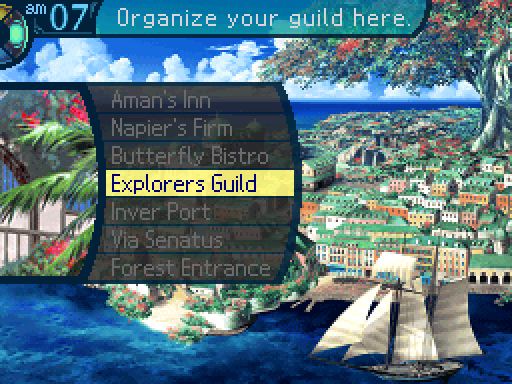 Only one place we can go to at the moment.  A little side note: The DS Etrian Odyssey games have two versions of the soundtrack. The PC-88 version, and the version that you would actually hear while playing this on a Nintendo DS. The Nintendo DS doesn't really have good audio quality, so the soundtracks got compressed to accommodate for that. For the record, I recommend listening to the PC-88 version since the audio compression really lowers the quality of some of the tracks in this game. 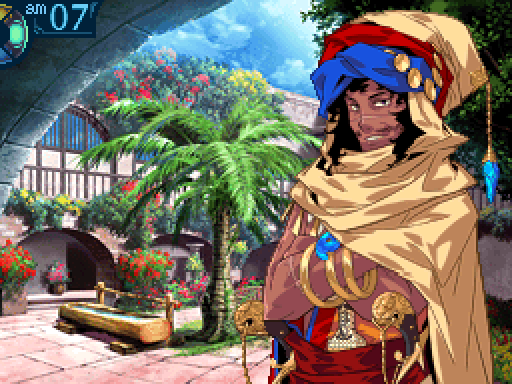 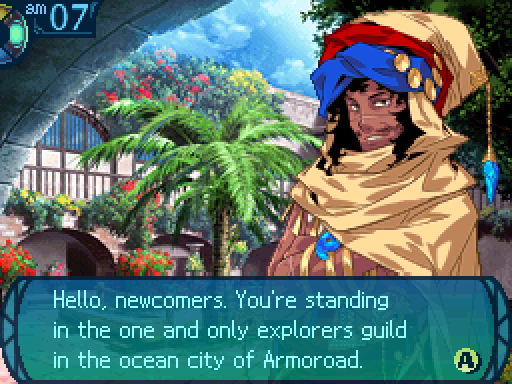  I'm here to supervise all the explorers who find themselves in our fair burg. Here's a little something I give every new guild for signing up. I'm here to supervise all the explorers who find themselves in our fair burg. Here's a little something I give every new guild for signing up. 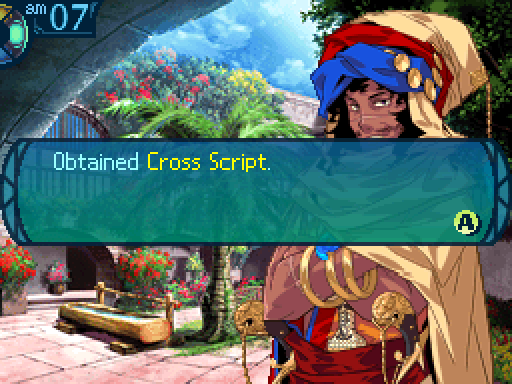   Now, let's get to it. First, write your guild name on the space provided on the certificate. Think hard, because that name may be known someday across the seven seas. It all depends on you. Now, let's get to it. First, write your guild name on the space provided on the certificate. Think hard, because that name may be known someday across the seven seas. It all depends on you. Whatever you type in here is what all the NPCs will refer to you as, so this is essentially your name. You can vote on a guild name later.  If no one wants to come up with one, then this is the name I'll be going with, since this is what I went with in my playthroughs. 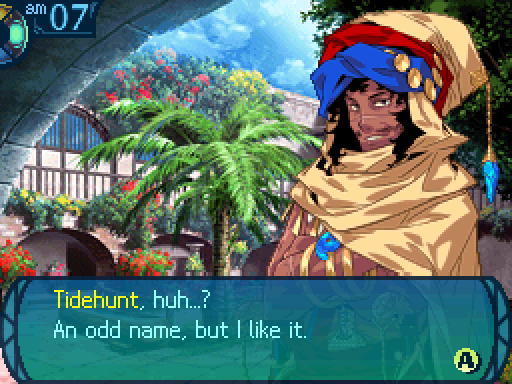 Well then, step two is registering explorers in your guild. You�ll need to hire a few folks, but it�s up to you whether or not you want to become a member too. Well then, step two is registering explorers in your guild. You�ll need to hire a few folks, but it�s up to you whether or not you want to become a member too.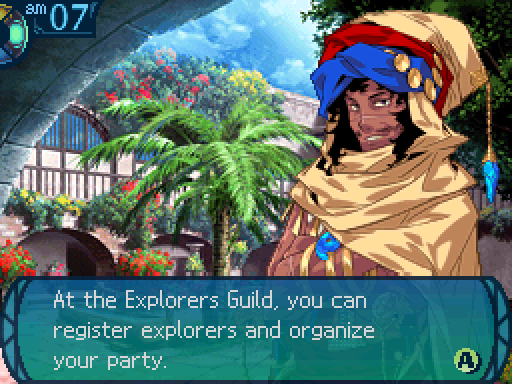 Choose your favored classes from the list and form a party of up to five explorers. 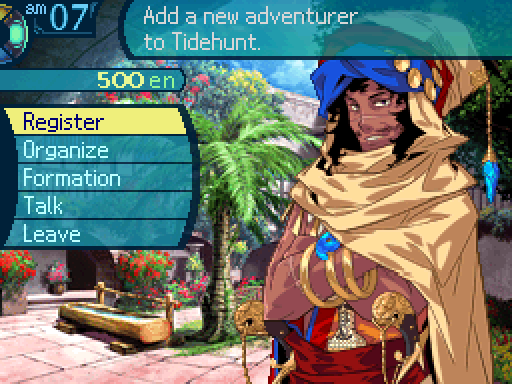 At this point you can create your party by selecting the Register option. 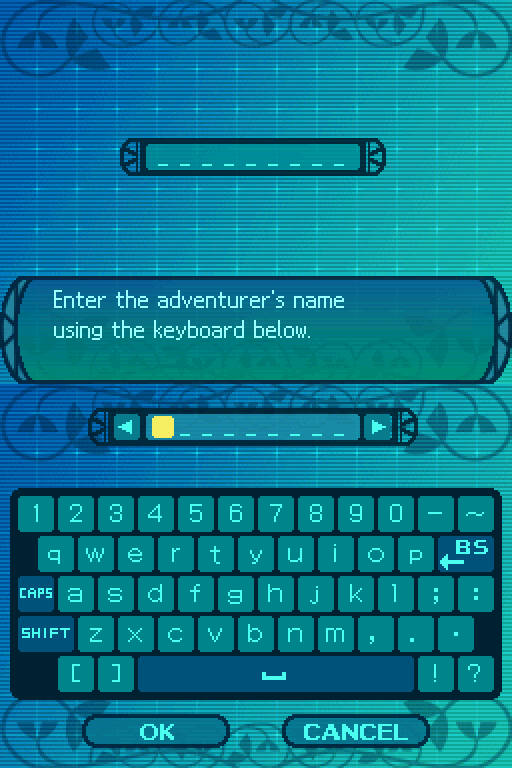 Type in your character's name.  And choose what class you want them to be. There are ten classes available to us right now, with two being locked at the moment. You can see the starting stats of each class at the top. They all start out with the same pieces of equipment.  From here, you can choose your character's appearance from four portraits.  But new to this game are palette swaps! Each class has two color schemes to choose from, so you technically have 8 choices on what you want a party member to look like. Now EO3 went with a completely new set of classes, unlike EO1 and 2 which shared classes. As such, these classes function a bit differently than the ones used in the last two games. Let's go over their roles, shall we? Prince   Those of royal blood from kingdoms large and small. Their orders raise morale to turn the tide. Supporting combatants on either line. The Prince is a support class that's all about buffing the party. They can buff their allies' physical attacks and defenses as well as being able to provide some passive healing to the party. They're very durable and can operate on the front lines if they need to. They have balanced stats all around. A fun little fact is that the class name will change to Princess if you choose a female portrait. It doesn't make a difference which row they're placed on, since their buff skills don't benefit from row placement, and they have high enough defenses to survive on the front lines. Gladiator  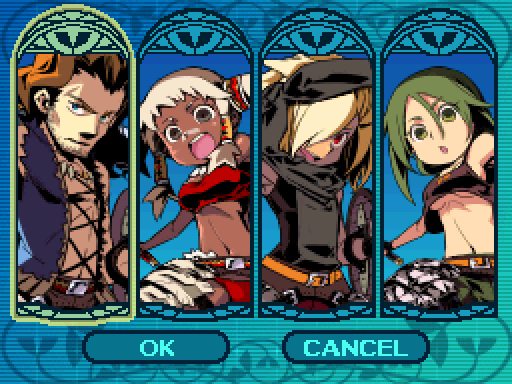 Courageous and strong, they eschew armor to display their trained bodies and fight with swords and hammers. Vigorous attackers of the front line. The Gladiator is an offensive class that can operate on the front lines. They can use two different weapons: swords and clubs. Their sword skills involve attacking multiple enemies, while their club skills focus on attacking a single target, but also have the potential to debilitate the enemy. They're very durable in terms of HP and defense, and their strength stat is very high, so they're a pretty safe choice for an offensive class. Hoplite 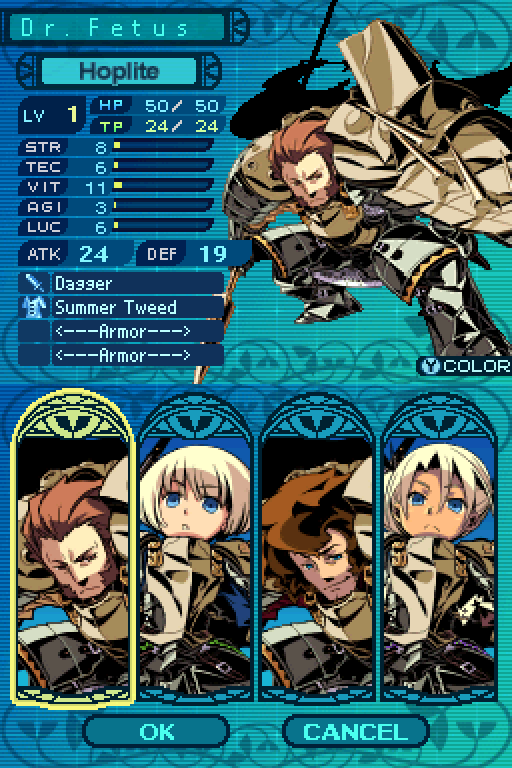 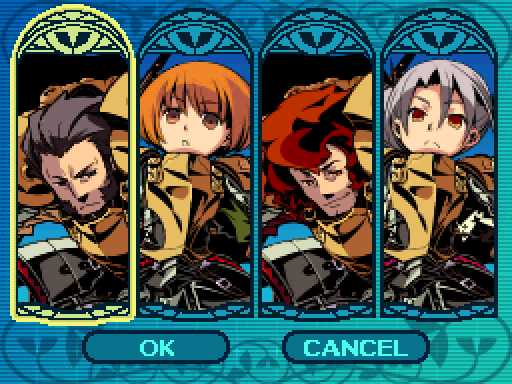 Their golden armor gives them unequalled defense, while their spears provide a strong offense. Defense specialists on either line. The Hoplite is a support class that's focused on the art of defense and protecting others. They provide a lot of defensive support, such as being able to reduce the amount of damage the party takes from physical and elemental attacks, and can protect other party members by taking damage in their place. Being the resident tank class of this game, they're the most durable class, especially since they have a passive that drastically reduces the amount of physical damage they take. They can operate on either the front or back lines, though the front lines are usually the best place for them. Their offensive capabilities are heavily lacking, but the utility they provide with their defensive capabilities more than makes up for that. Buccaneer 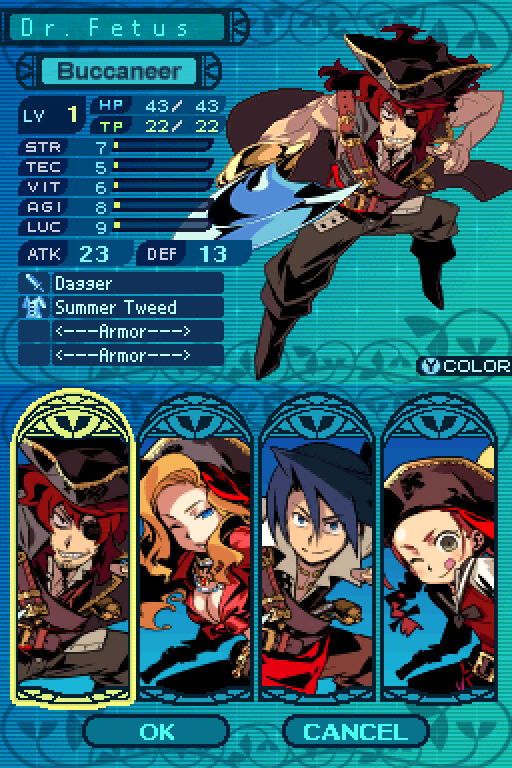  These descendants of pirates learned to fight in gangs, supporting each other rather than dueling. Cooperative attackers of the front line. The Buccaneer is also an offensive class, but they can function on both rows depending on what weapon they equip. They can use both rapiers and guns, and like the Gladiator, they have separate skills for each weapon. Rapiers deal single target damage and can debilitate the enemy, while guns can attack multiple enemies and be used from the back row. They also have the ability to �chase� attacks, which means that if an enemy is struck by an attack of a certain element from another class, the Buccaneer can hit the targeted enemy again as long as the enemy keeps getting struck by the attack of the chosen element. They're less durable than the Gladiator, and don't deal as much damage, but they're one of the fastest classes in the game. And they have some more utility than Gladiators in that they can lower the enemy's defense drastically, and charge up their Limit meters faster than any other class. Ninja   They hide in shadows and use the art of ninpo, the advanced practice of which can create duplicates. Special attackers who work on either line. Ninjas are supports who can dish out status ailments and binds. They're mostly a utility based class, as they can bait enemies into attacking another party member, and instantly kill enemies. They can summon decoys for enemies to waste their attacks on, or a clone which acts like them in every way. Ninjas are the fastest class in the game and are fairly evasive, but are very fragile. While they mainly use melee weapons, one of their passives enable them to deal full damage from the back row, so there's little reason for them to be placed in the front. Monk  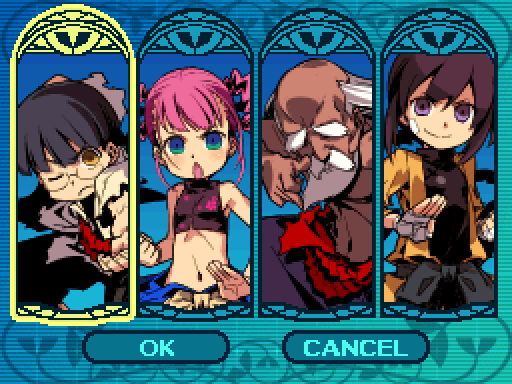 With the power of qi, they can both heal and inflict wounds. Their bare hands are stronger than weapons. Healing specialists of either line. Monks are basically healers, and they're really good at that job. They can cure status effects, undo binds, and revive the dead on top of healing. They also have the capabilities to be a front line fighter with their fist skills, although investing in those means that they won't be good as at healing, and there are better offensive classes to go with for that purpose. They do have a fairly decent strength stat, in fact it's a bit higher than the Buccaneer�s, but their technique stat is far higher and let's them be much more effective at healing than attacking. If your Monk is a healer, they're best placed on the back lines. Zodiac 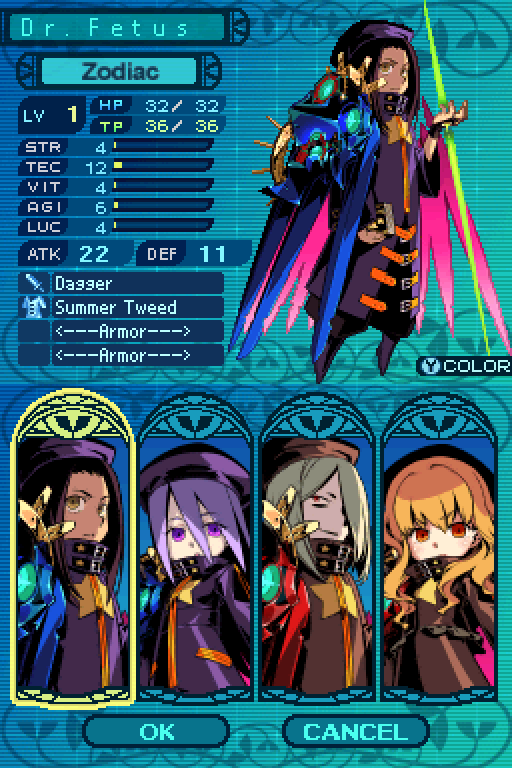  Scientific magicians who manipulate the etheric energy of the stars. Highly valued in battle. Elemental attackers of the back line. Zodiacs are back row attackers that specialize in elemental attacks. This class is all about dishing out the damage, both single and all target, though they do have some powerful utility skills. They can completely nullify elemental attacks, and make it so that a row doesn't have to spend any TP to use their skills on the turn it is used. They specialize in exploiting weaknesses, as one of their passives grants them bonus damage if they do just that. As powerful as they are offensively, they have little in the way of HP and defense, so they're best used from the back row. Wildling  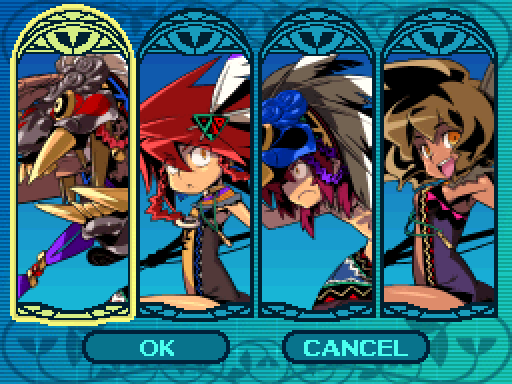 Their rapport with beasts gives them command over many animals. Some can even control lions. Beastly summoners of the back line. Wildlings specialize in inflicting status effects and binds, and are by far the best class for that job. They can summon beasts which will attack the selected targets on the initial cast, and then randomly attack the enemy and try to inflict their respective ailment while they're at it. The Wildlings themselves can also lower all enemies' offense and defense in addition to summoning animals. They have high technique and luck stats, which also helps in inflicting ailments. The class itself is lacking in durability, so they're best used on the back lines. The animals they can summon can survive and deal more damage on the front lines, although their infliction rates are the same if they're on the front or back rows, which is something to keep in mind. Arbalist 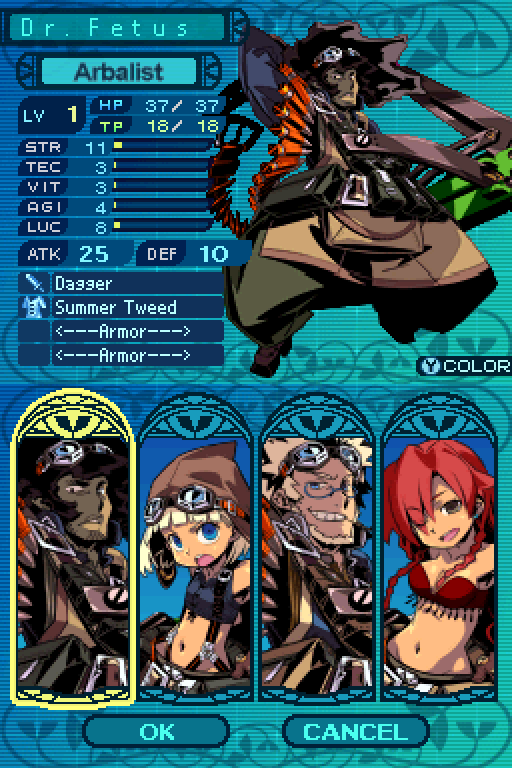 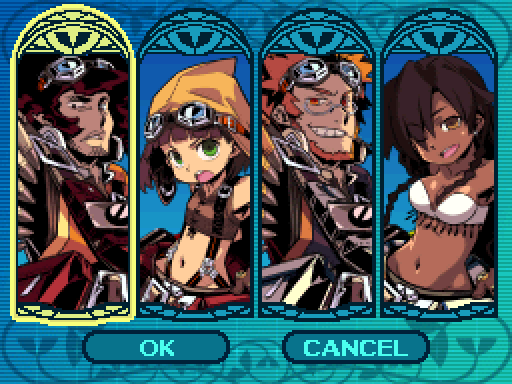 Experts in giant bows and cannons as big as they are, the fire-power they provide is a worth asset. Long-range attackers of the back line. Arbalists are ranged physical attackers that are all about the damage and shooting things until they're dead. This class is the definition of a glass cannon, as they have the highest strength stat out of all the classes, but their defenses are very lacking. This class has very little in the way of utility, since most of their damage skills solely deal damage, unlike some of the other offensive classes where some of their damage skills tend to have an additional effect. While they are fragile, they hit very hard. Even harder than the Gladiator. Normally a fragile class like this should be placed on the back row, however, one of their best skills benefits from them being placed in the front. Farmer 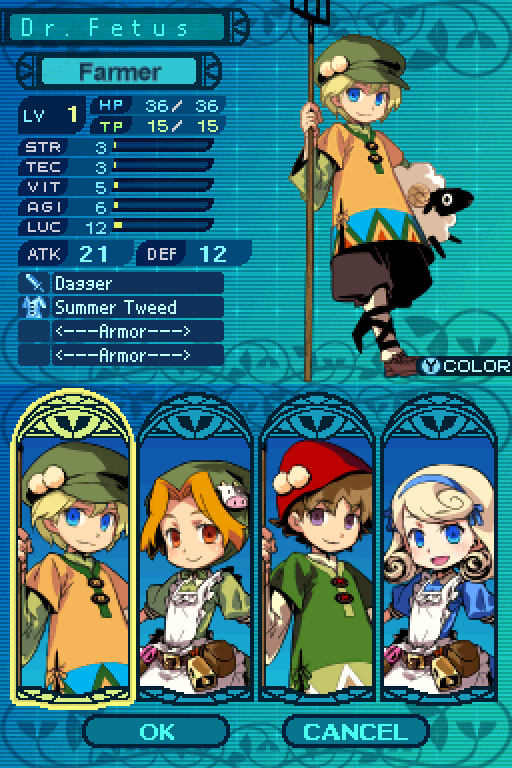 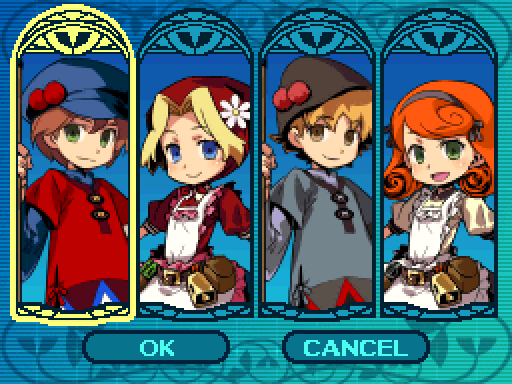 These farmers seek to apply their wisdom to navigating the Labyrinth despite their clumsiness in battle. Exploration specialists of the back line. Farmers are more focused on exploring the Labyrinth rather than actually fighting monsters. They lack combat utility, both in offense and support, but they have a wide arsenal of field skills that make actually exploring the Labyrinth easier, such as being able to gather from any item point, eliminating random encounters for a while, making camp grounds heal your party for a lot more than they normally do, and nullifying damage taken from damage tiles. They can also warp the party back to town as long as they have enough TP, which can be handy if you happen to forget to buy an important item for your trips into the Labyrinth. Aside from luck, their stats are terrible all around, so they're best suited for the back row. So, with all that in mind, go ahead and feel free to create some guild members for this LP. The specific rules and format will be at the bottom of this update, but first. Let me demonstrate a bit of the gameplay. 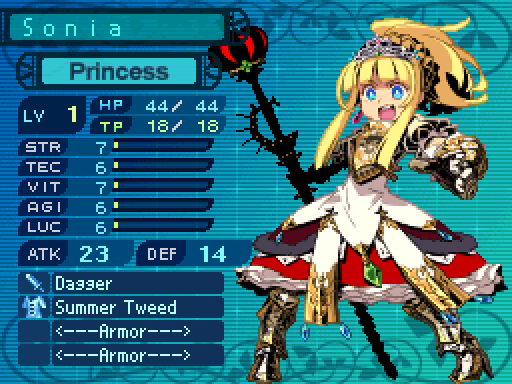 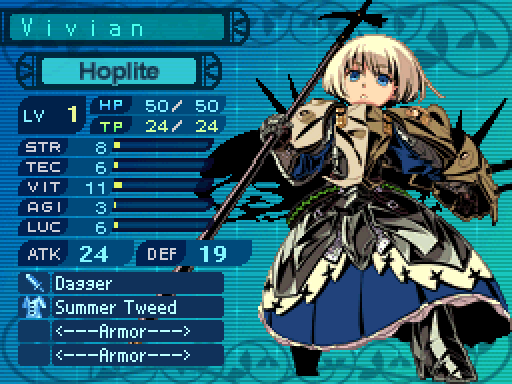  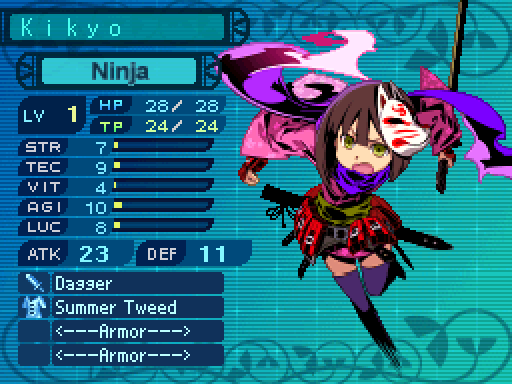 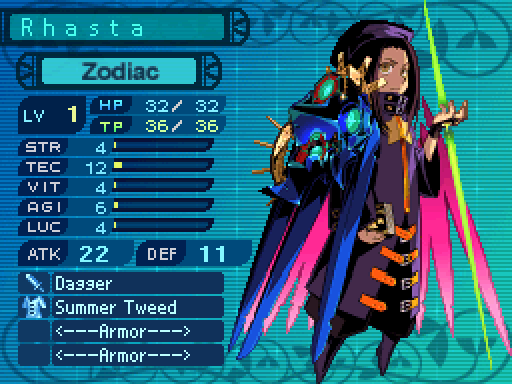 This was the party that I used for my first playthrough, so I'll do a bit of a combat demonstration with them. 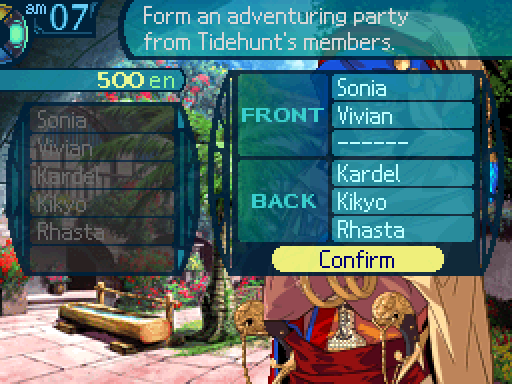 Once all your characters are created, make a party with them. You can have up to five characters in a party. You can go with less, and there are some advantages to doing that, but for the most part I don't recommend doing that.  Within the menu, you can level up your classes' skills with some skill points. While most skills require 10 points to max out, some only need 5 or 1 point to reach their maximum potential. When you get into a battle within the Labyrinth, you'll see that transition. Video: Battle Watch the video to get an idea of how combat works and flows in EO3.  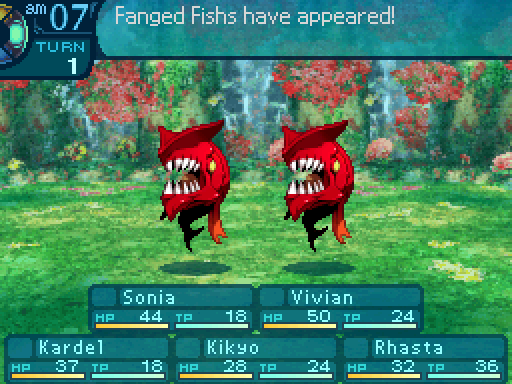  Fanged Fish Level: 1 HP: 40 STR: 5 VIT: 3 AGI: 11 LUC: 5 TEC: 7 Attack Type: Slash Exp: 38 Item Drops: -Drop 1: Red Scale - 50% Drop Rate. 1 needed for Scale Jerkin (Clothes.) 10 needed for Fortune Book (Book.) --Hard scale that covers the Fanged Fish's body. -Drop 2: Sharp Tooth - 10% Drop Rate. 1 needed for Kopis (Sword.) --Long tooth that always finds its target. -Gold Drop: N/A Description: This river fish is no threat singly, but a school of them is cause for concern. Damage Resistances: Slash: 100% Strike: 125% Pierce: 100% Fire: 100% Ice: 100% Volt: 100% Ailment Resistances: Sleep: 100% Confusion: 100% Plague: 100% Poison: 100% Blind: 50% Curse: 100% Paralysis: 150% Bind Resistances: Head: 100% Arm: 100% Leg: 100% Other Resistances: Death: 100% Petrification: 100% Stun: 100% Skills: Sharp Fang: Uses the Head. Deals 130% STR-based Slash damage to a single target. Has an accuracy of 99. Has an action speed of -5. Whenever I come across a new enemy, I'll put up a bio like this. Now all the resistances listed are multipliers, so higher numbers are better. When an attribute's resistance is listed as 100%, it means they don't resist it at all, but they're not weak to it either. There's another important mechanic involved in Ailment and Bind resistances, but I'll cover that later. I'll do have a bit more to say about this enemy later, but it doesn't have much going for it. 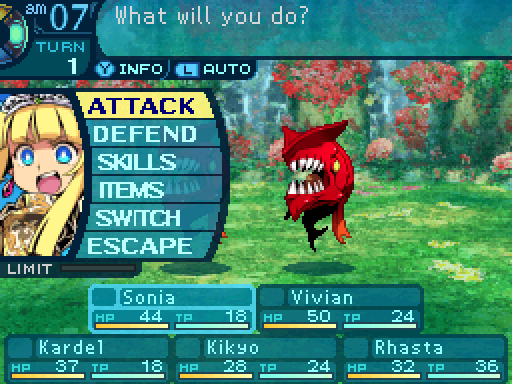 Right here we can choose from a bunch of options. Most of them are self explanatory. 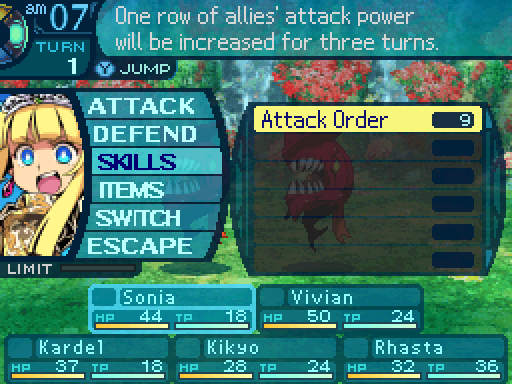 Each class has a different set of skills they have access to. The Princess is a buffer, and she can buff a row's physical attack power for 3 turns with this skill. 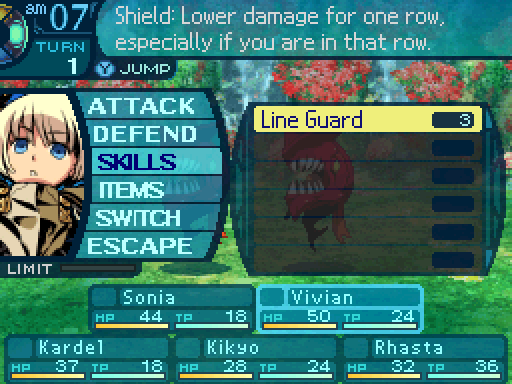 Hoplites can protect others with their skills, and what this does is reduce the physical damage the chosen row takes for the current turn. 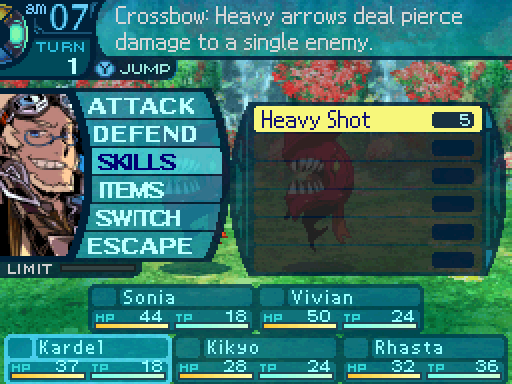 The Arbalist is an offensive class, so most of their skills revolve around doing damage. Though some damage skills on the various classes have additional effects.  This skill has a special effect that you'll see in a moment.  Zodiacs are basically mages and have access to elemental attacks. Mine only has access to a Fire attack at the moment. 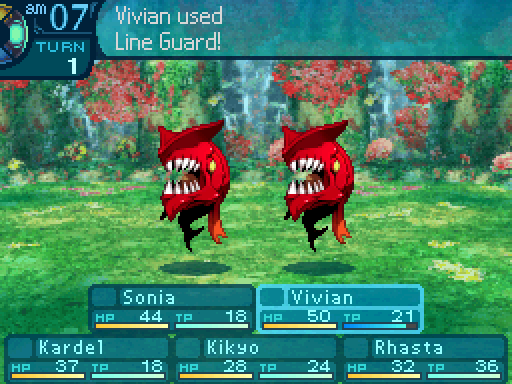 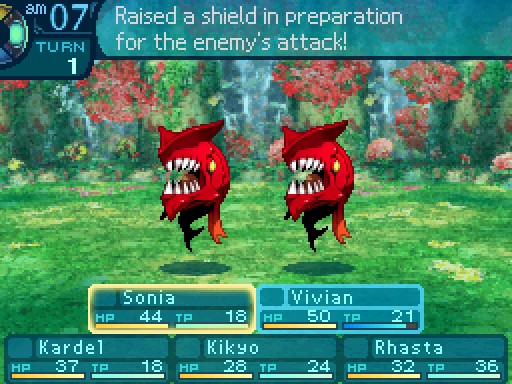 You can see which character is acting in the turn if the outline of their box is highlighted a light blue. 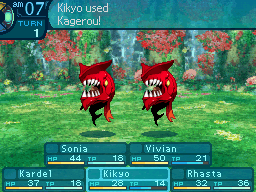 New to this game is the ability to fill up the 6th party member slot. A few classes have some special abilities that lets them summon a helper of some sort to fill up the empty slots in the party, including the 6th slot that's impossible to fill up in normal circumstances. In this case, the Ninja can create a decoy that attracts enemy attacks. 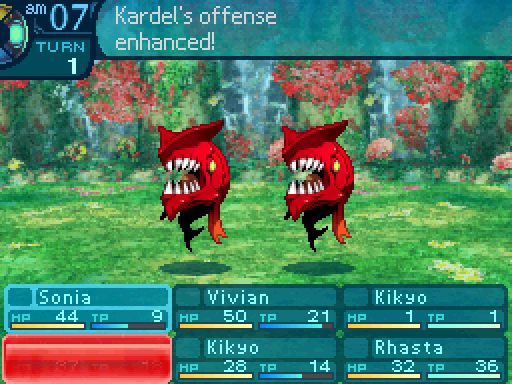 Attack buffs are represented by a red overlay on top of a character box. 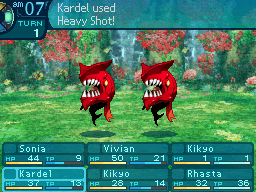 Unfortunately, attacks have a small chance of missing, which depends on several factors that I'll go over later. 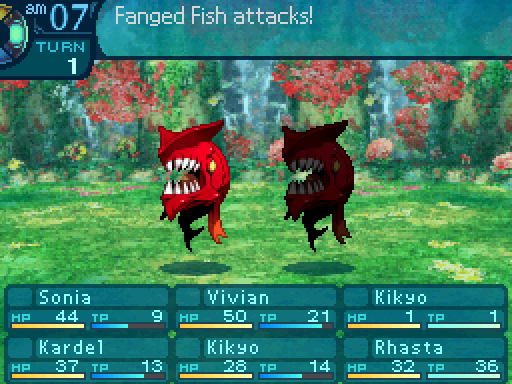 When an enemy attacks, the game lets you know which one does so by darkening the sprite a bit. 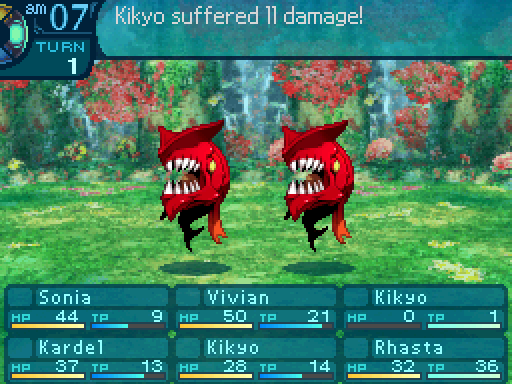 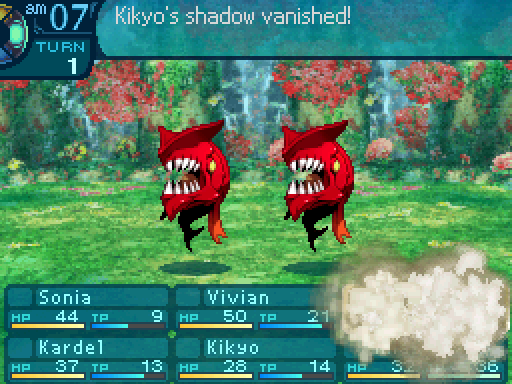 And the decoy goes down. Ah well, it did its job of protecting the rest of the team.   Unfortunately, now that the decoy's gone, my Princess takes the hit from the other Fanged Fish. At least Line Guard reduced the amount of damage she took. 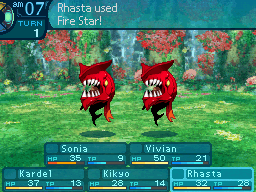 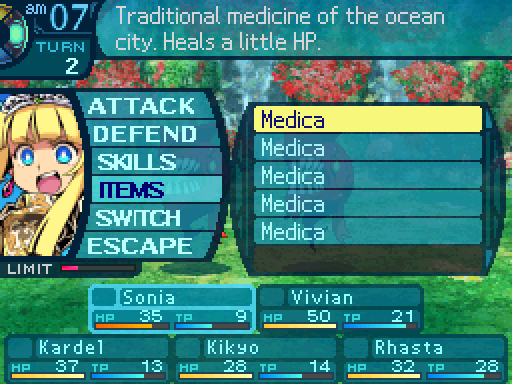 Of course, that can be healed up very easily. 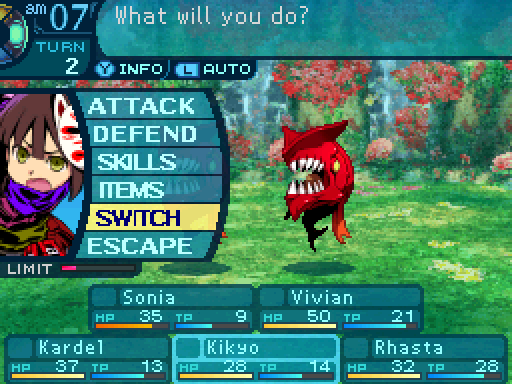 Returning from the 2nd game is the Switch option, although it operates differently in this game. In Etrian Odyssey 2, it swapped the rows.  In this game, you can chose to have the selected character swap positions with another party member, but this uses up the turn of the character that initiated the swap.  Another thing to keep in mind is that you can't swap with empty spaces, so you can't fill up your front or back line with 3 members. This can get a bit problematic when summoned units get involved, as they disappear on death. And if a character swapped with them previously for whatever reason, they can't return to their old spot without forcing another character out of the same row.  Ah, and the Princess is as good as new. It's like she never took any damage in the first place.    And thanks to Attack Order, Heavy Shot did enough damage to kill the Fanged Fish in one hit. 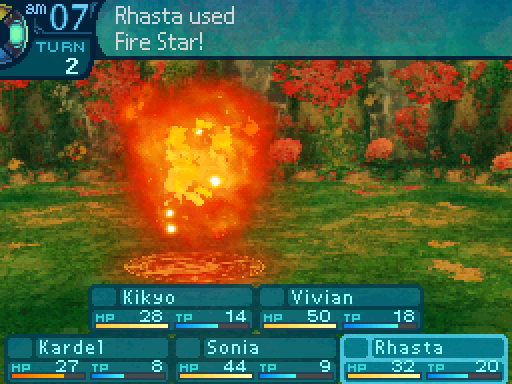   And they're all dead!   Once all the enemies are dead, the total exp (which is displayed in the top right corner) is divided among the surviving party members. The less people alive at the end, the more exp the survivors get. So with all that in mind, go on and create your character. If you wish to get a full body view of the character sprites, click here. This is going to be a narrative LP, so just come up with a name (Which has a 9 character limit), and choose which portrait you wish to go with (and if you want to use the Normal or Alternate color palettes), and a small bio detailing their personality or whatever. Now if a lot of people wish to create a character, I'll pick and choose from the lot. But if not enough people make one, I'll be doing first come, first serve in regards to choosing which characters get in. Oh, and only one character per person. Now as for party composition, you can vote on that too throughout this LP! You can even vote on the party that I will start out with. Or not, if you want to have mercy. For this initial vote only, you can choose between Democracy if you want me to use the most popular classes that you all vote for, or LPer's Choice if you wish for me to choose the party. (The earlygame of any Etrian Odyssey game are notorious for being the toughest part of the game until you reach the postgame.) The rest of the votes will only operate on Democracy since the game gets easier after the first Stratum. My initial party if the LPer's Choice option is chosen might be Prince/Hoplite, Arbalist/Ninja/Zodiac. Keyword, might. I may not go with that party at all depending on the circumstances. At any rate, no matter which option you choose, vote for up to three different classes that you want to see me use if the Democracy option wins. Also, don't forget to come up with a guild name (That will default to Tidehunt if no one decides to come up with one.) Araxxor fucked around with this message at 23:52 on Aug 11, 2017 |
|
#
¿
May 18, 2015 16:34
|
|
|
Crosspeice posted:Oh baby, I've been waiting for this. It's looking really good so far, where did you find all the enemy info, out of curiosity? I'm resourceful! I found it in another bout of internet dumpster diving. Along with a bunch of other info about the game. Rigged Death Trap posted:3 characters. While I appreciate your enthusiasm: Dr. Fetus posted:Oh, and only one character per person. The new character rules make it crazy already, and it's already hard to choose between a lot of the characters here. Araxxor fucked around with this message at 18:12 on May 18, 2015 |
|
#
¿
May 18, 2015 18:10
|
|
|
Wow, that's quite the stampede. I didn't expect this many applicants. I'll probably leave character creation and votes open for a little longer. If Democracy wins, the party choice would be the following: Hoplite: 7 Farmer: 7 Wildling: 6 Arbalist: 5 Monk: 4 Buccaneer: 4 Gladiator: 3 Zodiac: 3 Prince: 3 Ninja: 3 As for the main two choices that will determine if this will happen or not: LPer's Choice: 30 Democracy: 12 Well looks like a lot of people want to have mercy. As for Guild name votes: Tidehunt: 18 CalmSeas: 2 Bedouin: 1 Aw Yeah!: 1 Hotaru: 1 Strawhats: 1 Mompracem: 1 Scallywag: 1 Well I guess you all really like the name I went with. Endorph posted:Akatsuki (Ninja, Portrait 1) Even if your character may or may not be chosen, I want to let you know that this is by far the best bio I've read out of everyone's. I laughed quite a bit at this. Though it's a tossup between yours and one other applica- Endorph posted:i wish to provide a sample gif of my character: ...Or it's leaning heavily in your favor.
|
|
#
¿
May 19, 2015 03:38
|
|
|
VOTES AND CHARACTER CREATION ARE CLOSED! If Democracy wins, the party choice would be the following: Hoplite: 7 Farmer: 7 Wildling: 7 Arbalist: 5 Monk: 5 Buccaneer: 4 Prince: 4 Gladiator: 3 Zodiac: 3 Ninja: 3 As for the main two choices that will determine if this will happen or not: LPer's Choice: 33 Democracy: 13 Well, looks like I'll be going with my own party, which will be Monk/Hoplite, Arbalist/Ninja/Zodiac As for Guild name votes: Tidehunt: 21 CalmSeas: 2 Bedouin: 1 Aw Yeah!: 1 Hotaru: 1 Strawhats: 1 Mompracem: 1 Scallywag: 1 Tethys Looks like the default name won. Now as for who I've decided on, here's who I'm going with. Some of these were hard to pick from for various reasons, so don't be too concerned if yours didn't get in. Prince: Orange Fluffy Sheep with MEGAQUEEN! (She will be named Susan ingame.) Gladiator: W.T. Fits with Rose. Hoplite: theshim with Cassandra. Buccaneer: Tyty with Scott. Ninja: Endorph with Akatsuki. Sorry Alchargia, you had a really good one, but Endorph dethroned you hard. Monk: Chilblain with Faye. Zodiac: cdyoung with Asteria. Wildling: Arcade Rabbit with Fang. Arbalist: Level Seven with Sidney. Farmer: blizzardvizard with Alice. If you didn't get in, don't worry, there will be some more chances later. Though those opportunities may be handled differently. Araxxor fucked around with this message at 21:00 on Nov 21, 2015 |
|
#
¿
May 19, 2015 16:38
|
|
|
Rawkking posted:I'm somewhat surprised we're only going with one of each class, as this game kind of rewards having a full roster of adventurers due to one skill everyone can take. That is way too many characters to write for or to use in gameplay. Like for the most part, people tend to make a 5 man party and stick with it for the whole game. The EO2 LP had 12 characters, and some of them got the shaft in terms of screentime and all that. Also grinding up that many characters would be a huge pain, especially since EO3 lacks a fast grinding method like EO2 and 4 did. Glazius posted:Can't wait to see what's on offer this game. The new classes sound pretty neat and I can see parallels to some old class skills, but I imagine it's not that simple. There are, but they are much more balanced than Force Skills. I will actually be using those instead of holding back on them like I did in EO2, since they don't completely vaporize the difficulty of important fights.
|
|
#
¿
May 20, 2015 03:52
|
|
|
Dragonatrix posted:Um, are you sure about that? Because I can think of one very obvious and well-known one offhand although it's not available for a while. There is that method, but it unlocks so late and I was thinking like early on. Also it kind of falls off after a certain point, EDIT: They're higher, but they're not that much higher. Oops. Still, EO3 is a bit more stingy about exp in general compared to EO2 and 4. Araxxor fucked around with this message at 05:01 on May 20, 2015 |
|
#
¿
May 20, 2015 04:52
|
|
|
Update 2: Preparations Today was the start of something special.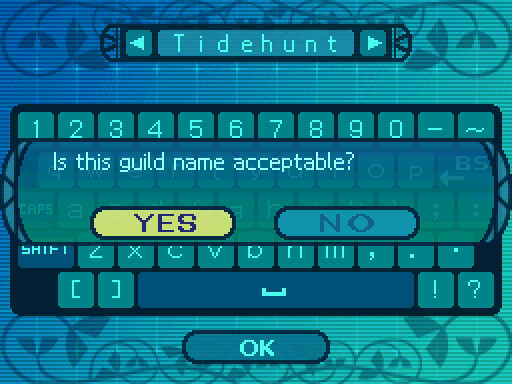 This is the name most people wanted to go with, so we're known as Tidehunt! Yeah, our guild name? Tidehunt! Don't you forget it!Well, let's take a look at our current party. 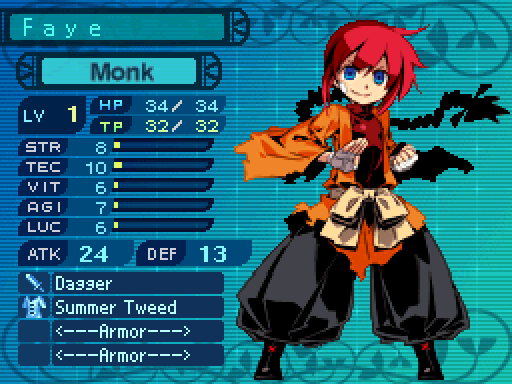 For justice! Nothing's gonna get in my way! I hope you know what you're doing. How did we even get roped into this? Hey, you guys are the ones who wanted to come with me to Armoroad. Don't be getting cold feet now. For justice! Nothing's gonna get in my way! I hope you know what you're doing. How did we even get roped into this? Hey, you guys are the ones who wanted to come with me to Armoroad. Don't be getting cold feet now.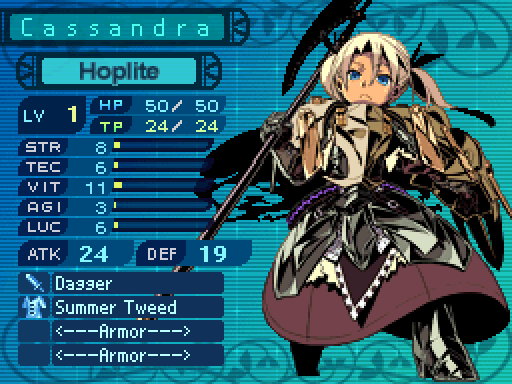 I wonder if this really was a good idea. Maybe it's not too late to back out. Don't even think about it. I wonder if this really was a good idea. Maybe it's not too late to back out. Don't even think about it.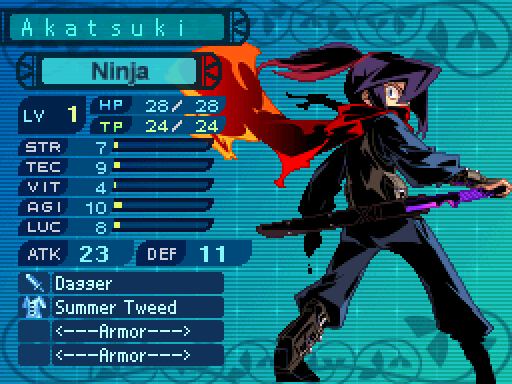 Don't blink, or you'll miss me. Don't blink, or you'll miss me. I'm the brains! I'm the brains!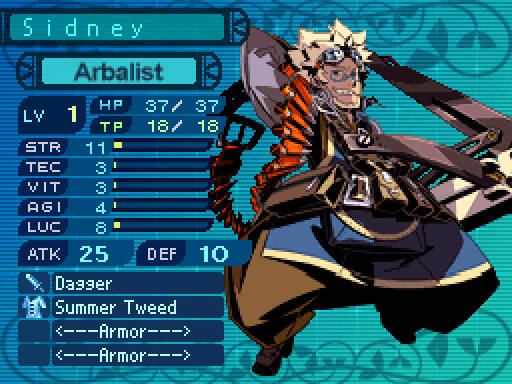 And I'm the brawn! And I'm the brawn!We're not gonna be exploring the Labyrinth in this update. We're just going around town and learning about what you can do there. But in the meantime, I'll talk game mechanics and what you can do to make the early-game easier for yourself in this game. If you're playing along, you really want to pay attention because the early-game of most Etrian Odyssey games are easily the toughest part until you get to the post-game, and this game is no exception. 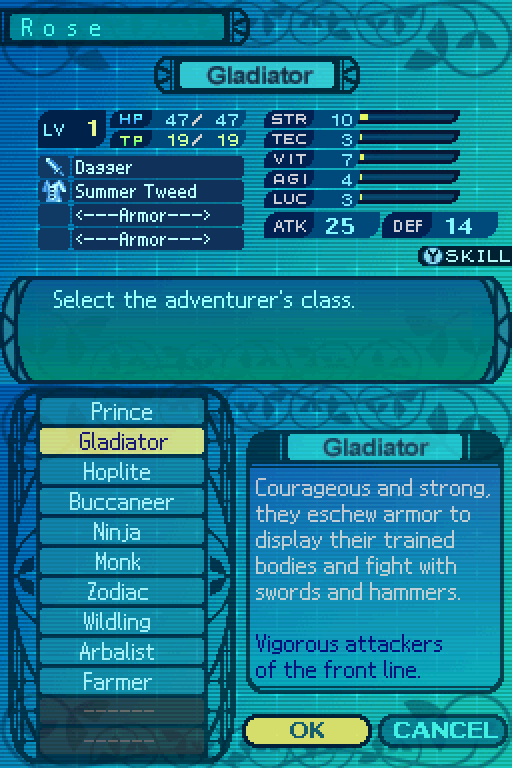 First things first, after making your initial party, create a character from all the other classes you aren't using. Every one of them. 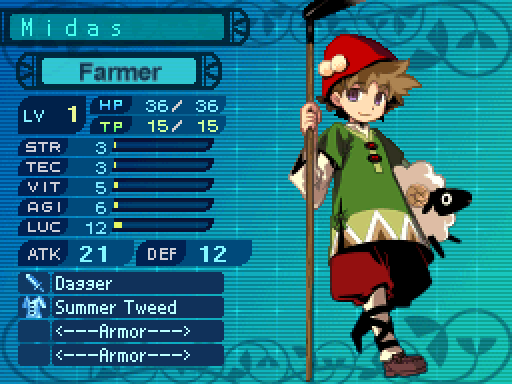 Next, make 10 Farmers.  And 5 Ninjas. As for what to do with them, I'll cover that in a bit.  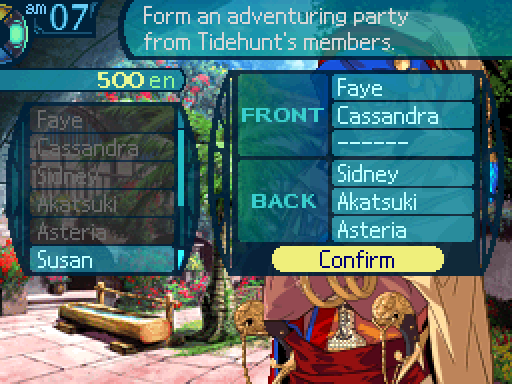 Formation is where you go to make your party. You can go with either a 3-2 or a 2-3 formation with a 5 man party. I personally prefer the 3-2 formation in all the EO games, but for now I'll go with this. 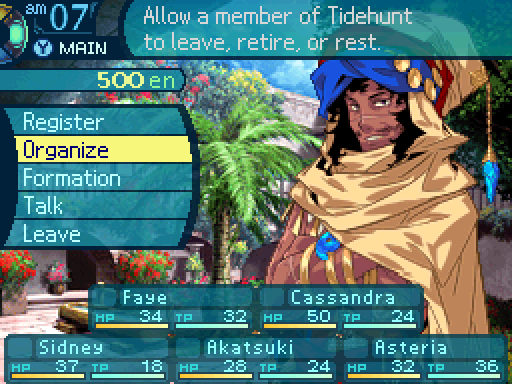 We can also organize our party members. 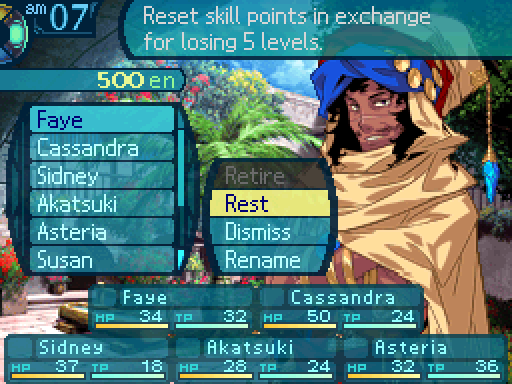 Retire isn't available to us now, we'll be able to do that once our party members reach level 30. Though in this game it's pretty awful and there's very little benefit to doing so. But more on that later. Rest is a panic button in case you messed up your skill builds. For a 5 level penalty, you'll get all your skill points back to allocate elsewhere. Though you can still rest when your party members are at levels 1 through 5. Doing so will return all their skill points, but no level penalty will be applied. The resting penalty got lowered to 2 levels in future EO games. 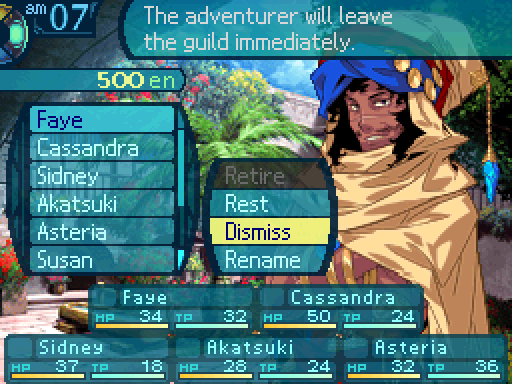 Dismiss deletes a party member. I'll be using this on the Farmers later, but hopefully I won't have to use this on any of the actual characters. 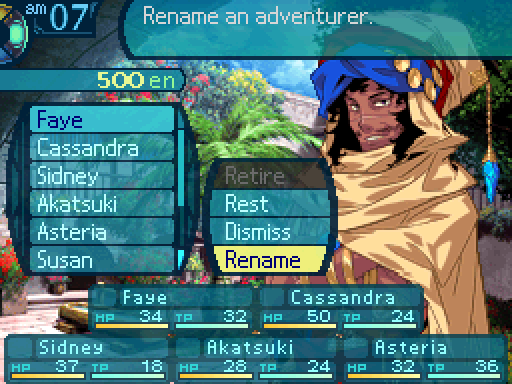 The rename function returns from the last game. You can rename a party member with this. You know what? Faye is a lame name, let's change it to something cooler, like HEAL! 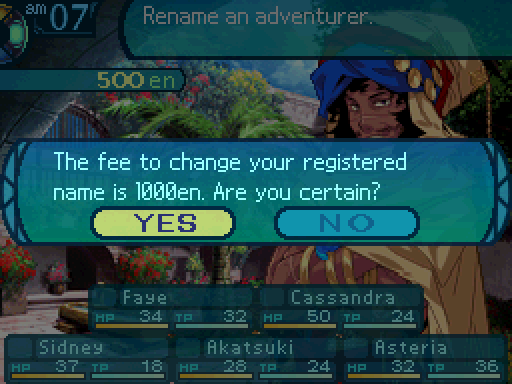 Or not. Yeah you have to pay a 1000en fee in order to do such a thing. I will not be using this feature at all. In future EO games, the renaming fee was completely removed. 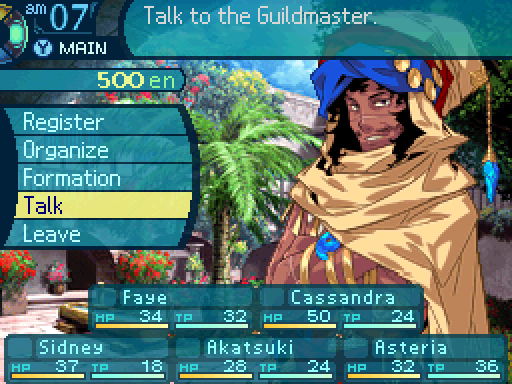 We can also talk to the Guildmaster in order to hear what he has to say for the moment.  Even experienced warriors get swallowed up by that Labyrinth every day... If you�ve come here as weekend warriors, I�ll be straight with you: hit the beach instead. Tch! We'll show you! We'll get to the bottom, easily! Even experienced warriors get swallowed up by that Labyrinth every day... If you�ve come here as weekend warriors, I�ll be straight with you: hit the beach instead. Tch! We'll show you! We'll get to the bottom, easily!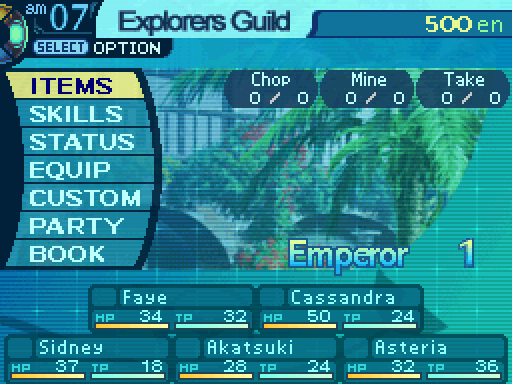 This is the menu. We can do a bunch of things here. Now see the words �Emperor 1� near the bottom right? That's the calender. You use that to keep track of how many in-game days have passed. Why would you want to do that? You'll see later. 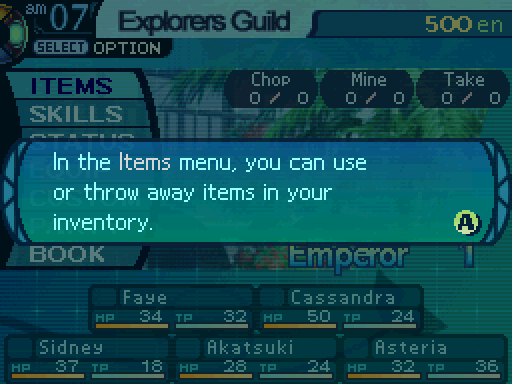 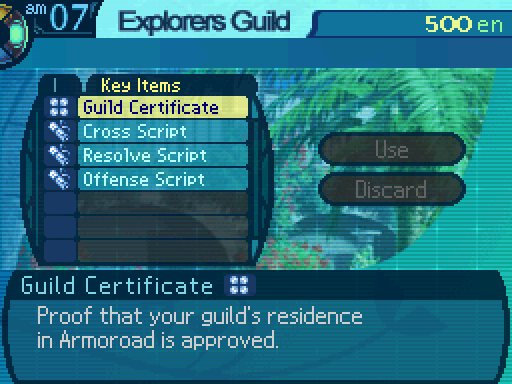 We don't have any items right now, just key items. Speaking of, while Etrian Odyssey 2 had key items, but they weren't separated from the regular items. This game actually has separate categories for both. Improvements!  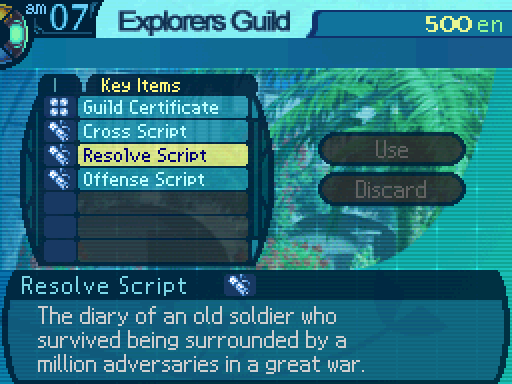 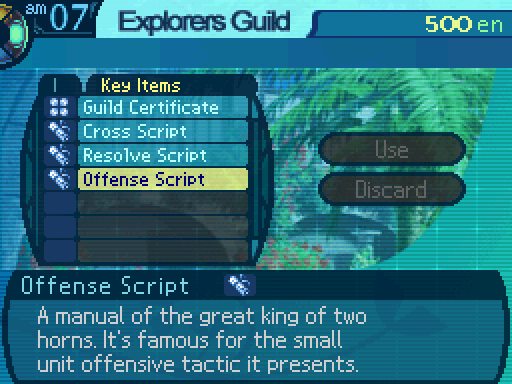 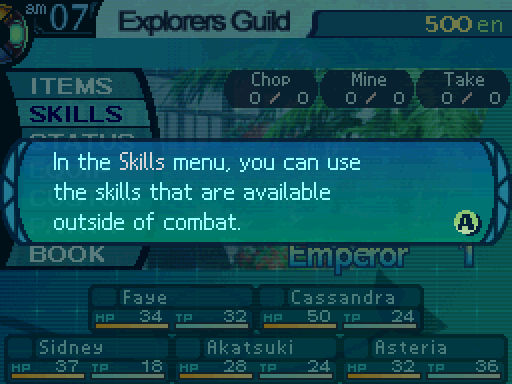 Such as healing or field skills.  Except no one has learned anything yet! We'll fix that soon enough. 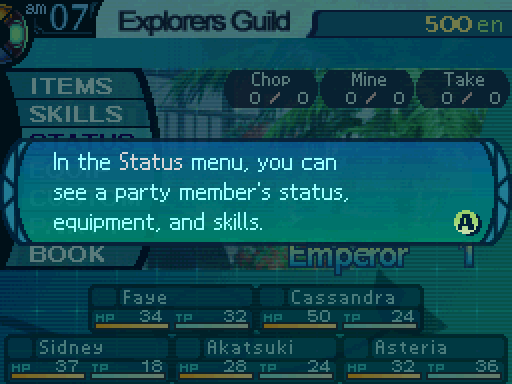 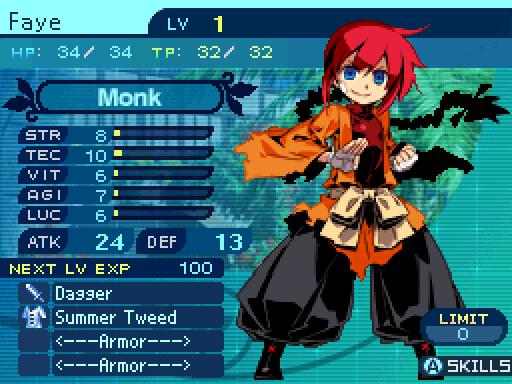 We've seen the stats before. 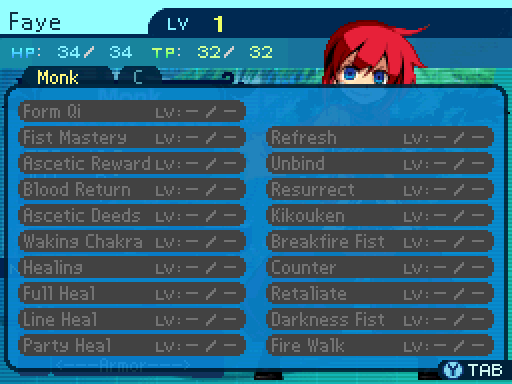  But we can also see the skills a character has learned in this screen. I personally like this way of visualizing skills better than how EO2 handled it (which was a scrolling list), as it's easier to check up on how your characters are doing.    Self-explanatory.  From Custom, we can choose between two options. Let's actually level up our skills now.     Now see that skill at the very top? That's what known as a Class Skill, a special passive skill that helps out the class in some way. Some are very good, and some aren't that great. In most cases, they're worth taking, although they're not the first thing you should max out in most cases. Now something to keep in mind when leveling up a skill is that in all the Etrian Odyssey games, they only give a vague description for what leveling up the skill does, instead of telling you the exact returns. This is bad thing because some skills don't scale all that well, or are horribly bugged, making investing in them at all or maxing them out a complete waste of skill points. Fortunately, people have data mined the games and figured out exactly what happens when you level up a skill. In this case, Form Qi boosts the healing power of a healing skill by 20% at level 1, and 25% at level 2, capping out at a 65% boost at level 10.  The key to purification is a good, steady mind. The key to purification is a good, steady mind.I mentioned the skill's power at level 1 and 2 because I put 2 points into the skill.  This oughta keep em standing. This oughta keep em standing.I also put 1 point into Healing, which is a single target healing skill. Something I should probably mention is that in the first two EO games, healing skills had a specific amount that they healed for, which could be slightly affected by the TEC stat. It's the other way around in this game. The Monk's TEC stat and their level provide the base amount of healing, while the skills influence how much the Monk can heal for. In this case, a level 1 Healing has a heal power of 70%, and at this point, it heals for around 20 HP, counting the boost from Form Qi. The skill also has an action speed of -6 at all levels, so it's a very slow skill. You may have to cast it preemptively to make sure your allies don't die before you heal them. Now, something you shouldn't do if you're using a Monk in your party is to level up the skill past 1 at the beginning of the game. Leveling up a skill makes it more powerful, but it also increases the TP cost, which doesn't matter in most cases. In this case though, the TP cost would jump up to 5 at level 2, and Faye would only be able to cast the skill 6 times, compared to the 8 times she could do at level 1. Also the heal power only jumps up to 75%, which makes Healing heal for one extra hit point. Which is definitely not worth it. Level it up later, but not now. Also something I wouldn't do is investing anything into their Fist skills, especially if they're your main source of healing. Their offenses are really lackluster, and chances are that they won't get plenty of opportunities to attack if you're using them as a healer. Okay not all of that is true, but if you're playing for the first time, I really wouldn't recommend using a Punch Monk.  Sometimes, a good defense is enough. Sometimes, a good defense is enough.Guardian is the Hoplite's class skill. It reduces all physical damage (Which is Slash, Strike, and Pierce.) by a certain amount. At level 1, it applies a 10% reduction to physical damage, and a whopping 40% at level 10! This skill is great, and drastically lengthens the Hoplite's lifespan. Though I wouldn't max this out straightaway. They have a ton of other skills that they want as soon as possible.  Well, I suppose I better start learning how to use this. Well, I suppose I better start learning how to use this.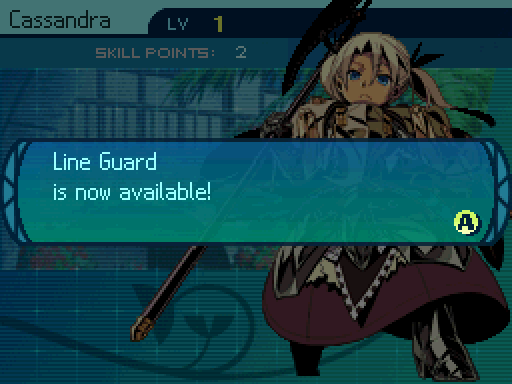 Leveling up some skills unlocks new ones. You can check the requirements needed to unlock a skill to the right of the skill list. At any rate, Shield Mastery is just an inferior version of Guardian. It does provide a damage reduction to physical attacks, but the damage reduction is only 1% at level 1, and caps out at a measly 10% at level 10. You do need to put points into this to unlock some very useful skills, so only level this up as much as you need to. Now while I did unlock Line Guard, I don't put any points into it. Not yet. 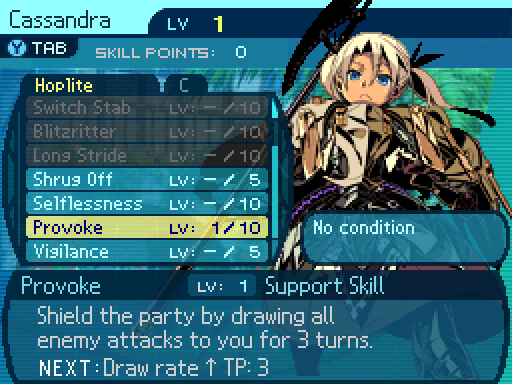 Prove yourself! Prove yourself!Instead, I put in a point into Provoke. What it does is make the Hoplite more likely to be attacked. However, the exact mechanics of how it works is pretty complicated, so I won't detail that until it's relevant. I'll say this, at level 1, Provoke can potentially add 5 points to the Hoplite's aggro value. You also want this skill if you're using a Hoplite since it can help deal with a special enemy on the first floor. As for skills to avoid, never ever touch their offensive skills. Hoplites have a terrible STR stat, so their attacks don't do that much damage. And the skills themselves don't really deal much damage anyway. Also, you rarely want Hoplites attacking, they have an incredible amount of utility as a tank support. 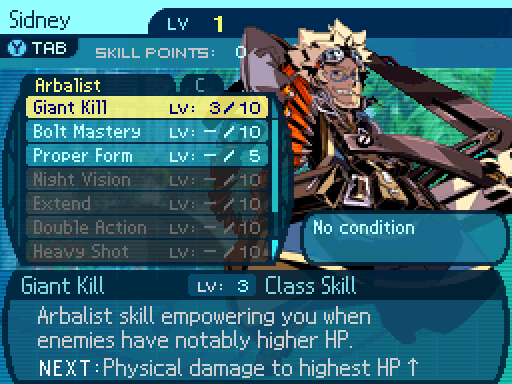 Pick on someone my own size? Aww, but that's boring! Bring on the big fry! Pick on someone my own size? Aww, but that's boring! Bring on the big fry!The Arbalist's class skill is a massive damage boost, and should be maxed out ASAP. Well, it depends on how you want to handle a specific situation near the end of the 1st Stratum anyway. What it does is provide a 20% boost to all damage types and skills at level 1, a 23% boost at level 2, and 27% boost at level 3, eventually capping out at a whopping 55% damage boost at level 10! For comparison, the Gladiator also has a class skill that boosts their damage (only to physical attacks in their case) but it caps out at a 25% damage boost. There is a �catch,� though. The damage boost only kicks in if the target of the Arbalist's attacks have twice as much of the Arbalist's current HP at the time of attack. This is barely a catch, and it pretty much applies in nearly every situation that matters. By the time the damage boost stops kicking in, your intended targets are probably gonna die in the next turn or so. Not to mention, the Arbalist has an incredibly low HP pool, so it's easy for the damage boost to apply in nearly every situation. Okay the HP stat is a huge downside, but the Arbalist is a bit of a risky class to use. 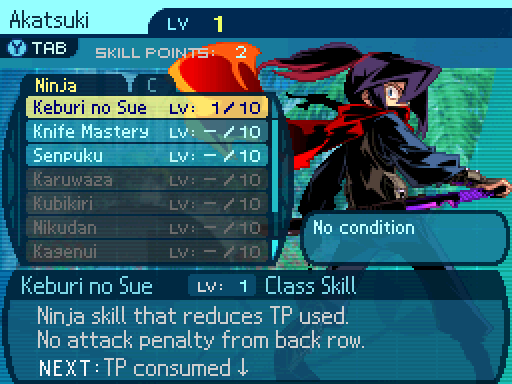 The way of the ninja is clear to me. The way of the ninja is clear to me.Keburi No Sue is the Ninja's class skill, and something you want one point in immediately. Now, when attacking from the back row, melee attacks normally get a damage penalty, and do a lot less damage than they could. The class skill gets rid of that penalty, and lets the Ninja launch full power assaults from the back row. And more levels decreases the TP cost of all skills, capping out at a 9 TP cost reduction at level 10. A handy skill, and one you want to max out eventually if you want to take advantage of a certain strategy that becomes available in the mid-game. 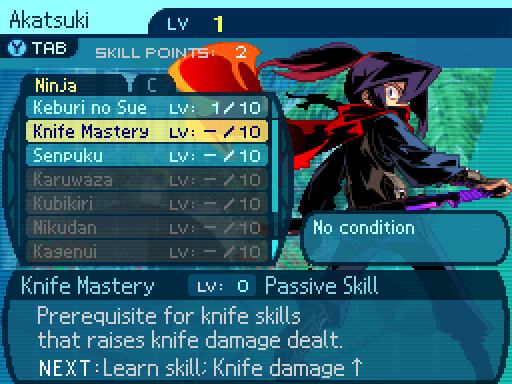 Speak softly and carry a big knife. Speak softly and carry a big knife. Putting one point into Knife Mastery unlocked this skill, which I'll take later. This a good opportunity for me to talk about another trap. In the first two games, weapon mastery skills boosted the damage of regular attacks and certain skills, as long as they used the respective weapon. This is not the case in this game. Weapon mastery skills only boost the damage of regular attacks, not skills. Regular attacks are awful in this game, because skills deal so much more damage. The damage boost isn't that great either, since it's a 2% damage increase to regular attacks at level 1, and a mere 11% at level 10. But you need to invest points into them to unlock skills, so they're nothing but point sinks. Spend as much as you need to, but not a single point more. Fist Mastery is an exception to this, but it follows it's own set of rules. 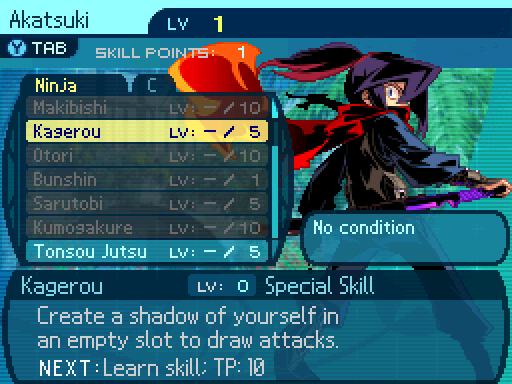 Let my illusions cause discord! Let my illusions cause discord! Putting one point there unlocked this useful skill. As for Kagerou, you've seen what it does in the combat tutorial. It sends out a decoy that has a potentially high aggro value on it, making enemies target it instead of an actual character. 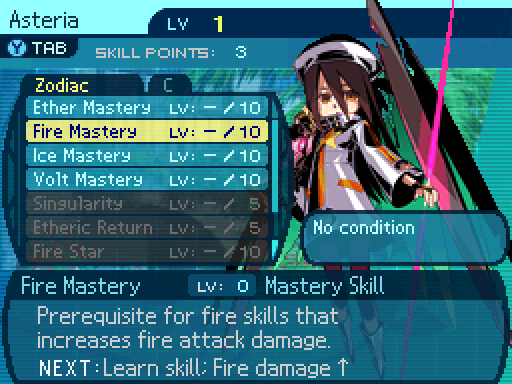 Hmm, if I just tinker with this here, ignite this... AHA! Hmm, if I just tinker with this here, ignite this... AHA!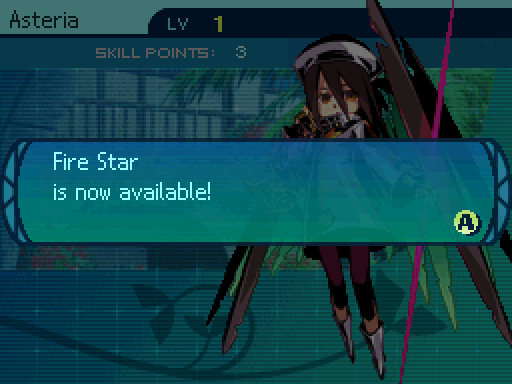 A point in Fire Mastery unlocked this skill. The Zodiac's elemental mastery skills don't act like weapon mastery skills, and actually boosts the skill damage of the proper element. 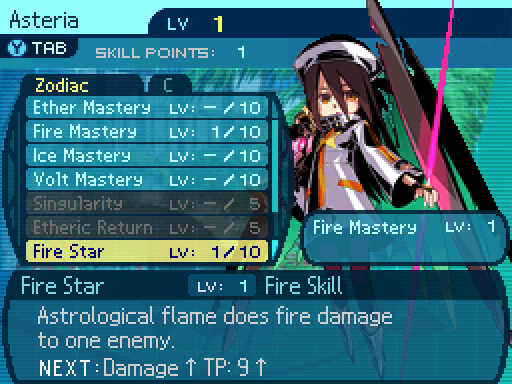 I forecast a sunny, burning hot day! I forecast a sunny, burning hot day!The elemental stars are single target elemental attacks that run off of the TEC stat instead of STR, and deal 40% damage at level 1. Sounds a bit low, but TEC based damage runs off of an entirely different damage formula than the STR based attacks, making their scaling significantly more front-loaded. Now if you've played the first two games, you probably think you should just focus on a single element and max that out, right? 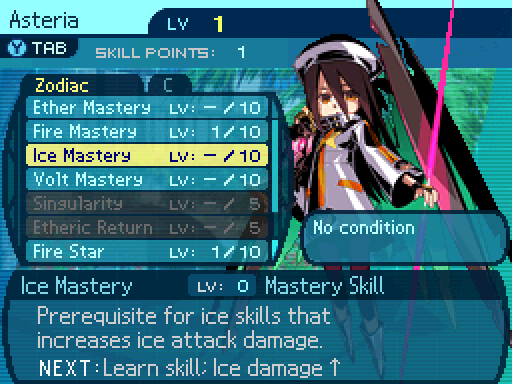 Now if I just lower the temperature by a few Kelvins... oh my! Now if I just lower the temperature by a few Kelvins... oh my!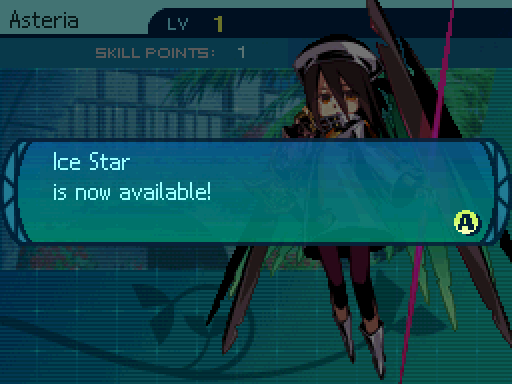 You are dead wrong if you think that's how you're supposed to skill a Zodiac. Doing such a thing will actively cripple them and prevent them from reaching their full potential. What you want to do is invest a single point in all their elemental stars, and no more than that. This is because the damage caps out at 80% at level 10, but the TP cost jumps up to 22, which basically doubles the damage, but nearly triples the TP cost. Max them out if you want in the late and post-game, but you'll run your Zodiac dry in the and mid-game, when a level 1 star is enough to deal with a lot of enemies throughout the game. As for their Class Skill, Ether Mastery, it boosts all elemental damage (Fire, Ice, and Volt)by 25% at level 10. A handy damage boost, but not one you should invest in first. There's a ton of other skills the Zodiac wants ASAP before having any luxury skill points to spend on that skill. Now as for the Farmers and Ninjas I made earlier... 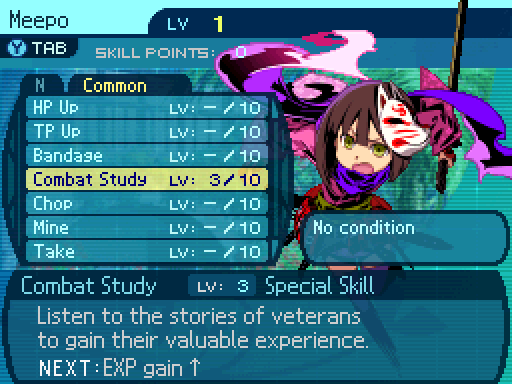 You want all of the classes you're not using, the 5 Ninjas, and 5 of the Farmers to invest in this skill. It basically enables leaked experience, but it only takes effect if the characters who have it are not in your active party. At level 10, any character that has this skill will gain 10% of the total experience you gain in battles. Sounds like a ripoff? It isn't. Consider that the total exp is split amongst 5 people in a 5 man party, which means each member in the active party gets 20% of the exp. So maxing out Combat Study means that everyone who has it is getting half of what a 5 man party would be getting. Now the reason you want 5 Farmers not to have this is to have a Farmer team to help harvest while the other Farmers are leveling up. As for the Ninjas? That's for later.   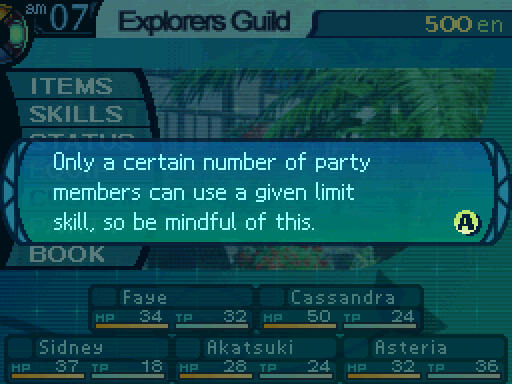  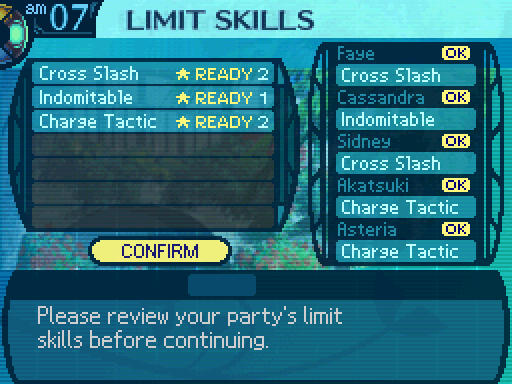 Limits are basically Final Fantasy VII's Limit Breaks, special moves you can perform in battle. They're kind of like Force Skills in Etrian Odyssey 2, but Limits are much more balanced, so I'll actually be using them in this game instead of holding back on them.     You can rearrange the party setup here. 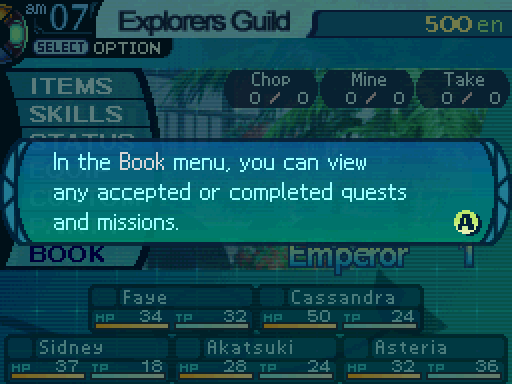 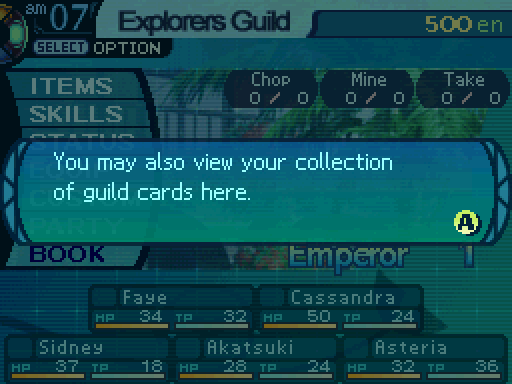 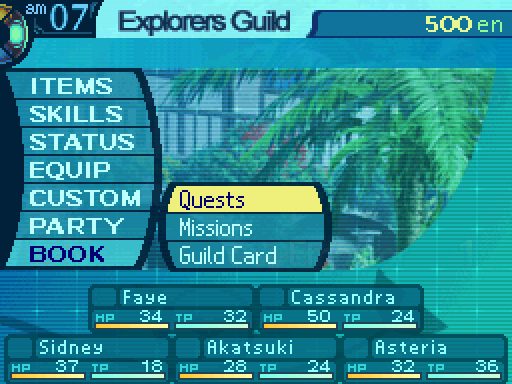 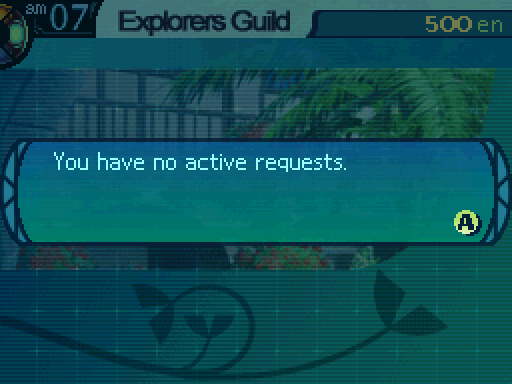 Oops, can't view anything since we actually haven't accepted any quests or missions yet. Let's check out Guild Cards. 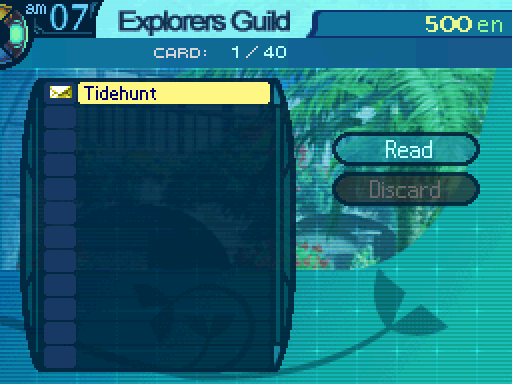 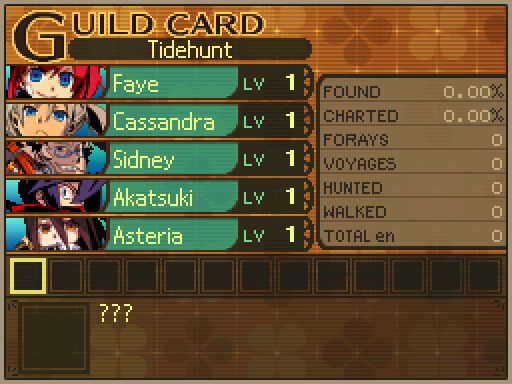 This is the game where Guild Cards made their debut, and became a mainstay in the rest of the series. These list out stats of what you did in a playthrough, and a list of accomplishments. Although we didn't really do anything yet, so there's nothing in those blank squares right now. Anyways, I think we spent enough time in the menus. 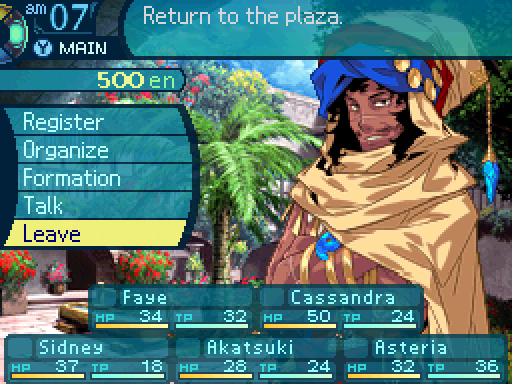 Let's leave. 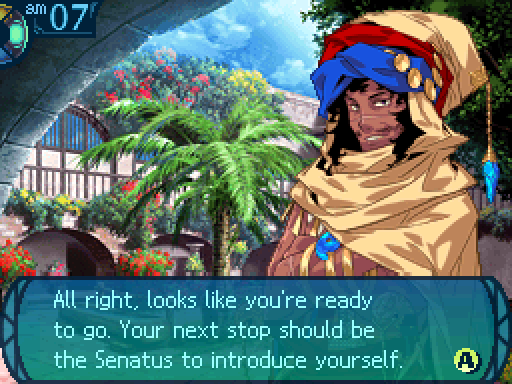 Oh, but before you go, let me explain one more thing. It�s about the documents I just gave you along with the guild certificate... Smart explorers actually read them carefully. If you don�t feel like it, just throw them away... But if you hope to go all the way in the Labyrinth, you�d be well-served giving them a look. Way ahead of you. Oh, but before you go, let me explain one more thing. It�s about the documents I just gave you along with the guild certificate... Smart explorers actually read them carefully. If you don�t feel like it, just throw them away... But if you hope to go all the way in the Labyrinth, you�d be well-served giving them a look. Way ahead of you.In this game, powerful abilities called Limit Skills can be used by up to five party members. Limit Skills can be learned by obtaining documents with the skill details written in them. Gather various Limit Skills and use them well to make your time in the Labyrinth easier. The Guildmaster actually has different things to say depending on how many party members you leave with. If you have no one in the party: ...Come back here once you�re ready to get serious.If you have 1 to 4 party members: It�s up to you how many people to put in your party, but... I myself wouldn�t go with less than five. But that aside, you still have to visit the Senatus next. Introduce yourself to the old lady there. Oh, but before you go, let me explain one more thing.And then the game continues with the Limit explanation. But enough of that, onwards!  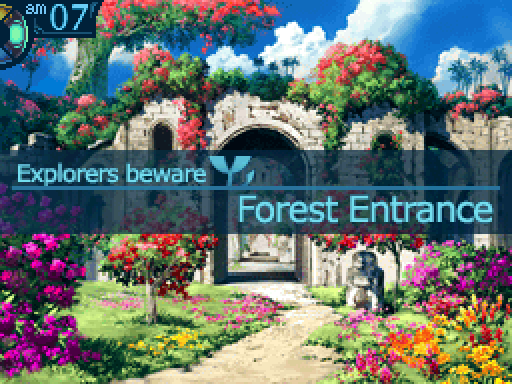 WOO HOO! Let's get on with this whole exploring thing! WOO HOO! Let's get on with this whole exploring thing!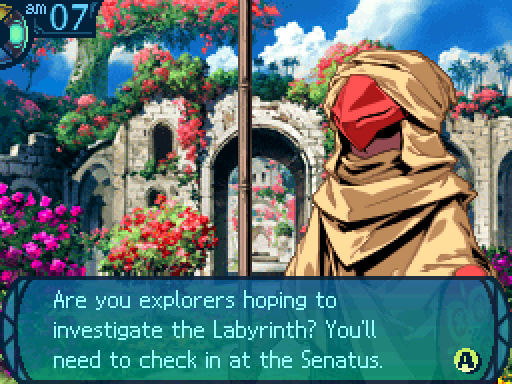 Aw, what!? You're kidding me! The honorable Guildmaster did say we needed to go to the Senatus first. Uh, where is the Senatus anyway? I think we better look around town first, and maybe get familiar with the place while we're at it. Aw, what!? You're kidding me! The honorable Guildmaster did say we needed to go to the Senatus first. Uh, where is the Senatus anyway? I think we better look around town first, and maybe get familiar with the place while we're at it.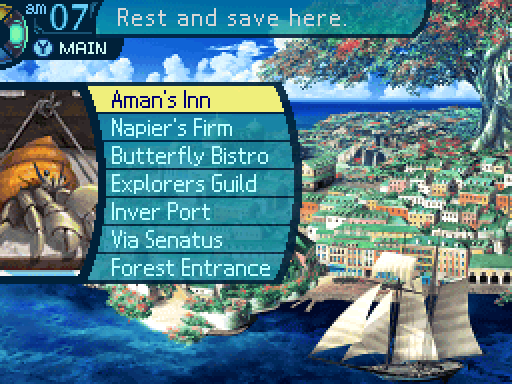 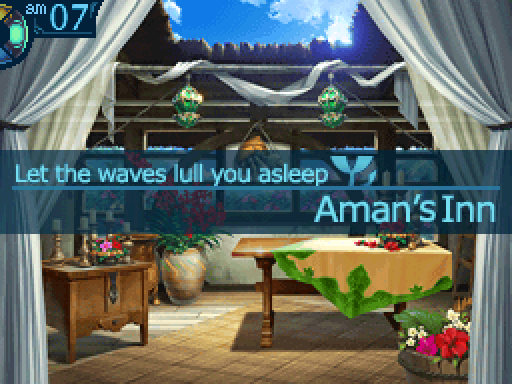 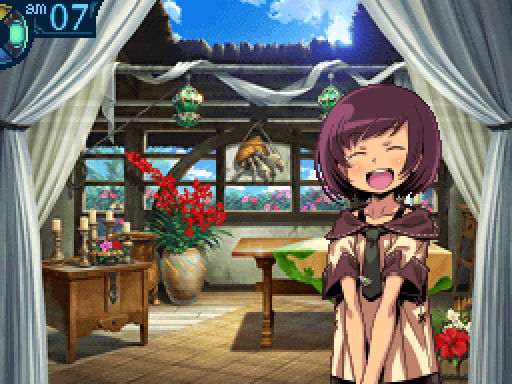  Welcome to Aman�s Inn, boss! Not only can you spend the night here, we have doctors to treat your wounds, too! So, is this your first time in Armoroad? Isn�t it awesome? Those clear seas! Those blue skies! Ehhh, I'd need to spend more time here- It's a beautiful place. Welcome to Aman�s Inn, boss! Not only can you spend the night here, we have doctors to treat your wounds, too! So, is this your first time in Armoroad? Isn�t it awesome? Those clear seas! Those blue skies! Ehhh, I'd need to spend more time here- It's a beautiful place. 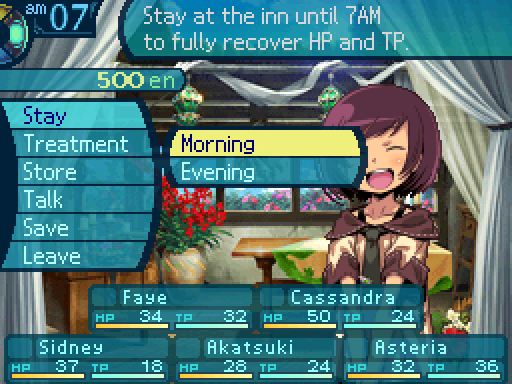 You can rest at the inn to recover all your HP and TP. But something this game finally does is to let you sleep in until evening, even if it's already evening. The first two games didn't let you do that, and this game finally does away with that needless thing. The resting fee is 5 * the highest leveled party member's level. However, sleeping can't revive the dead or undo petrification. 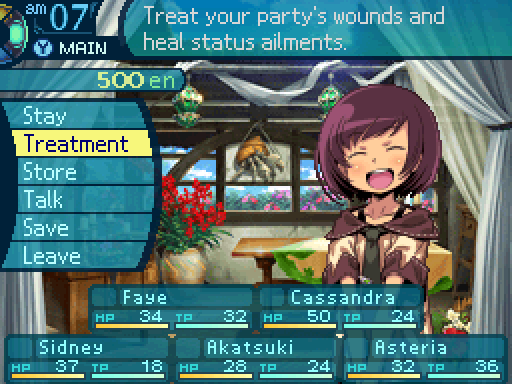 But don't worry! You can go to the clinic to do that! The game did another small improvement and merged the inn and hospital together, where in the first two games, they were separate locations. The clinic's fee for treatment is 5 * the client's level. 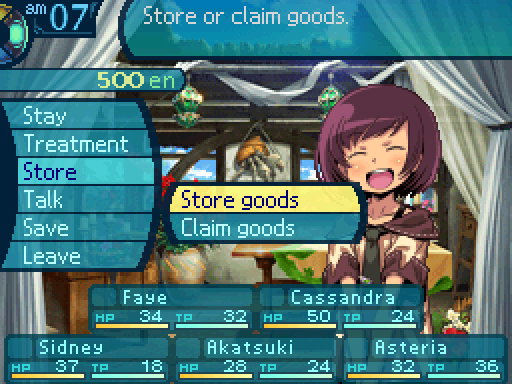 Returning from EO2 is the storage system, you can store 99 items here, and the storage costs are 100en per item. 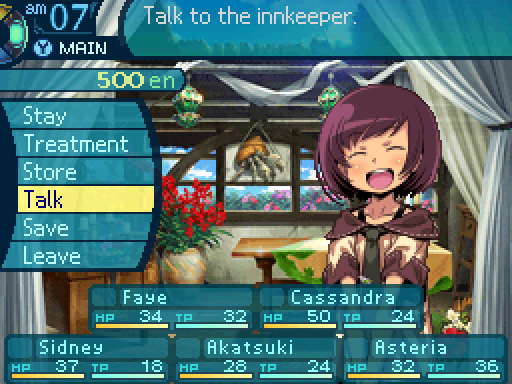 Let's talk to the innkeeper. 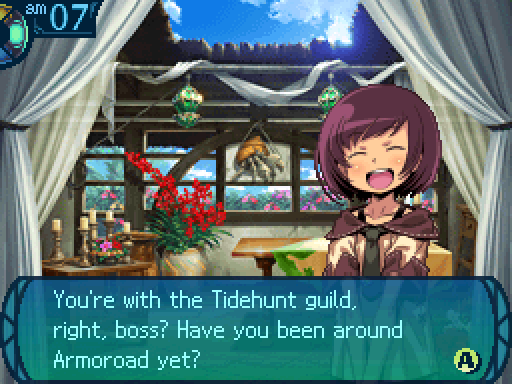 Ah, we haven't really looked around all that much yet. They call this the ocean city, �cuz so many people from across the seas wind up here. I bet you�d enjoy taking a walk around town before you go down into the Labyrinth. Ah, we haven't really looked around all that much yet. They call this the ocean city, �cuz so many people from across the seas wind up here. I bet you�d enjoy taking a walk around town before you go down into the Labyrinth.You can also save your game here. Anyways, let's look around town some more. 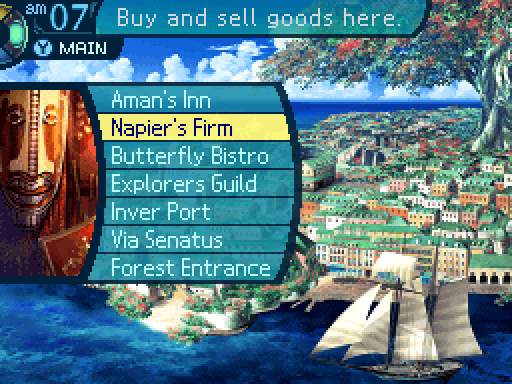 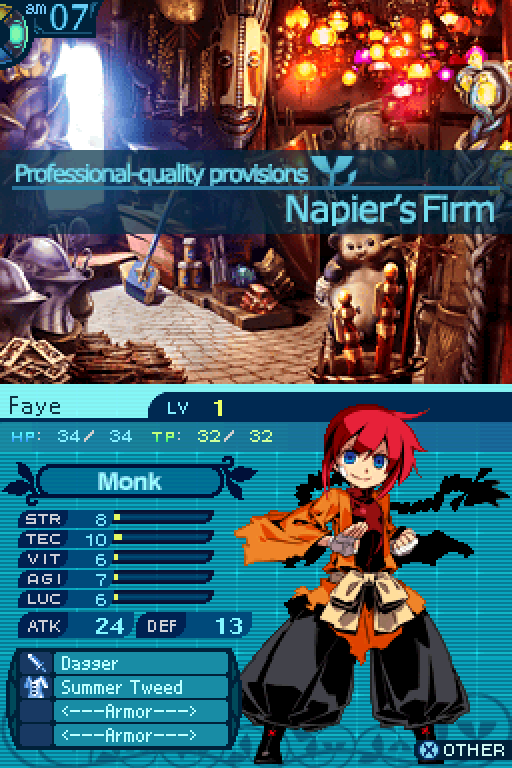 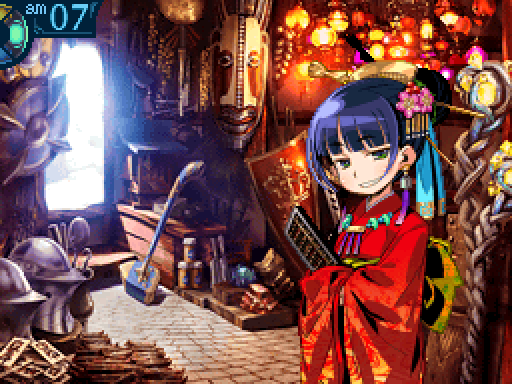  What�s this...? Unfamiliar faces? Let me guess: new explorers lured by the sweet scent of profit? Uh, maybe? In that case, welcome to Napier�s Firm. We carry all the weapons, armor, and tools you�ll require. Here at our Firm, the customer is God. We�ll spare no expense for those who line our coffers. Though that is conditional on you participating in a transaction. No window shoppers, please. She's quick to the point. What�s this...? Unfamiliar faces? Let me guess: new explorers lured by the sweet scent of profit? Uh, maybe? In that case, welcome to Napier�s Firm. We carry all the weapons, armor, and tools you�ll require. Here at our Firm, the customer is God. We�ll spare no expense for those who line our coffers. Though that is conditional on you participating in a transaction. No window shoppers, please. She's quick to the point.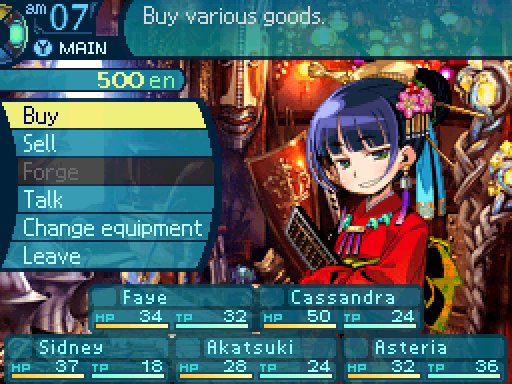 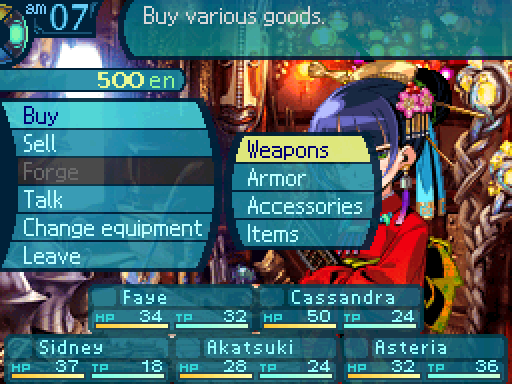 We have nothing to sell, so let's buy some weapons. Hmm, it seems like this is a good place to stock up on supplies. How much have we got again? Let's see here... 500 ental. That should be plenty to buy everything we need! These weapons and all that can't be that expensive. Besides, it was really hard to scrounge up this much.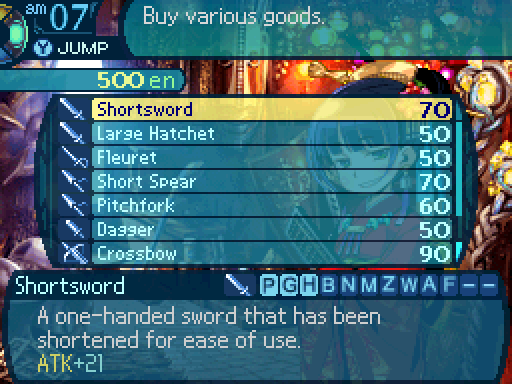  WHAT. There's some sort of mistake in the price tags, right? WHAT. There's some sort of mistake in the price tags, right?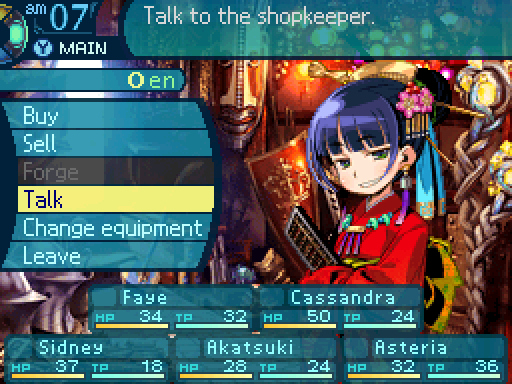 Lady, these prices are outrageous! Can't you give us some sort of discount or something!? Lady, these prices are outrageous! Can't you give us some sort of discount or something!? Skilled explorers have few qualms at parting with their money. Stinginess never saved a life. All things depend upon money. Your finances dictate whether you master Yggdrasil or die penniless. Remember that. So then, what can I get for you? Such naked avarice! Hmm, I did some calculations and we should be able to afford everything we need here after all. Sweet! We just need to forgo breakfast, lunch, dinner, and any other times we need to eat for the next week. Skilled explorers have few qualms at parting with their money. Stinginess never saved a life. All things depend upon money. Your finances dictate whether you master Yggdrasil or die penniless. Remember that. So then, what can I get for you? Such naked avarice! Hmm, I did some calculations and we should be able to afford everything we need here after all. Sweet! We just need to forgo breakfast, lunch, dinner, and any other times we need to eat for the next week.  You're kidding. Can't we just look for another store? What am I going to do without my daily helping of sushi!? I've checked around, and this is the only store in the area. Sorry everybody. ...Lousy freaking highway robbery. Fine! You win! You're kidding. Can't we just look for another store? What am I going to do without my daily helping of sushi!? I've checked around, and this is the only store in the area. Sorry everybody. ...Lousy freaking highway robbery. Fine! You win!Despite the shopkeeper's obvious greed, she's completely right. You want to spend every bit of money you can on weapons, armor, and medicine. You need every single advantage you can get to survive the early-game, which I've said before, is the most difficult part of most Etrian Odyssey games. Your party will not survive with just their starting equipment. Also unrelated to gameplay, but Edie (That's her name) is my favorite shopkeeper in the series. Okay let's buy some stuff. 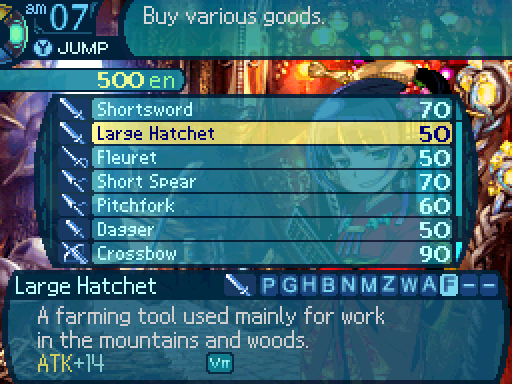 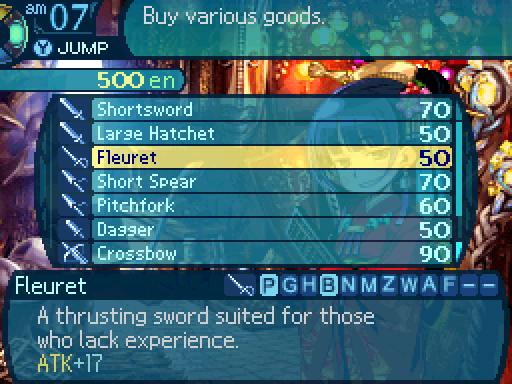 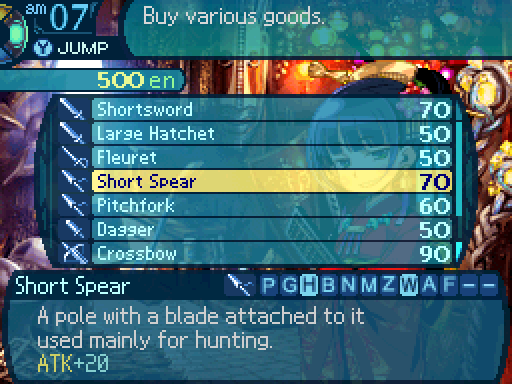     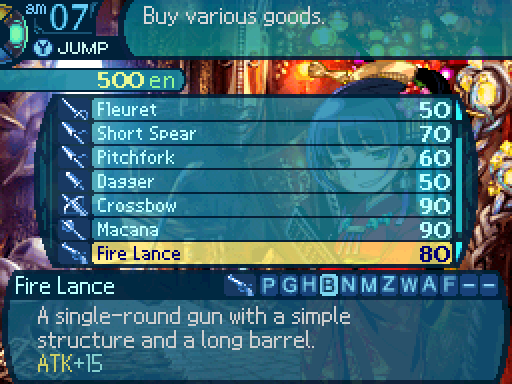 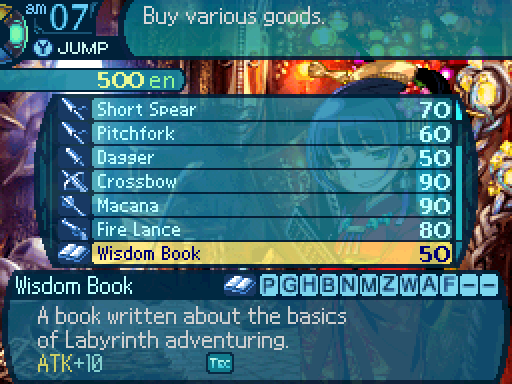 These are all the available weapons for now. You may have noticed that some of the weapons had boxes with the name of a stat in them. Those are forge slots, and they replace the secondary stats of a piece of equipment the earlier games had going. A weapon had 2 slots with LUC in them, so if a class equipped that weapon, they would gain 2 points of LUC. It's also possible to customize empty forge slots with a forge of your choosing, but we can't do that right now. Anyways, I buy the necessary equipment for my party members.  Let's check out the armor selection. 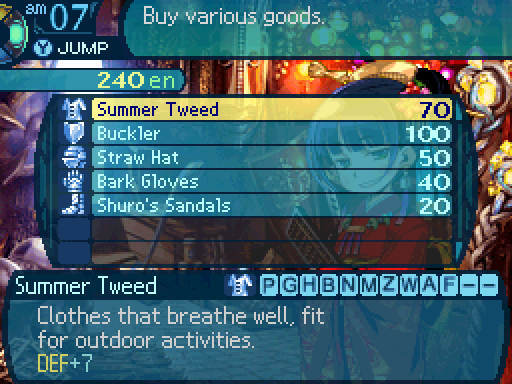 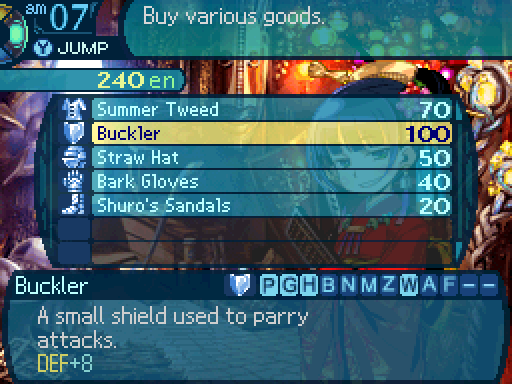 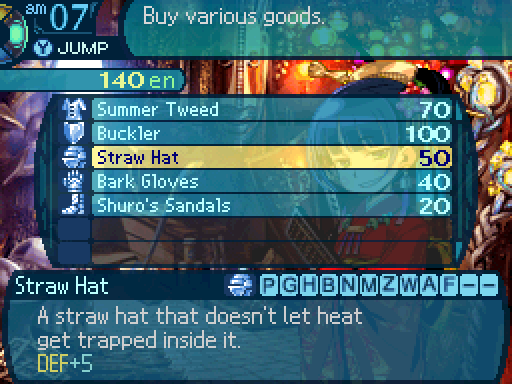 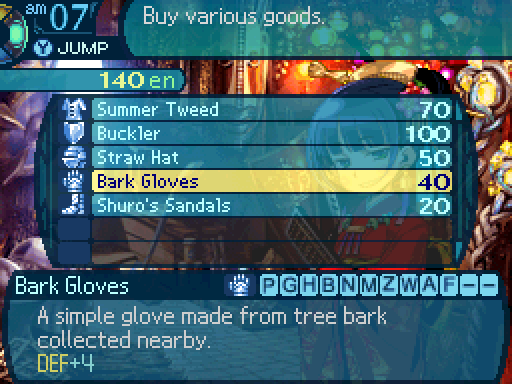 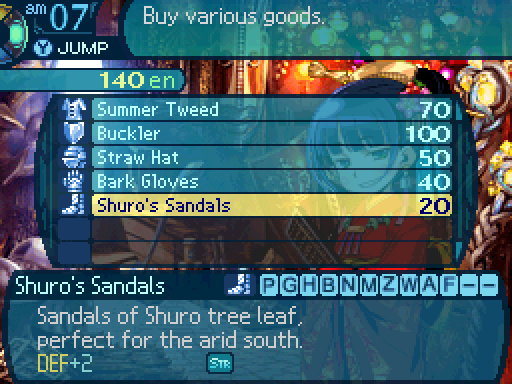 Okay, there's not much here, but if you have a Hoplite, buy a shield for them. They can't use most of their defensive skills without one. I also make sure to buy boots for everyone. They don't provide as much of a defense bonus as the gloves and the helmet, but they provide a hidden boost to something called Action Speed, which determines how much faster you are than the enemies. Now let's look at accessories. 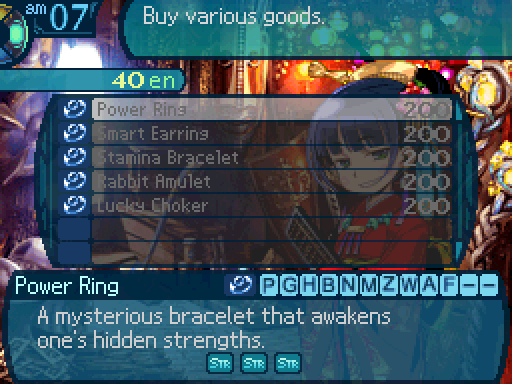 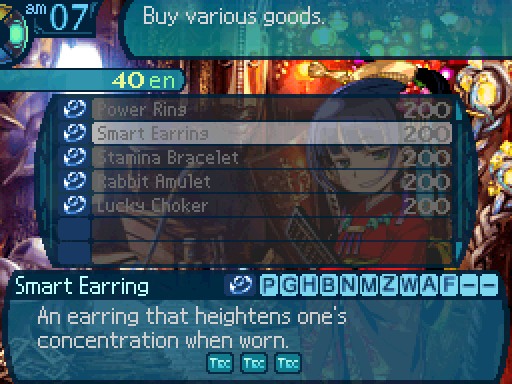 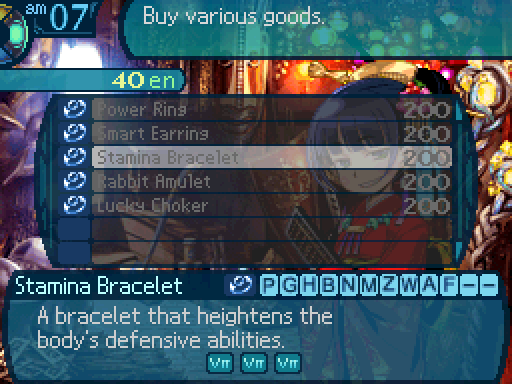 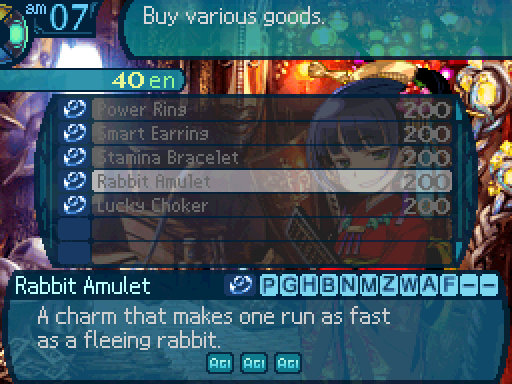 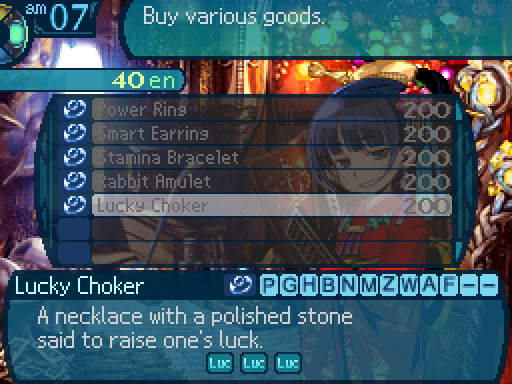 Which are all out of our price range. These all provide a 3 point boost to a certain stat. And finally, the item section. 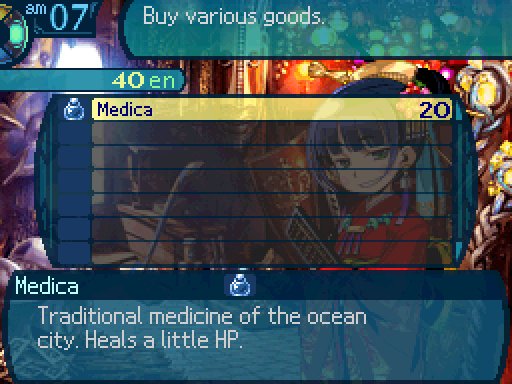 This is the only thing we can buy, and with the remaining amount of money, I buy two of these. Normally I wouldn't do this, and buy 5. But I have Faye, who provides a ton of healing for the group, so I can afford to go in the Labyrinth with less Medicas than I normally start out with. 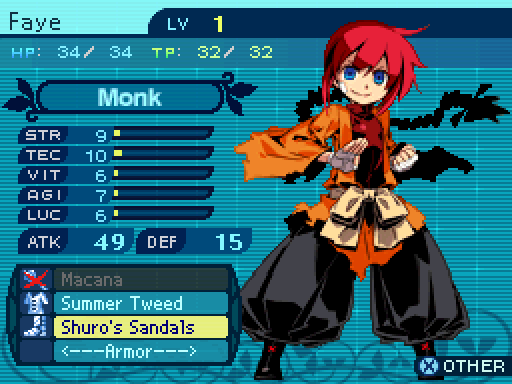 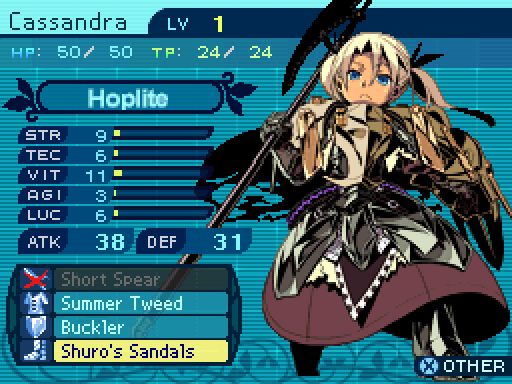 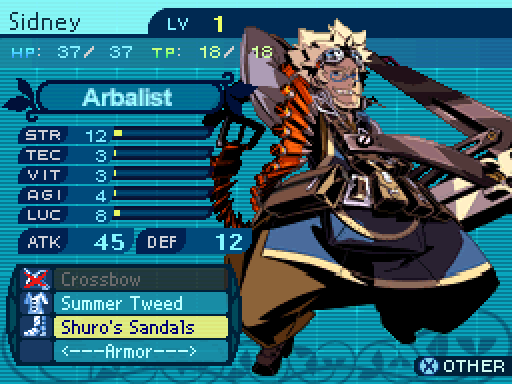   The guild is now completely and utterly broke. (This is a good thing at this point in the game, it means you're as prepared as possible.) And here's everyone's loadouts before setting out. Wait, what does �other� do?  Here's another new convenience feature that got added to this game. You can now buy and change equipment for your reserve guild members! Handy if you're switching out characters for whatever reason. Let's look around town some more.  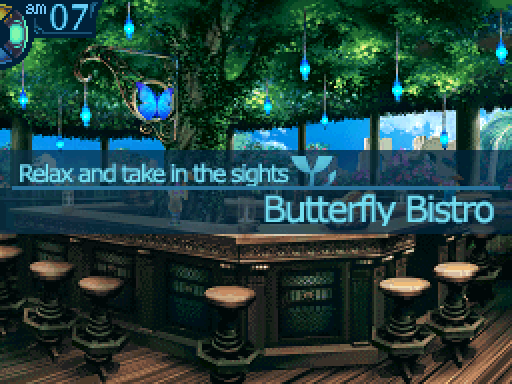 For the record, the shop music also plays in this place. 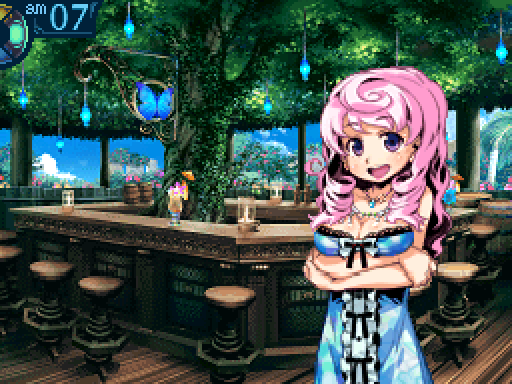  Welcomes! ...Hm? I am not recognizing you people. Are you new explorers here? Ah, yes. We are. Well, welcomes to you! This is the Butterfly Bistro, and I am the owner here! Once you finish the mission that the old lady gives all the newbies, I can give you work. ...Until the then time, have some drinkings and chatting swith the other explorers here! Welcomes! ...Hm? I am not recognizing you people. Are you new explorers here? Ah, yes. We are. Well, welcomes to you! This is the Butterfly Bistro, and I am the owner here! Once you finish the mission that the old lady gives all the newbies, I can give you work. ...Until the then time, have some drinkings and chatting swith the other explorers here!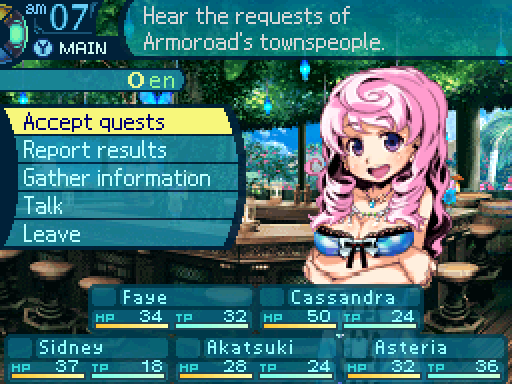  The Butterfly Bistro is a place where we can go do sidequests. However, we can't do any right now. What a shame, and I mean that sincerely. 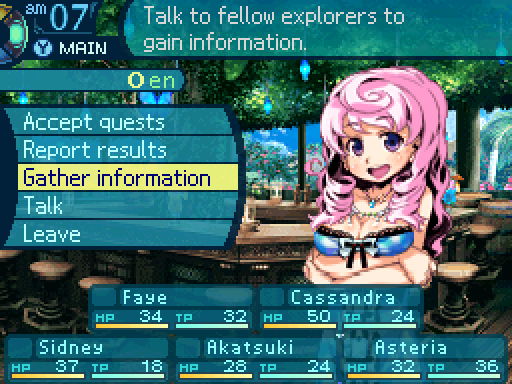 Here's another new feature Etrian Odyssey 3 added that became a series mainstay. 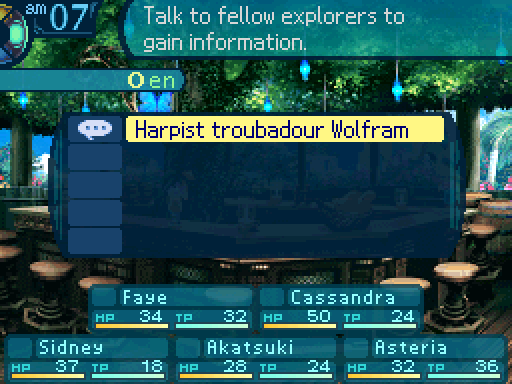 You can talk to other NPCs at the bar. They'll usually have something useful to say, such as warning you about specific dangers, or telling you about other kinds of stuff. There's only one guy here right now. 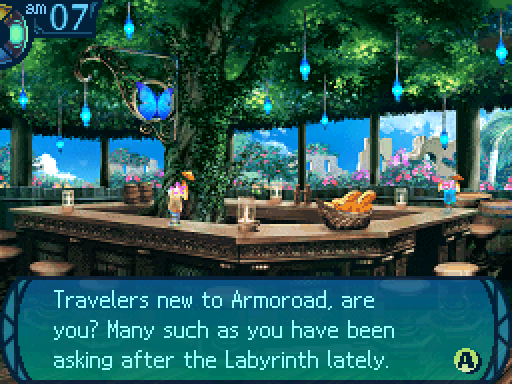  I�m Wolfram, a troubadour. I�ve wended my way from the far north all the way to this ocean city. I�ve been here a long time... I may have a few words of advice about challenging that place. I�m Wolfram, a troubadour. I�ve wended my way from the far north all the way to this ocean city. I�ve been here a long time... I may have a few words of advice about challenging that place.For the record, none of the bar NPCs actually have portraits, but I'm gonna splice some in, so the transcribed dialogue is a bit easier to read. (Originally I planned to use emoticons to represent bar patrons, but that ran into several problems, such as the emoticon cap.) 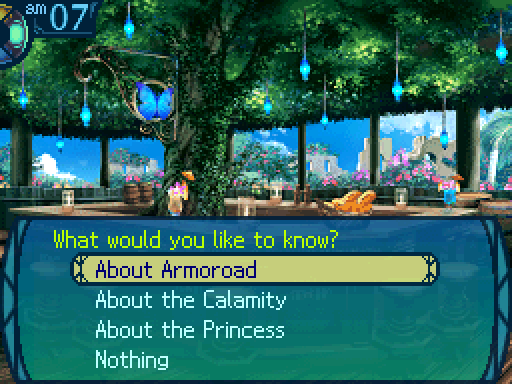 We would like to know more about this city, for one. This city where you stand is the world-famous ocean city of Armoroad! A free city of clear skies and white clouds, an endless sea, and a vibrant, eclectic culture! ...But freedom can�t exist without order. This country does have a royal family. Sadly, the modern royal family has been reduced to mere figureheads... Wait, then who leads this city? Ah, but who then governs Armoroad? The aristocrats of the Senatus, led by a fearsome old crone! Consider her to be the true power behind Armoroad. You�ll most certainly meet her yourselves. There�s more to Armoroad�s royal family than that, but... Let�s leave that for another time, hm? We would like to know more about this city, for one. This city where you stand is the world-famous ocean city of Armoroad! A free city of clear skies and white clouds, an endless sea, and a vibrant, eclectic culture! ...But freedom can�t exist without order. This country does have a royal family. Sadly, the modern royal family has been reduced to mere figureheads... Wait, then who leads this city? Ah, but who then governs Armoroad? The aristocrats of the Senatus, led by a fearsome old crone! Consider her to be the true power behind Armoroad. You�ll most certainly meet her yourselves. There�s more to Armoroad�s royal family than that, but... Let�s leave that for another time, hm?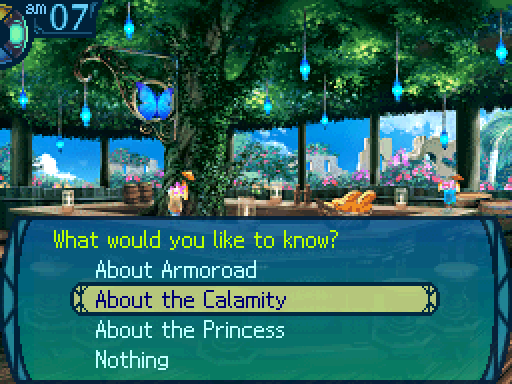 We heard something about a Calamity. What happened here? This ocean city of Armoroad was once a grand capital where science and technology flourished. But around 100 years ago, the center of Armoroad was suddenly swallowed by the ocean! Afterwards, the rippling waters became tidal waves... The gentle breeze gave way to earthquakes. Armoroad�s advanced technology was sunk, which ended diplomatic relations with nearby countries. It�s been a long road to recovery for Armoroad, but even today, it�s nowhere near what it once was... Not since the Calamity. If you ask anyone here, you�ll get nothing but a stony silence. Then again, that�s just because no one knows exactly what went on 100 years ago! It wasn�t all bad, mind you. After the Calamity, a Labyrinth was revealed, drawing explorers here. Though the Senatus had other reasons for gathering explorers... But that tale can wait for now. We heard something about a Calamity. What happened here? This ocean city of Armoroad was once a grand capital where science and technology flourished. But around 100 years ago, the center of Armoroad was suddenly swallowed by the ocean! Afterwards, the rippling waters became tidal waves... The gentle breeze gave way to earthquakes. Armoroad�s advanced technology was sunk, which ended diplomatic relations with nearby countries. It�s been a long road to recovery for Armoroad, but even today, it�s nowhere near what it once was... Not since the Calamity. If you ask anyone here, you�ll get nothing but a stony silence. Then again, that�s just because no one knows exactly what went on 100 years ago! It wasn�t all bad, mind you. After the Calamity, a Labyrinth was revealed, drawing explorers here. Though the Senatus had other reasons for gathering explorers... But that tale can wait for now.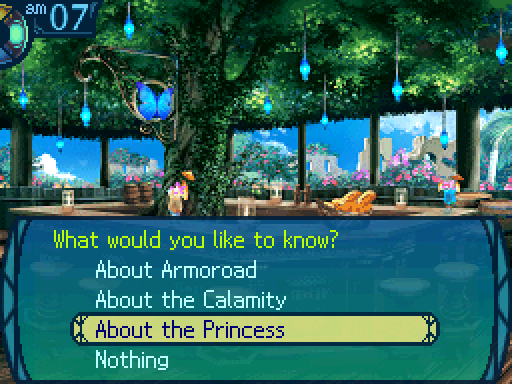 Um, you said something about a royal family. Did they have a princess of some sort? I believe I heard some tales about her before I came here. Glad you asked! That�s the most popular story of the day! I�d appreciate a tip for the telling. Her sobriquet of the Porcelain Princess comes from her pure, white shining skin... Her voice is like music from the harps of the goddesses; radiant enough to tame monsters! But even the goddesses wouldn�t linger in her presence for having to compete with her face... She is Princess Gutrune, a lovely goddess of Armoroad in her own right! Her visage is the stuff dreams are made of... She sounds like quite the princess. Though, mind you, I�ve never seen her in person. Um, you said something about a royal family. Did they have a princess of some sort? I believe I heard some tales about her before I came here. Glad you asked! That�s the most popular story of the day! I�d appreciate a tip for the telling. Her sobriquet of the Porcelain Princess comes from her pure, white shining skin... Her voice is like music from the harps of the goddesses; radiant enough to tame monsters! But even the goddesses wouldn�t linger in her presence for having to compete with her face... She is Princess Gutrune, a lovely goddess of Armoroad in her own right! Her visage is the stuff dreams are made of... She sounds like quite the princess. Though, mind you, I�ve never seen her in person.  Each successive princess in Armoroad is named Gutrune. I�ll tell you the reason... later. Each successive princess in Armoroad is named Gutrune. I�ll tell you the reason... later.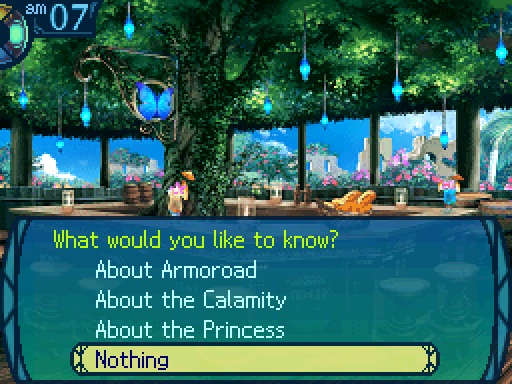 Sheesh, what a windbag. Right, Faye? Uh, Faye? Mmph. Grumblecakes... Huh!? WHA!? Oh. Uhhh. Your tales were veeeeeeerrrry interesting, but we gotta go. Did I speak out of turn? I must protest; my profession requires me to sing loud and long! ...Ah, but I jest, I jest. Come again, explorers, if you wish to hear my stories. Does that guy like hearing the sound of his own voice or something? Yeesh. Sheesh, what a windbag. Right, Faye? Uh, Faye? Mmph. Grumblecakes... Huh!? WHA!? Oh. Uhhh. Your tales were veeeeeeerrrry interesting, but we gotta go. Did I speak out of turn? I must protest; my profession requires me to sing loud and long! ...Ah, but I jest, I jest. Come again, explorers, if you wish to hear my stories. Does that guy like hearing the sound of his own voice or something? Yeesh.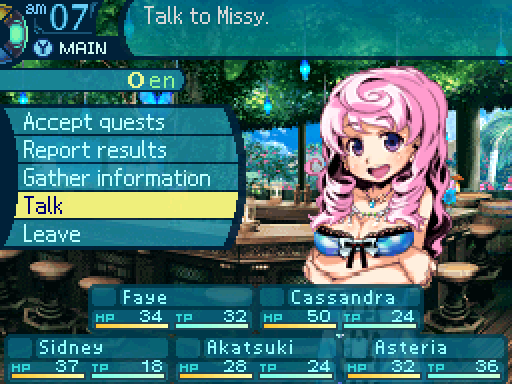  We are about to set out. ...Ah, you are just heading out? You may want to gather info before you go in there. Oh, by the by the way, what�s the name of your guild? We're Guild Tidehunt! Don't wear it out! ...Tidehunt? That�s cool! I will make sure to be remembering it. I am hoping to do a lot of business with you, Tidehunt! We are about to set out. ...Ah, you are just heading out? You may want to gather info before you go in there. Oh, by the by the way, what�s the name of your guild? We're Guild Tidehunt! Don't wear it out! ...Tidehunt? That�s cool! I will make sure to be remembering it. I am hoping to do a lot of business with you, Tidehunt!Another gameplay unrelated tidbit, Missy is my favorite bartender in the series, although Cass in EO2 comes close. Anyways, let's leave. 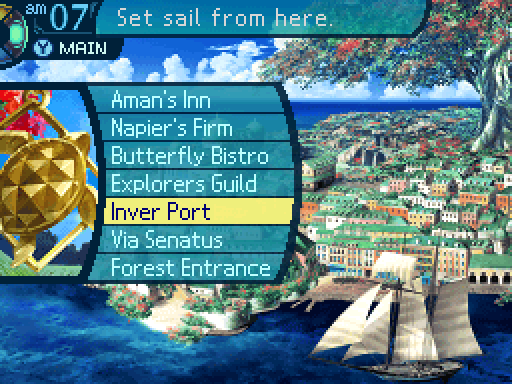 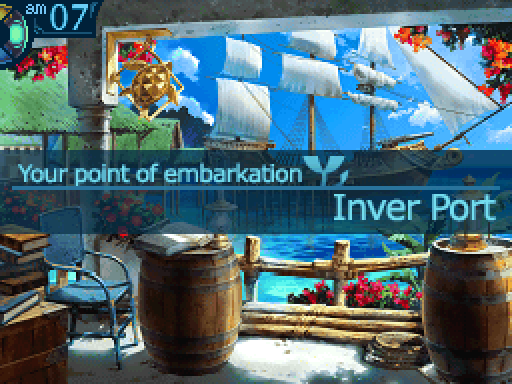   ...Are you new explorers here in Armoroad? You don�t look quite ship-shape to me yet. You�ll need permission from the Senatus to go on voyages, so you should seek that out first. ...Are you new explorers here in Armoroad? You don�t look quite ship-shape to me yet. You�ll need permission from the Senatus to go on voyages, so you should seek that out first.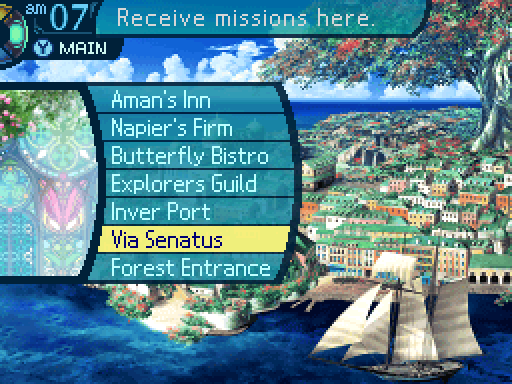  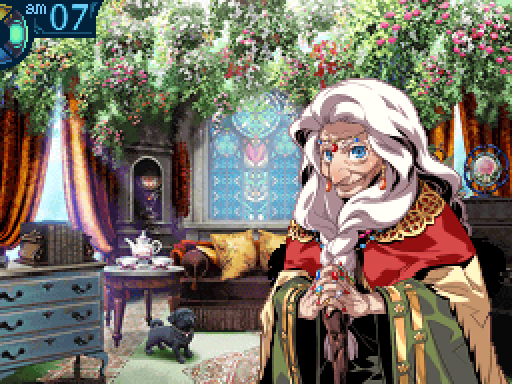  You�re outsiders, aren�t you? Let me guess. You were drawn here by the rumors of the Labyrinth. Why else would we be here? Then you�d best remember this: You stand in an assembly hall of the Senatus, Armoroad�s government. And I am she who wields the Senatus� authority to manage explorers such as yourselves. This is where so-called explorers� skills are tested to sort the true warriors from the cowards. If you want to be recognized as true Armoroad explorers, accept the mission I issue you now. You�re outsiders, aren�t you? Let me guess. You were drawn here by the rumors of the Labyrinth. Why else would we be here? Then you�d best remember this: You stand in an assembly hall of the Senatus, Armoroad�s government. And I am she who wields the Senatus� authority to manage explorers such as yourselves. This is where so-called explorers� skills are tested to sort the true warriors from the cowards. If you want to be recognized as true Armoroad explorers, accept the mission I issue you now.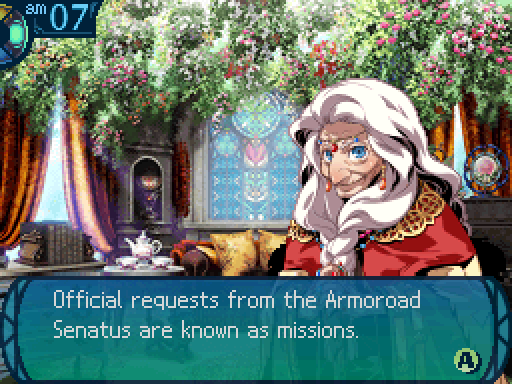 Carry out these missions to gain various rewards and advance the game�s storyline. Select �Accept mission� from the menu to see the details. 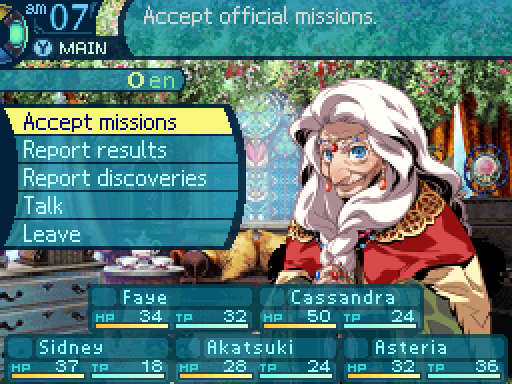 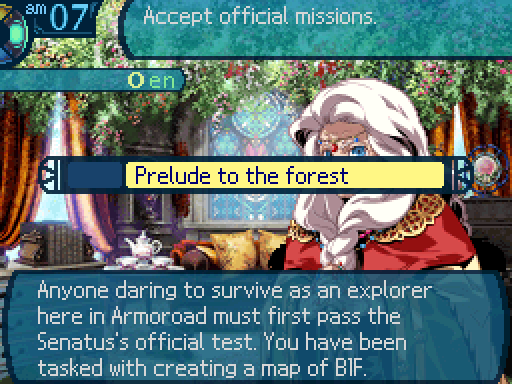 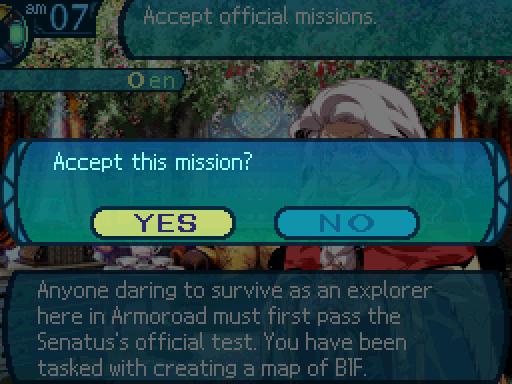 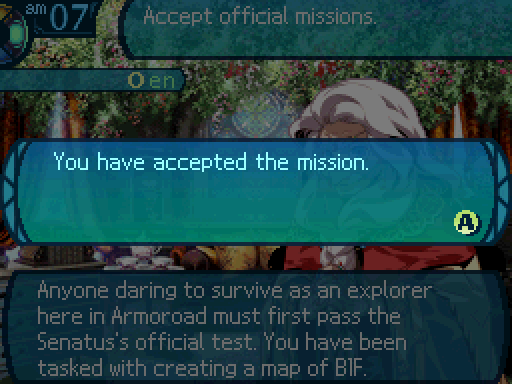 What is this test that you have in mind for us? What is this test that you have in mind for us?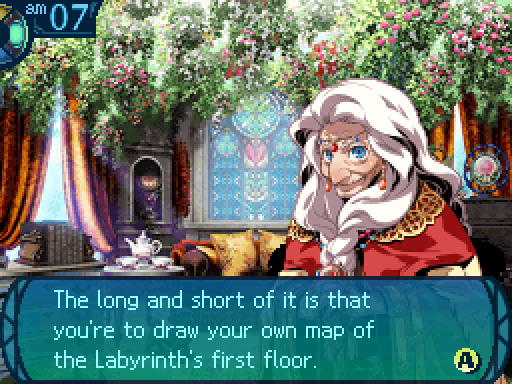 The guard there will have more details for you. Look to him before you proceed. Ah, but you must have parchment first, eh? Here is the blank map given to explorers. Use it well. The guard there will have more details for you. Look to him before you proceed. Ah, but you must have parchment first, eh? Here is the blank map given to explorers. Use it well.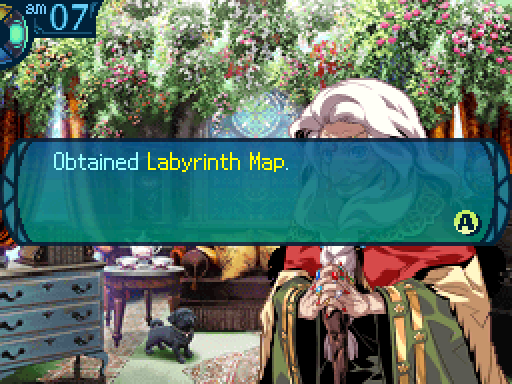 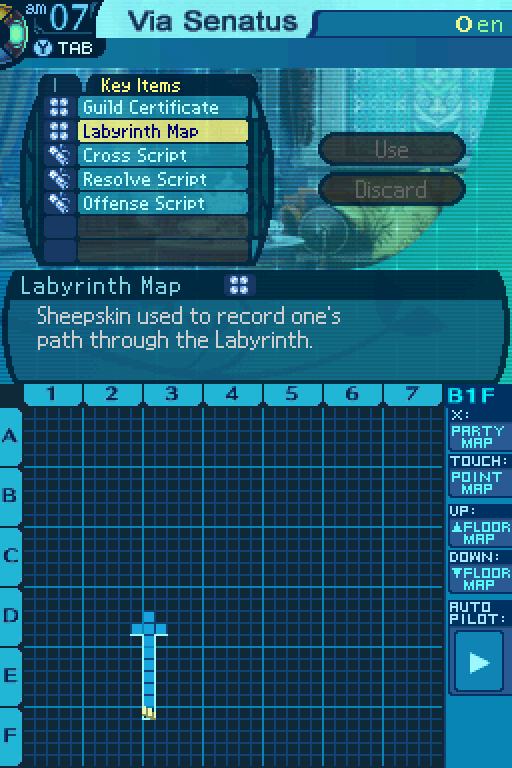 Now we get access to one of the main features of the game, drawing a map! Which I will cover next time. 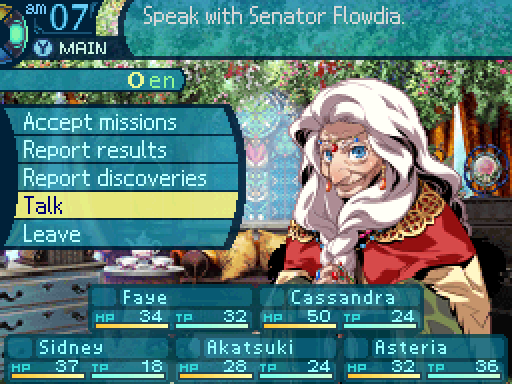 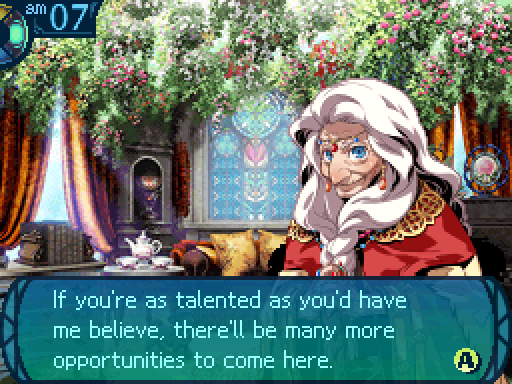 Just don�t get lost in the assembly hall on your way here! Just don�t get lost in the assembly hall on your way here! We can also report our discoveries in the Labyrinth. For those of you that played EO2, note the lack of a Gear Registry. Yep, unlocking all the gear is no longer required for 100% completion.  Of course, since we were never in the Labyrinth, we have nothing to report.   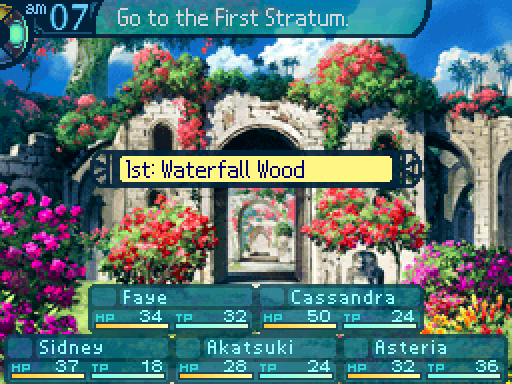 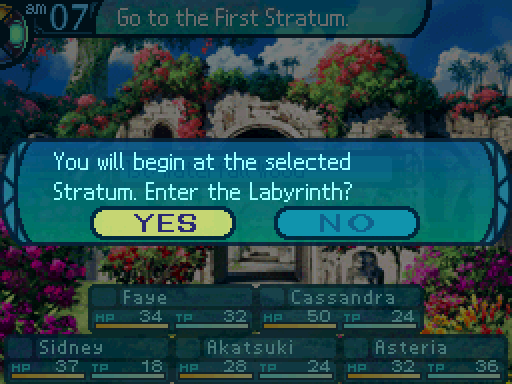 Sheesh, that took a while. Ooh, I wonder what mysteries this Labyrinth could hold. Plenty, I'm sure. Are you sure we should do this? We can still go back home, you know. Positive! I didn't come all this way for nothing! Now, let's go in! I'm not waiting another second! Sheesh, that took a while. Ooh, I wonder what mysteries this Labyrinth could hold. Plenty, I'm sure. Are you sure we should do this? We can still go back home, you know. Positive! I didn't come all this way for nothing! Now, let's go in! I'm not waiting another second! Here's another change Etrian Odyssey 3 made. Stratum splash screens are now animated! This was a change that wasn't kept for future games. The 3DS Etrian Odyssey games went back to having static splash screens. Anyways, next time we'll explore the Labyrinth. Araxxor fucked around with this message at 00:14 on Aug 12, 2017 |
|
#
¿
May 20, 2015 08:51
|
|
|
Strange Quark posted:It's only obvious on a dark background, but your innkeeper portrait has a few white pixels on the left edge of the image. Huh, not sure what happened there, but it's fixed now. Erg posted:You missed a portrait in the shopkeeper section. Whoops! Thanks, fixed!
|
|
#
¿
May 20, 2015 15:49
|
|
|
Spielmeister posted:Where did you find that out? The game only only refers to her as the "girl from the shop" or "the shopkeeper." I believe it was stated in the EO3 artbook, but I'm not too sure. I've read it once, and I don't have the artbook anymore. I don't believe it stated any of the other NPCs' names though. Anyways, the next update isn't gonna be exploring the first floor, I'm gonna cover how to build the other 5 classes for the very beginning of the game for the benefit of people playing along or new to the series. I've tried to record the first floor, but uh, I ran into a bit of a problem. A problem that I'm sure everyone who played the game is familiar with. (The worst part is that I had a completed run ready to go, but due to not understanding how the recording features worked, I accidentally corrupted my save file.  Now this problem keeps screwing me over.) Now this problem keeps screwing me over.)And to curb everyone's expectations, the 5 Ninjas aren't gonna be used for anything special like the 2 Landsknechts were in the EO2 LP. It's just for something minor, and you don't have to do it. But it makes it makes something a bit more convenient later on. Araxxor fucked around with this message at 23:50 on May 20, 2015 |
|
#
¿
May 20, 2015 23:45
|
|
|
Update 3: Preparations: The Other Five Classes Actually, we won't be heading into the Labyrinth just yet. Instead, I'll talk about the other 5 classes I didn't go into detail about in the last update, and discuss on how to build them for the early-game.  I accept your gracious gifts! I accept your gracious gifts!Okay, so the Princess' Class Skill, Royal Lineage, recovers the Princess' TP every time she gets a buff. Any buff, not just her own. The skill starts out recovering 1 TP at level 1, and 10 TP at level 10. Never ever touch this skill. Princesses do not need this at all. This skill is a terrible TP recovery passive, on a class that doesn't even have TP problems in the first place! While buffs are useful, chances are that you're not casting them in every single fight, and in the important ones, they have big enough TP pools to support the party during that time. Also, this skill only applies when they get a new buff, not when they get hit with a buff skill, so renewing buffs does nothing. And this Class Skill being so bad actually brings down the Princess' usefulness as a whole. Okay, you can skip it, but believe me when I say that Royal Lineage not being a good skill is a much bigger deal than it seems at the moment.  My dear servants shall appreciate my very presence! My dear servants shall appreciate my very presence!As for how to spend your skill points, stick every one of them in Royal Veil. While their buffs are very good skills, they're not gonna be useful at the very beginning of the game, and they don't have big enough TP pools to cast them many times. Sure, sticking all 3 skill points into this passive leaves them with no skills, but at this point in the game, Princesses are decent damage dealers and tanks, so they can still contribute a bit while in the Labyrinth. As for Royal Veil, it's a passive that heals the party at the end of a turn, as long as their HP is full. At levels 1, 2, and 3, it heals for 4, 7, and 10 HP per turn, capping out at 48 HP healed per turn at level 10. Yeah it doesn't sound like much, but the skill can do a lot as long as you can keep the Princess' HP full. Still, the real reason to take this skill is because putting 5 points into it unlocks this skill.  What this passive does is restore the party's HP if the Princess is alive at the end of battle. Easier to accomplish, but this skill falls off eventually. No, once again, you want to invest 5 points in Triumphant Cry in order to unlock this skill.  Contrary to the other two abilities, Monarch March does not fall off, and is relevant throughout the whole game, including the post-game. Every time you take a step within the Labyrinth, your party gets healed for a certain amount, depending on how many levels are in this skill. This cuts down on your active healing, such as items or skills, by a lot since Monarch March can top off your party between battles. Yes you do want the buffs eventually, maybe by the end of the first Stratum, but they won't help too much at the very beginning of the game.   Bring it on! I can take any of you! Bring it on! I can take any of you!Now onto the Gladiator. Endless Battle is their Class Skill, and boosts all physical damage (Slash, Strike, and Pierce attacks) by 3% at level 1, and 25% at level 10. Take this whenever, maybe max it out first if you want. As for why I'm saying this when I said that Zodiacs don't want their Class Skill right away, is because that Gladiators don't really have any must have skills they want early. Level up their skills however you want early. Well, there is one thing you should be aware of, since there is a trap you can fall into while leveling them up.  Just the edge I need. Just the edge I need.The Gladiator's weapon mastery skill. Contrary to what the description says, this affects swords, not katanas. This skill is one you're gonna wanna max out eventually since it's a prerequisite for their strongest sword skill. Now as for the trap I mentioned, don't level up anything related to Clubs. The skills in the Club skill tree aren't that great, and the �ultimate� damage skill in there is awful. Where as the sword skill tree has a much better ultimate damage skill to make use of. It's a trap that a lot of people fall into, and end up making their Gladiators really hard to use well, when they're normally a pretty straightforward class.  Putting one point into Sword Mastery unlocks this skill.  To battle! To battle!Which I accidentally put a point into, because I thought this skill was required for a much better one. Whoops! Oh well, she's still level 1, a little rest can fix that easily. Break is just a single target attack that deals more damage than a regular attack, nothing special.  But if there were any skills I would make a beeline for, it would be this one. Charge, well, charges up any physical move's attack power by a whopping 260% at max level, effectively increasing the Gladiator's damage output per turn by 30%. And it works with physical limits. It's a very strong skill, and one I would recommend taking eventually. 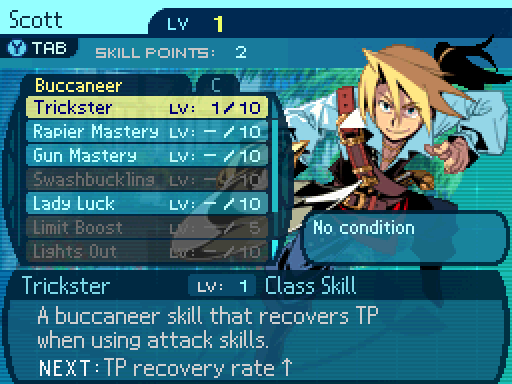 Hope I still remember some of my old tricks. Hope I still remember some of my old tricks.Trickster is the Buccaneer's Class Skill. Every time the Buccaneer uses an attack skill, they recover a certain amount of TP. 1 TP at level 1, and 10 at level 10. It's not essential, but it's very nice to have, and can help the Buccaneer last longer in Labyrinth trips. Something to keep in mind is that the TP restore will proc for attack limits, even though those don't cost any TP whatsoever, and if the TP cost of the skill being used is lower than the TP restore, than the Buccaneer can use cheap attacks in order to restore TP. Handy!  Still got it! Still got it!Now there's two skill branches they can go for: rapiers, or guns. I personally prefer rapiers, because they deal more damage, and the skills they unlock have more utility. Guns can be used from the back row, but the guns themselves deal less damage than rapiers, and rapiers give a speed boost to the Buccaneer, while guns slow them down.  Putting a point into Rapier Mastery unlocks this skill.  They won't see what hit em! They won't see what hit em!The Buccaneer is kind of a late bloomer, and is a fairly weak class in the early-game. Later on, their damage output can get crazy, but they have little use early. This skill is why I prefer the rapier tree. What it does is deal 110% Pierce damage to a single target, but it has a 42% chance to inflict Blind, which heavily lowers the victim's accuracy. Enemies missing their attacks can lengthen your party's lifespan while in the Labyrinth. But if you're specifically taking this skill to deal with a certain problem you can run into early on, I'm gonna warn you right now, it's not gonna help much. As for traps to avoid falling into, they have skills called chasers, which attack the enemy every time they get hit with a specific element. The have 6 different chaser skills, each one corresponding to a different element. Yeah, you want to avoid these. One, the game doesn't consider these to be attack skills, since you can technically never attack at all with them, so they don't activate Trickster. Another reason is that you have to build a team around the Buccaneer if you're using chaser skills. And if an enemy happens to be resistant to the elements you've built your team around, yeah there's gonna be problems. And if you really want to use chaser skills, there's no reason to use the Buccaneer's versions because... okay I'm getting a bit ahead of myself there. You'll find out later.  You know what I love? Everything! You know what I love? Everything!Beast Soul is the Wildling's Class Skill. What it does is increase the stats of summoned animals by a certain amount. At level 1 it increases their HP by 10%, their attack by 20%, and their defense by 5%. At level 10, Beast Soul increases the animal's HP and defense by 50%, and increases their attack by 75%. While it is a good class skill that makes your beasts hit harder and last longer, don't get this just yet. You need the ability to summon animals to make use of this!  I hope I make tons of new friends in the Labyrinth! I hope I make tons of new friends in the Labyrinth!Okay, so the Wildling isn't exactly an intuitive class, so it can take a little while to understand how they work. Basically, they're the class that specializes in status ailments and binds, both of which are disables you can use on enemies to hinder their attacking capabilities, stop them from casting certain skills, or stop them from doing anything altogether. If you've played the first two games, these guys are comparable to Hexers, although they are nowhere near as powerful as the 2nd game's version. How the Wildling works is that they'll summon an animal, which can attack a single target, random targets, or everything on the field, depending on which animal is summoned. Upon attacking, the animal has a chance to inflict a certain ailment or bind upon its targets, depending on which animal is summoned. While you can tell the animal which enemy to attack on the initial cast, after the first turn, the animal will simply attack randomly, trying to reapply the ailment on targets if needed. They will never stop attacking until they get dismissed by the Wildling, or get killed. Anyways, I dump all my skill points into Wild Mastery. Wild Mastery is the Wildling's Mastery Skill, and enables them to summon animals. It also provides a 5%, 6%, or a 7% boost to the animal's chances of inflicting an ailment at levels 1, 2, and 3. The boost chance gets capped out at 15% at level 10. There's more to this skill that makes it a lot better than it seems. Let's say the Wildling summons an animal that has a 50% chance of inflicting Paralysis. But the target has a 10% resistance to it, which will lower the Paralysis chance to a measly 5%. Now here's where Wild Mastery comes in. The bonus chance is added after the ailment is run through resistances. And if the Wilding's Wild Mastery skill is maxed out, the 15% bonus chance is added to the 5% chance, making it so that the Wildling actually has a 20% chance to inflict said target with Paralysis. That said, you don't have to worry about resistances just yet, level this up as much as you need to in order to get the animals you want, then max it out later.     Putting a single point into Wild Mastery unlocks all these skills. These animals are capable of inflicting binds on a single target.    Anyways, the reason I dumped all my points into Wild Mastery was to unlock this skill, which summons a butterfly to Poison a single target. I don't really find Poison to be that useful in this game, but there is a reason you want this skill early.  Mainly to unlock this skill. Call Elephant summons an Elephant to attack every single enemy upon the initial cast, and it has a chance to inflict Confusion, which is the most powerful ailment in the entire game. You definitely want this as soon as possible. Although if you want your Wildling to contribute more early, I suggest investing in Call Snake. Call Snake summons a snake to inflict arm bind on a single target, which reduces the power of any physical attacks by a ton, which is really helpful early on. Not too many enemies can cast elementals at this point in the game.  Oh, that's a big harvest! Oh, that's a big harvest!Why. Why would you put this class into your main party? The game explicitly stated that they're not good in combat. But if you insist on using them, I recommend sticking one point into Earth's Bounty, which increases the exp gain by 10% at level 1 if the Farmer is alive at the end of battle, and caps out at a 30% increase at level 10. At that point, a 5 man party's exp gain would increase from 20% to 26%, which is 1% more than what a normal 4 man party would get from battles. You're essentially fighting with a 4 man party anyway if you're using a Farmer.  Rock-a-bye... Mmmmm... Rock-a-bye... Mmmmm...Lullaby is probably the only real contribution they can make in battle. If you're gonna be using a Farmer, you may as well have them do something important. What this skill does is that it attempts to put all enemies to sleep, with a 15% chance of doing so at level 1. However, upon casting this skill, the Farmer will always fall asleep, even if none of the enemies do. There are ways to get around this penalty, but that's not something that's possible to do at the moment.  Taking a point in Lullaby unlocks this skill. I don't know if I'll get this.  I hope we get a good harvest this time. I hope we get a good harvest this time.Now, here's another trap that any class can fall into. Now see, within the Labyrinth, there are these spots called Item Points, where you can either Take, Chop, or Mine materials from in order to sell to the store to unlock new equipment and items. Take, Chop, and Mine are different gathering skills that all classes can take. In the first two games, those three skills were distributed among different classes, but now everyone has access to all of them. You should never even think about putting a point into any of those.  Because putting a single point into a Farmer's Harvestry skill increases all the gathering method attempts by one. You're essentially spending 1 skill point to get 3 different skills at once. Harvestry is a very efficient skill, and you may as well take this since that's what this class was designed for. Which is farming materials from gathering points. Next time, we'll explore the Labyrinth for real. Araxxor fucked around with this message at 03:36 on Aug 12, 2017 |
|
#
¿
May 21, 2015 20:55
|
|
|
RareAcumen posted:Yeah, like a vampire. I'm surprised they went with that one instead of the blonde one. Well in most cases, yes. Although depending on the party composition, I might allocate my skill points differently. As for why I'm not making use of Combat Study, that's gonna leave everyone with a skill point deficit, that I really don't want to deal with. So I'm gonna manually grind up the spare party members. It's gonna be painful, boring, and time consuming, but I really don't have any access to good grinding methods at the moment. Also, something I've noticed in the update. What? 
|
|
#
¿
May 21, 2015 23:14
|
|
|
Rigged Death Trap posted:I think you might be belittling Royal lineage a bit. Hmm, maybe. I just don't find that skill's benefits big enough to justify using a Princess after a certain point, which is my main problem with it. Krumbsthumbs posted:Edit: Also, I think you're a little hard on the Gladiator Mace Line. The final skill is... well not great, but it has two decent skills in Crushing Blow and Arm Breaker. I actually really like Freezing Blow, it's a very hard hitting attack along with being an Ice/Strike attack. I don't like Crushing Blow and Arm Breaker because while Confusion and arm binds are useful, the Gladiator has the lowest TEC stat in the game, and a really mediocre amount of LUC, which can really drag down the success rate of inflicting those ailments. The biggest reason I don't like them is because I think Ailments and binds are awful in this game, but I'll get to why I think that later.
|
|
#
¿
May 22, 2015 03:12
|
|
|
Update 4: Cartography I used to like cats a lot before I came here. Now, I'm not so sure. DS Version DS Version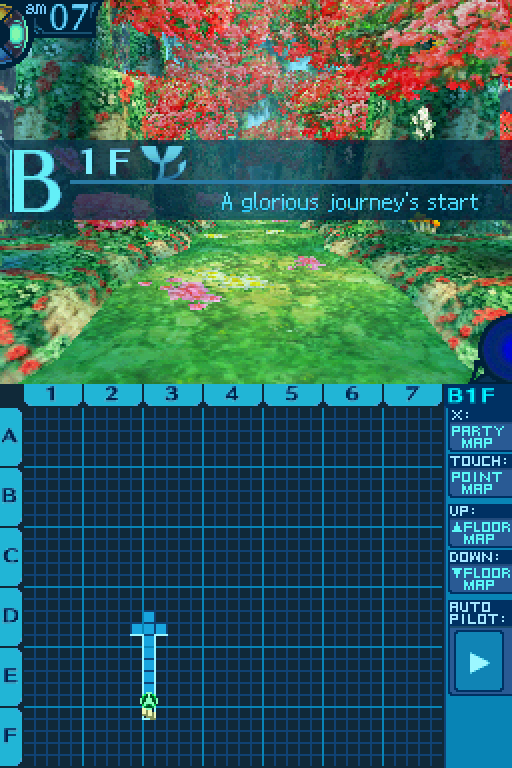 Welcome to the Labyrinth. We'll be spending a lot of time here. 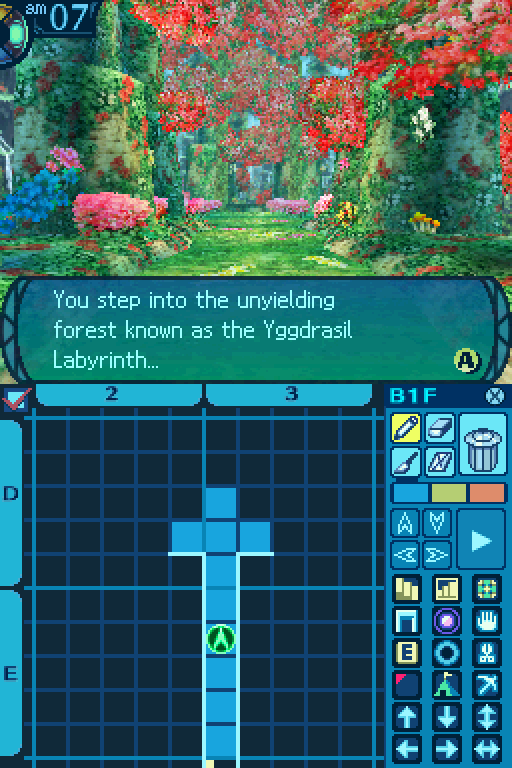 Though many explorers have lost their lives in its halls, it is surprisingly beautiful. The breathtaking flowers here are enough to make you feel as if you are simply out for a nature walk. But you mustn�t let your guard slip even for a moment! Go forth and explore, always remembering that this forest is fundamentally a dangerous place. Ahhh... So this is the Yggdrasil Labyrinth. Quite the beautiful place. It almost makes you forget that a lot of people have died here. Ha! But that won't happen to us, right? As long as we stay cautious. I'll try not to let anything happen to you.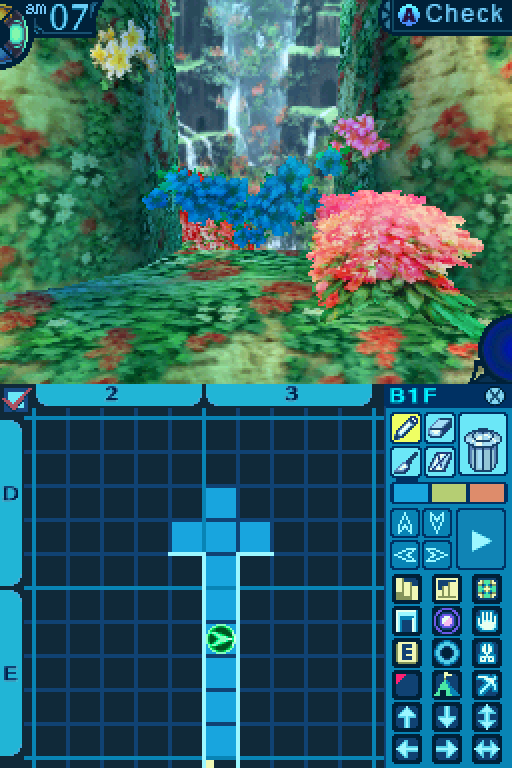 What pretty flowers. Oh? What have we here? Huh? What'd you find? What pretty flowers. Oh? What have we here? Huh? What'd you find?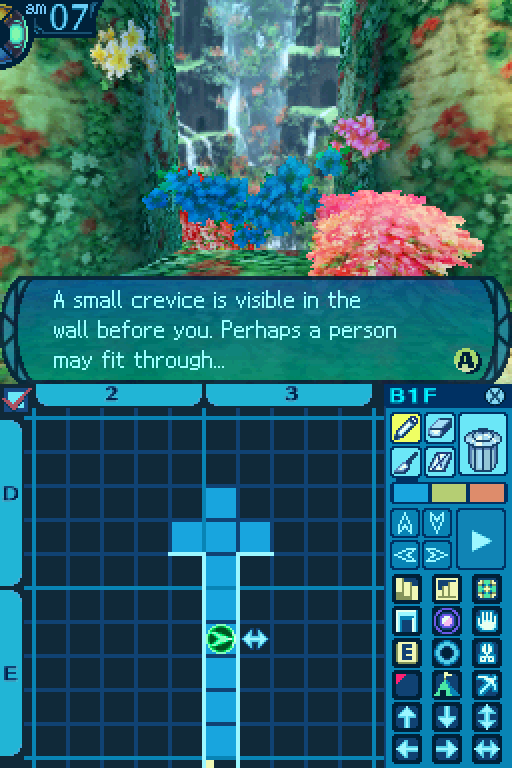 However, it appears to be impassable from this side. Looks like there's a crack in the wall. But, I don't think we can fit. I suppose we better mark this place down. Perhaps we'll be able to open up the way from the other side. Wha?Some walls within the Labyrinth are hiding shortcuts. Most of the time they're inaccessible, and you have to go to the other side of the wall to open them up. The game is kind enough to mark them with those blue flowers, instead of having to check every single wall. 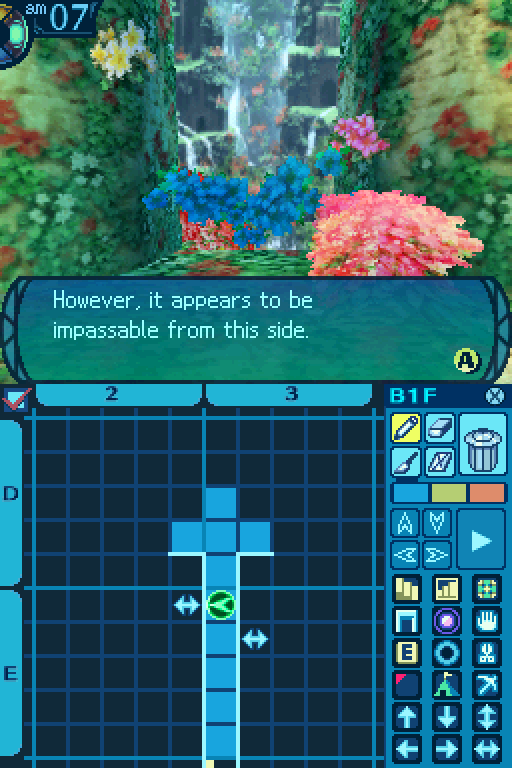 Here's another shortcut we can't access.  Now, I'd like to bring your attention to that blue orb in the bottom-right corner. It was a dark blue before, but now it's a light blue.  It's green now. What that orb does is to warn you that you're about to get into a fight, as Etrian Odyssey uses a random battle system.  Once it's red, the game warns you that you're about to go into battle.  Like so. Look out! GAH! DS Version DS Version  Deadly Durian Level: 2 HP: 48 STR: 4 VIT: 5 AGI: 6 LUC: 12 TEC: 7 Attack Type: Pierce Exp: 48 Item Drops: -Drop 1: Green Thorn - 50% Drop Rate. 1 needed for Markiri (Knife.) 6 needed for Hairband (Helm.) 15 needed for Blind Mask (Accessory.) --Thorn on a monster's head that mimicks a fruit. -Drop 2: N/A -Gold: N/A Description: A fruit monster with a uniquely pungent smell. Its thorns temporarily rob victims of sight. Damage Resistances: Slash: 75% Strike: 75% Pierce: 75% Fire: 125% Ice: 125% Volt: 125% Ailment Resistances: Sleep: 100% Confusion: 100% Plague: 25% Poison: 100% Blind: 25% Curse: 100% Paralysis: 100% Bind Resistances: Head: 100% Arm: 100% Leg: 100% Other Resistances: Death: 100% Petrification: 100% Stun: 100% Skills: Thorn: Uses the Head. Attempts to inflict Blind on a single target, and has a 70% chance of succeeding. Decay Breath: ??? Deadly Durians are a soft lesson in diversifying your damage types. They have a minor resistance to physical damage, and their offenses are incredibly weak. Elementals take them down easily, but you don't really need them. Thorn is a complete non-issue, and just serves as a warning that enemies can inflict ailments too. As for that 2nd skill, don't worry about it for now. 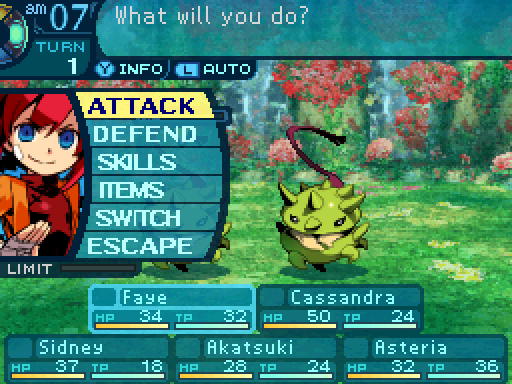 Let's bash some heads in! Let's bash some heads in!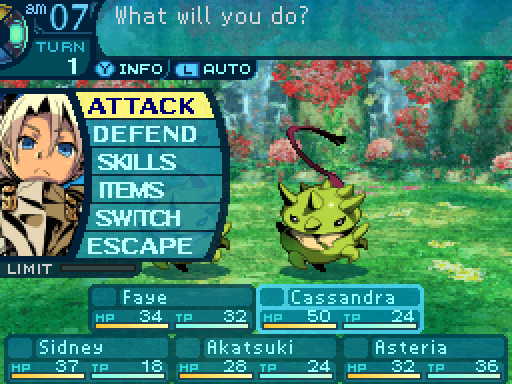 Don't be reckless, everyone! Don't be reckless, everyone! Ooh! Is this the part where I get to shoot stuff? Ooh! Is this the part where I get to shoot stuff? Hello there. I am Akatsuki. Pleased to meet you. ...What are you doing? It is customary for a Ninja and his opponent to politely greet each other... before one kills the other! But... fruit can't talk. I don't think they can greet you back. Then they are dishonorable fruit, and must die! Hello there. I am Akatsuki. Pleased to meet you. ...What are you doing? It is customary for a Ninja and his opponent to politely greet each other... before one kills the other! But... fruit can't talk. I don't think they can greet you back. Then they are dishonorable fruit, and must die!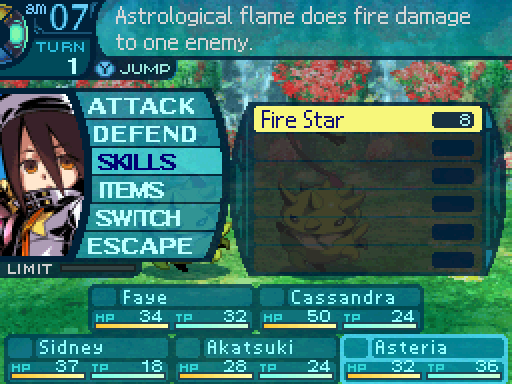 How do meteorologists say hi? How do meteorologists say hi?Having everyone attack except for Asteria, who's gonna roast up the enemies.  YEEEART! YEEEART!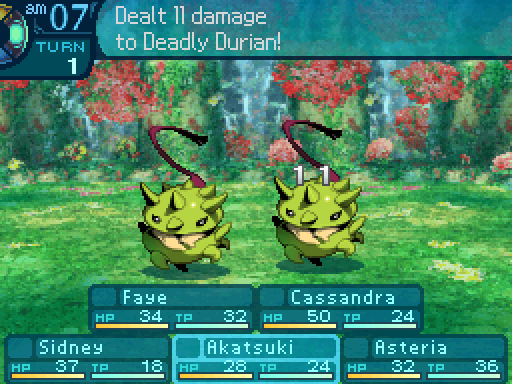 Knives deal Slash damage.  Smashy smashy! Smashy smashy! Clubs deal Strike damage.  Ready... Aim... FIRE! Ready... Aim... FIRE!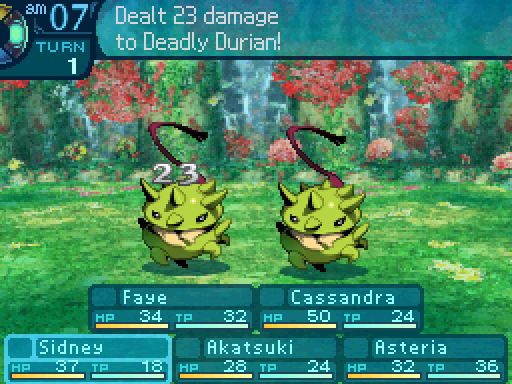 Crossbows deal Pierce damage. Also, take note of Sidney's and Faye's damage outputs. Both of them are my best physical damage dealers at the moment.  Ow! Ow! 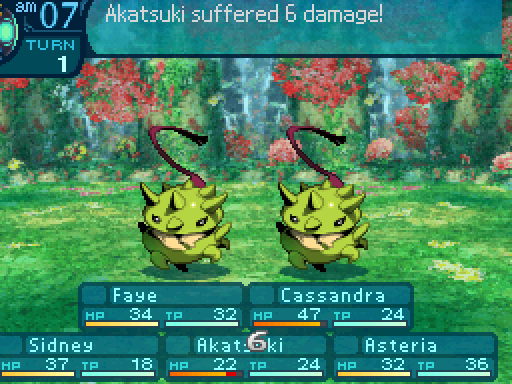 I am under attack! I am under attack!  What? What?Spears deal Pierce damage. 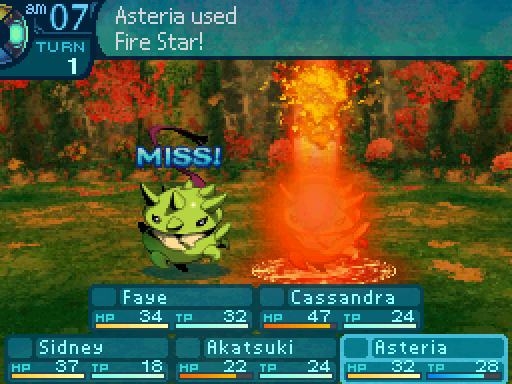 With a heat wave! Aha! Ahahahaha! With a heat wave! Aha! Ahahahaha!  Boooooooo. Wow, tough cloud. ...I hate you. Boooooooo. Wow, tough cloud. ...I hate you.Unfortunately, TEC attacks can also miss. For the record, books deal Strike damage.  Eventually, we win. Ha! Man, is that all this place has got? I would not be so foolish as to assume that those are the only creatures that live here. We get item drops, along with exp. Don't expect those exp bars to stay synced for long. If you're the kind of person that gets bothered by desynced exp bars and are playing along, I'm gonna warn you right now. No matter how hard you try, you can't avoid them desyncing in this game. Well technically you can, but that would involve skipping out on a huge part of the game. DS Version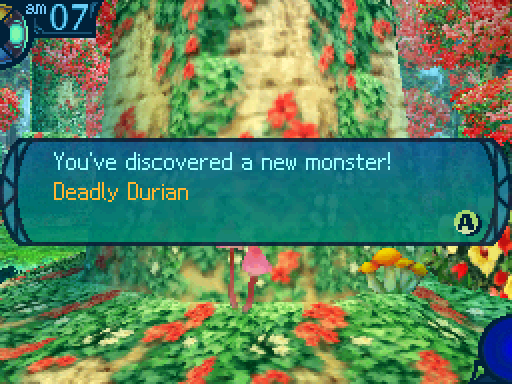 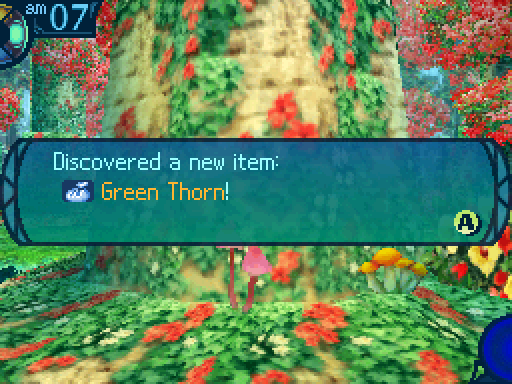 If you discover a new enemy or item, these notices pop up. This is the only time I'll be showing them.  As you have some skill at adventuring, some 3 Skill Points should be available to you. To spend them on skills useful in the Labyrinth, open the Main Menu with the Y Button. Select Custom to allocate these skill points. Combat, healing, and protective skills will all be essential to survival during your journeys. You may already be aware of this, in which case this advice is happily unnecessary. If so, then hesitate no longer to begin your adventure in this lush, green forest! A nice reminder if you didn't do so already.  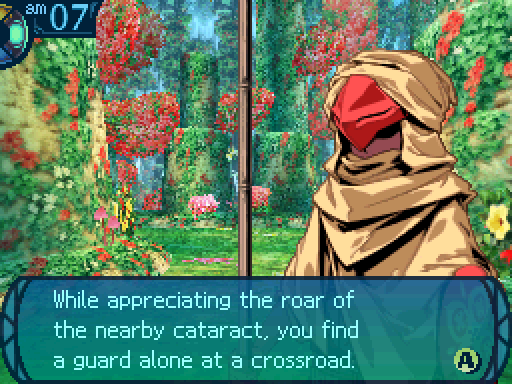  I heard there�d be newcomers to the Guild coming. Welcome to the Yggdrasil Labyrinth. I heard there�d be newcomers to the Guild coming. Welcome to the Yggdrasil Labyrinth.The guard greets you cheerfully, and then motions toward the unmarked map you hold. I�m sure they told you at the Senatus, but your first task is to map this floor. Mine, meanwhile, is to instruct beginners such as yourselves in the cartographic arts.Upon saying this, the guard explained slowly and plainly to you how to draw a map... 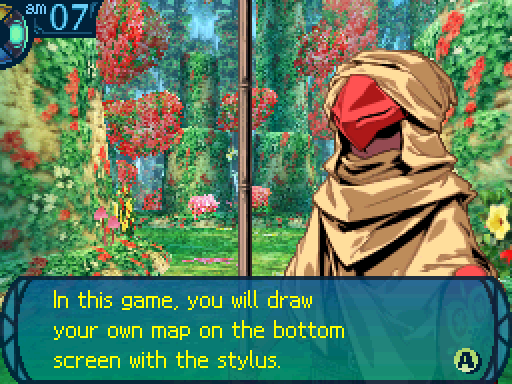 Keep careful and accurate notes on the dungeon�s layout as you explore it. 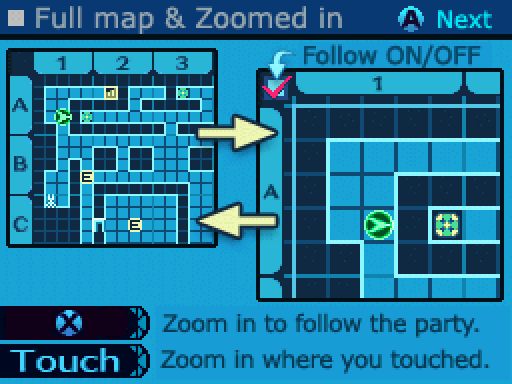  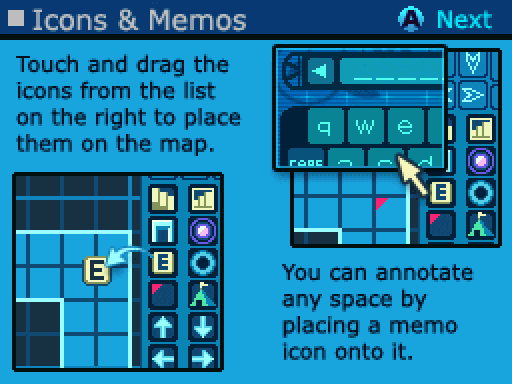 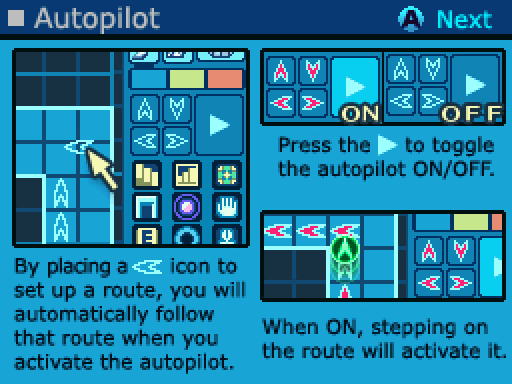 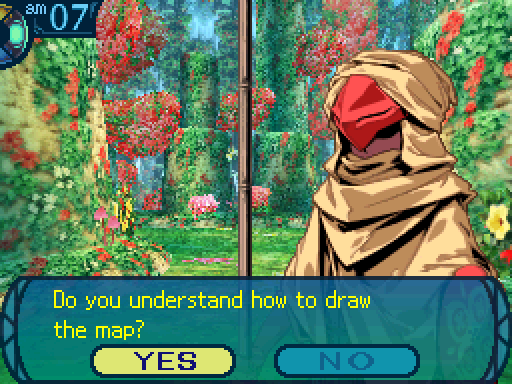 Saying no just repeats the tutorial. That concludes your cartography lesson. Draw your map thus, then show me your finished work.The guard then steps back, as if to indicate that his duty has been discharged. You may do as the guard says and venture forth to complete your map, or stay and question him. Pfft, screw that. Let's just go on ahead.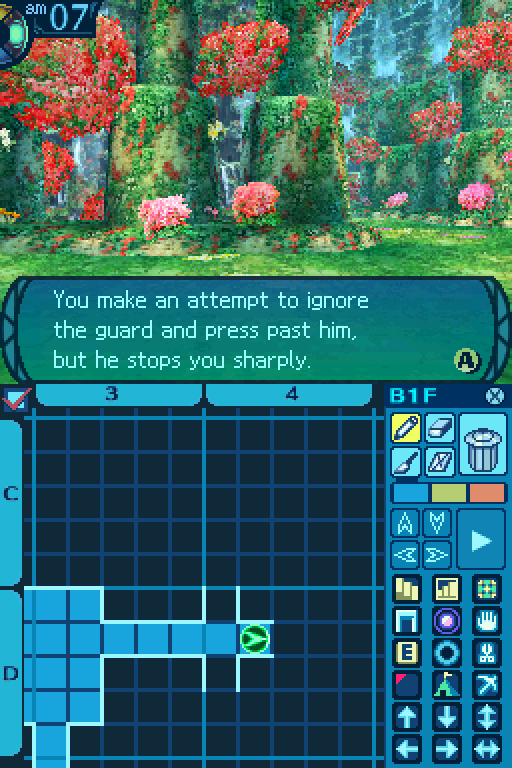 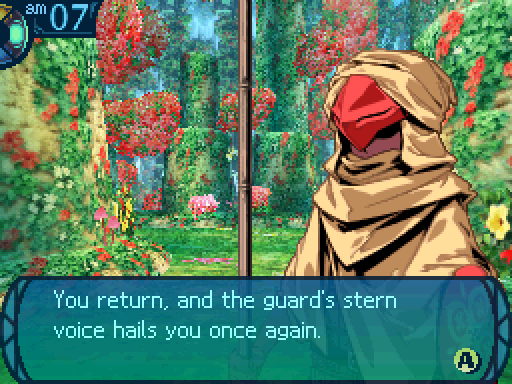 Is your map complete? Show me that I might examine it. Um. yes? Is your map complete? Show me that I might examine it. Um. yes?The guard�s severe expression is unwavering as he pores over your map with a critical eye. ...No, no. This will never do. You�ve much more to chart.It appears you won�t be passing this way yet. You must redouble your efforts to map the area.  We can also talk to him again.  Some questions come to mind, and you hesitate whether to ask them or leave him be.  Hey, we're done! You can let us pass now. Hey, we're done! You can let us pass now. You present the parchment with your map on it and inform the guard your task is complete. The guard pores over your map with a critical eye and responds in a stern voice: ...No, no, this won�t do either. Try harder before you come to me again....It seems your map is not yet complete. You must continue your search through the Labyrinth before your mission is finished.  There's something I've been wondering about. Where did this Labyrinth come from? There's something I've been wondering about. Where did this Labyrinth come from?The guard turns his head this way and that before answering your question. ...It�s said that this Labyrinth was created following the Calamity over 100 years ago. Many were wounded, and the old city was destroyed. Everything suffered that day. Ironic, no, that we use the Labyrinth formed by the Calamity to restore the Ocean City...After speaking his piece, the guard sighs and continues. ...And that is the sum of our knowledge. We still have no inkling of what lies deeper. I hope that explorers like yourselves will one day master that mystery.The guard then falls silent, as a man who has said all there is to say. You may continue to engage the guard in conversation or leave this spot. 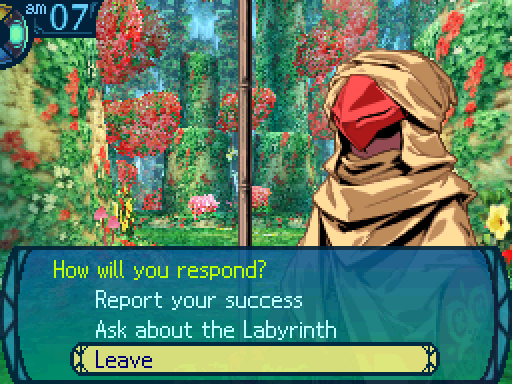 You decide to leave the guard to his post. Time's a wastin'! Let's get that map done! Which way should we go? How about south?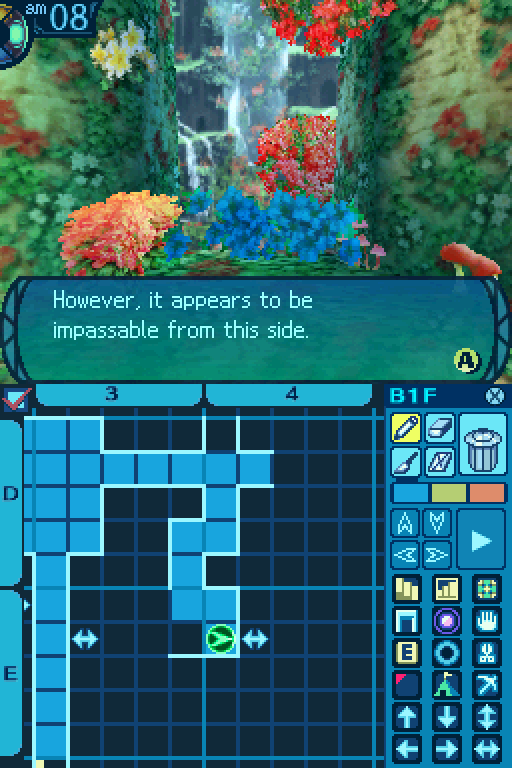 Another shortcut we won't open for a while.  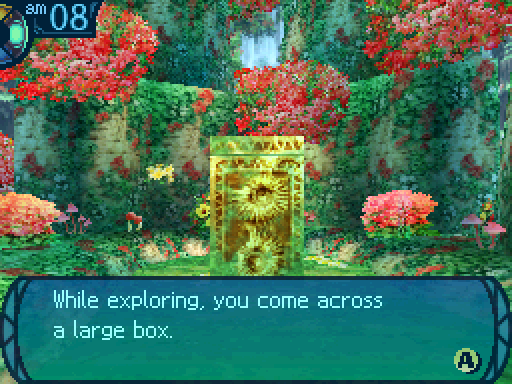  Ooh, a treasure chest! Wonder what's in here! Quit wondering, and just open it! Ooh, a treasure chest! Wonder what's in here! Quit wondering, and just open it!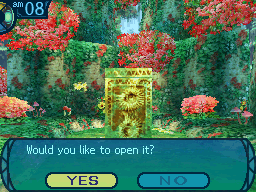 So here's another convenient change EO3 made. The game will actually show you if the chest is empty. Earlier games didn't do this, so the only way to know if you already took what was inside a chest was to check it again. 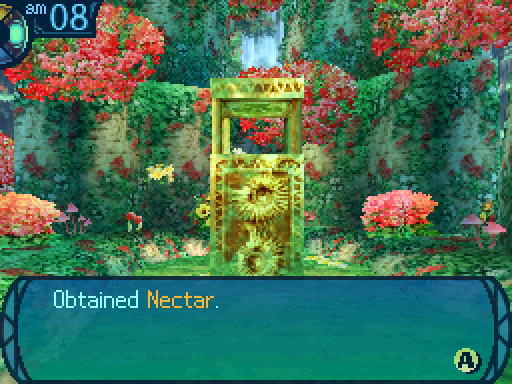 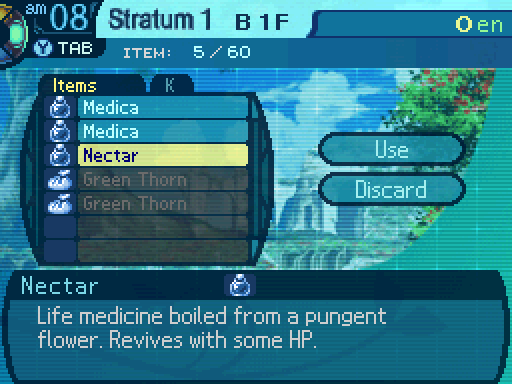 Oh! Now this will come in handy! Oh! Now this will come in handy!Nectars are very powerful consumables, since they can revive the dead. They'll bring a party member back to life at 20 HP.   If I just push this aside... There! If I just push this aside... There! And presto! The shortcut can now be used from this side. Why couldn't we have just done that from the this side in the first place? I dunno. Magic? Feh. Preposterous.DS Version Oh hey, two new enemies. Fanged Fish Level: 1 HP: 40 STR: 5 VIT: 3 AGI: 11 LUC: 5 TEC: 7 Attack Type: Slash Exp: 38 Item Drops: -Drop 1: Red Scale - 50% Drop Rate. 1 needed for Scale Jerkin (Clothes.) 10 needed for Fortune Book (Book.) --Hard scale that covers the Fanged Fish's body. -Drop 2: Sharp Tooth - 10% Drop Rate. 1 needed for Kopis (Sword.) --Long tooth that always finds its target. -Gold Drop: N/A Description: This river fish is no threat singly, but a school of them is cause for concern. Damage Resistances: Slash: 100% Strike: 125% Pierce: 100% Fire: 100% Ice: 100% Volt: 100% Ailment Resistances: Sleep: 100% Confusion: 100% Plague: 100% Poison: 100% Blind: 50% Curse: 100% Paralysis: 122% Bind Resistances: Head: 100% Arm: 100% Leg: 100% Other Resistances: Death: 100% Petrification: 100% Stun: 100% Skills: Sharp Fang: Uses the Head. A single target Slash attack that deals 130% damage. Ferocious Fish: ??? You've seen these things in my combat tutorial. They're just weak trash enemies that are just there to help you get used to the battle system. As for their 2nd skill, don't worry about it for now.  Forest Frog Level: 3 HP: 72 STR: 6 VIT: 5 AGI: 7 LUC: 11 TEC: 7 Attack Type: Strike Exp: 73 Item Drops: -Drop 1: Slimy Leg - 45% Drop Rate. 1 needed for Strap Shoes (Boots.) 3 needed for the quest Butterfly Bistro's new menu. --A leg completely covered in frog mucus. -Drop 2: Frog Cheek - 15% Drop Rate. 1 needed for Tent (Item.) 2 needed for Intellect Book (Book.) 5 needed for Life Belt (Accessory.) 1 needed for the quest Butterfly Bistro's new menu. --Can stretch to 10 times its original size. -Gold Drop: N/A Description: A large frog that uses its powerful leaps to pounce on enemies. It poses little threat. Damage Resistances: Slash: 100% Strike: 100% Pierce: 100% Fire: 100% Ice: 150% Volt: 100% Ailment Resistances: Sleep: 100% Confusion: 100% Plague: 100% Poison: 100% Blind:100% Curse: 100% Paralysis: 122% Bind Resistances: Head: 100% Arm: 100% Leg: 100% Other Resistances: Death: 100% Petrification: 100% Stun: 100% Skills: Jump: Uses the Legs. A single target Pierce attack that deals 120% damage. These guys are a slight step above the other enemies in that they have more HP. Otherwise, they're still trash mobs, and are just here to help you get used to the battle system. 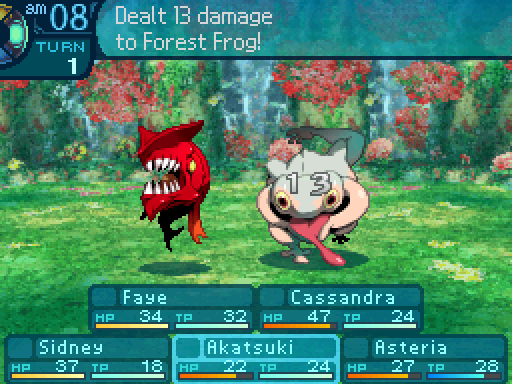 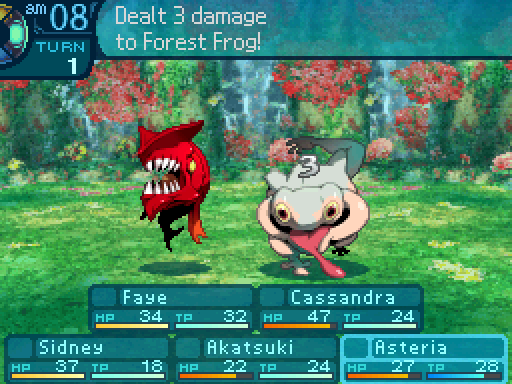 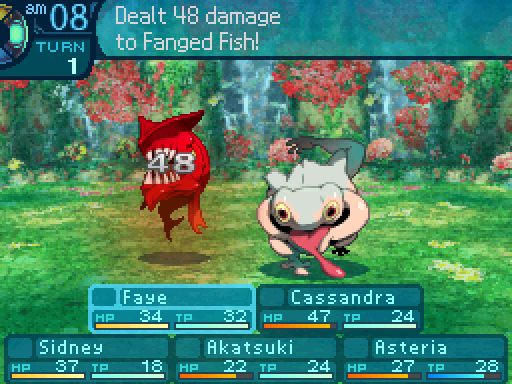 Easy peasy. Easy peasy.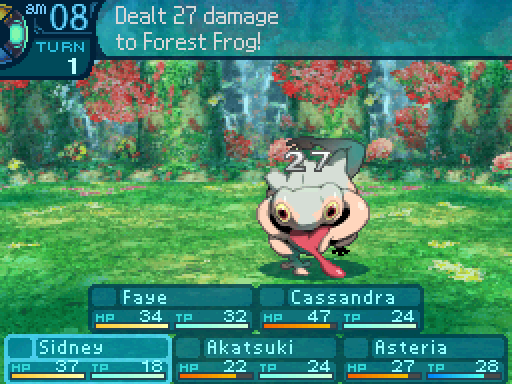 Like I said, Sidney and Faye are currently my best physical damage dealers right now, although that won't last in Faye's case.  I wanna draw your attention to the starburst shape over Asteria's text box. That indicates that she's taking Pierce damage, which is a nice change EO3 made. If you take damage from a physical damage skill, the game will give you a visual indicator of which type of damage they took. While EO1 and 2 did this, they only gave a visual indicator if you took elemental damage, physical damage types weren't given the same treatment. However, you'll only see those indicators if the enemy tries to use a skill on you. If they use regular attacks, they'll all show the same overlay over a textbox, even though the damage type of regular attacks differ from enemy to enemy. (hence the Attack Type section in the bios) 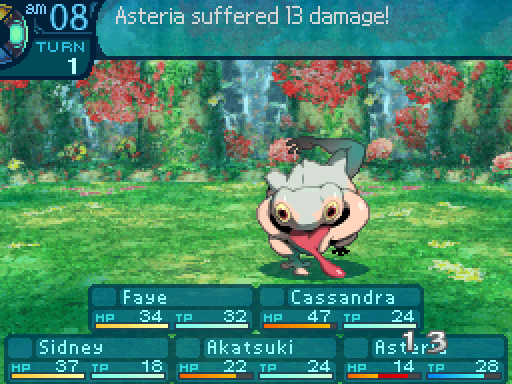 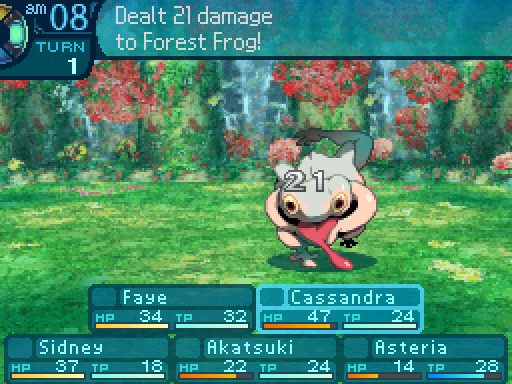  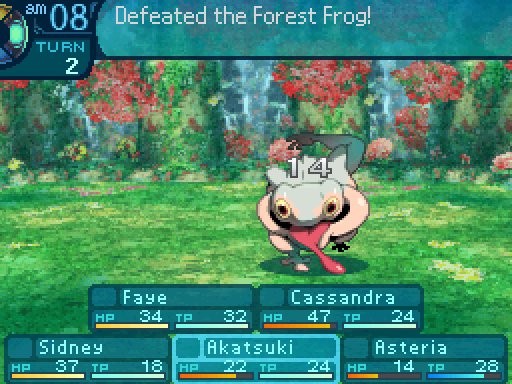 Sayonara! Sayonara! DS Version DS Version DS Version DS Version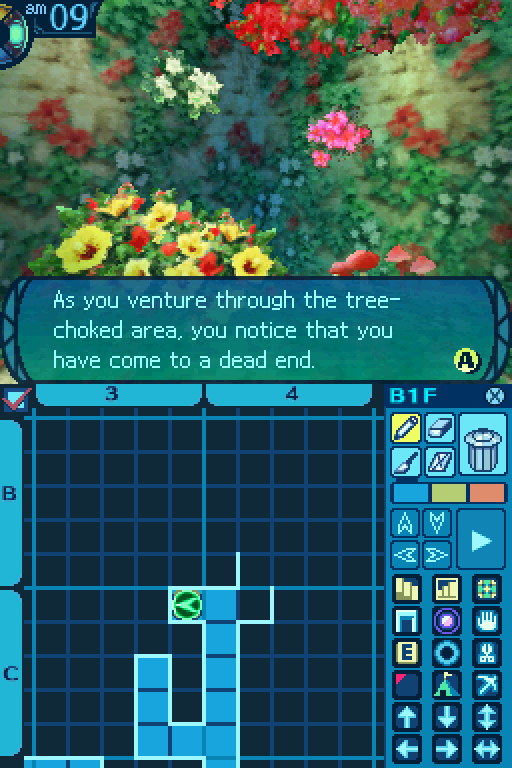 Why do we have to make a map of the place? What kind of dumb test is that? Well, think about it. Aside from copying one off of another explorer, and gooood luck with that, what's the best way to make a map? ...Ohhhh, I get it. They wanna see if we can survive in here, right? Yep! But this test has been easy so far. All the monsters here are pretty harmless. Hey, what's this? Why do we have to make a map of the place? What kind of dumb test is that? Well, think about it. Aside from copying one off of another explorer, and gooood luck with that, what's the best way to make a map? ...Ohhhh, I get it. They wanna see if we can survive in here, right? Yep! But this test has been easy so far. All the monsters here are pretty harmless. Hey, what's this?You find an old sign in front of the wall of trees, written in large print: 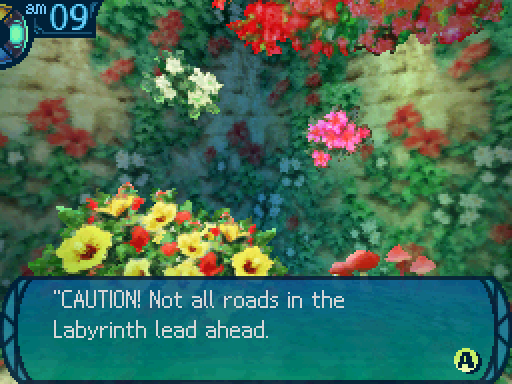 Only explorers who are careful to examine their full surroundings will be able to continue forth. Someone probably made that sign for people like us.You surmise that the sign, which contains elementary advice, was written for novice explorers. You tip your cap to its wisdom before returning to your investigation. 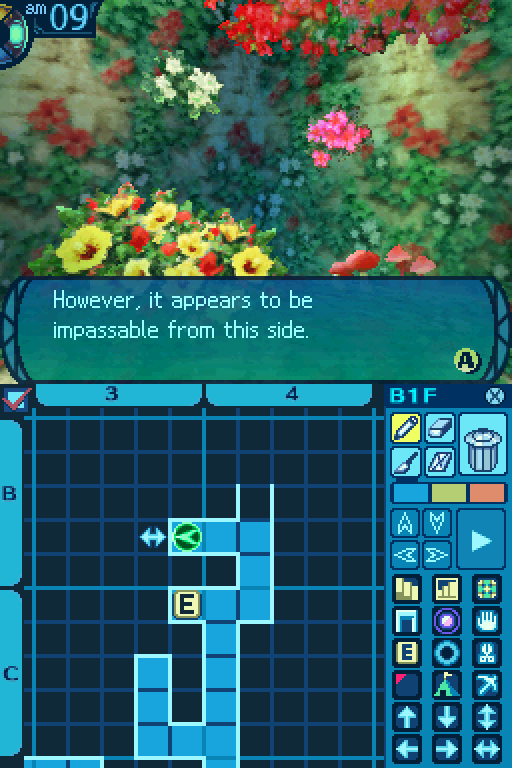 While the blue flowers mark shortcuts, not all of them will be marked, so be careful about that. 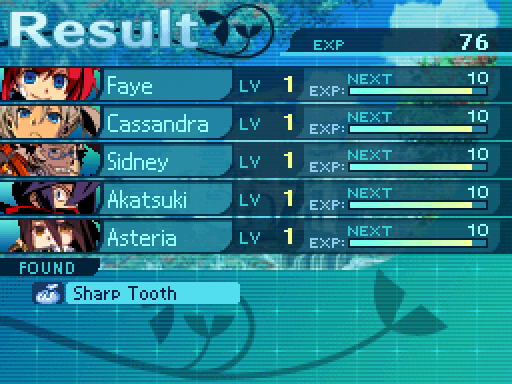 I'm only showing you this to show you that I haven't reached level 2 yet. 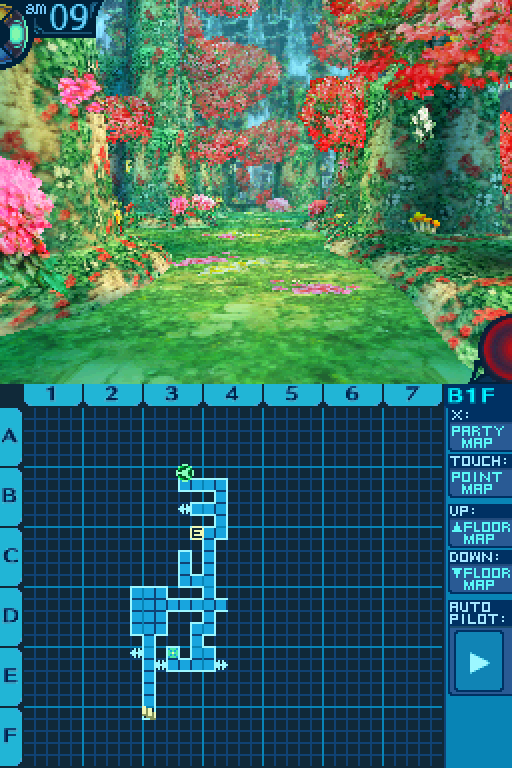 Oh, and just a warning. The tile I'm standing on right now is the last safe spot in this area. If you haven't done so already, I highly advise reaching level 2 before going any further. As for why the next area is dangerous... DS Version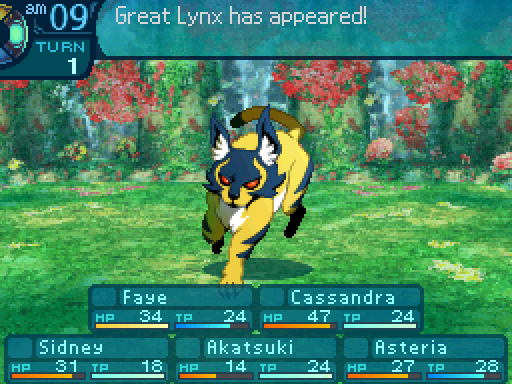 Because you start encountering these enemies after that point. I was hoping not to run into this thing this early.   Great Lynx Level: 4 HP: 114 STR: 13 VIT: 6 AGI: 10 LUC: 10 TEC: 10 Attack Type: Slash Exp: 181 Item Drops: -Drop 1: Mountain Claw - 70% Drop Rate. 1 needed for Tetsukiyari (Spear) and Tent (Item.) --Long, sharp talon for inflicting severe wounds. -Drop 2: N/A -Gold: N/A Description: Overall responsible for the most novice explorer deaths. Skilled explorers need not fear it. Damage Resistances: Slash: 100% Strike: 100% Pierce: 100% Fire: 150% Ice: 100% Volt: 100% Ailment Resistances: Sleep: 100% Confusion: 100% Plague: 100% Poison: 100% Blind: 25% Curse: 100% Paralysis: 100% Bind Resistances: Head: 100% Arm: 100% Leg: 100% Other Resistances: Death: 100% Petrification: 100% Stun: 100% Skills: Bite Off: Uses the Head. A single target Strike attack that deals 150% damage. Before deciding to stay and fight this enemy, please answer the following series of questions: Are you level 1? If so, then RUN, YOU FOOL! Are you level 2? If so, then answer the next question. -Do you have a Hoplite? If no (You fool), then answer the next question. --Are your Limits fully charged and ready to go? If no, then RUN, YOU FOOL! Are you level 3? If so, then you can probably take it. Just be careful. The Great Lynx is an infamous enemy among the people who have played this game. Compare the stats of this thing to the earlier enemies. Yes, way more HP and STR than those 3 trash mobs. This enemy is strong enough to one shot several classes, with both its regular attack and Bite Off. It can also cause a party wipe if you're not careful. Oh, and note the 25% Blind resistance. In case you thought about giving your Buccaneer Lights Out to deal with it, it won't help much. A level 1 Buccaneer using a level 1 Lights out would only have a 6% chance of inflicting Blind. Really, the Great Lynx is only a threat if you're at a low level. Your party is weak and has no tools to really deal with anything. Once your party gets stronger, this thing won't be so scary anymore. Heh, another monster waiting to get its head smashed in? I would be careful, Faye. It looks much tougher than the ones we've faced so far.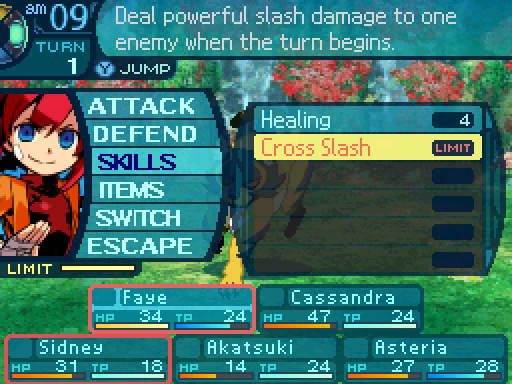 Normally I would run away in these circumstances, but my Limit gauges are full. When they're full, you can select the Limit skill from the skill menu. 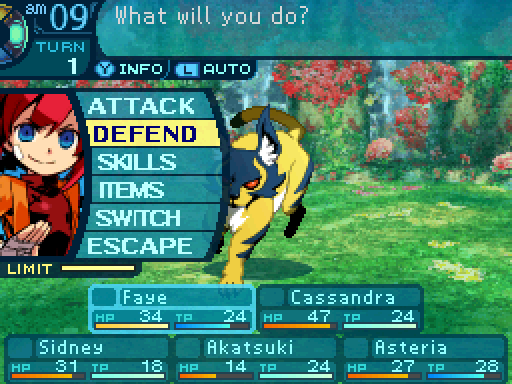 But I don't want Faye using it, so I have her defend, even though it won't help at all. The Great Lynx can still one shot her. What Defend does is reduce the damage of all physical attacks by 45%. It doesn't work on elemental attacks or Almighty damage.  I have Cassandra Provoke so no one else dies. What it does is place a 4-turn buff on her that makes enemies likely to target her. But while she can take a regular hit, if the Great Lynx decides to bite her face off, she'll die.  Hey Faye! Wanna try out those Limit thingies the Guildmaster gave us? Sure, let's go for it! Hey Faye! Wanna try out those Limit thingies the Guildmaster gave us? Sure, let's go for it!On the other hand, I want Sidney to use the Limit. The person that initiates the Limit does matter. The Limit does take their passives and buffs into account, so if Sidney uses it, Cross Slash gets the damage boost from Giant Kill. The damage boost from Giant Kill won't apply if Faye uses it. 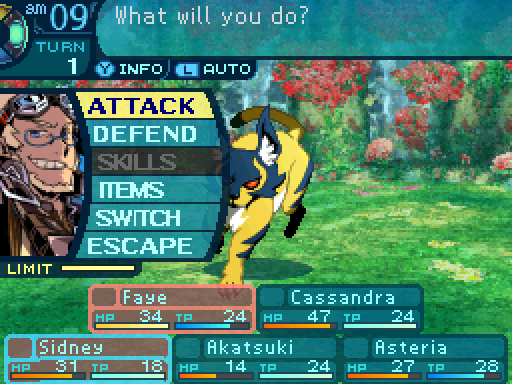 Limits don't use up a turn, so I can have Sidney do something else. In his case, just using a regular attack. 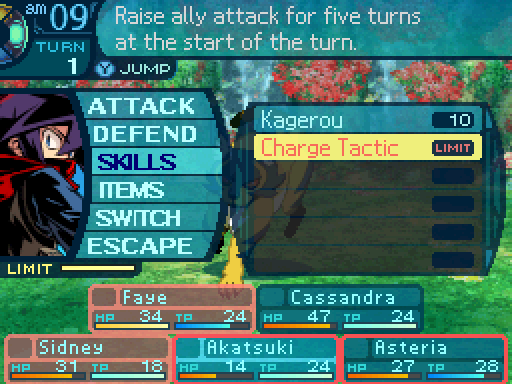 I also want to boost Cross Slash's damage first with this limit.  I'm gonna have Akatsuki send out a decoy in the hopes of diverting the Great Lynx's attention from the rest of the party. Ah, but before you do so... Ready? Ready! ATAAAAAAACK! ATAAAAAAACK!Charge Tactic boosts the damage output of all damage types, including Almighty damage, by 25% for 6 turns.  Slice and dice! Slice and dice!Oh, and that's a real nice amount of damage. Cross Slash deals 230% Slash damage to a single target at the beginning of the turn. How attack limits operate is that they take the STR stat of all the people that have equipped the limit and their weapon attack power and average them out. So the classes that equip the limits also matter, even if they're not the ones you're having initiate them.  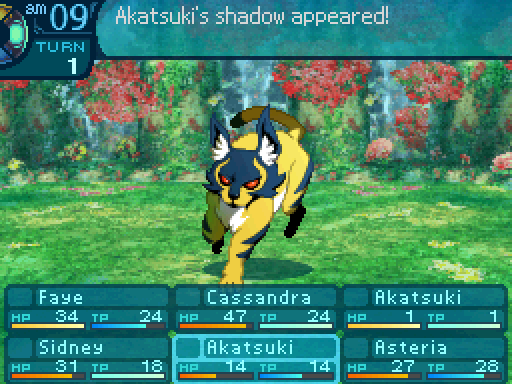 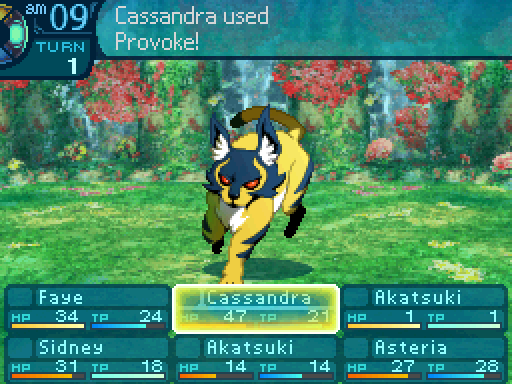 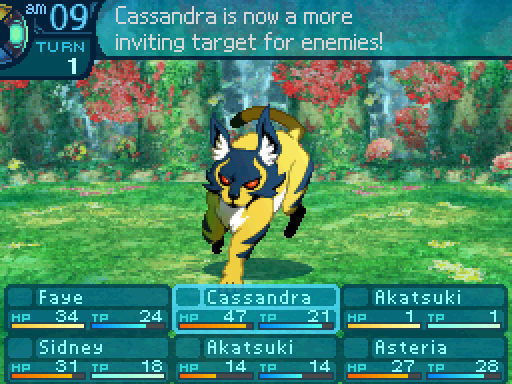 You're ugly! And... you smell bad? Really? You're ugly! And... you smell bad? Really? 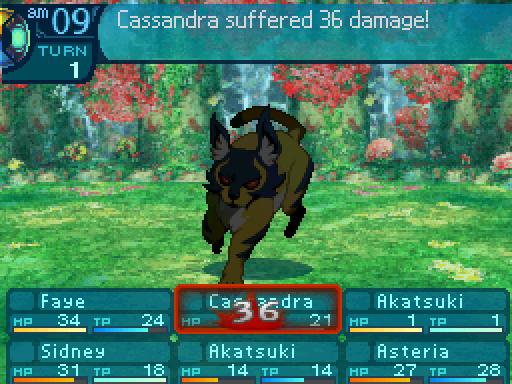 This is worse than being hit by fruit! Stop! This is worse than being hit by fruit! Stop!Fortunately, the Great Lynx decided to use a regular attack, and it didn't crit. So, now I'll talk about how the enemy targeting system works because it's pretty convoluted. Some attacks follow specific targeting rules, but most attacks in the game decide to attack a random target. How this works is that when an enemy starts an attack, each party member is assigned an Aggro Value. This number ranges from 0 to 4. Now at this point, the enemy can decide to target the front row, or the back row. The chances for which row it wants to attack are different from enemy to enemy. Typically most enemies prefer attacking the front row. Once it decides on which row to attack, the enemy's preferred target will always be the character with the highest amount of HP. Said character will now have a random number from 0 to 6 added to their aggro value. After this is done, the attack will always target the character with the highest aggro value. So typically the character will the highest amount of HP in the front row will be the one that gets attacked in most situations. How Provoke factors into this is that as long as the buff stays in effect, a random number ranging from 3 to the Provoke value is added to that character's aggro value. In Cassandra's case, Provoke is level 1, so it has a max aggro value of 5. Which means that a random number ranging from 3 to 5 will be added to the aggro value. The minimum value cannot be raised, so Provoke won't always cause a target to attack them, even at level 10. But it's still a handy skill. There's also a few skills that act as an anti-Provoke, where they place a buff on a character to make them less likely to be attacked. In Alice's case, she has Play Possum, and at level 1 it has a max anti-provoke value of 5. As long as she has the buff on her, a random number from 0 to 5 would be subtracted from her Aggro Value each time the enemy attacks. Once again, the minimum value can't be raised, no matter how much you level up the skill.    If you weren't so damned dead, I'd shoot you again. If you weren't so damned dead, I'd shoot you again.And it goes down without any casualties! DS Version Woo hoo! I feel stronger! How many levels was that? One. Woo hoo! I feel stronger! How many levels was that? One.Level ups for everyone! They're great. DS Version Level ups provide an increase to stats, standard RPG stuff. But each level up also provides another skill point to spend somewhere. I actually hold off on leveling up anything for Faye, since I want to level up Healing. But I'm still using that skill heavily, the TP cost increase would make Faye run out of TP faster. 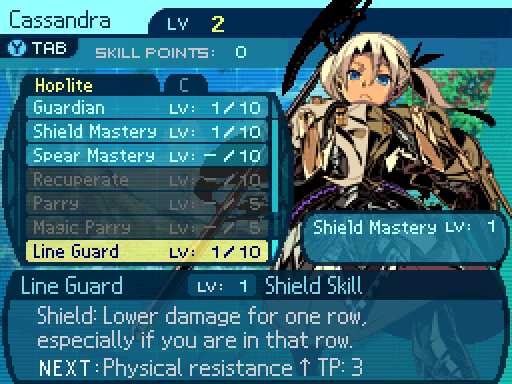 I'll protect you all! I'll protect you all!Cassandra learned a very important skill. Line Guard reduces the amount of physical damage a row takes, and the damage is reduced even further if the Hoplite casts it on their own row. At level 1, if a Hoplite casts it on a row they're not in, any physical damage taken would get reduced by 10%. However, if they do cast it on their own row, the damage would get reduced by 23%. Very handy, and it's the skill you want to max out first since enemies like throwing physical attacks around. 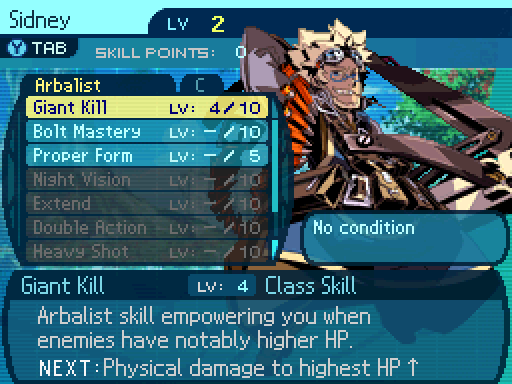 Sidney levels up Giant Kill to 4, which gives him a 31% damage boost.  Stay where you are! Stay where you are!I have Akatsuki learn how to use Kagenui, which is a 140% damage skill that has a 33% chance to inflict leg binds. 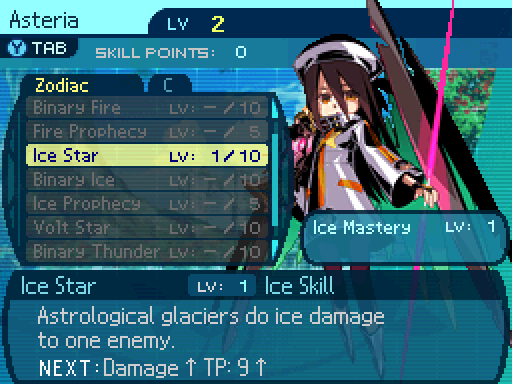 Through rain, snow, or sleet, I'll still take them down! Through rain, snow, or sleet, I'll still take them down!Ice Star is just an Ice version of Fire Star. 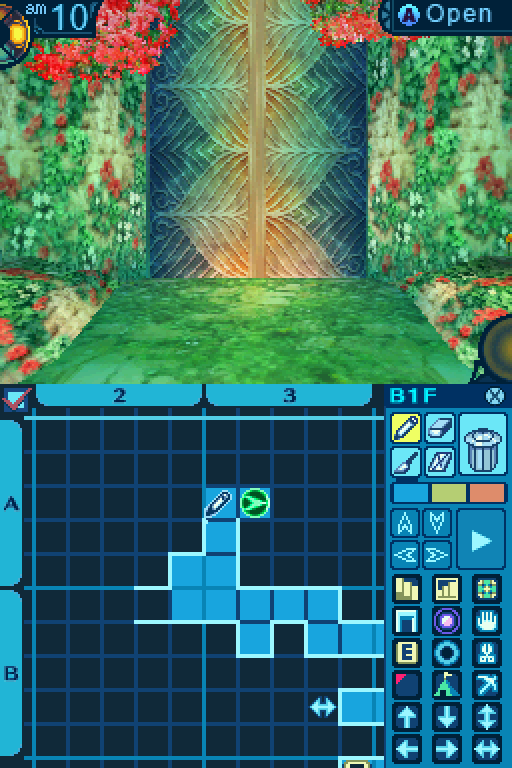 Here's a door. 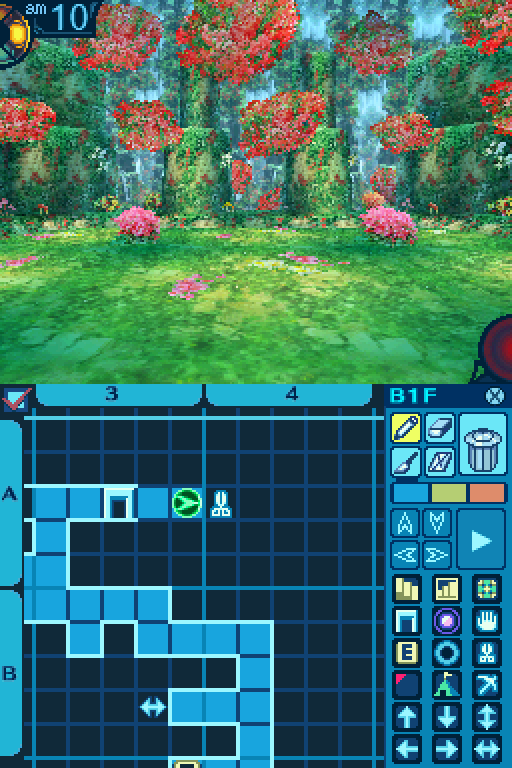 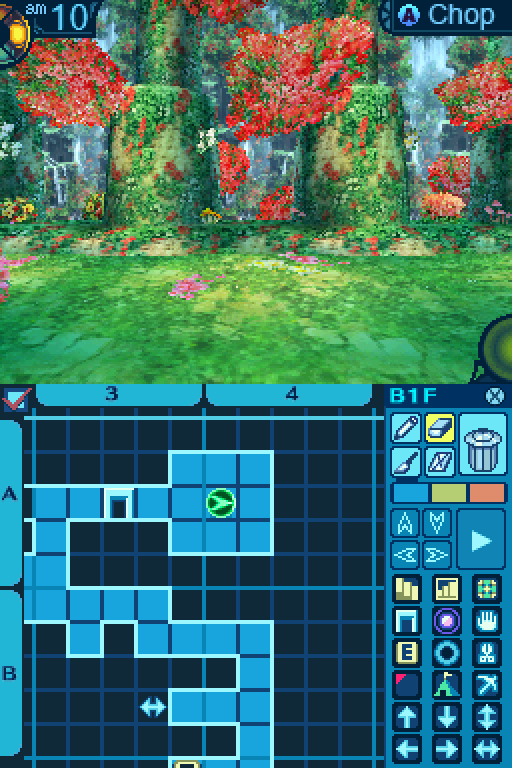 Hmm, this looks like a good place to gather materials from. We would just need to chop some of these trees down. And then we could sell them to the store. That's a great idea and all, but there's one problem. Hmm, this looks like a good place to gather materials from. We would just need to chop some of these trees down. And then we could sell them to the store. That's a great idea and all, but there's one problem. What a dilemma. Perhaps we could hire a Farmer to help us with tasks like that. What a dilemma. Perhaps we could hire a Farmer to help us with tasks like that.These are the item points I was talking about. Without the right gather skill, or a Farmer's Harvestry, we can't get any items from these. A4 Chop Point: Soft Bark: 50% Gather Rate. 1 needed for Main Gauche (Knife.) 5 needed for Lance (Spear.) -Bark that can be easily shaped for a variety of uses. Supple Branch: 50% Gather Rate. 1 needed for Life Belt (Accessory.) 5 needed for Pike (Spear.) -A piece of wood that doesn't easily snap. Palm Trunk: Rare. 1 needed for Crushing Club (Club.) 3 needed for Flame Lance (Gun.) -Sturdy timber commonly seen in the south. Common Gather Periods: 1 to 8. Rare Gather Periods: 2 to 6. Here's what we can get from this Chop Point. We have a 50% chance of getting either Soft Bark or Supple Branches. As for the Palm Trunk and the gather periods thing, I'll explain that later once it becomes relevant. DS Version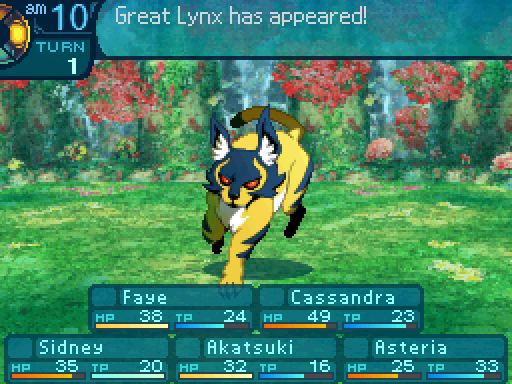 Another one!?  I shall not fall! I shall not fall!Indomitable provides the user with an endure effect. If they take a blow that would normally kill them, they are left at 1 HP instead. It's very handy, but it doesn't work against Poison, Instant Death, or Petrification, so keep that in mind. Perhaps my illusions shall come in handy here. BEHOLD!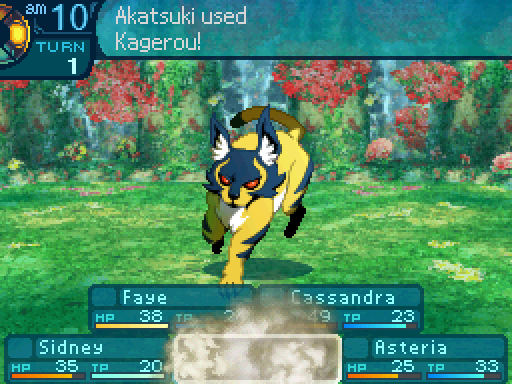  ...Suki. That's a cardboard cutout of yourself. THAT YOU COLORED IN WITH CRAYON! It is my masterfully crafted illusion. ...Suki. That's a cardboard cutout of yourself. THAT YOU COLORED IN WITH CRAYON! It is my masterfully crafted illusion.  Do you seriously think that something like that would- Do you seriously think that something like that would-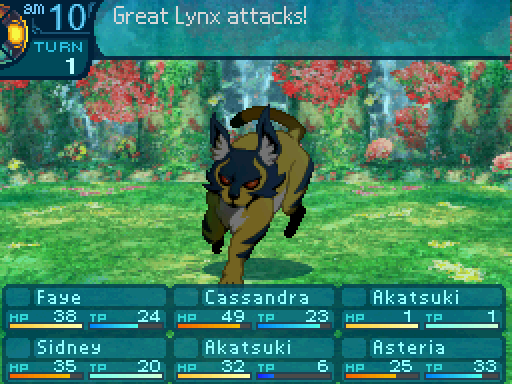   How. It looks as though the monsters around here aren't too intelligent. How. It looks as though the monsters around here aren't too intelligent.Here's also something I want to bring up. Akatsuki summoned a decoy, but the Great Lynx attacked it on the same turn. EO3 made a massive change to the enemy AI. In the first two games, enemies couldn't react to your actions instantly, so if you did something to tick them off, you would only see the effects the next turn. In this game, enemies can directly react to your attacks, so using Provoke would actually apply the effect on the same turn it was casted, where in the first two games, you would have to wait until the next turn for the effects to kick in. In some cases, the enemies use their newfound AI upgrades to cheat and do stuff like killing someone that you just revived with a single target attack. 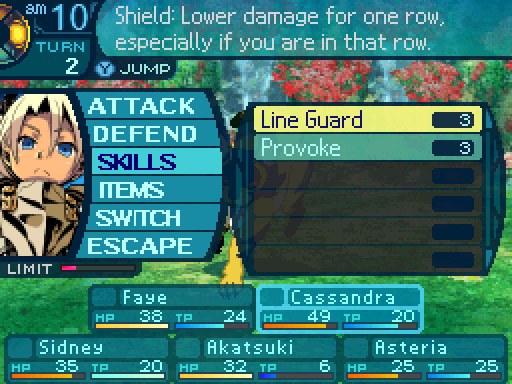 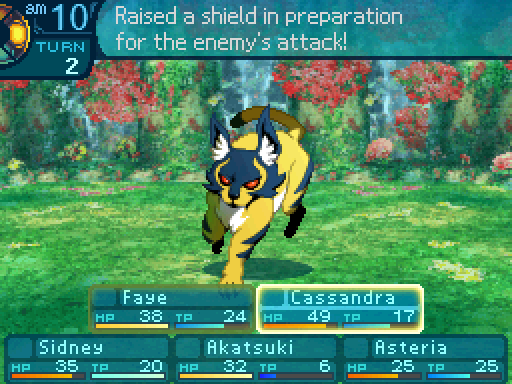 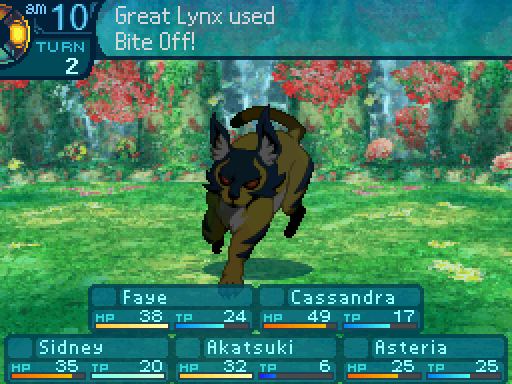 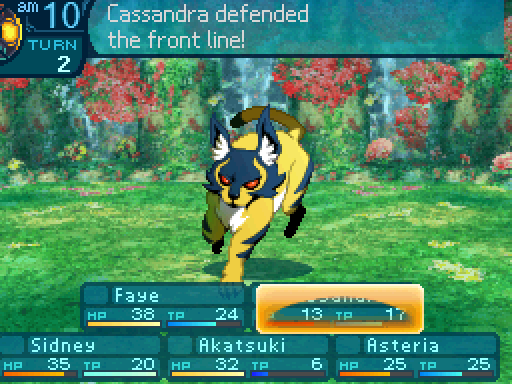 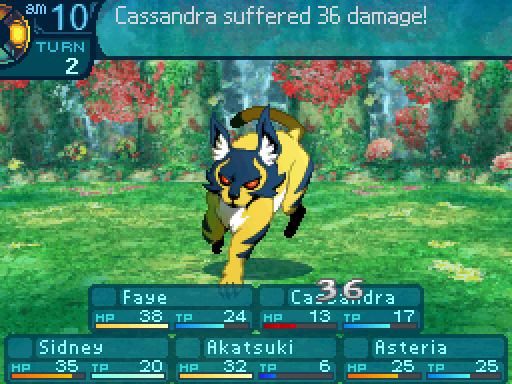 Okay, that still hurts. Just not as much. Okay, that still hurts. Just not as much.Thankfully, Line Guard let her survive Bite Off, although defending would have done the same thing. I mainly used it in case the Great Lynx went for Faye. 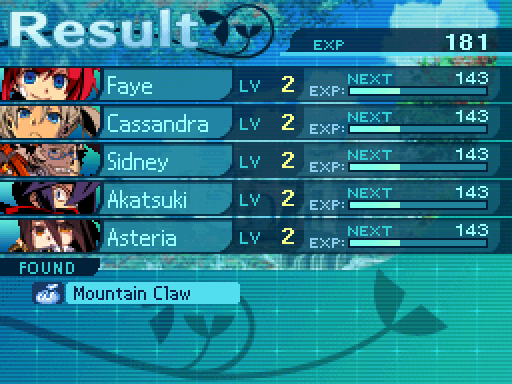 Either way, I got lucky with this Great Lynx too. DS Version Gentle sunlight shines through the leaves and you hear the chirping of birds. It�s so peaceful here... You don�t sense any monsters around... This spot seems ideal to take a rest. But continuing your exploration seems more important than resting here, so you take your leave. Remember this spot for later. 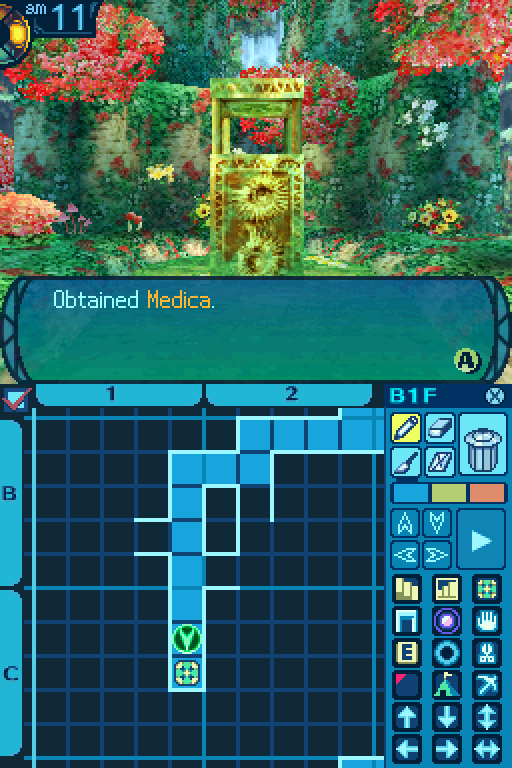 Handy, because I'm running low on these right now. 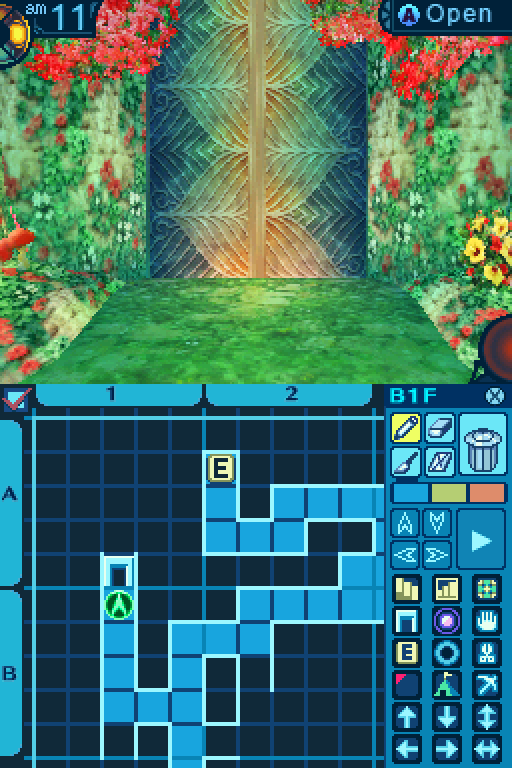 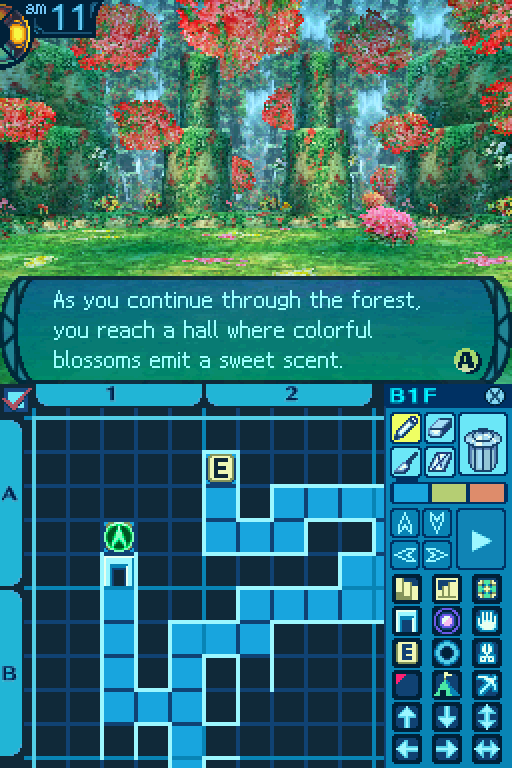 The peculiar flowers sway in the wind... their sweet fragrance grows more alluring... You consider resting here to more fully enjoy the flowers� scent.  Say, you all wanna take a break? We've been in here for a while. Yes, I really could use one myself. Say, you all wanna take a break? We've been in here for a while. Yes, I really could use one myself.You rest your weary muscles, the beautiful flowers and their sweet aroma all around you... 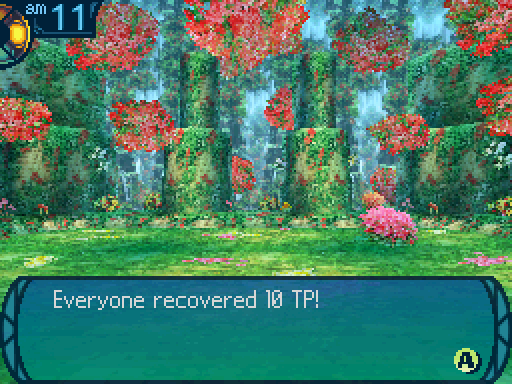 Now fully rested, you resume your exploration of the Labyrinth. What happened there was an event. There's a couple of spots where you can choose from some options, and depending on what you choose, something good or bad can happen. In my case, some TP recovery. You need to be careful and decide if it's worth taking a certain option or not in certain events. Now if you say no, this text gets displayed. You hurry to leave the flowers and their cloying scent behind, concerned for some hidden danger. Keep in mind that while rejecting an event can prevent both good and bad things from happening, sometimes rejecting an event is a trap and causes a bad thing to happen.  The footprints lead east, where you can hear something like an animal�s cry beyond the bushes. 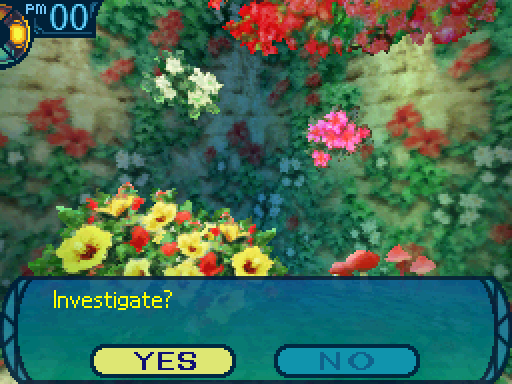 Saying no has this happen. Wary of the situation, you decide to leave without a careful investigation of the area. But if we say yes: As you carefully peer into the bushes, you find an animal caught in a hanging snare. You hear the cries of its brethren all around, as if in response to its piteous wailing... Oh dear. It seems to be in a bad predicament. If we say no, this happens: Thinking that this is clearly some hunter�s trap, you decide not to touch it and leave this area. If we say yes: I will cut it down... There! Nice!After you cut the rope with a knife and remove the trap, the animal nimbly jumps down. The animal is still young; once it is freed, two of its kind that seem to be its parents emerge. You freeze... You can see that your luck is about to be put to the test! If your luck fails, the beasts will misinterpret your kindness and attack! Whoa whoa whoa! We were just trying to free your kid! We don't mean any harm! Who knows if they'll see it that way.At this point, one of two things can happen. 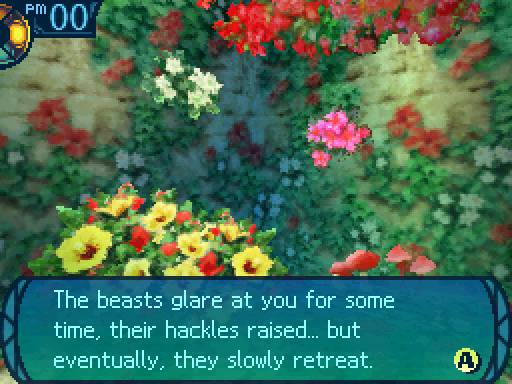 They seem to have understood your actions were meant in kindness. You watch the animals go as they protect their young before resuming your exploration. Phew! I thought they were about to attack us.And this is actually the outcome I didn't want. There's another outcome here, and the music changes to the following as it happens:  DS Version DS VersionThe beasts glare at you and begin to growl. It seems they�ve perceived you as a threat...! Your goodwill was misunderstood and now you must fight the beasts who stand ready to pounce! At this point, you would get into a fight with 3 Great Platypi, which are monsters from the 2nd floor. Yes, three. Apparently the kid joins in on the fight as well. Ungrateful little critter. Anyways, I wanted that to happen because the party was in top condition and had their Limit gauges full, so the fight would have just been free exp. Oh well. Anyways, that event is a little special. If your party is at a low level, it's random whether you get into a fight or not. But if your levels are high enough, you'll never get into a fight. Some shortcuts you can go through immediately when you first encounter them. 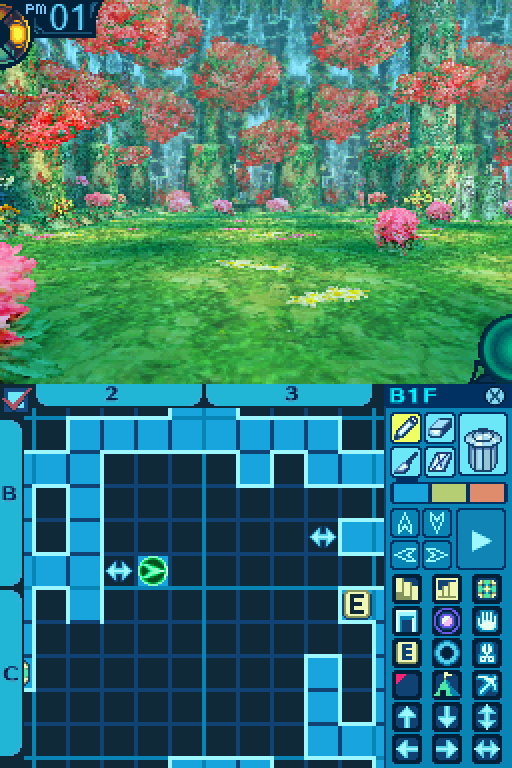   Amritas are very handy consumables, restoring 50 TP to one person. Now I normally don't advocate hoarding, but I advise you to hold onto the Amrita for as long as you can, until you can buy them in stores.  Rats. I wonder if we can find a key to these chests. Rats. I wonder if we can find a key to these chests.And some chests are locked for now. 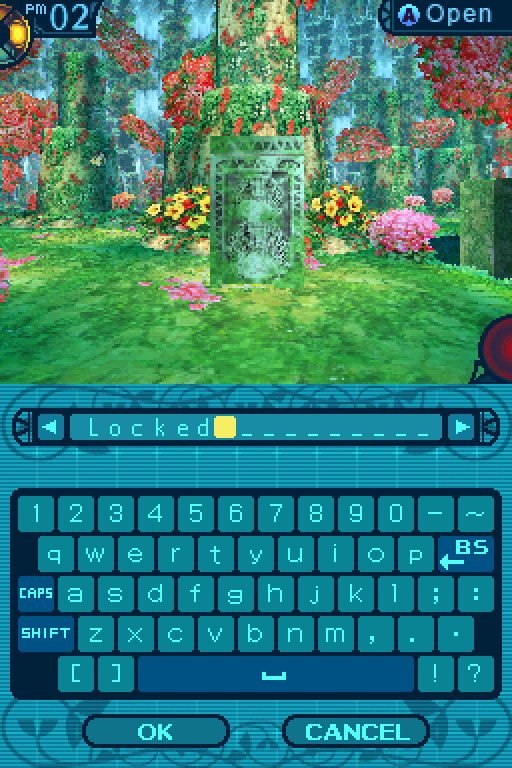 I mark these chests with a little memo. Oh by the way, you want to be careful in this area. 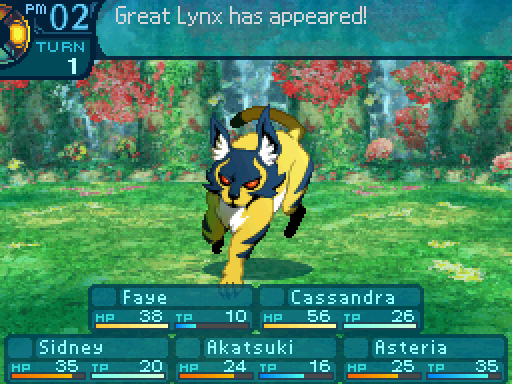 Because this place is Great Lynx central.  GO AWAY!  DS Version DS Version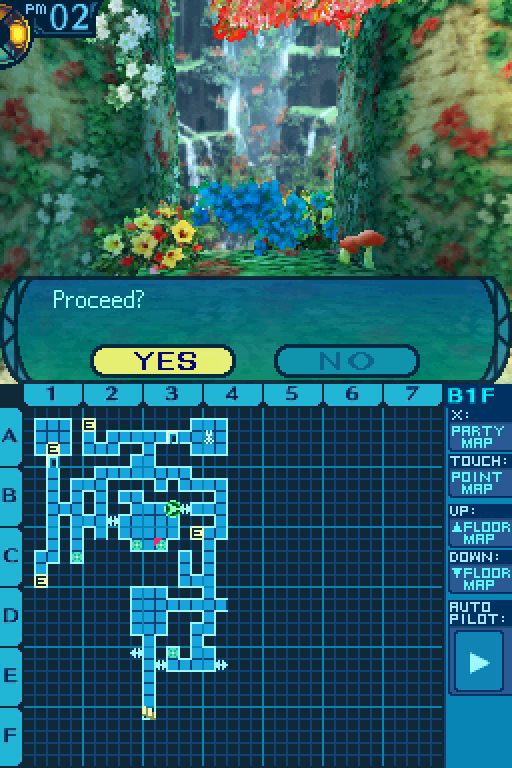 And a shortcut out.  As you gaze upon the waterfall in this relatively clear area, a cool breeze washes over you. It might feel nice to rest here for a while, you reflect...  If you say no: However soothing your surroundings may be, you feel it is too risky to stay in one place for long. If you say yes: You decide your current pace is overtaxing and it would be best to take a brief respite here. After all, the air is so clear that you can feel your strength replenishing just standing here. Mind and body both refreshed, you resume your journey.  Another little recovery event. How soothing. AAAAHHHH! What the!? We're under attack! 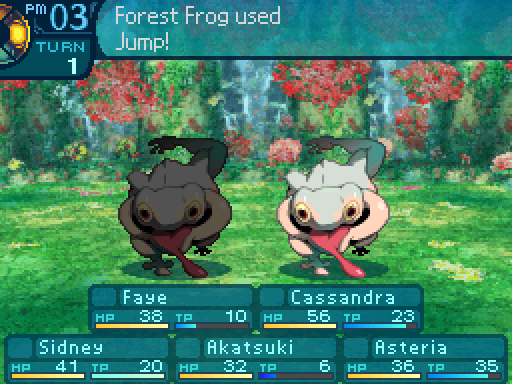 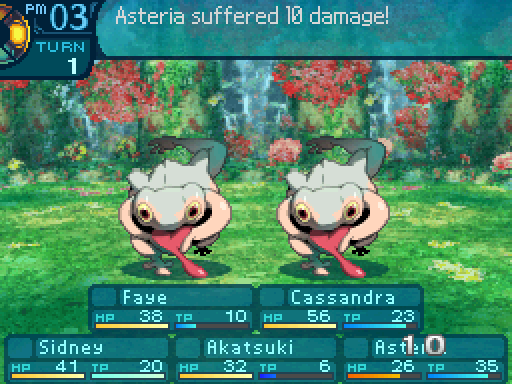   And here's something that can happen while walking around. You can get blindsided by monsters (Which the game visually indicates with those red leaves particle effects.) That means they get a free turn to do whatever they want. Now if you've played EO2, don't worry. The game doesn't do guaranteed blindsides for certain random encounters anymore (Which was an incredibly stupid decision in that game.) 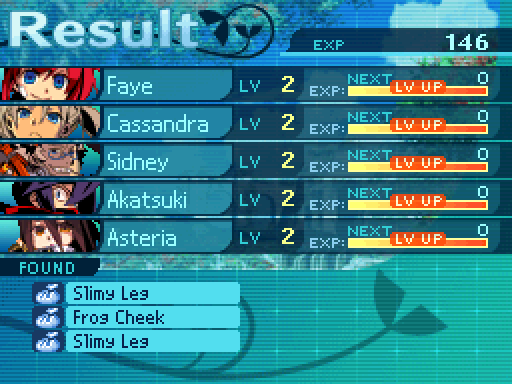 If we were at a lower level, that might have been troublesome. Anyways, that fight gave my party enough exp to level up. DS Version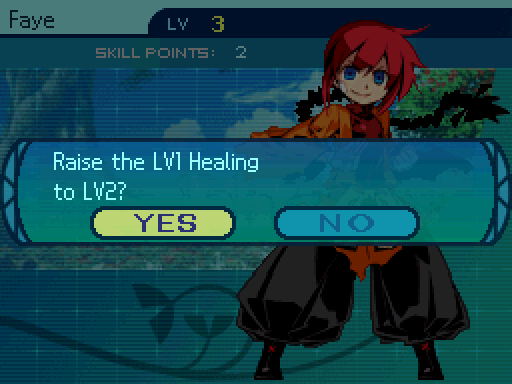 The healing power is now 75%.   Leveling up Healing to 2 unlocks these skills. 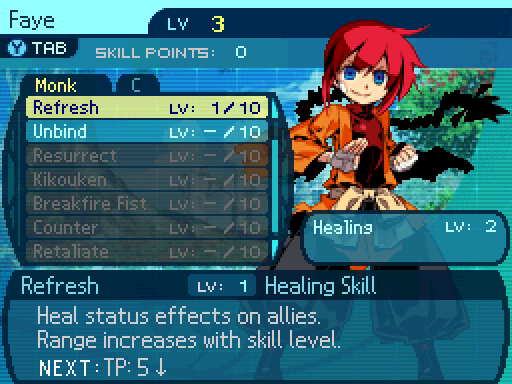 Freshen up! Freshen up!I take this one. Refresh dispels all kinds of status ailments on a single target. 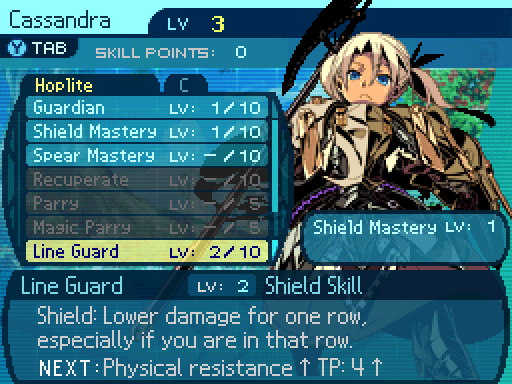 Damage reduction on the Hoplite's row is 26%. Otherwise, it only provides an 11% reduction.  Damage bonus is now 35%. 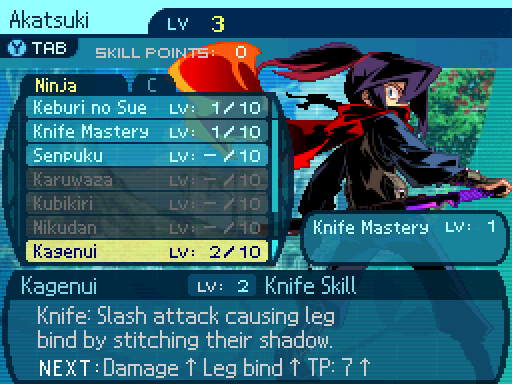 Kagenui now deals 145% damage with a 36% chance to inflict leg bind.  Zaaaaaaap! Zaaaaaaap!Provides a 2% damage bonus to Volt spells.  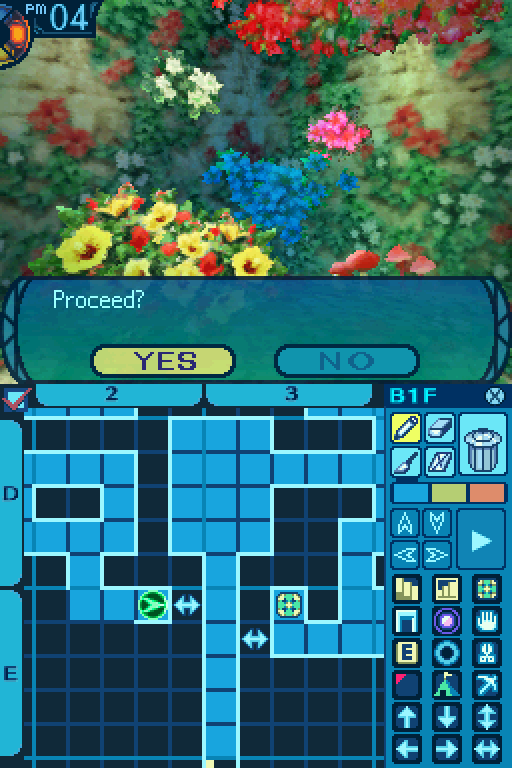 And here's a shortcut back to the beginning. 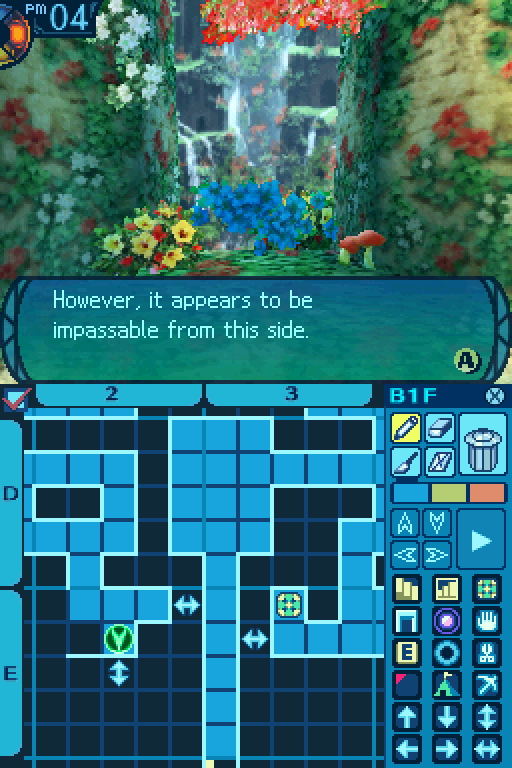 Here's another that's inaccessible for now. 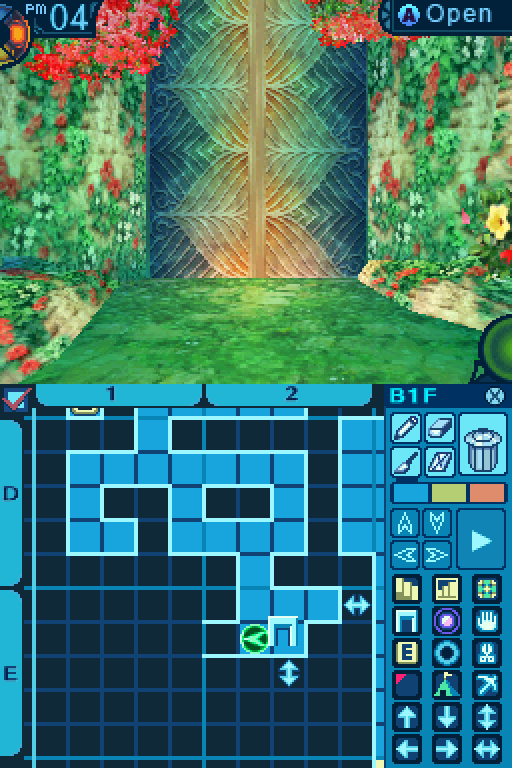 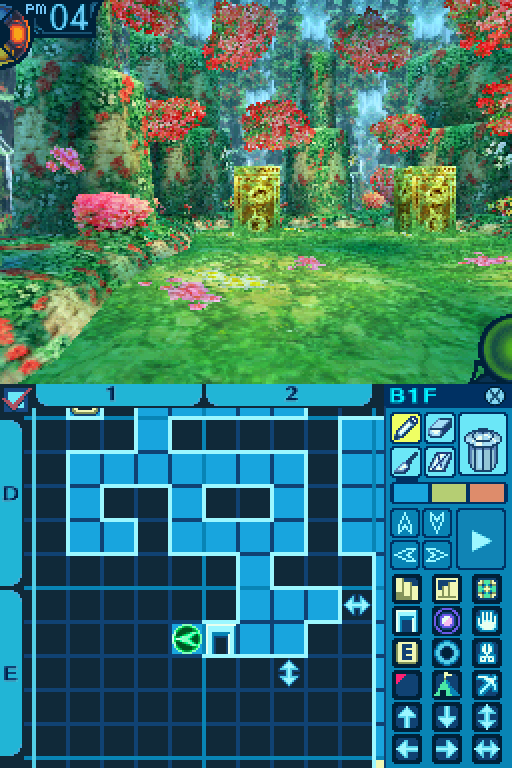  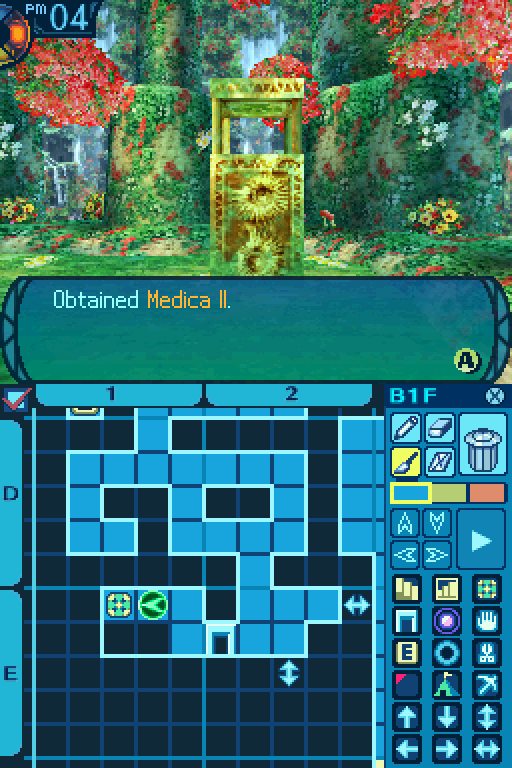 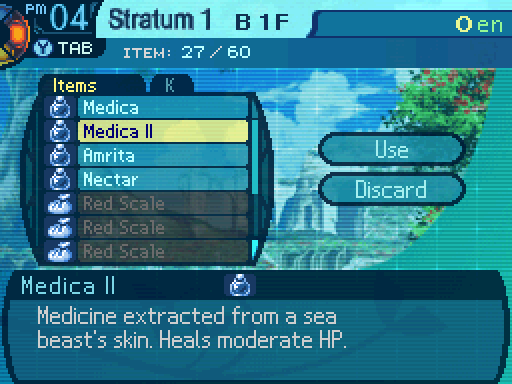 Restores 160 HP to one person.  Any bit of money is nice at this point.  And we've finished our map! I think we got everything. Let's go back to that guard and show him our map!
Araxxor fucked around with this message at 21:40 on Jan 22, 2017 |
|
#
¿
May 22, 2015 23:55
|
|
|
thenightsshadow posted:Democracy playthrough Huh, neat. Although with a party like that, I think I would have went for Call Snake instead of the Call Elephant path. Even with one point in it, a 25% chance to inflict Arm Bind, which is boosted by the Wildling's LUC and TEC stats and lowers the STR of problematic enemies would have been helpful. As for the platypi, I've done that event with a high LUC party, and the fight still triggered for me, so I think it's just genuinely random.  Until you're insanely overleveled anyway. Until you're insanely overleveled anyway.In fact if anyone wants to trip report their own playthroughs, go right ahead. Just don't get ahead of the LP. Oh by the way, I saw something in the main Etrain Odyssey thread, and there was something I was wondering about. Tyty posted:It could be worse. Is anyone up for this challenge?  Probably gonna have another update up soon since it's gonna be fairly short, and there's gonna be a minor vote on something.
|
|
#
¿
May 23, 2015 02:35
|
|
|
Update 5: Mission Complete We passed the test, and got a nice big present! Now, what do we name it?DS Version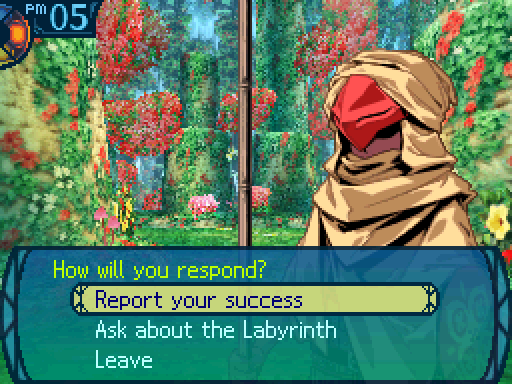 The mapping mission has a few requirements before it's considered finished. First of all, there's 185 tiles to step on, but you need to have at least stepped on 105 of them. This is to prevent cheesing by copying from someone else. The other thing the game checks for is mistakes. A missing tile, a extra tile, a missing wall, or an extra wall all count as mistakes. If you have more than 18 mistakes, you cannot complete the mission until you fix them. We're done!You present the parchment upon which you�ve inscribed your efforts thus far. The guard�s previously stern countenance lightened upon examining your work. Outstanding. You�ve done a simply wonderful job here!His expression utterly transformed, the guard showers you with effusive praise. Go now hence to the Senatus and report to them your success to claim your reward. Woo hoo! Finally!We can talk to the guard and try to report our success again.  They should have a reward for you, which I imagine will only make your journey easier. They should have a reward for you, which I imagine will only make your journey easier.If you try to run past him at this point:  �The the?�  Most sorry, but you need to report your success to the Senatus before moving on. I understand your eagerness to explore further, but there are clearly established rules. Most sorry, but you need to report your success to the Senatus before moving on. I understand your eagerness to explore further, but there are clearly established rules.Ah well, let's go back to town. Everyone in town has new dialogue when you enter the Labyrinth. In fact, the townspeople's dialogue changes for every new floor you reach.  DS Version DS Version You can drop your stuff here if you need to, boss. It�s just 100en a pop. If you can�t hold any more stuff, just leave it with us! Huh. Thanks for letting us know, kid! You can drop your stuff here if you need to, boss. It�s just 100en a pop. If you can�t hold any more stuff, just leave it with us! Huh. Thanks for letting us know, kid! DS Version DS Version Let's sell our materials.  If you press the Y button when the cursor is over an item you want to sell, you'll have the option to sell all of them at once.    And the game lets you know if you've unlocked any new stuff and what you've unlocked. I don't sell my Slimy Legs or Frog Cheeks because I know they're needed for a quest, and I forgot how many were needed. Let's take a look at what we've unlocked.     This is all I've unlocked so far. I don't buy anything because even with 181en, the Guild is still poor. Let's talk to Edie.  That's right. Should you obtain any workable materials on your journey, my Firm will happily buy them from you. As you sell me new materials, we will stock new merchandise derived from it. And I am sure you could use the coin we pay in return. Everyone benefits. That's right. Should you obtain any workable materials on your journey, my Firm will happily buy them from you. As you sell me new materials, we will stock new merchandise derived from it. And I am sure you could use the coin we pay in return. Everyone benefits.Way ahead of you. 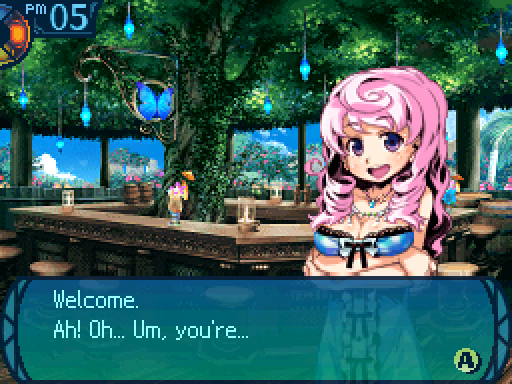 Starts with a T. ......Tidehunt! I know it! I remember it clearly! I do know my customers here at the Butterfly Bistro! Have a drink, and have fun! Starts with a T. ......Tidehunt! I know it! I remember it clearly! I do know my customers here at the Butterfly Bistro! Have a drink, and have fun!Let's see what the bar patrons have to say.   ...Have you folks been out to sea yet? If you�re ever out on the water, try catching some fish. There�s all kinds of fish around Armoroad. If you catch any, folks at the port will pay handsomely. The rarer your catch, the more you�ll rake in. Give it a try. Huh. Might be a nice way to make some money. But we would need a boat first. True. ...Have you folks been out to sea yet? If you�re ever out on the water, try catching some fish. There�s all kinds of fish around Armoroad. If you catch any, folks at the port will pay handsomely. The rarer your catch, the more you�ll rake in. Give it a try. Huh. Might be a nice way to make some money. But we would need a boat first. True.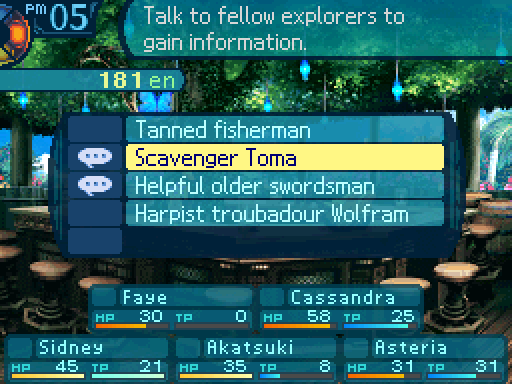  Hm? Ain�t seen ya before... New explorers, I take it? Yes. We just started out. Alright... Then here�s some advice. Did ya know if you beat monsters a certain way, they�ll drop different stuff than usual? Oh? How so? Some ya gotta kill with fire, or maybe defeat �em while their arms are bound. That kinda thing. I know all sorts of secret tricks like that to get good treasure. If ya wanna know �em, just ask. I don�t give �em away for free, but ya buy me a drink or something and I�ll gladly spill for ya! Hm? Ain�t seen ya before... New explorers, I take it? Yes. We just started out. Alright... Then here�s some advice. Did ya know if you beat monsters a certain way, they�ll drop different stuff than usual? Oh? How so? Some ya gotta kill with fire, or maybe defeat �em while their arms are bound. That kinda thing. I know all sorts of secret tricks like that to get good treasure. If ya wanna know �em, just ask. I don�t give �em away for free, but ya buy me a drink or something and I�ll gladly spill for ya!What Toma just told us about is very important. Some monsters have something called Gold Drops, or Conditional Drops. When we reach a new floor, we can buy him a drink in order for him to tell us about how to get conditional drops from enemies. He won't tell us how to get every single one, but he'll tell us about most of them This is a massive improvement over the first two games, which had conditional drops, but didn't tell us how to get most of them. A very good reason to check back in with the townspeople more often. 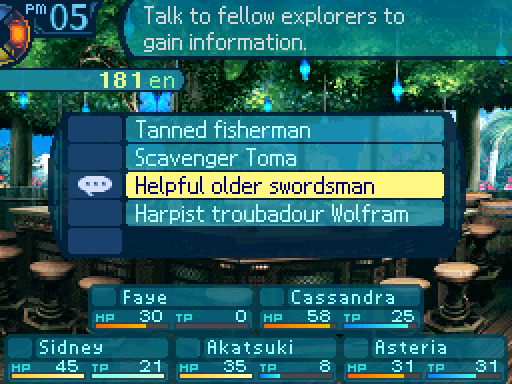  Yo! Haven�t seen you lot around! Are you new around here!? Great! Yes, we are. C�mon, sit here next to me! I used to challenge the Labyrinth when I was your age too. You gotta start from B1F! No shortcuts! Speaking of which, have you seen any Great Lynxes? Its sharp claws can rip rookies in half! They�re weak against fire, but that doesn�t make them any easier. It�s good practice for beginners. There�s a famous phrase around these parts: Great Lynxes are where rookies become explorers! Really? ...Alright, you got me. I just came up with that a second ago! Bwahahahahahaha! Still, I wish we got that warning before we went into the Labyrinth. Yo! Haven�t seen you lot around! Are you new around here!? Great! Yes, we are. C�mon, sit here next to me! I used to challenge the Labyrinth when I was your age too. You gotta start from B1F! No shortcuts! Speaking of which, have you seen any Great Lynxes? Its sharp claws can rip rookies in half! They�re weak against fire, but that doesn�t make them any easier. It�s good practice for beginners. There�s a famous phrase around these parts: Great Lynxes are where rookies become explorers! Really? ...Alright, you got me. I just came up with that a second ago! Bwahahahahahaha! Still, I wish we got that warning before we went into the Labyrinth. DS Version DS Version We only went in there once. A warning to you newbies about going forward with investigating the Labyrinth: Bravery isn�t the same thing as idiocy. If you feel like you�re in danger, come back immediately. We only went in there once. A warning to you newbies about going forward with investigating the Labyrinth: Bravery isn�t the same thing as idiocy. If you feel like you�re in danger, come back immediately.Pfft. Speak for yourself. I love taking risks when I play. In fact, if you're the kind of player that loves to play conservatively when playing an Etrian Odyssey game, I'm gonna warn you, my playstyle might make you scream. I love playing aggressively and taking risks, and trying to get a lot done in one trip into the Labyrinth instead of doing things little by little. For the record, I'm not crazy. I don't dive into completely suicidal situations, like running around with only one person alive. Now the Harbormaster still has nothing new to say and will kick us out, so let's head back to the Senatus.  DS Version DS Version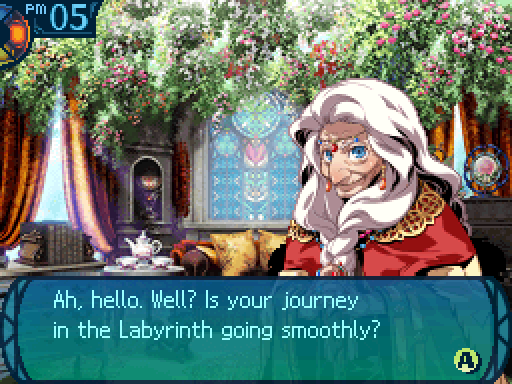 I should tell you that if you find new equipment or creatures there, make sure to report them here. Contributing to a comprehensive list of discoveries is a duty of all registered explorers. In return, the Senatus will provide support to make it easier for you to go on your adventures. Tit for tat, you see. If you want fame and glory, you�ll have to work for it! I should tell you that if you find new equipment or creatures there, make sure to report them here. Contributing to a comprehensive list of discoveries is a duty of all registered explorers. In return, the Senatus will provide support to make it easier for you to go on your adventures. Tit for tat, you see. If you want fame and glory, you�ll have to work for it!Well let's report our discoveries right now. 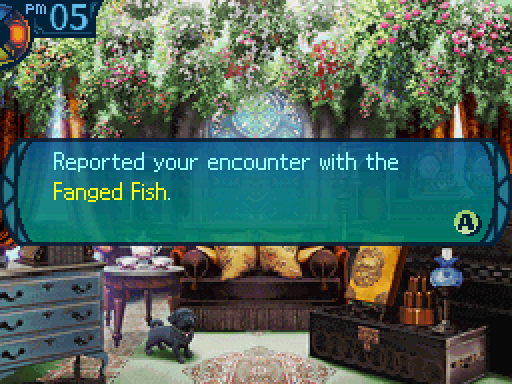 When you check in with the Monster Codex or the Item Compendium, any new stuff you encountered is automatically recorded. 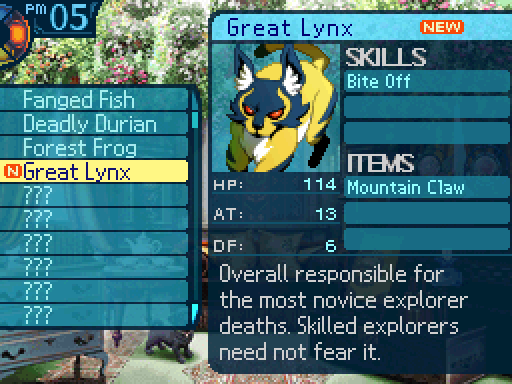 An apt description. Also don't worry, the game has worse tricks up its sleeve than the Great Lynx.  The Item Compendium also tells us how much each material sells for. 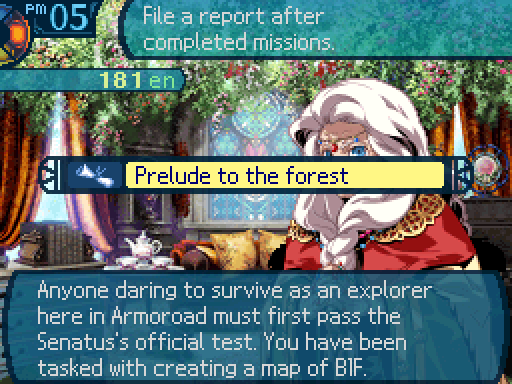 Let's hand in our mission report.  DS Version DS Version  You�ve proven your mettle as explorers strong enough to challenge the Labyrinth. I�ll authorize the sale of items at Napier�s Firm which you may find necessary in your travels. I�ll also send word to the pier that Guild Tidehunt requires a seaworthy vessel. That should allow you to set out on voyages whenever the seafaring urge may strike. Train yourself in battle on the open seas and gain power enough to someday grant my wish. You�ve proven your mettle as explorers strong enough to challenge the Labyrinth. I�ll authorize the sale of items at Napier�s Firm which you may find necessary in your travels. I�ll also send word to the pier that Guild Tidehunt requires a seaworthy vessel. That should allow you to set out on voyages whenever the seafaring urge may strike. Train yourself in battle on the open seas and gain power enough to someday grant my wish.Missions give out very nice rewards.  Oh, well that takes care of our money troubles. I hate you for giving me a heart attack back at the store. My apologies. Oh, well that takes care of our money troubles. I hate you for giving me a heart attack back at the store. My apologies.The money is real nice. DS Version Oh, but just look at that exp! Missions also reward a ton of experience points upon handing in your report. I should note that you can't increase the amount of exp a party member gets by shrinking your party. Even if I were to have only one person hand in their report, they would still get 300 exp. Oh, and the mission exp doesn't affect anyone who has Combat Study. So have as many people in the party as possible when you go to make your report. Now that wasn't enough for a level up, but I'll fix that soon enough. DS Version Here at the Butterfly Bistro, you can talk to people and take on side jobs called �requests.� There are all kinds of different jobs, from monster hunts to item collecting. If you accept a request and complete the mission, report back to me! When you do, I will then give you the reward that the client gives me when they put it up! Doing these requests might make you some easy cash! I�ll keep getting more and more requests as time goes on, so come back here lots, okay? That�s pretty much it. Do you want to be taking on one of the requests right away? Uh, sure! Here at the Butterfly Bistro, you can talk to people and take on side jobs called �requests.� There are all kinds of different jobs, from monster hunts to item collecting. If you accept a request and complete the mission, report back to me! When you do, I will then give you the reward that the client gives me when they put it up! Doing these requests might make you some easy cash! I�ll keep getting more and more requests as time goes on, so come back here lots, okay? That�s pretty much it. Do you want to be taking on one of the requests right away? Uh, sure! Oh boy! Now that we've completed the first mission, we get access to a bunch of sidequests. I love quests. You'll see why soon enough. Let's take this one.    Did you need something? I am wanting to make a new menu item here at my bar, and I am needing ingredients. What is required is 1 Frog Cheek and 3 Slimy Legs. I am most sure you can gather them by killing Forest Frogs on B1F. I can be counting upon you, yes? Good, good! Now �hop� to it! Ahaha! Ahahahaha! A woman after my own heart! Ergh... Did you need something? I am wanting to make a new menu item here at my bar, and I am needing ingredients. What is required is 1 Frog Cheek and 3 Slimy Legs. I am most sure you can gather them by killing Forest Frogs on B1F. I can be counting upon you, yes? Good, good! Now �hop� to it! Ahaha! Ahahahaha! A woman after my own heart! Ergh...  Dumb puns aside, what's this about? I'll have you know that puns are the highest form of humor! Oho, you are accepting this request, yes? It is easy, so is perfect for you. The client is Bill, an apprentice fisherman who is known for being a lazy oaf. He says he is wanting a safe place to sunbathe... I bet he is looking for a nap spot. You may be finding such a perfect spot somewhere on B1F, yes? You find a good place for him and let me know, yes? That will be the end of this. You be running along now, adventurers! I can be counting on you! Dumb puns aside, what's this about? I'll have you know that puns are the highest form of humor! Oho, you are accepting this request, yes? It is easy, so is perfect for you. The client is Bill, an apprentice fisherman who is known for being a lazy oaf. He says he is wanting a safe place to sunbathe... I bet he is looking for a nap spot. You may be finding such a perfect spot somewhere on B1F, yes? You find a good place for him and let me know, yes? That will be the end of this. You be running along now, adventurers! I can be counting on you!We'll do that one later. But we've already completed the Butterfly Bistro's new menu quest.  DS Version DS Version Ah, you are returning to see me, yes? The frog dish that has been swimming in my mind can now become reality. I thank you! Perhaps you would be liking some? I am most sure it will be tasteful! ...Oh, wait, yes. I am almost forgetting. You deserve reward for hard work! You will be getting more requests now, I am sure. Many thanks again! Ah, you are returning to see me, yes? The frog dish that has been swimming in my mind can now become reality. I thank you! Perhaps you would be liking some? I am most sure it will be tasteful! ...Oh, wait, yes. I am almost forgetting. You deserve reward for hard work! You will be getting more requests now, I am sure. Many thanks again! I guess the free tents are nice. DS Version But quests are absolutely worth doing because they give out experience points now! This is by far the best change that's been made from EO2 to 3 because quests were awful in the first two games and barely gave a decent reward compared to the tedium you had to go through to get them in the first place. There's an actual incentive to do these now. Even if the reward itself sucks, the experience points they give out are absolutely worth it! It also helps that quests are a lot less of a pain to do in this game. There's fetch quests sure, but there are a lot fewer of those in this game than in the first two games. And yes, quest exp follows the same rules as mission exp. The amount of exp one person can gain can't be increased by shrinking the party, and Combat Study party members don't get a single bit of it.  I'll go over what tents do when they become relevant. DS Version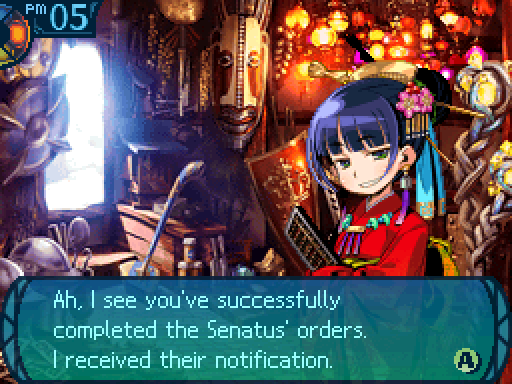 You see, there is one item that may only be sold to explorers authorized by the Senatus... It�s called an Ariadne Thread. When you�re lost or wounded, use it to be teleported back to Armoroad. You should always have one with you when in the Labyrinth from this point on. Whoa. Stare at it all you want, though: I do not give them out for free. There�s no percentage in that. She's got a one track mind. You see, there is one item that may only be sold to explorers authorized by the Senatus... It�s called an Ariadne Thread. When you�re lost or wounded, use it to be teleported back to Armoroad. You should always have one with you when in the Labyrinth from this point on. Whoa. Stare at it all you want, though: I do not give them out for free. There�s no percentage in that. She's got a one track mind.I've unlocked a few new things some selling the rest of the Slimy Legs and Frog Cheeks. Yeah, just a warning. The game doesn't warn you if you have an item for a quest in your inventory, so you won't accidentally sell it. That feature was added in EO4.   Ariadne Threads are awesome. They are one of the most important items in the game since they can warp you back from any point in the Labyrinth. And yes, for those of you that have played the first two games, this is what Warp Wires got renamed to, because the translators had more cartridge and text space to work with. Try not to forget buying one, because being stuck deep inside the Labyrinth without a quick way out can get nasty real fast. Don't ever expect the game to remind you of this. The lack of a reminder in the series is an intentional feature. You could buy spares in case you forget to restock on them on a trip to the store. Oh, and if you've played EO2, don't worry. There's no squirrels in this game, nor any event that will steal your Ariadne Threads. Although squirrels were planned to be in the game at one point, and they would have made off with your Ariadne Threads if you tried to pet them.  Don't bother buying any Tents yet. 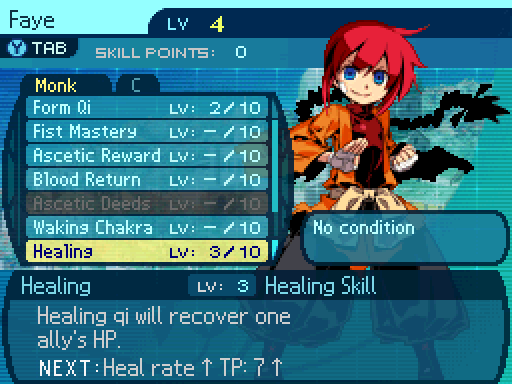 Let's level up skills now. Healing is now level 3, which has a heal power of 80%. 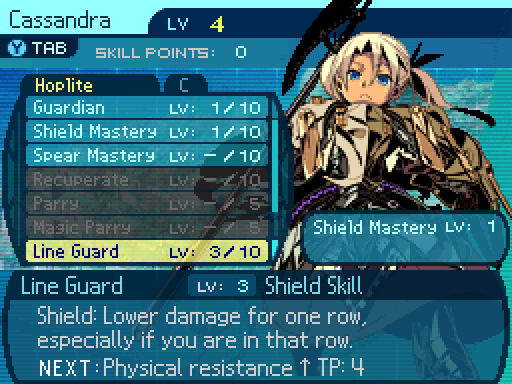 Line Guard now reduces physical damage by 29% if casted on the Hoplite's own row. Otherwise, it only reduces the damage by 12%.  Giant Kill provides a 39% damage boost to enemies that have equal or more than twice the amount of the Arbalist's current HP/  Kagenui deals 150% damage while having a 39% to inflict leg bind. 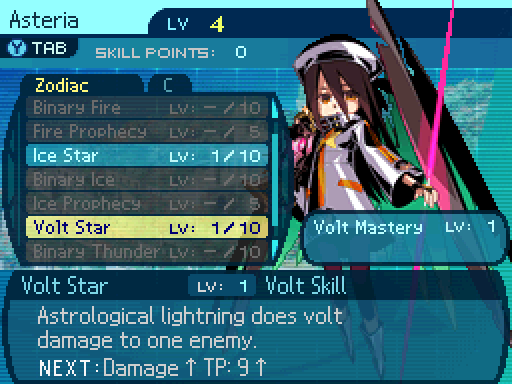 Things are about to get very stormy. Things are about to get very stormy.Volt Star deals 40% Volt damage to a single target. Now that I've got one point in all the elemental stars, I'll be going for some different skills. Now Flowdia said that we can use a boat now, so let's go check that out.  DS Version DS VersionIt's a fairly catchy theme, and I think it fits this place quite well. 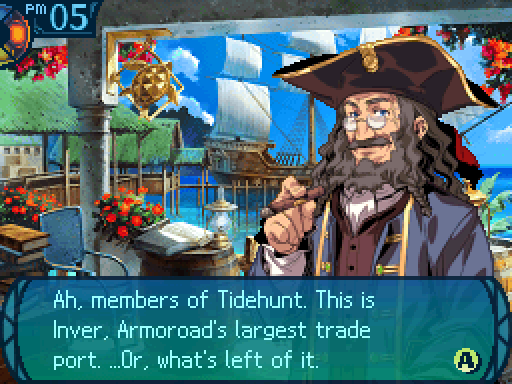 When the Calamity struck a century ago, the topography changed, and commerce ended. Since then, many have worked to reopen trade routes, but nobody can get ships out past these currents. That�s why the Senatus and I are asking explorers to set sail and create new sea charts. The rewards are handsome indeed. If you can chart a course from here to the north, it�ll be worth it. I�ve even gotten them to lend you a ship, exclusively for Tidehunt�s use. Got a name in mind? When the Calamity struck a century ago, the topography changed, and commerce ended. Since then, many have worked to reopen trade routes, but nobody can get ships out past these currents. That�s why the Senatus and I are asking explorers to set sail and create new sea charts. The rewards are handsome indeed. If you can chart a course from here to the north, it�ll be worth it. I�ve even gotten them to lend you a ship, exclusively for Tidehunt�s use. Got a name in mind?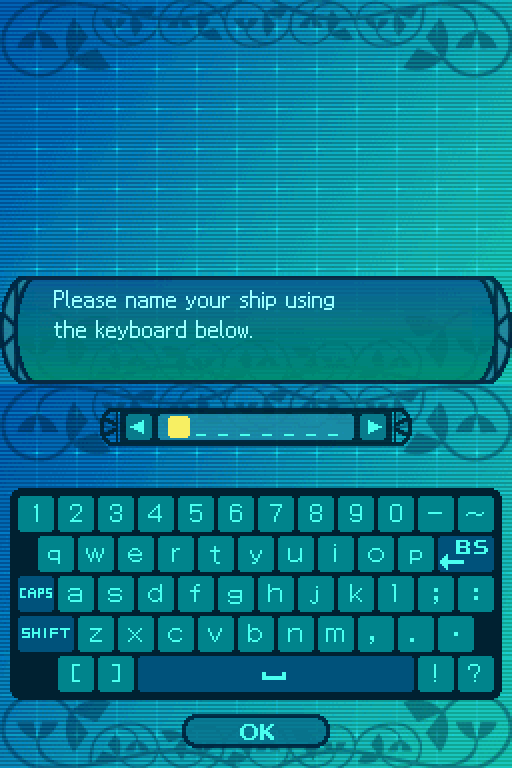 I've got an idea... I've got an idea...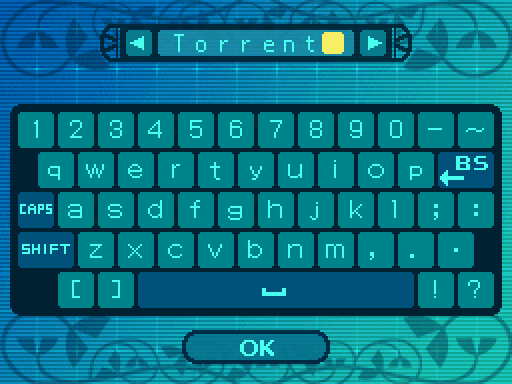 Aha! Ahahahaha! Get it? Because- Please. Stop. Aha! Ahahahaha! Get it? Because- Please. Stop.So come up with or vote on a name for our ship. Please bold both the name you've came up with and the choice you're voting for. The default name will be Torrent if no one comes up with a name. Because that's what I went with in my own playthroughs. Araxxor fucked around with this message at 17:53 on Jun 21, 2015 |
|
#
¿
May 23, 2015 06:17
|
|
|
BearDrivingTruck posted:How about HunkJunk? Yeah, there's only room for 8 letters, like the Guild name. Ship Names so far: Torrent: 3 Battere: 2 Endeavor: 2 A: 2 CalmSeas: 1 Oh No!: 1 Nautilus: 1 boat: 1 Hesperus: 1 Heimdall: 1 Nemo: 1 Jumpjet: 1 Tug Life: 1 Kunkka: 1 Calamity: 1 HunkJunk: 1 Forrent: 1 Next update isn't gonna have any Labyrinth exploration. Instead, it will cover a different major part of the gameplay in EO3. Also the sooner I get to show off one of the best tracks in the game, the better.
|
|
#
¿
May 23, 2015 18:57
|
|
|
Hobgoblin2099 posted:I can't help but wonder why they named it the same thing as EO2's battle theme, though. Because those are the Japanese names of the songs. The English name of EO3's battle song is actually Light Skirmish. I forget what the English name for EO2's first battle song was. As go why I was using the translated from Japanese names instead of the actual English names, the website I got the 3PMs from was using the Japanese names, and I was just too lazy to rename them when uploading them to Tindeck. That's all.
|
|
#
¿
May 23, 2015 23:55
|
|
|
VOTING IS CLOSED! Ship Names: Tug Life: 8 Torrent: 5 Battere: 3 Endeavor: 2 A: 2 CalmSeas: 1 Oh No!: 1 Nautilus: 1 boat: 1 Hesperus: 1 Heimdall: 1 Nemo: 1 Jumpjet: 1 Kunkka: 1 Calamity: 1 HunkJunk: 1 Forrent: 1 Atlantis: 1 Titanic: 1' Flavio: 1 Pobeda: 1 And suddenly there was support for Tug Life. Okay, I guess that's what the ship will be named from now on.
|
|
#
¿
May 24, 2015 03:10
|
|
|
Spielmeister posted:I imagine it has more to do with accommodating individual mapping styles. For example, some people surround doors with walls while others don't. Yeah, the guard is actually really picky about the map, and some people had trouble getting him to approve their maps when they played. So I've listed out the requirements there if you're having trouble with that. Or you could just copy mine after stepping on enough tiles. Fortunately, that's the only time the game actually does a map check. All mapping is optional* from that point, and isn't required for 100% completion. You should still make good looking maps for your benefit. Araxxor fucked around with this message at 00:37 on May 25, 2015 |
|
#
¿
May 24, 2015 23:53
|
|
|
Update 6: On the High Seas We've been trusted with the restoration of Armoroad. A big responsibility. I wonder if we can truly accomplish such a thing.DS Version I didn't choose this. For it chose me. 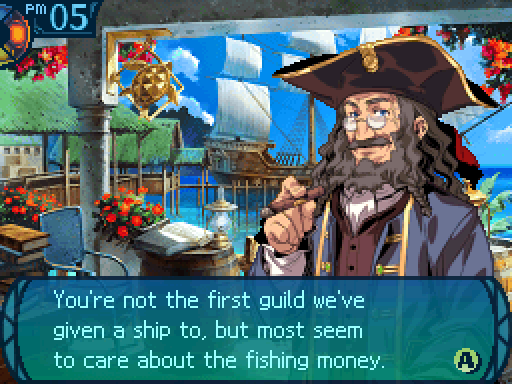 You�re different, though! We�ll be counting on you to restore Armoroad�s name as the Ocean City! You�re different, though! We�ll be counting on you to restore Armoroad�s name as the Ocean City!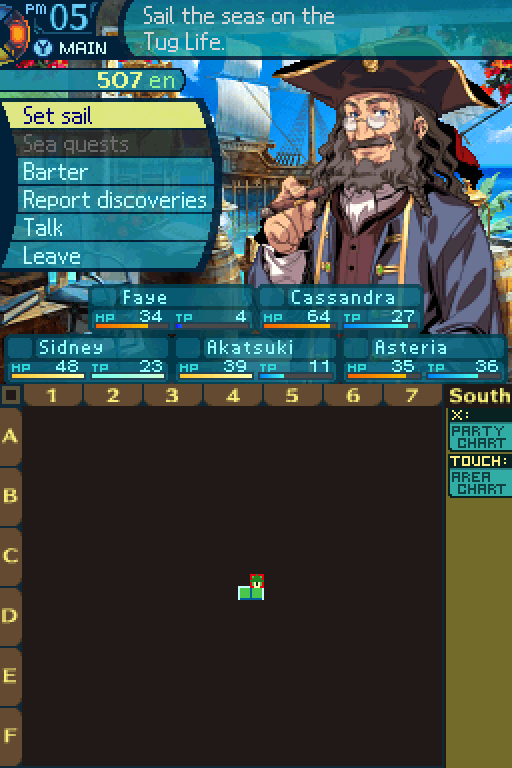 We get a new map now that we can access Inver Port. Now there's a couple of things we can do here, although one of them is unavailable to us right now.  Let's talk to him.  Yes, we are. How are you finding the Yggdrasil Labyrinth? Its grandeur and depth is like the greatness of the sea. But remember, you�ve been tasked with an important mission on these seas. Don�t get too preoccupied! I shouldn�t worry, though; you�re young yet. I�m sure you can take on both the Labyrinth and the seas. Yes, we are. How are you finding the Yggdrasil Labyrinth? Its grandeur and depth is like the greatness of the sea. But remember, you�ve been tasked with an important mission on these seas. Don�t get too preoccupied! I shouldn�t worry, though; you�re young yet. I�m sure you can take on both the Labyrinth and the seas.The sea is a new thing EO3 added and it's a very big part of the gameplay. Although you can ignore it completely and just only explore the Labyrinth if you want. However, you miss out on a lot by doing this, so I don't advise ignoring this place completely.  Barter is a multiplayer feature. You can exchange Guild Cards with other players, or have other players help you fill out your Barter Log. The 3DS games replaced exchanging Guild Cards wirelessly with StreetPass.  Like the Senatus, the port also has its own glossaries that need to be filled out for 100% completion. Anyways, let's Set Sail. 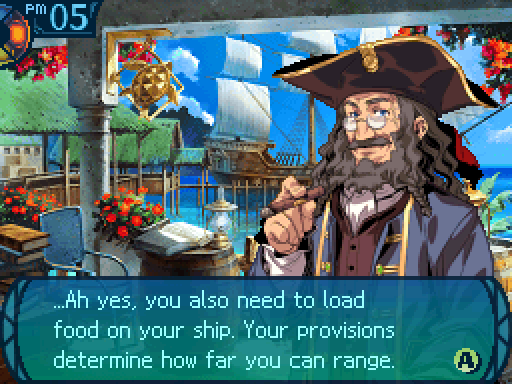 This isn�t very tasty, but it�ll keep you going. Use it to learn the ropes of charting the sea. This isn�t very tasty, but it�ll keep you going. Use it to learn the ropes of charting the sea. It�s a good-luck token, commonly hoisted by fishermen praying for a big catch. Your objective is to fill in the sea map, but voyages get pretty costly. So, I propose a deal. When you notice fish during your voyage, catch and bring them back. That�ll bring in a bit of income. Just make sure you keep your eyes on the real prize. It�s a good-luck token, commonly hoisted by fishermen praying for a big catch. Your objective is to fill in the sea map, but voyages get pretty costly. So, I propose a deal. When you notice fish during your voyage, catch and bring them back. That�ll bring in a bit of income. Just make sure you keep your eyes on the real prize. At this point, we can decide what equipment to put on our ship, although most of them cost a bit of money to use each trip.  Food is required and determines how long you can stay on the ocean.  But there's other pieces of equipment you can put on there. Like this Fishing Flag, which has a 10% chance to make more schools of fish appear on each trip. Not great, but it costs nothing to use, and we don't have any other pieces of equipment yet. Alright, let's set sail! Wait wait wait wait wait. Does anyone here know how to steer a boat? Um. Er. Do you? No. Wait, what do we do? I do!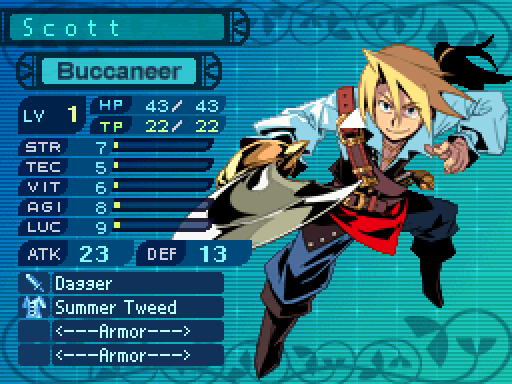 Ahoy there! Name's Scott. Ex-pirate, looking to be an explorer. I know a couple of things about steering ships! Hmm. Do you also know how to fight? We could use more members for our guild. Well, I'm a bit rusty, but I know a few tricks. Like stabbing my enemies' eyes out and pinning their heads against a wall! Mmmmmm. You're hired! Welcome aboard! Ahoy there! Name's Scott. Ex-pirate, looking to be an explorer. I know a couple of things about steering ships! Hmm. Do you also know how to fight? We could use more members for our guild. Well, I'm a bit rusty, but I know a few tricks. Like stabbing my enemies' eyes out and pinning their heads against a wall! Mmmmmm. You're hired! Welcome aboard!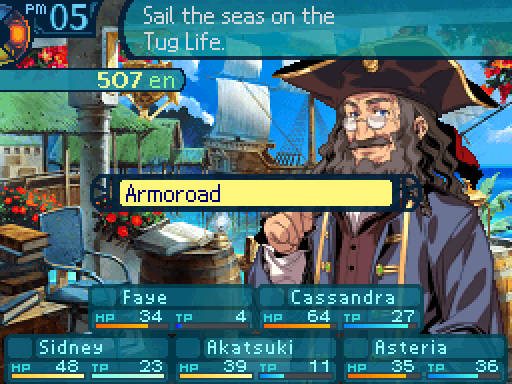  Time to set out!  DS Version DS Version 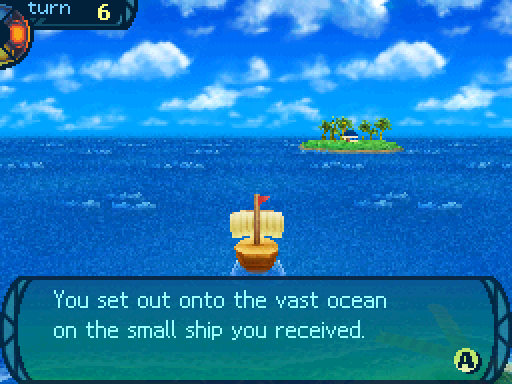 Your duty: to chart the boundless ocean, recording its shores and shoals on your map. You decide to start with the area around Armoroad to get used to navigating the seas. 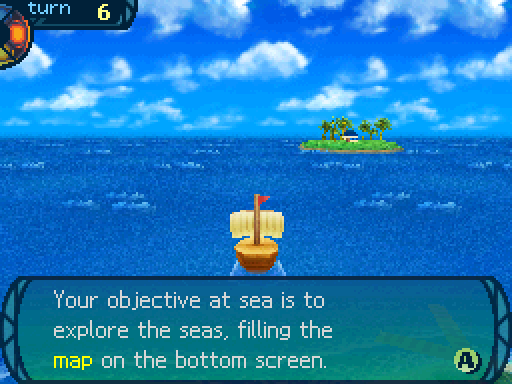  Now in case I can't be around, here's how you steer a ship. Now in case I can't be around, here's how you steer a ship.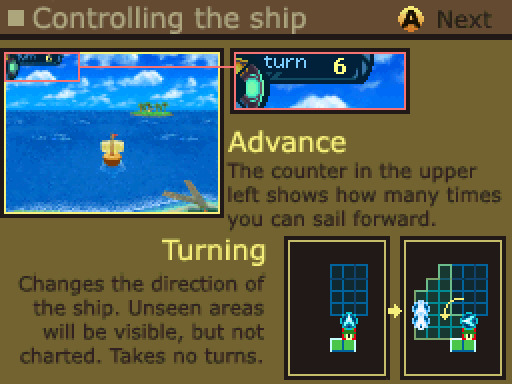 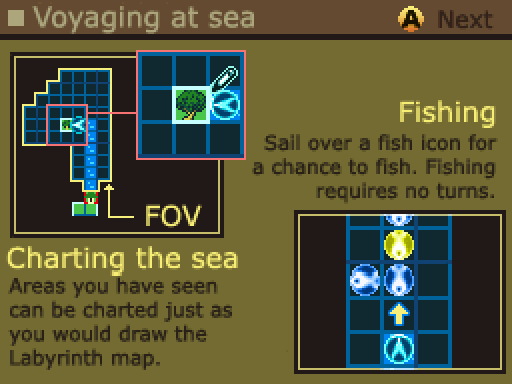  Got it! Thanks! Got it! Thanks!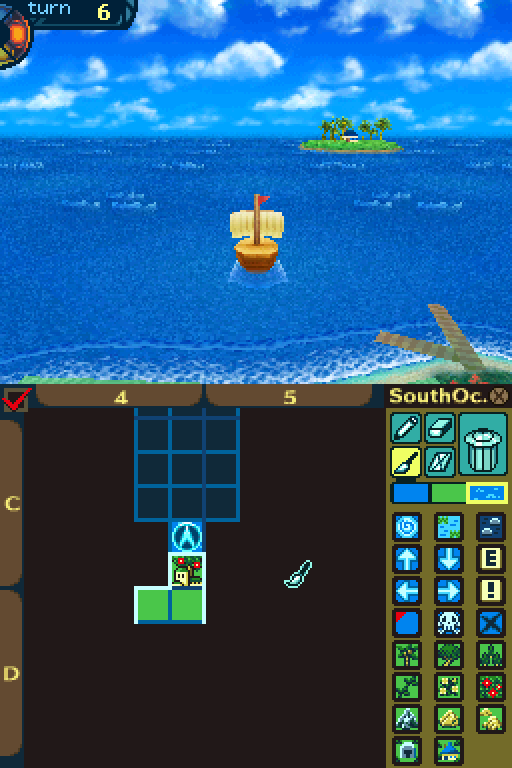 Like the tutorial said, you have an FOV. You can only paint and draw in the FOV. Areas you haven't been into are out of the question, so the sea maps can be a bit of a pain to complete. Especially since they actually take up the whole map, where in the Labyrinth there were walls and all that. Sailing is kind of like a puzzle minigame. You have a limited amount of moves, and so you have to figure out how to accomplish things with your limited tools in order to gain access to more stuff, which lets you explore more of the ocean. It's a bit of a polarizing aspect because of the puzzle elements. Some people like it, others don't. As for me, I really like sailing in this game, so I'll be looking to show off the whole thing, and make a good map of the place. Wow! Looking at the ocean from here, it's a lot bigger than I imagined! Rebuilding Armoroad is gonna be tough. Where do we even start? Perhaps we should start small and just look around. I see a few islands up north. Let's check those out. Heading north 3 spaces, we come to this island. Also, time passes by really fast when sailing. 2 hours per turn while sailing. For comparison, it takes 30 turns to make an hour pass by in the Labyrinth. Through your spyglass, you can see marines from Armoroad gathered around, seemingly hard at work. You can disembark here and talk to them or continue on your way.  You disembark, but the marines are too busy with their own tasks to notice you. You decide against pestering them and return to your ship. 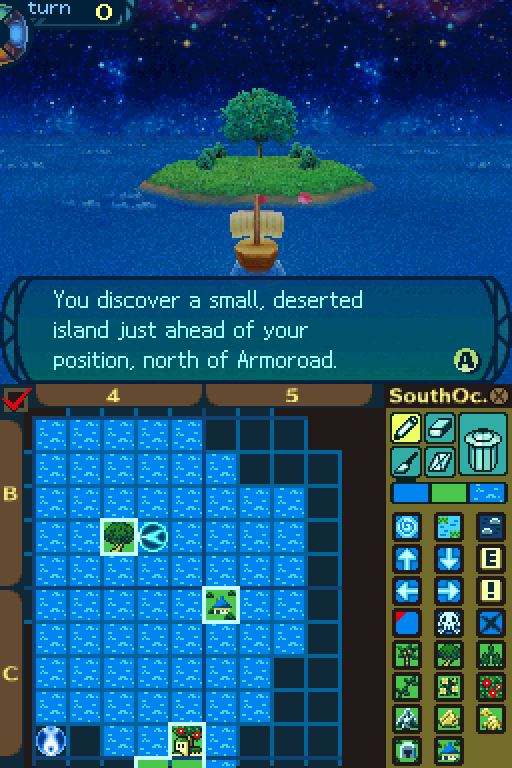 You mark the island on your map and attempt to set sail when the trees suddenly sway. Something may be nearby... You wonder if you should stop to investigate or continue sailing. 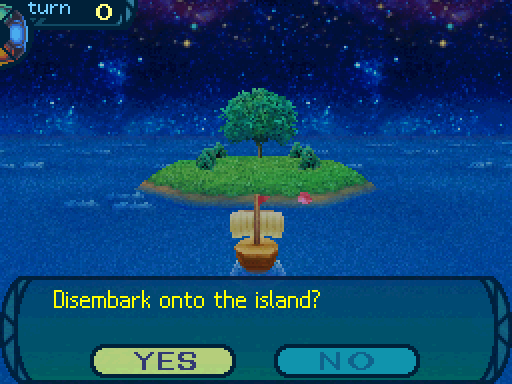 You disembark and come across a flock of Armoroad sheep with brown wool and spiral horns. From the rear of the flock, you hear the unexpected voice of a man. 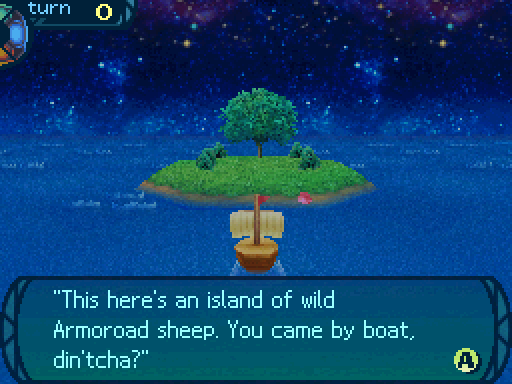 An old man emerges from behind the flock. It seems he lives on this island as a shepard. Ah, yes. I see that your sheep pens are not in good condition. Is there anything we can do to help?He explains that the sheep�s pen has deteriorated and he needs good cedar wood to fix it. The old man asks if you can bring back some Armoroad Cedar, found west of the ocean city. You make a note of his request in your logbook, though you can�t be sure when you�ll get to it. We'll see what we can do. We're out of supplies. We gotta go back. Awwwww... But this was so fun! Fine. We're out of supplies. We gotta go back. Awwwww... But this was so fun! Fine.When you run out of turns, attempting to take an action besides turning will force you to go back to the port. 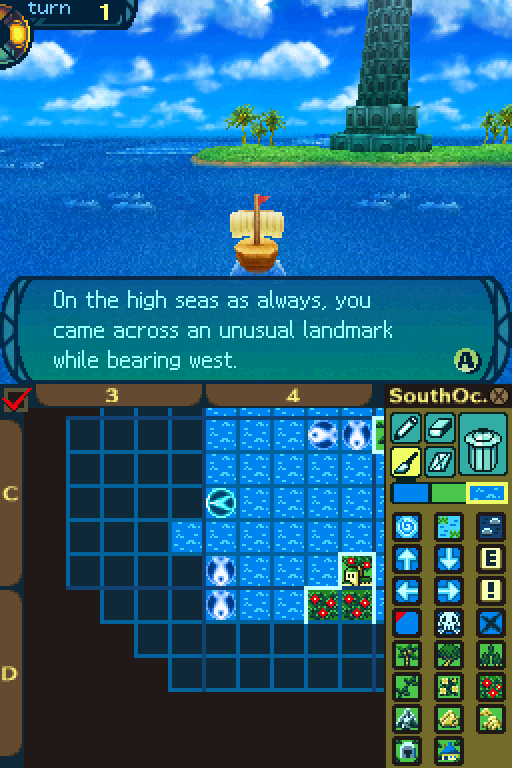 Going west from Armoroad, we come upon this lighthouse. The giant lighthouse to the west of Armoroad towers over the surrounding seas. The lighthouse has stood there for ages, its majestic bearing always visible. You may visit the lighthouse or simply go on your way. Let's take a closer look. 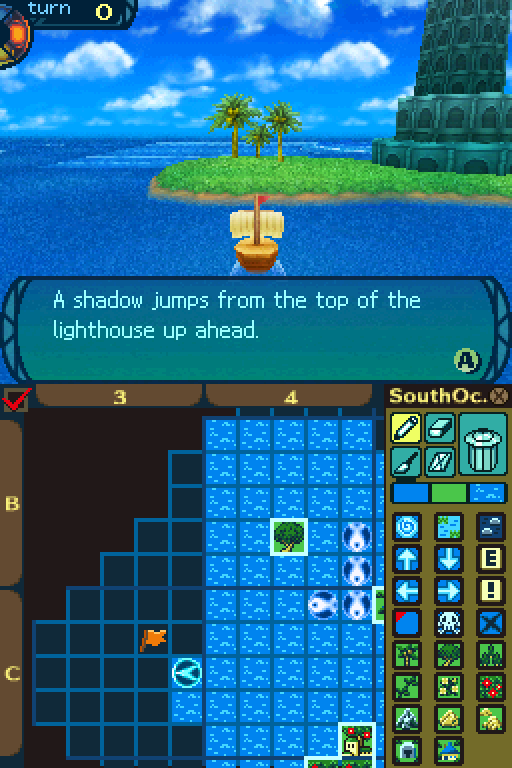 DS Version DS Version The monstrous bird flies past you, causing a strong gale, before turning its talons on you! It's coming straight for us! Can't you get us out of here!? There's no way this ship can outrun that thing! I suggest bracing for impact! This is going to hurt!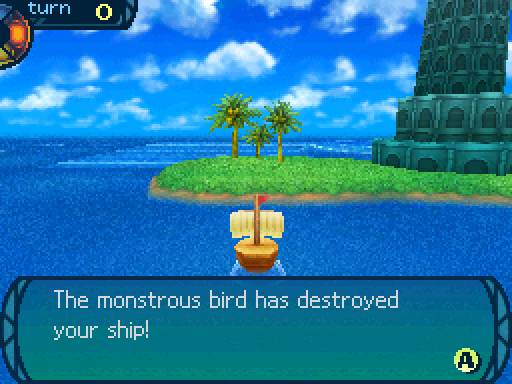 DS Version DS Version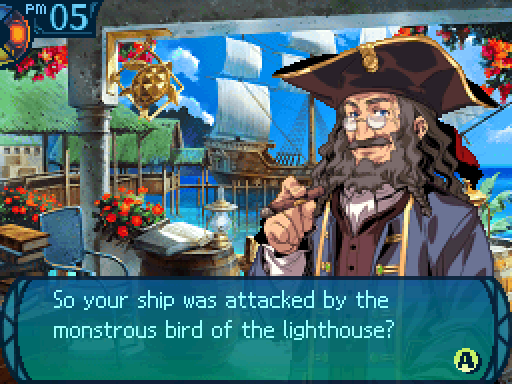 Yeah. And we had to swim all the way back. Stupid dumb bird. You're going to have to do a lot of repairs on the ship. Yeah. And we had to swim all the way back. Stupid dumb bird. You're going to have to do a lot of repairs on the ship.If you discovered the lighthouse, but went back before being attacked by the bird, he says this line instead: It looks like your investigation is going well. I�d expect no less from you guys.And then he continues on as normal. Have you heard of the Skandalia Lighthouse? Before the Calamity, it was a beacon of commerce. But ever since, its light has been extinguished by a bird monster nesting there that attacks ships. So not only are sailors forced to go without its light, we can�t even get close enough to repair it. But maybe it has a blind spot, so to speak. Would you guys be capable of finding a safe route there? The marines on a small island to the north have a stock of dried peas they could share with you. With those, you could sail further. If you can get to the beacon, we can dispatch combat engineers. This is a crucial part of restoring Armoroad. I wish you the greatest success.Normally when your ship gets destroyed, you have to pay a repair fee, which is equal to the cost of the departure fee. However, this very instance is a freebie, since the game didn't warn us beforehand. There are other ways to get your ship destroyed, and you will have to pay for repairs in those instances. DS Version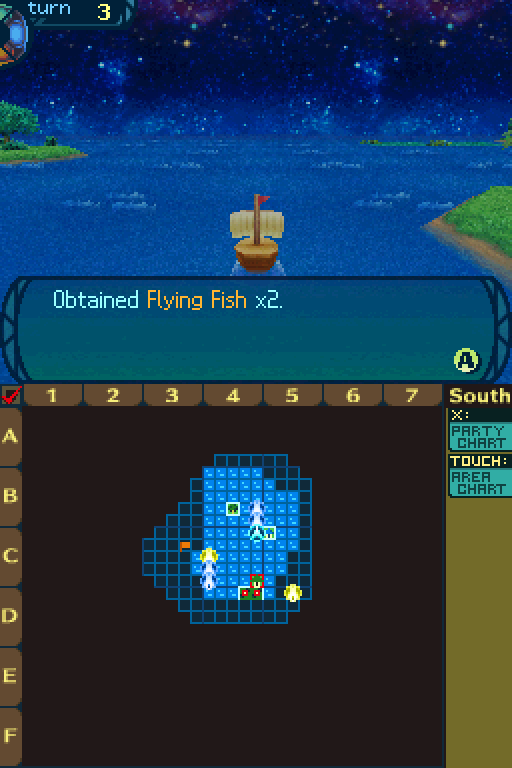 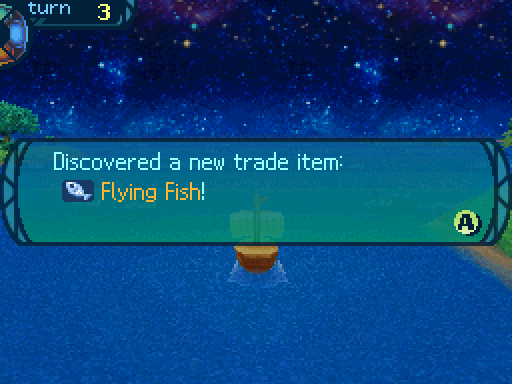 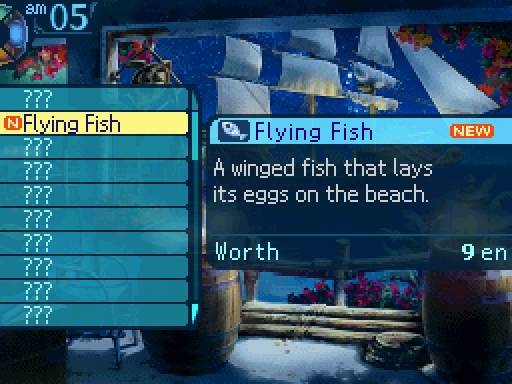 Fish can net you some money. Also, there's different kinds of fish in different locations, so be sure to fish wherever you can.  Now that the Harbormaster told us about Dried Peas, we can talk to these people now.  Oi, what brings you to this tiny island? I make Dried Peas here, as chow for the marines. Oi, what brings you to this tiny island? I make Dried Peas here, as chow for the marines.You explain that you need Dried Peas to reach the Lighthouse. ...So we're working to restore Armoroad. Can you help us out? ...Really, now. Well, if that�s the case, I�m more than willing to share some with you. They�re long-lasting in the hold AND the stomach... Marines and Labyrinth guards both love �em. They ought to come in handy if you�re out to explore the sea lanes.You thank the seaman for his Dried Peas and return to your ship.  DS Version DS Version 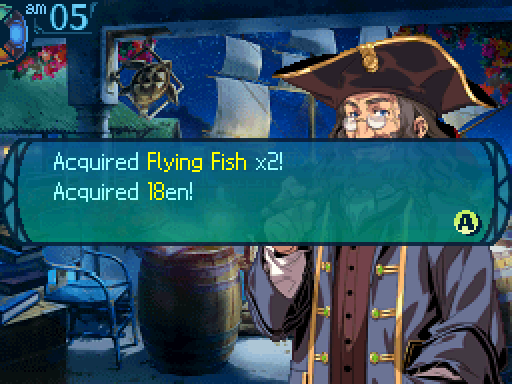 If you've acquired any goods during a voyage, the game tells you how much money you made. 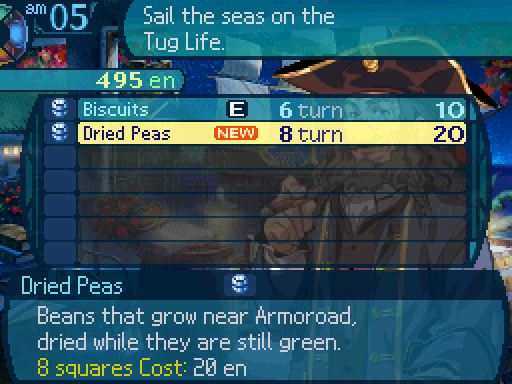 The Dried Peas are an upgrade over the Biscuits letting us more an extra 2 turns, however they cost more. Now we can't reach the Lighthouse with these. Well we can, but the bird is blocking the front door, so that's a no go. DS Version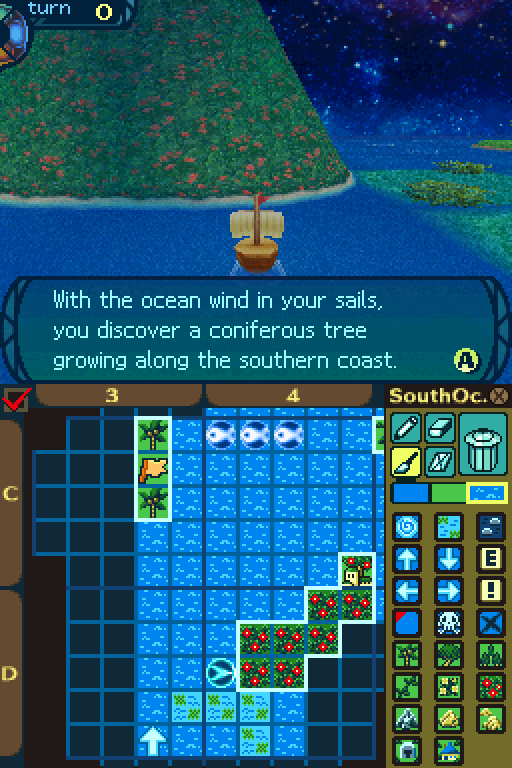 What we can do is use our 2 extra turns to reach this very spot. Looking closely, you see they are Armoroad Cedars, well-known to yield good-quality lumber. If you like, you may cut one down.  Each of you takes a saw in your hands and sets to work felling a tree. After it comes down with a crash, you load it onto your ship and return to your voyage.  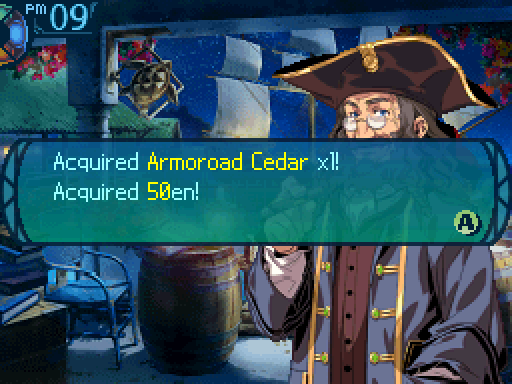 Any kind of goods, not just fish, will net us some money. 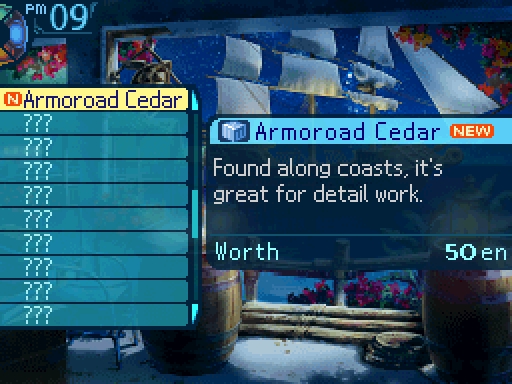 Now let's go back to the old man. 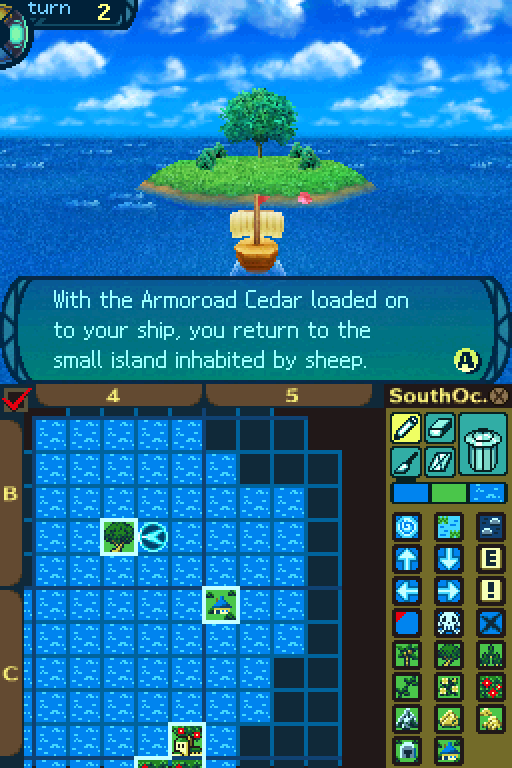 On delivering the wood to the old shepherd, he thanks you and gives you a small bag as a reward. Inside is a hunk of Sheep Cheese, a delicacy beloved of sailors on long voyages! You thank the old man and leave the island in search of more unmapped regions to explore.   Sheep Cheese is a massive movement upgrade, letting us move for a whopping 16 turns. But it's very expensive at this point in the game. It'll let us reach the lighthouse. Which we won't do yet. 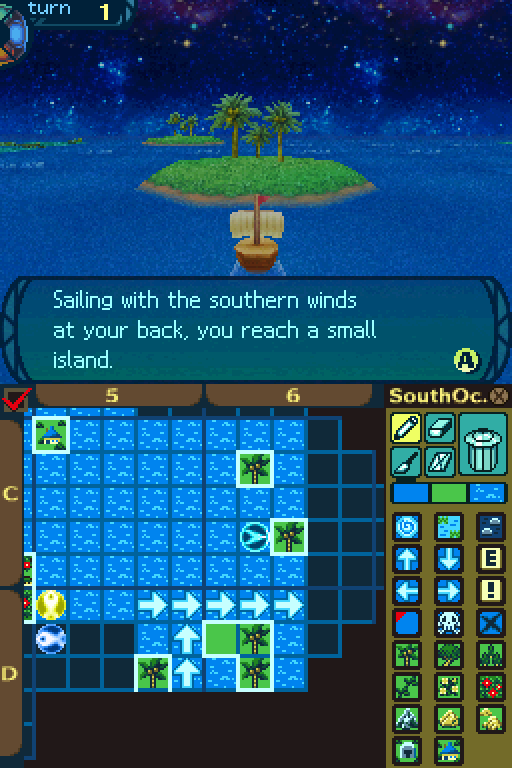 Instead, I head all the way east from the starting point. The island is small enough for a child to walk across in a day and would be easy to investigate. If you like, you may land here and explore. 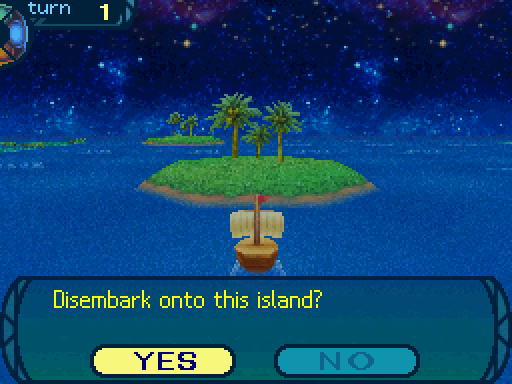 Let's take a quick look around. Scott, stay on the boat in case something happens. Will do! Let's take a quick look around. Scott, stay on the boat in case something happens. Will do!As you disembark, the vivid tropical flowers put you in mind of some island paradise. You can investigate this area near the flowers or go further into the island. 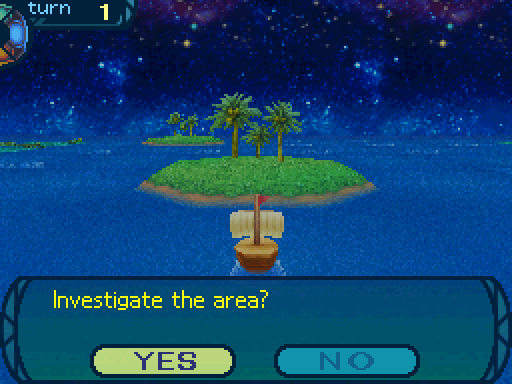 Ah, the flowers here are so very... ow ow ow OW! Why do I feel so itchy- OW! Ah, the flowers here are so very... ow ow ow OW! Why do I feel so itchy- OW!As you enjoy the sweet smell of the flowers, you feel an itchy sensation at your feet. The itch soon turns into an unbearable stinging pain! You hastily remove your boots... Poisonous ants known as Bull Ants are swarming all over your feet! AUGH!  The intense pain causes you to flee, but not before gathering some Bull Ants to take back. 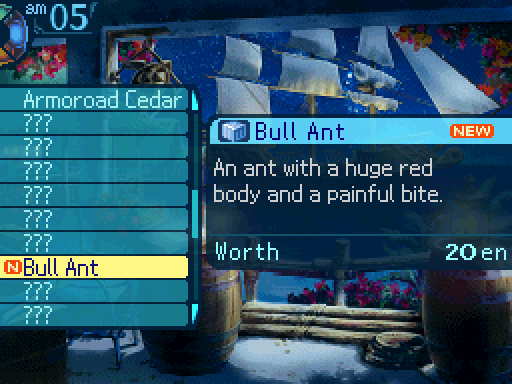 Not exactly a good prize. However, the island does contain more stuff.  This time, say no to the 2nd question. Okay, let's NOT check out the flowers this time. Agreed.Shaking off the temptation of the sweet-smelling flowers, you push ahead to reach a forest. The densely wooded vale is like a natural fortress, though it is nothing to one such as yourself. As you move on, spirits high, you reach an open area where one tree stands taller than the rest. You may investigate this area or go further into the island.  Now say yes to this question and something good will happen. As you search the area, the tall tree seeping with sap constantly draws your attention. You walk over to it and see amber-colored ants gathering around the sap. Ah, Honey Ants! They make a fantastic meal! Try some! Mmmmm...You grab one and try eating it. A mellow, thick sweetness spreads over your tongue... You recall the sailors who talked about Honey Ants, a delicacy of Armoroad. This may be that very species. You fill a bottle full of the ants and return to your ship. 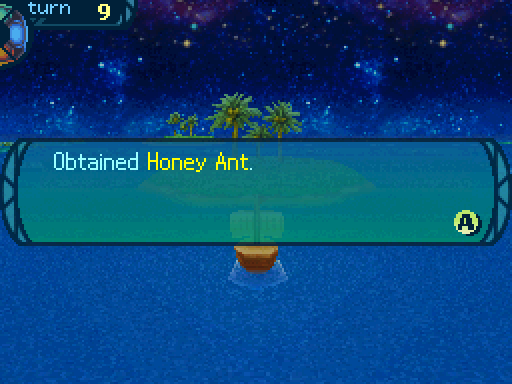  A much better prize.  From that island, head south 1 tile, and then head east to this island. A middle-aged woman spots your ship and flags you down. The lady, who comes from Armoroad, asks you to try her new batch of raisins, which are freshly dried. You pop one into your mouth, and are met with a sublime mix of sweetness and tanginess. These raisins are very delicious! Hmm, do you have any more? We could use some for our voyages.You tell her that the raisins are delicious; she seems pleased and gives you a large bag of them. The raisins would be perfect for maintaining your sugar intake on long voyages. You thank the woman profusely and take the raisins back to the ship.   Raisins are a much cheaper version of the Sheep Cheese, so there's no reason to use that piece of food ever again.  If you head south one tile from that island, you'll come across this event. As you look more closely, you can see several crates, likely cargo from the ship, floating nearby. You can salvage the crates if you wish, or proceed on your way without doing anything. 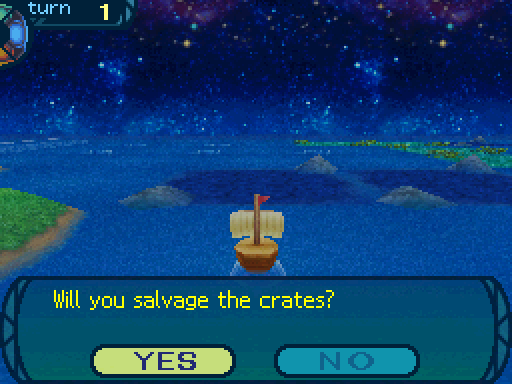 Really, you should say yes to most of these. The worst that can happen is that you'll have to restart your voyage because something bad happened. You jump into the ocean and begin bringing the crates back to your ship. After recovering all the crates you can find, you pick one and open it. You discover that the box is full of Black Pepper seeds, a high-quality spice as valuable as gold. This brightens your mood considerably, and you have the crates carefully stowed aboard. 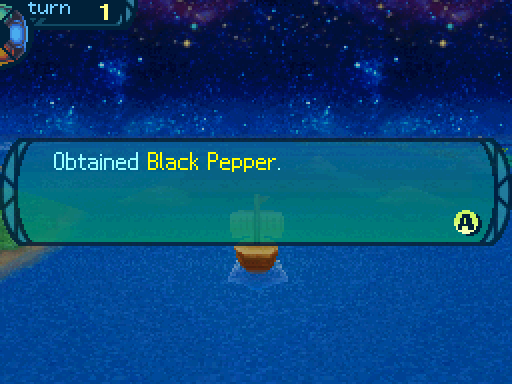 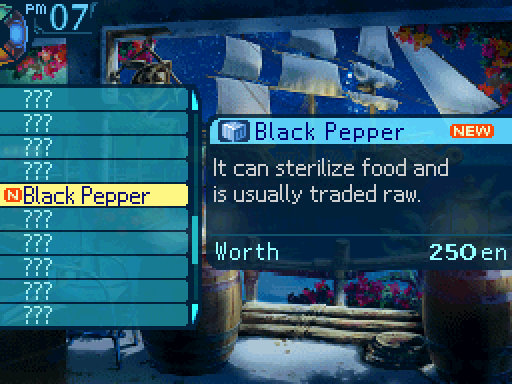 Oh yeah. I don't believe we'll be having any more money troubles for a long while.Now let's actually set out for the lighthouse. 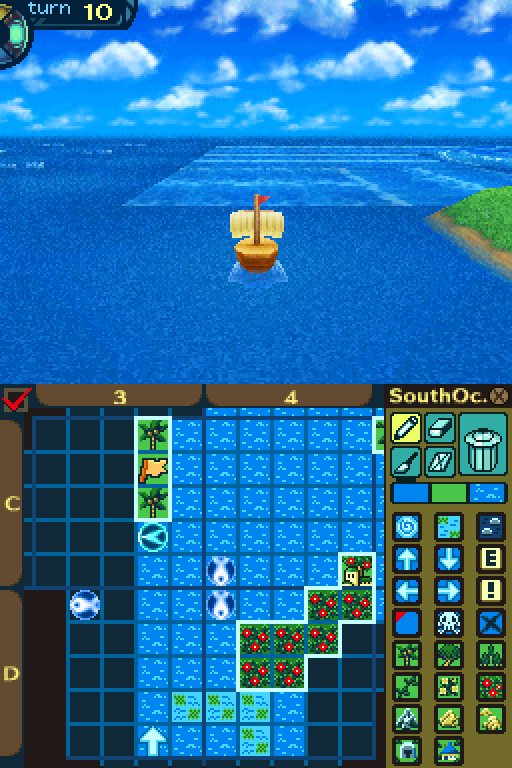 First, go all the way west without hitting the current.  Then go south 1 tile. 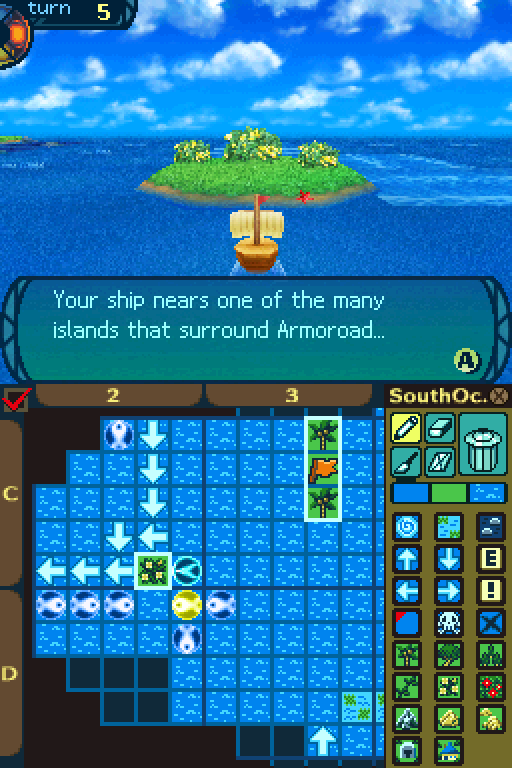 And then all the way west to this island. Be sure to check it out. It�s a featureless island, but on close inspection, you see that something has washed ashore. It looks like one of the Dolphin Statues that were once attached to fishing vessels for luck. Thinking that it may prove useful, you decide to salvage it and return to Armoroad.  The Dolphin Statue is a piece of equipment for our ship. I'll go over what it does later. 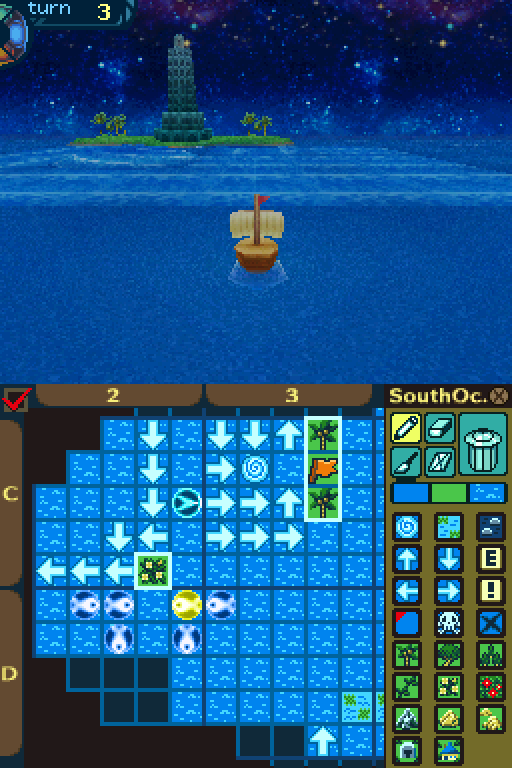 Then go up 2 tiles. Oh, and watch out for whirlpools. They'll destroy your ship, and you'll have to pay for repairs. DS Version Head east into the current, and you've reached the lighthouse! 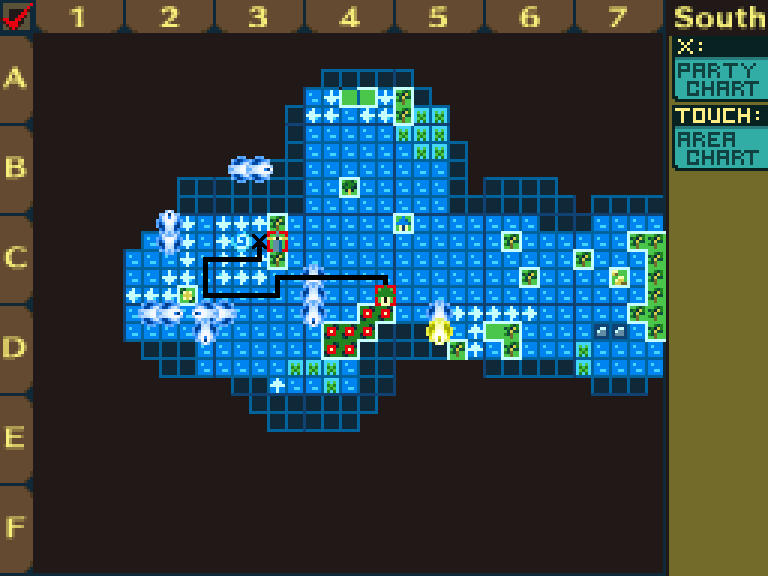 Here's a visual guide on how to reach the lighthouse, in case you couldn't follow along with the text. 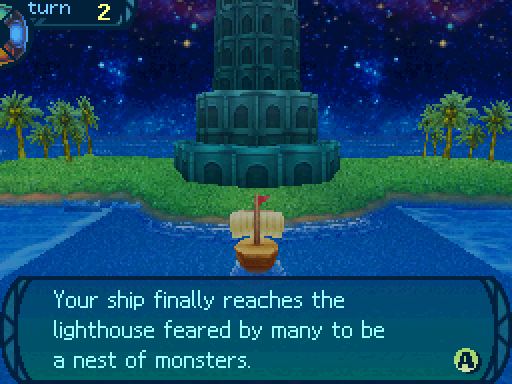 After noting its location, which none have dared near for over 100 years, you return to Armoroad. The day of Armoroad�s return to glory is now one step closer. Ha ha! We did it! If we can reach other landmarks like this easily, Armoroad will be restored in no time! I appreciate your enthusiasm, however... While the lighthouse is reachable, that doesn't fix the problem of the giant bird residing here. Hmm, think we could take it out? Since we were able to sneak in through the back, it doesn't know we're here. We should probably report back to the Harbormaster first before attempting something like that.DS Version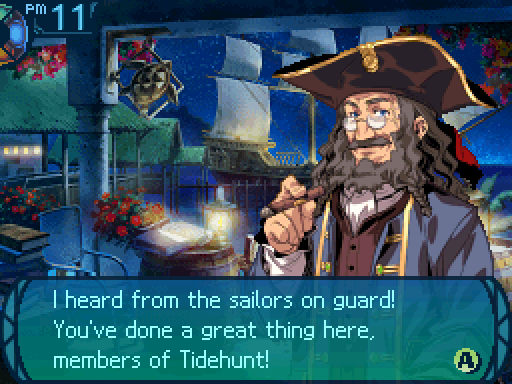 Paving the way to the lighthouse is the first step restoring our city, and we have you to thank. Keep at it and we�ll see Armoroad restored to its former glory. Or better, even! ...Here�s your reward. It�s a foremast, great for catching the wind. Try it out on your ship. Paving the way to the lighthouse is the first step restoring our city, and we have you to thank. Keep at it and we�ll see Armoroad restored to its former glory. Or better, even! ...Here�s your reward. It�s a foremast, great for catching the wind. Try it out on your ship.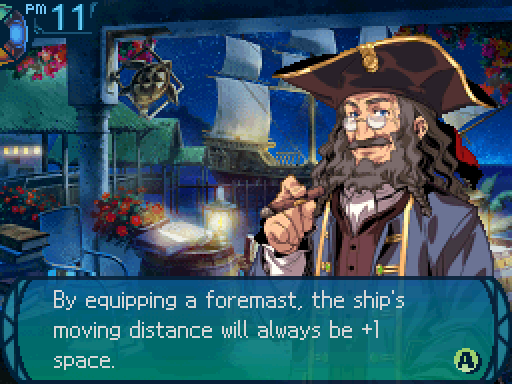   Whenever you reach a new landmark, you'll get an ship part that let's you explore more of the sea, and a huge amount of money. Also, now that you�ve secured a route to the lighthouse, we can take out the monster bird there! We�ve already had quite a few hot-blooded adventurers gathering at the port to try their luck. If you�re ready, you should try lending them a hand.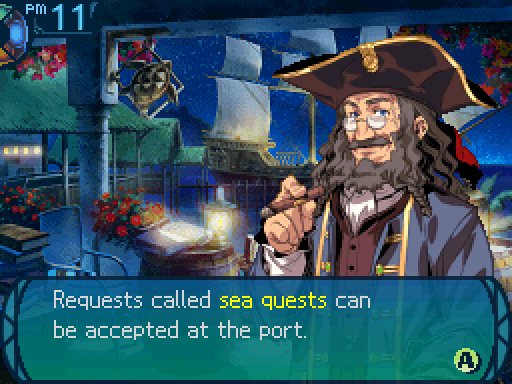 These quests can be played by connecting with other players and cooperating with them. If you�re attempting the quest alone, bring the adventurers who issued the request to the port. Try selecting a sea quest from the menu and see what you think. Sea Quests are another new addition to the game. This is the game's multiplayer feature, where up to 5 players can participate and fight together in a boss battle. There's also single player versions where the player fight with NPCs instead. Sadly, the co-op Sea Quests are impossible for me to show off, but I'll show off the single player versions. Every time you reach a major landmark, you'll unlock a new set of Sea Quests.DS Version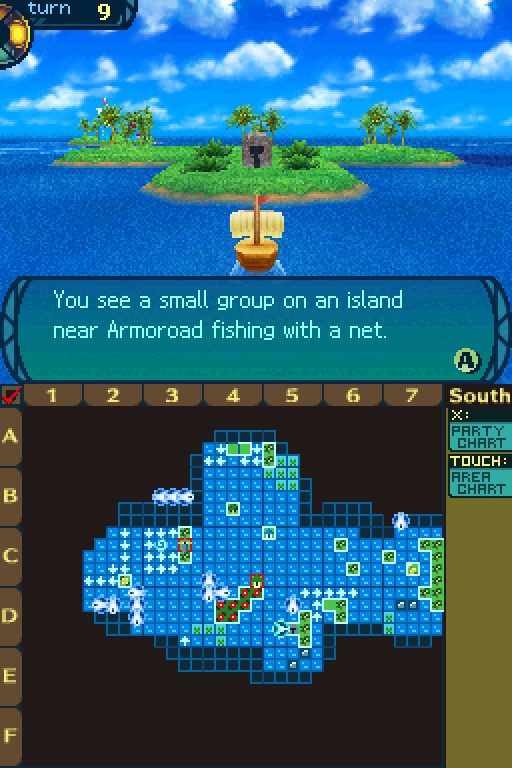 However, I won't be doing any Sea Quests this update, and instead will be sailing around some more. From the starting point, go east 2 tiles and south 5 tiles to reach this place. They claim to live on this island and fish whenever they feel a craving for seafood. The islanders offer to let you try using the Casting Net, since the sea nearby is thriving with fish. Your first duty is to draw your sea chart, but the net fishing does seem enjoyable... 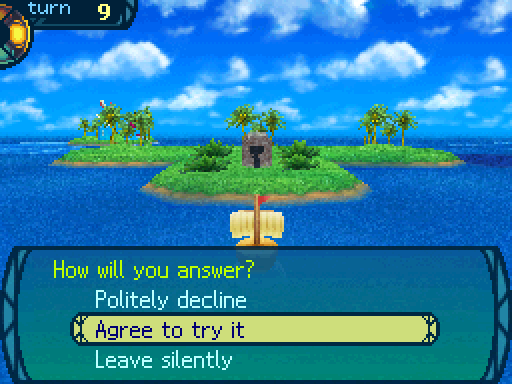 Can't hurt to try it out. Can't hurt to try it out.You decide to learn how to fish with a net. ......It isn�t long before the islanders are bowled over by your quick grasp of the technique. Easy peasy, lemon squeezy!The islanders praise your skill and give you a casting net to commemorate your meeting. Should you ever have a chance to fish in the future, the net will surely allow for a larger haul. You thank the islanders and board your ship again.  A new piece of equipment for our ship.  If you go all the way west until you run into the seaweed, and then go south 1 tile, you'll reach this island. You look closely and can see large, orange-colored fruit hanging in the tree boughs. If you are interested, you may pick the fruit.  I could use something sweet to eat. I could use something sweet to eat.You take a rowboat out to the island and yank one of the fruits off its branch. Yoink!It is about the size of a human head, and covered with thorns. The sweet smell is making you hungry. When you try it, you are disappointed to find out that the flesh is only slightly sweet. However, since you�ve come all this way, you decide to take some fruit back to the ship. 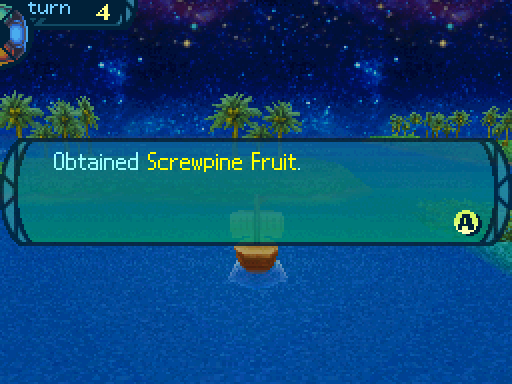 Blech, that was a waste of time. Blech, that was a waste of time.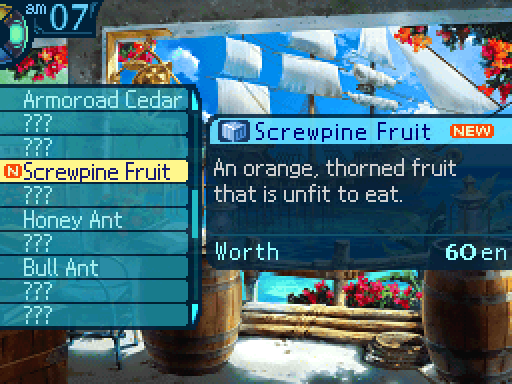 Meh. 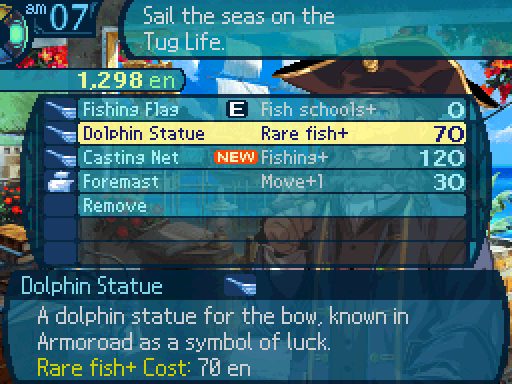 I'll go over our new equipment now. The Dolphin Statue has a 40% chance of increasing rare fish spawns (denoted by gold fish icons) by 33%. 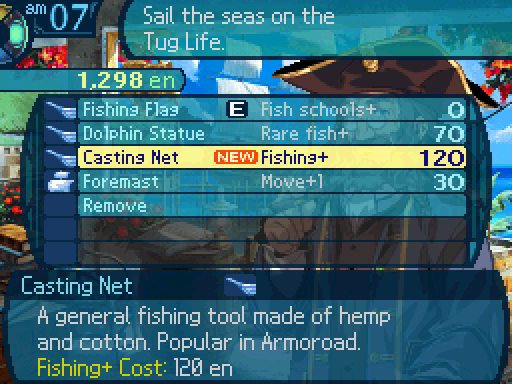 The Casting Net increases the amount of fish we haul in by a slight amount.  The Foremast will enable our ship to move 2 spaces at a time in 1 turn. However, it is impossible to move 1 tile at a time unless something blocks your path, so it's a double-edged sword and requires even more careful planning in regards to navigation.  From Armoroad, I head all the way north to this spot and this happens. Oh dear. The stars do not like the way the weather is behaving. What are they saying? We're about to experience some stormy weather. Very stormy weather. Great, because that's what we really need right now.Nautical folklore refers to this as the Fire of Helena, and fear it as an omen of storms. This puts you in a gloomy mood as you continue your voyage...  UGH. And sometimes, these events happen. They'll trigger when you're in a specific spot at a specific time. Sometimes they'll do what you just saw and take away a turn. These only happen once, so they're just an annoyance. Although other times you may find a special item, or gain some extra turns. 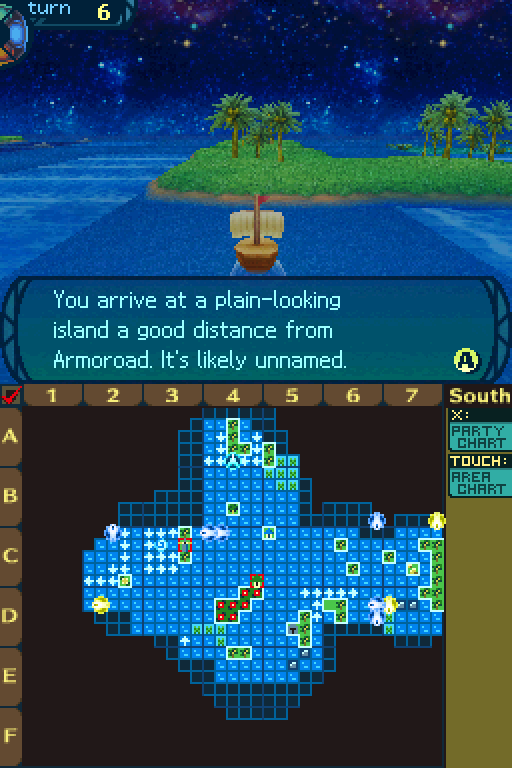 You are about to pass it by without a second glance when Asteria lets out a shout. Oh! Oh! Oh! Look there!Asteria excitedly says that there is a barrel wedged in a crevice in the cliffs. Oh what an exciting discovery! What could possibly be inside? Treasure? Trade products?You use a telescope to take a closer look, and you do indeed see a barrel as Asteria claimed. If you are interested in the barrel, you are free to recover it. 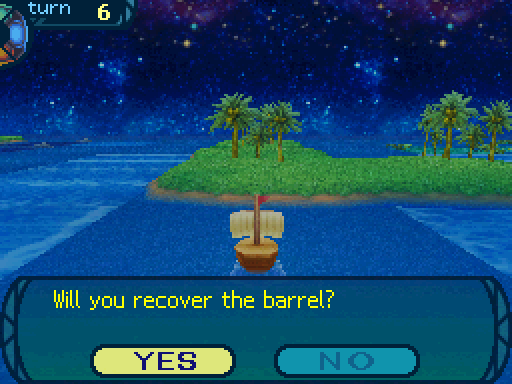 You disembark from the ship and head towards the crevice in the cliff face. You reach the cliff and find more barrels, stacked together behind the first. You open one and discover a crystalline stone known as Niter, a material used for gunpowder. Another ship must have stowed this shipment here, fearing being wrecked by violent currents. You decide to load this cargo onto your own ship.  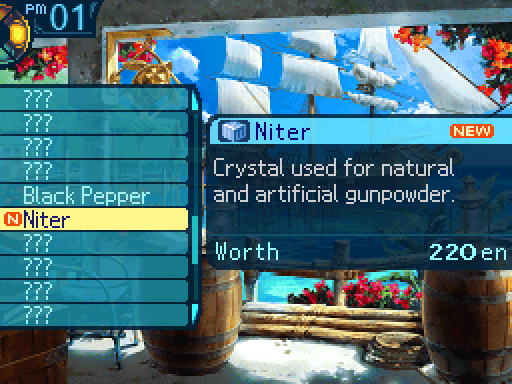 Not as valuable as the Black Pepper, but still a nice find.  I reached this spot by going north 6 tiles, west 12 tiles, north 1 tile, and then west 1 tile. On it, you can see several well-populated villages... Apparently the island has been colonized. When you disembark, a tall old man who claims to be a weaver by trade greets you. He tells you that he made too many Fishing Flags to ship to Armoroad and offers you one. Oh, how much do you want for it?You try to compensate him, but he stubbornly refuses. Huh? Why don't you want us to pay you?When you ask why, he replies that he is happy to see it used by youth unfamiliar with his culture. You promise him that you will treasure the gift, and take it back to your ship to hoist it. Um, okay. Thanks! Huh, wonder if this'll attract a bunch of fish.  The Large Flag is an upgrade over the Fishing Flag and has a 50% chance to increase the number of fish on the sea by a moderate amount whenever you set out on a voyage.  Something to keep in mind is that you can't travel through seaweed tiles. At least, not yet. 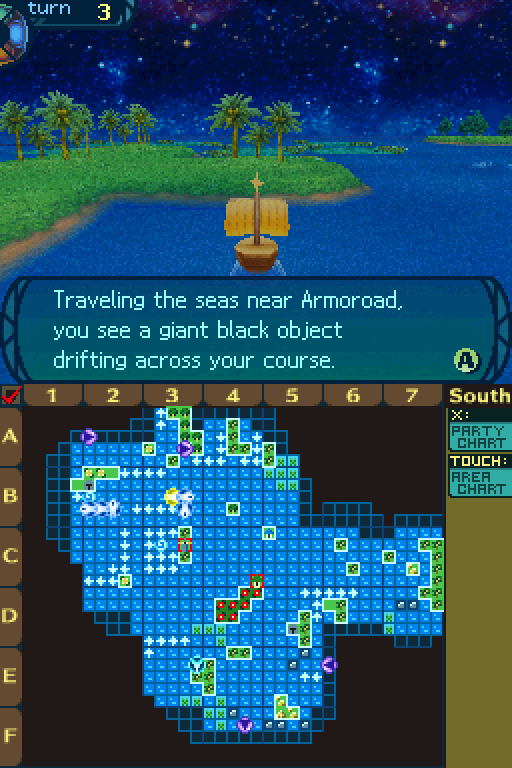 The route here is a little convoluted, as you need to go east 2 tiles, south 10 tiles, west 5 tiles, north 3 tiles, west 2 tiles, and south 1 tile. Whoever was fishing around here clearly has no honor! Ugh, that poor little thing.Looking closely, you realize that it�s a baby whale, apparently injured by a harpoon. You are aware that there is an unspoken rule between fishermen not to hunt baby whales. This harpoon must be the work of a heartless adventurer hunting for sport. You have the supplies to treat the injured baby whale, should you choose to do so. 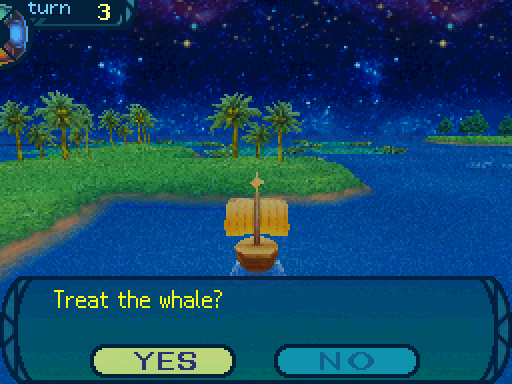 Come on guys, help me out! Come on guys, help me out!The whale is too weak to resist as you haul it in to treat it. You pull the harpoon from its side, rub ointment in the wound, and bandage it up. But the whale doesn�t look like it�s going to swim away anytime soon... Did the treatment succeed? Don't tell me that little thing died, and we did all that for nothing! No, it'll be fine! Look!As you ponder what to do, you see a huge black shadow the size of a schooner approaching you. The baby whale uses its remaining strength to swim toward what looks to be its mother. The two whales circle around you, as if in thanks, and then vanish over the horizon... You watch them go before turning to examine the harpoon that pierced the whale. On closer inspection, it is Ned�s Harpoon, which once belonged to the legendary fisherman! It is still in good condition and may be put to use once it has been repaired. You stow the harpoon in the hold in the hopes that it will prove useful. 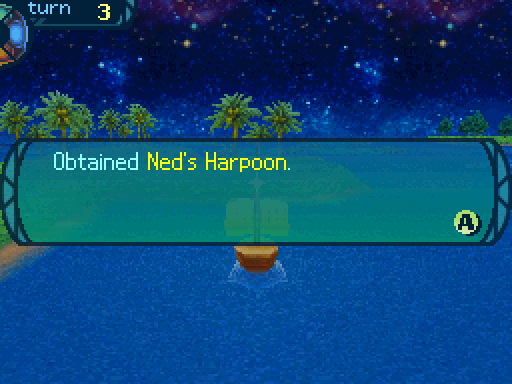  Here's another hazard to look out for, pirate ships. Running into them will destroy your ship, and they'll actively chase you down if you get into their line of sight. These are marked by purple circles with blue arrows in them. 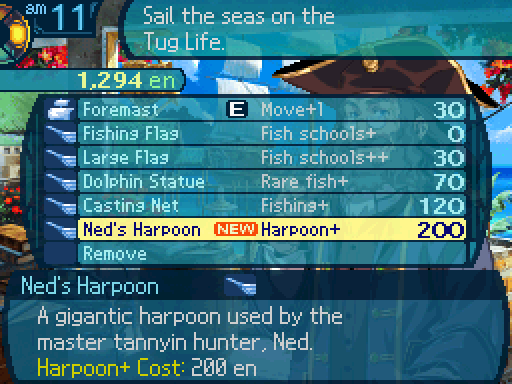 Ned's Harpoon is used to hunt down big fish. These fish normally take multiple turns to take down and reel in. However, Ned's Harpoon shaves off 4 HP off of these big fish if you have it equipped, making them easier to reel in. But enough goofing around, let's head for another major landmark.  You'll need these to reach it. 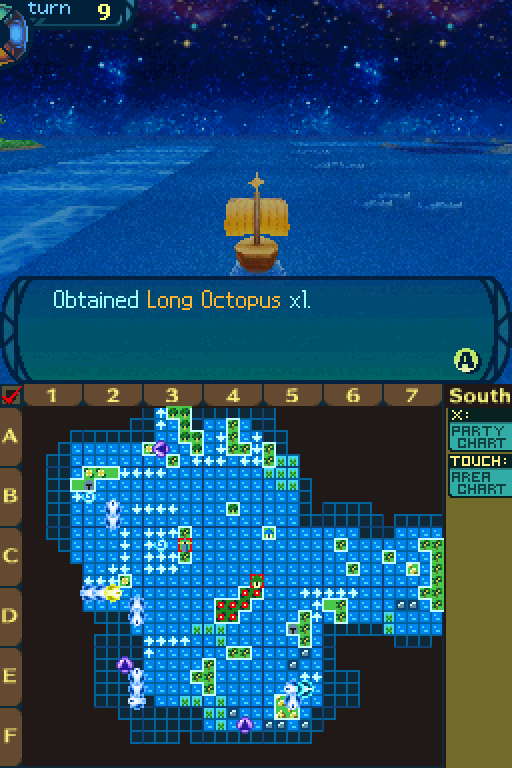 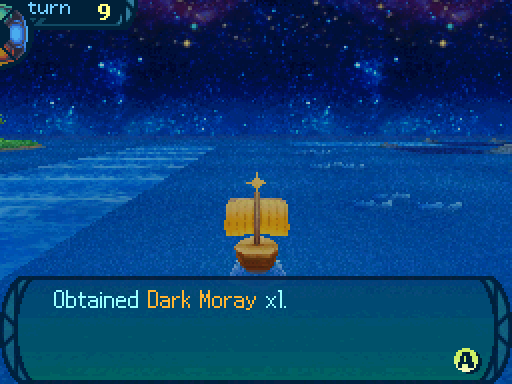 I snag some new fish on the way there.   Ech. At least I got more money through other means. 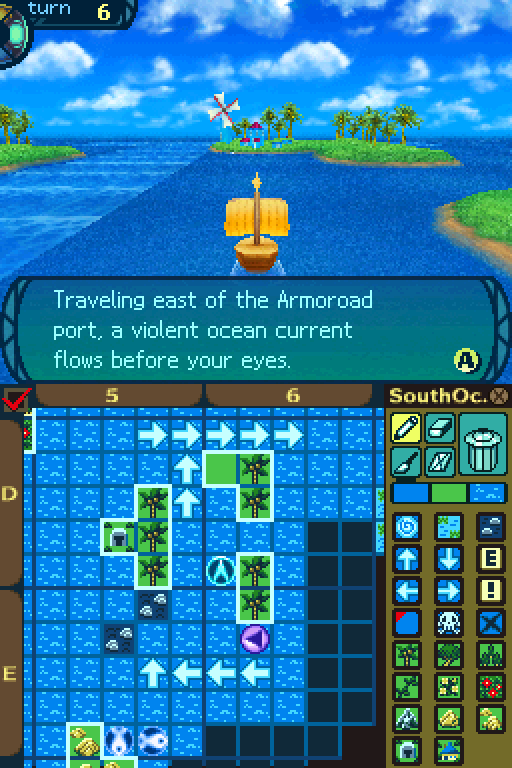 Beyond that current, you can see a town with a windmill sitting on a hill. That must be Batavia, whose commerce is known far and wide! You would like to find a way across the current to reach it, but you�re not sure if you can. But I've already crossed the current.  Yeah, the scripting for these locations occurs within a certain radius, and it can be possible for the flavor text to be completely off with its description and reach the location immediately. If you go back to the port after triggering that message, the Harbormaster has this to say: Welcome back, everyone. I daresay you�ve found your sea legs. You probably noticed, but some of the waters near here are prone to severe currents and raging tides. The Calamity changed the face of the world. We aren�t the only city to suffer from its effects. One such city is Batavia. There was a time when trade flourished with them, because they�re so close. Which brings me my request... See if you can chart a safe route to Batavia. If we hope to restore Armoroad�s glory, a route to Batavia will be instrumental. I�m counting on you.DS Version Yeah, the scripting for these locations occurs within a certain radius, and it can be possible for the flavor text to be completely off with its description and reach the location immediately. If you go back to the port after triggering that message, the Harbormaster has this to say: Welcome back, everyone. I daresay you�ve found your sea legs. You probably noticed, but some of the waters near here are prone to severe currents and raging tides. The Calamity changed the face of the world. We aren�t the only city to suffer from its effects. One such city is Batavia. There was a time when trade flourished with them, because they�re so close. Which brings me my request... See if you can chart a safe route to Batavia. If we hope to restore Armoroad�s glory, a route to Batavia will be instrumental. I�m counting on you.DS Version However, I already reached Batavia!  Here's the route I took to reach this place. 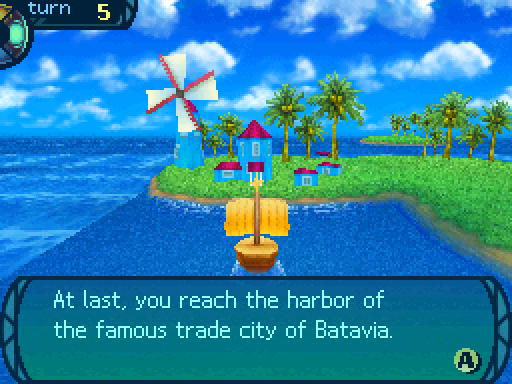 You overcame freak currents and eddies, as well as dastardly pirates, to reach this place. You note the route to Batavia on your chart and decide to return to Armoroad and report. The day of Armoroad�s return to glory is now one step closer. DS Version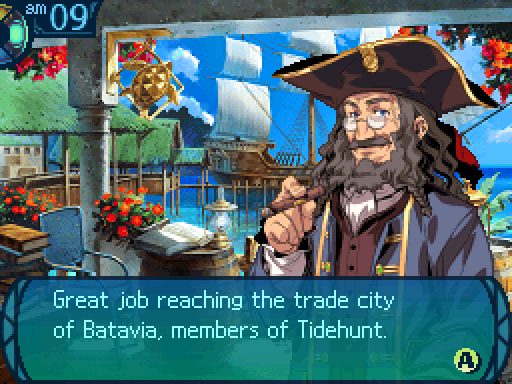 I received a report from a marine on guard. It must have been tough navigating those severe currents. Your achievements are a beacon of hope for all Armoroad. This isn�t much, but I�d like you to have it. I received a report from a marine on guard. It must have been tough navigating those severe currents. Your achievements are a beacon of hope for all Armoroad. This isn�t much, but I�d like you to have it. 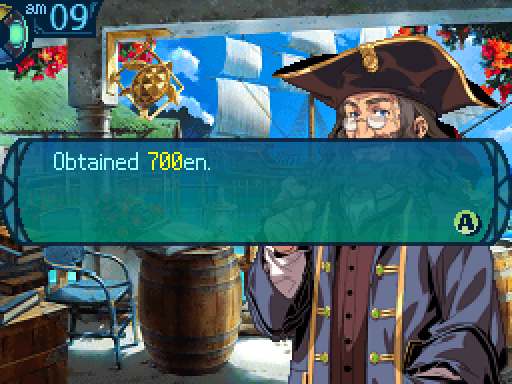 It�s called sauerkraut, salted cabbage invented by a Batavian merchant. It�s extremely useful as food for voyages, so don�t just snack on it! It�s called sauerkraut, salted cabbage invented by a Batavian merchant. It�s extremely useful as food for voyages, so don�t just snack on it!We now have access to Batavia's Sea Quests, but our party is too weak to take those on right now. 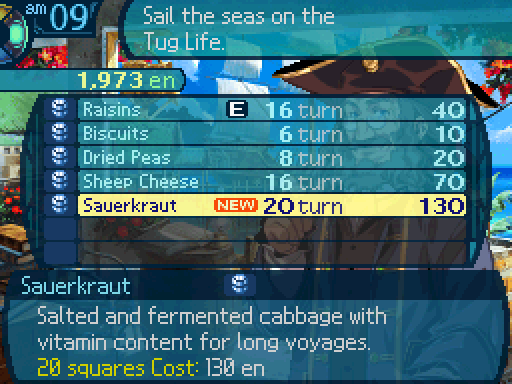 Saeurkraut is our next food upgrade, giving us 4 more turns. Combined with the Foremast, there are now a few more locations we can reach. DS Version Like the top-right corner. Oh, and I got a new fish. 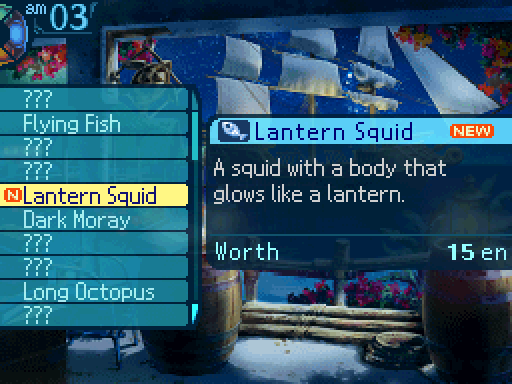 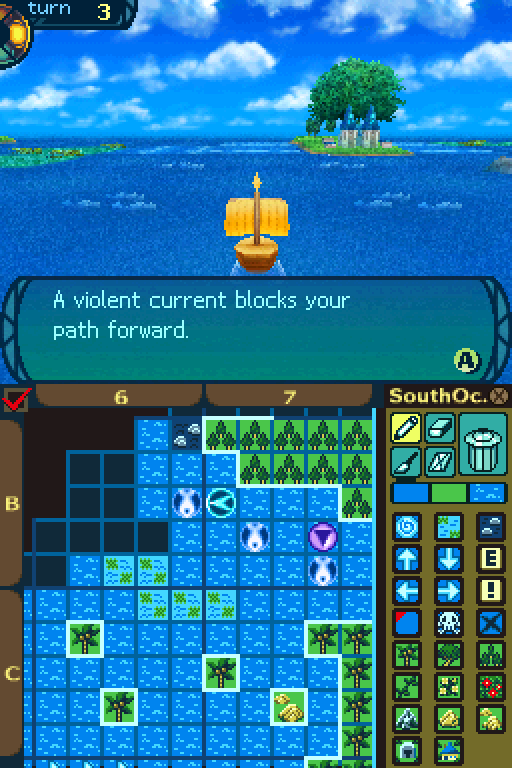 But... oh forget it. Squinting, you can see many ships moored at a harbor beyond the current. That must be Ayutthaya, the well-known commercial port! You can try to find a way there, if you like, or you can explore more easily accessible regions.  You can see orange-haired monkeys looking towards your ship in an amiable fashion. If you want to get closer to the monkeys, you could disembark and approach them.  Ooh, monkeys! Can I look at them too? I don't know. I mean, someone should look after the ship. I'm sure our ship will be fine. What's the worst that could happen? I really don't think this is a good idea. But if you insist... Ooh, monkeys! Can I look at them too? I don't know. I mean, someone should look after the ship. I'm sure our ship will be fine. What's the worst that could happen? I really don't think this is a good idea. But if you insist...When you disembark, the monkeys don�t run away. In fact, they run towards you. The monkeys have white faces with flat noses, and looking at them makes you smile. You spend a while playing with the monkeys, and return to your ship.  Fade to black.  Other monkeys have snuck aboard and raided your food storage while you were on shore! Regretting that you left the ship unguarded, you return to the voyage with what little remains. Oh, what!? drat monkeys, tricking us with their cute looks! I warned you, but nooooo, you didn't want to listen. How about we just never mention this again?  And because of that, we can't reach Ayutthaya. Never trust a monkey.  Have you heard of the commercial port of Ayutthaya? It�s famous for the goods we once exchanged. But the Calamity made the waves near there too high, sinking countless ships. Can I count on you to find a way around the waves, so that traders can sail to Ayutthaya safely? If you succeed, both Armoroad and Ayutthaya will reap the benefits of the trade routes. Have you heard of the commercial port of Ayutthaya? It�s famous for the goods we once exchanged. But the Calamity made the waves near there too high, sinking countless ships. Can I count on you to find a way around the waves, so that traders can sail to Ayutthaya safely? If you succeed, both Armoroad and Ayutthaya will reap the benefits of the trade routes.Take note of that big fish that appeared. That was the big fish I was talking about earlier. We're going after it. 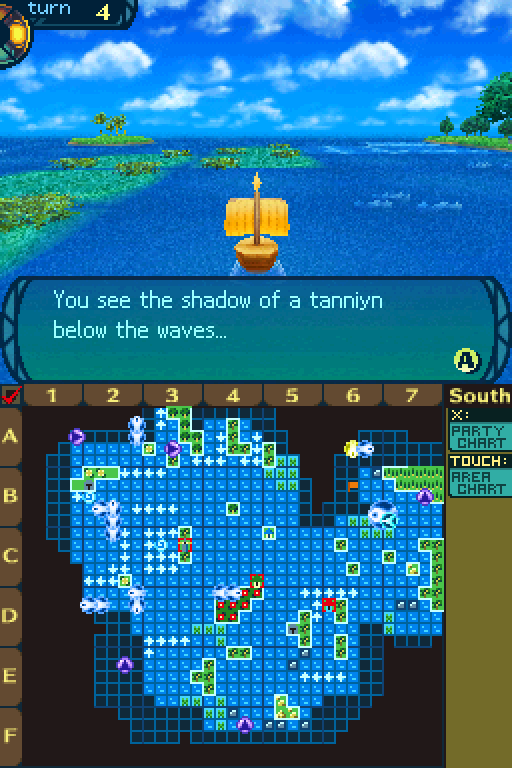 Unfortunately, I can't take Ned's Harpoon with me since I need the Foremast to reach this place.   The text here indicates how much HP the Tanniyn has left. 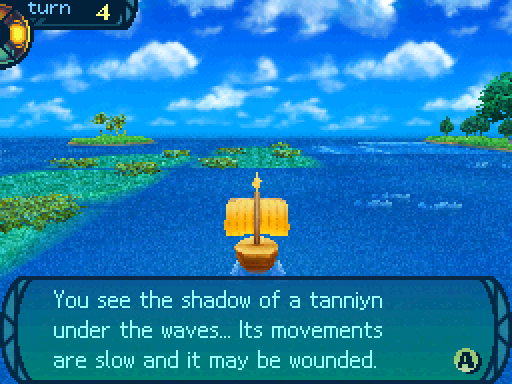 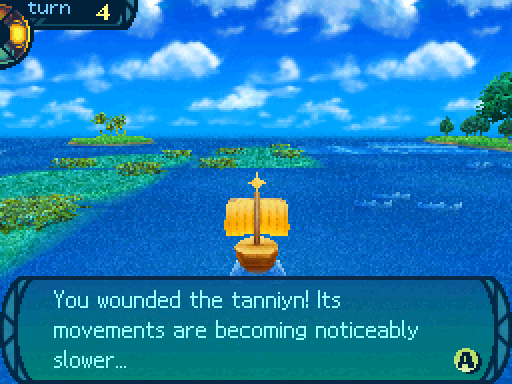 You have to repeat this a few times to get the Tanniyn. Unfortunately... Ha! A few more hits should take it out! Move the ship away! It's tail is about to- oh no.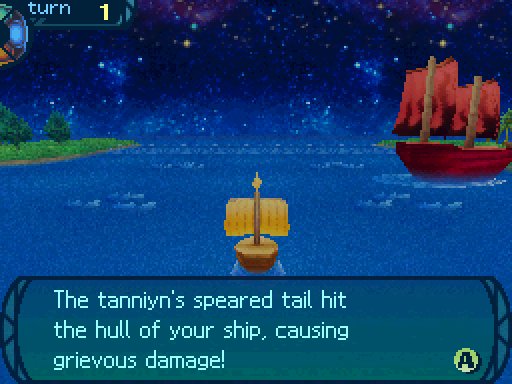 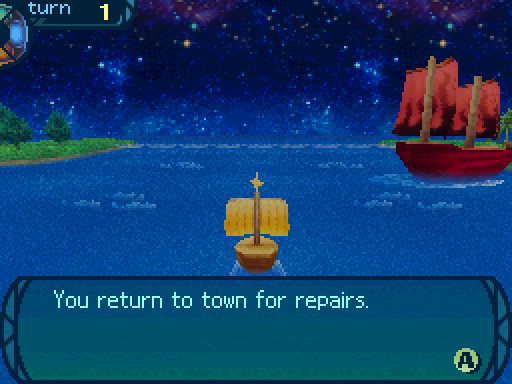  At least we didn't have to swim back this time. At least we didn't have to swim back this time.Each time you launch a spear, the Tanniyn has a chance of retaliating and destroying your ship. The only way to decrease the chances of that happening is to use a harpoon to take it down quicker. Also, sometimes the Tanniyn will disappear after wrecking your ship, but fortunately, this one didn't. So we can have another go at it. 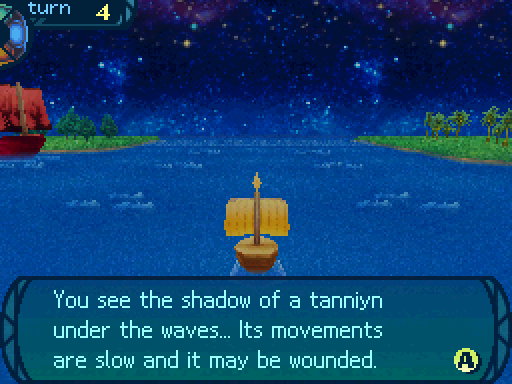 If a Tanniyn still sticks around, it'll have the same amount of HP right before you had to go back to town for whatever reason. 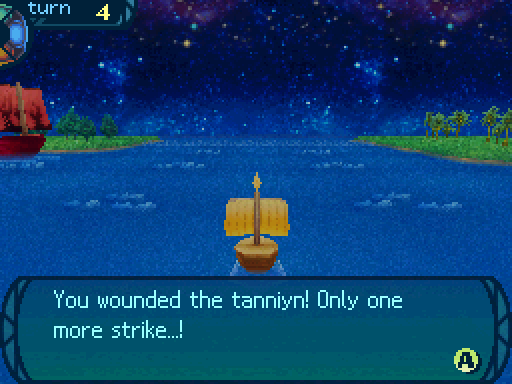 In some cases, this doesn't actually mean that one more hit will finish it. Just that its HP is really low. 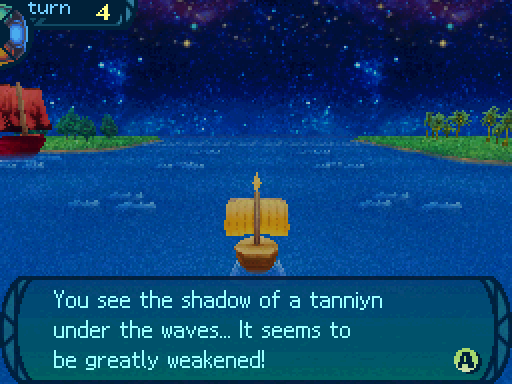 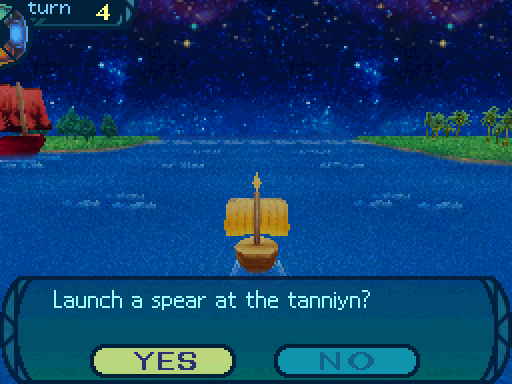 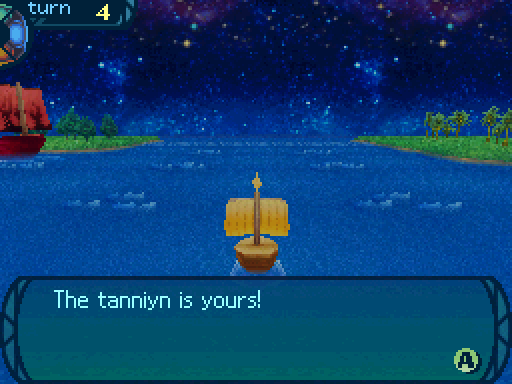 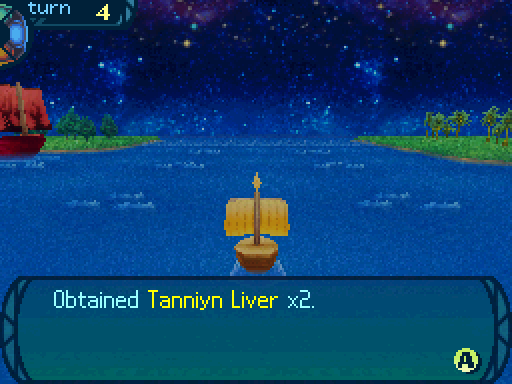  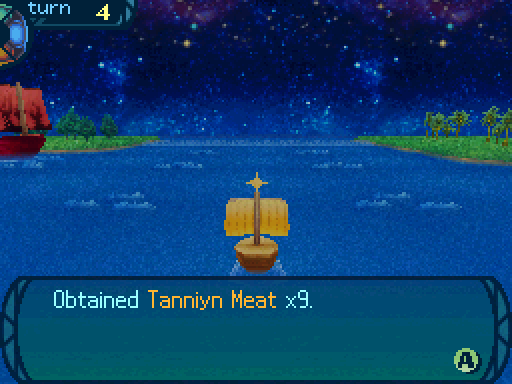 Hmm, how much did we just make? 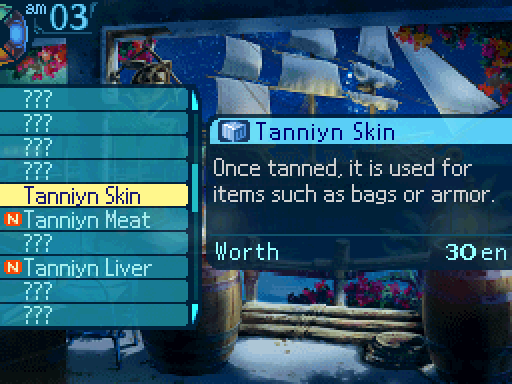   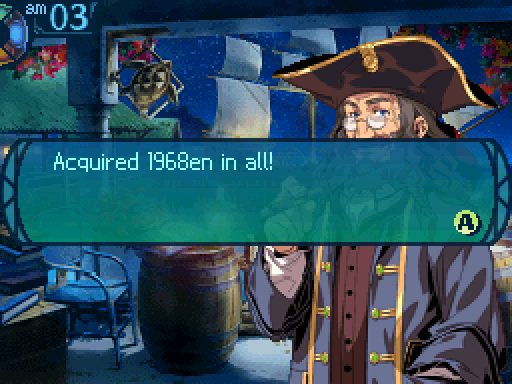 Yeah, sailing is a great way to make money early in the game. There's better ways to make money as you progress, but for now this will do.DS Version Yeah, sailing is a great way to make money early in the game. There's better ways to make money as you progress, but for now this will do.DS Version  The route I took to get here. 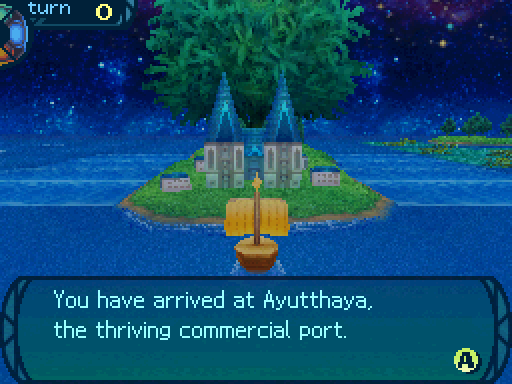 It took perseverance to navigate the sudden ocean currents and establish a route here. You note the route to Ayutthaya on your chart and decide to return to Armoroad and report. The day of Armoroad�s return to glory is now one step closer. DS Version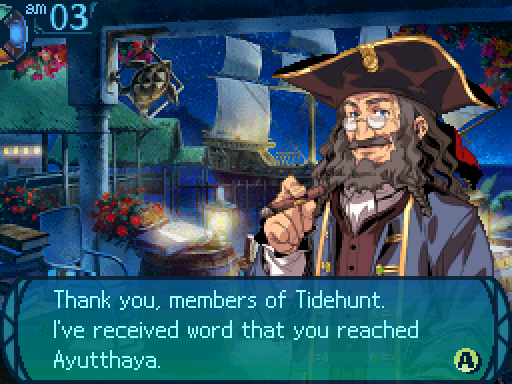 Ayutthaya has a long history... It�s been a monarchy since ancient times. It�s also a famous port of call for voyaging ships. The carpenters of Ayutthaya are quite skilled. Thanks to you, we should start to see activity along the route to Ayutthaya again. So... I took the liberty of contacting them and ordered some improvements for your ship. Is it really okay for you to do this? Hello? We need more ship parts so we can restore Armoroad. Can't travel the ocean without those. Oh, right. Don�t worry about it. It�s just my way of saying thanks. Besides, the carpenters can�t come over here until their work in Ayutthaya is done. I guess you�ll have to be patient for a little while. Ayutthaya has a long history... It�s been a monarchy since ancient times. It�s also a famous port of call for voyaging ships. The carpenters of Ayutthaya are quite skilled. Thanks to you, we should start to see activity along the route to Ayutthaya again. So... I took the liberty of contacting them and ordered some improvements for your ship. Is it really okay for you to do this? Hello? We need more ship parts so we can restore Armoroad. Can't travel the ocean without those. Oh, right. Don�t worry about it. It�s just my way of saying thanks. Besides, the carpenters can�t come over here until their work in Ayutthaya is done. I guess you�ll have to be patient for a little while. We still get the money, but we won't get the ship part for reaching Ayutthaya until we get to the 2nd Stratum. So while you can ignore the sea in favor of exploring the Labyrinth, you can't ignore the Labyrinth in favor of exploring the sea. We can now access Ayutthaya's Sea Quests, except the party is way too weak to even think about taking those on. There's one last landmark we can reach for now, but this update is getting a bit long. So I'll finish up the voyage for next time. We'll also see the Sea Quests then. Araxxor fucked around with this message at 00:21 on Aug 13, 2015 |
|
#
¿
May 25, 2015 06:10
|
|
|
Rigged Death Trap posted:The Taniyn only retaliates if you spear it while on it's tail. That's what I thought at first and made sure to spear only the head in one of my playthroughs.  But no, it really is just random. Glazius posted:Sea exploration seems pretty neat once you get the hang of it. I like that they kind of naturally throttle you based on your labyrinth experience. No fights when you're on the sea, there's only hazards that can destroy the ship. Actual sea fights take place in the Sea Quests.
|
|
#
¿
May 25, 2015 16:20
|
|
|
Update 7: Meregho Saeno That bird just learned the hard way that ice isn't always nice.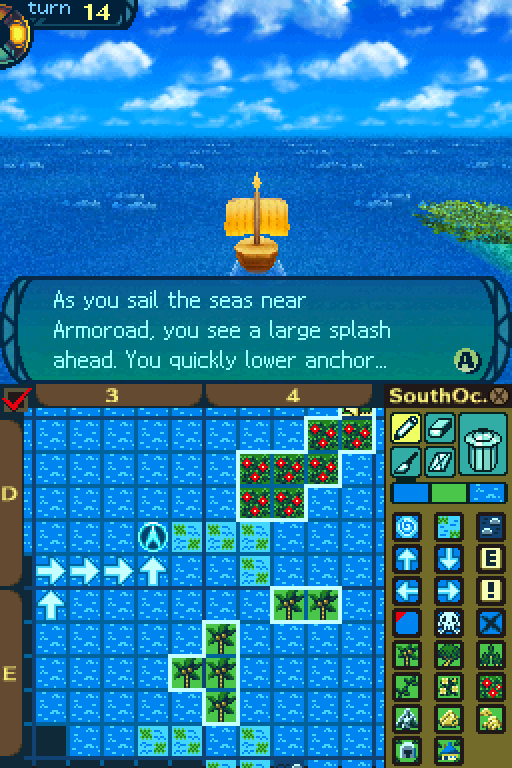 This spot is to the west of Armoroad. Looking closely, you can see a fish easily larger then your ship battling a crawfish-like creature! The crawfish has the fish in one of its giant claws, but the fish is thrashing about wildly! However, lacking the means to escape the crawfish�s viselike grip, the fish falls lifeless. The crawfish pulls its prey into the deep and disappears. Where it once was, you spot something... In the crimson-stained waters, you find a Crawfish Claw, likely knocked off during the struggle. If you wish, you can pull the Crawfish Claw aboard and take it with you.  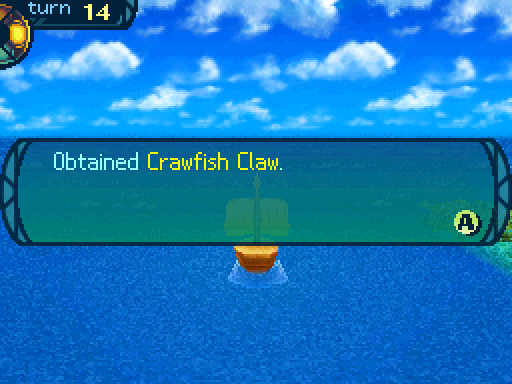   There are holes dug into the rock, obviously created by the hand of man. There may be some kind of ore left for you to mine, but it�s possible nothing remains. You are free to attempt to mine the cliff before you if you wish. 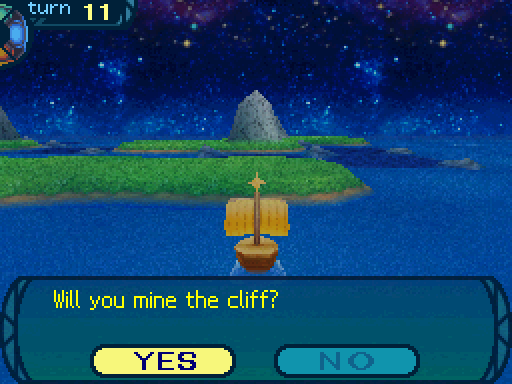 After several hours of labor, you stop as your pickaxe strikes something in the rock. You inspect the area you were digging at and see a spot with a metallic glint. You chip away at the stone and find a layer of Iron Ore. You store the Iron Ore you mined onto the ship and set sail from this area. 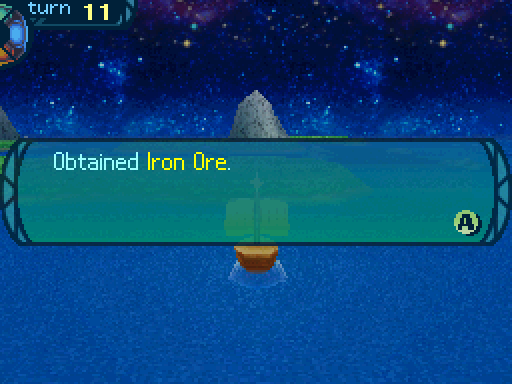 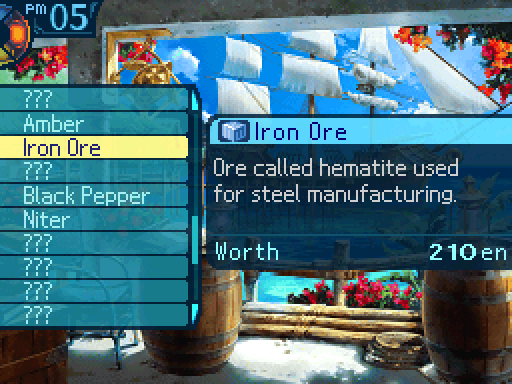 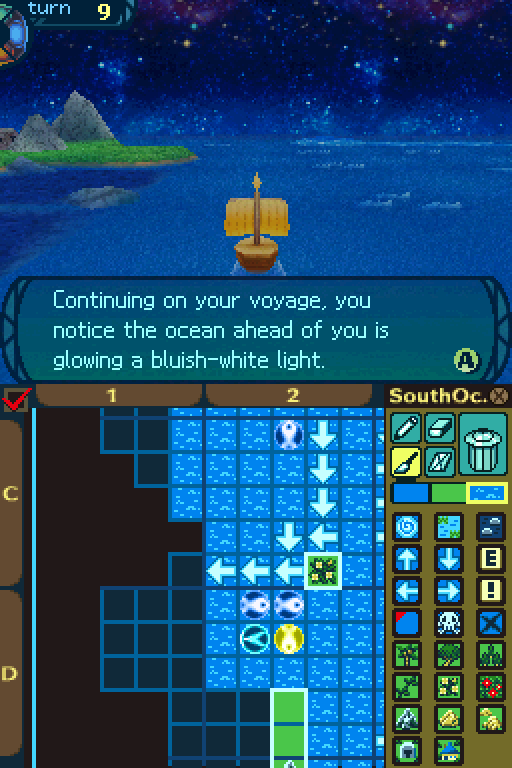 What's that glow over there? What's that glow over there?The lit area, about the length of ten of your ship, bobs eerily on the waves... It may be moving... It does not appear to be alive, but if it is, its size could make it a threat. You�re unsure whether you should dive in and investigate the glow or play it safe and leave. 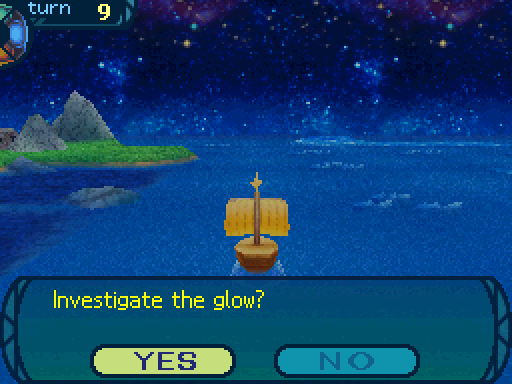 I'll check it out! Go ahead and lower me! Be careful, Faye... I'll check it out! Go ahead and lower me! Be careful, Faye...You lower Faye on a rope into the sea... Faye closes in on the glow and sees that it genuinely is something glowing under the sea. Picking it up, Faye observes that it is jelly-like and does not seem to be dangerous. But as Faye attempts to investigate further, the glowing objects sink into the ocean... Once Faye is back on board, you notice jellyfish-like things on Faye�s arms. Uh, Faye? Your arms. Wha- AAAHH! Get em off! Oh, I believe those are Light Salps. Hold still, Faye.You have heard tales of Light Salps, creatures akin to jellyfish that live in these waters. It seems the glow that you just witnessed was a colony of these light salps.   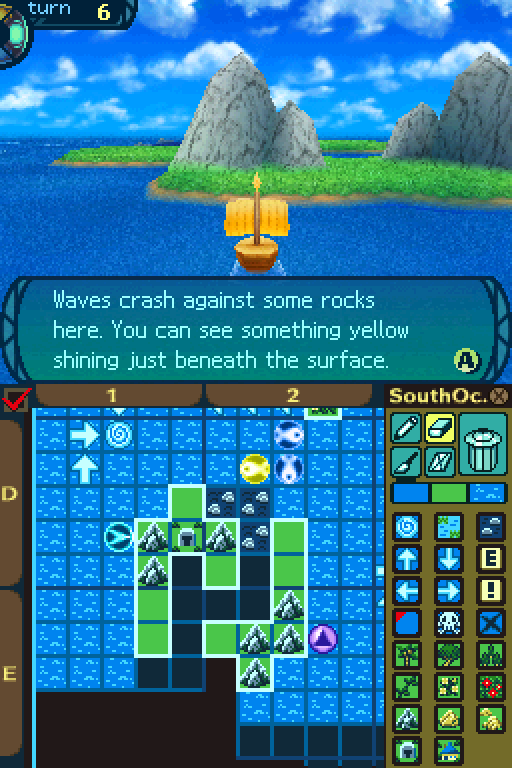 Down here is another event. You would like to get closer to see it, but the waves are so rough you can barely keep steady. The ship creaks ominously as the tall waves crash against the hull, and you tremble! You can gather your courage and approach the rocks, or turn away and avoid the risk of crashing.  Scott! Can you get us closer? Lemme see... I think I can, but it's gonna be a rocky ride! Scott! Can you get us closer? Lemme see... I think I can, but it's gonna be a rocky ride!You take hold of the wheel and brave the angry waves, getting closer to the rocks. You can see the glow is coming from some Amber embedded within the stone. You carefully chip away at the surrounding rock and remove the Amber. This giant chunk of Amber will surely fetch a high price if you take it back to Armoroad! You carefully stow the Amber in the hold and set sail for your next destination. 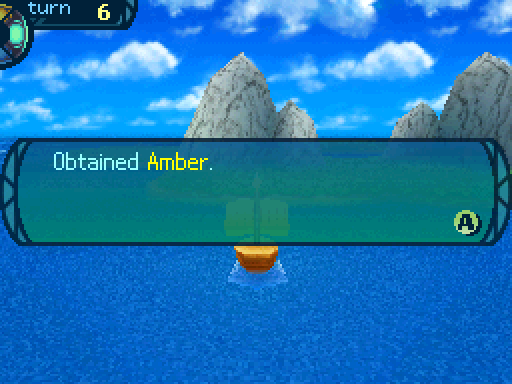 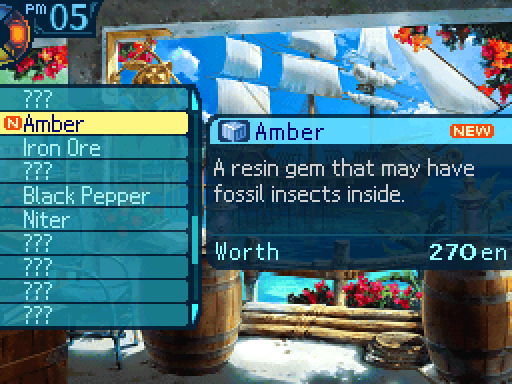  What is that strange boulder that seems so incongruous with its surroundings...? You seriously consider taking time out to investigate it. If you go back to the Harbormaster at this point, he'll have this to say: Welcome back, everyone. So you discovered Tortuga Island. They say that was once a gathering place for pirates. It so happens there�s a deep cave on that island. If I were you, I�d go take a closer look. Just be careful. There are a lot of dangerous reefs in the area that might give you trouble.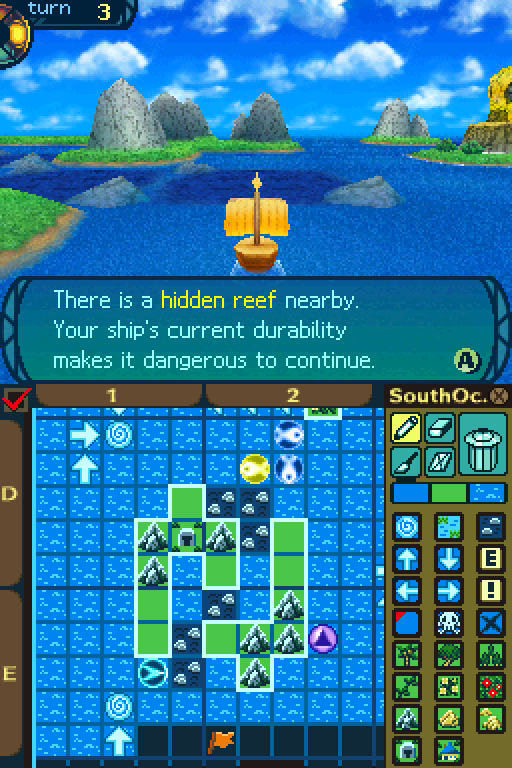 Also, like seaweed, we cannot go through hidden reefs. DS Version  The route I took to get here.  Looking at the boulder from this angle, you can tell there is an unnatural hollow inside of it. You would like to explore further, but it is dangerous to jump into the unknown when low on food. You decide to settle for charting the route here for now and return to Armoroad to report. DS Version I�ve heard rumors about the Pirate King�s treasure on that island ever since I was a lad. I thought they were just stories, but now that you�ve found the cave, maybe there�s more to it than that. If the opportunity arises, maybe it would be a good idea to send in the marines to investigate... ...But it would make more sense if you searched there first. Give it a shot if you get a chance. I�ve heard rumors about the Pirate King�s treasure on that island ever since I was a lad. I thought they were just stories, but now that you�ve found the cave, maybe there�s more to it than that. If the opportunity arises, maybe it would be a good idea to send in the marines to investigate... ...But it would make more sense if you searched there first. Give it a shot if you get a chance. No ship part this time. 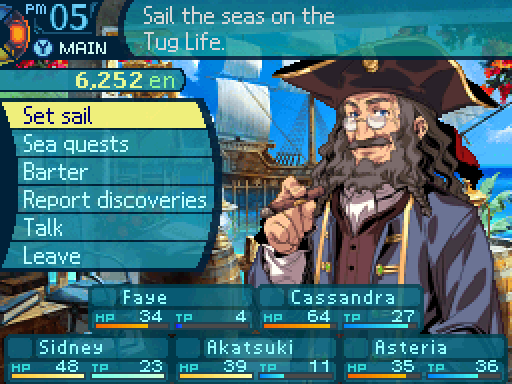 But our Guild is now rich. Not filthy rich, but this will hold us over for the 1st Stratum. Now I'll do other stuff other than exploring the sea. I haven't gotten everything possible since I've missed some items, but I can come back for those later. DS Version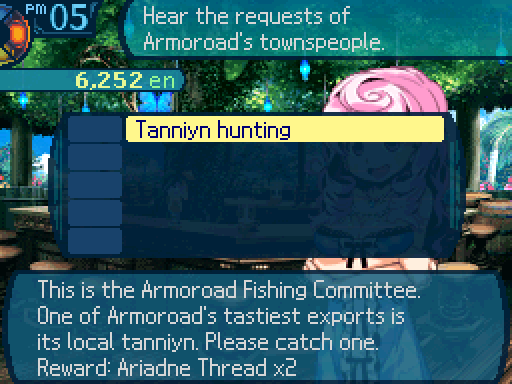 More fishing? Sure, why not? You're going to accept this request? It was put up there by the city's fishing committee. It is sounding straightforward. Go out on a voyage and catch a tanniyn. Simple, yes? The committee wants the tanniyn to be from local waters, so catch one near Armoroad. That is all you are having to do! The deep blue sea calls you! Do not keep her waiting! Oh, I am being all excitable about this! Get out of here so I can calm down! More fishing? Sure, why not? You're going to accept this request? It was put up there by the city's fishing committee. It is sounding straightforward. Go out on a voyage and catch a tanniyn. Simple, yes? The committee wants the tanniyn to be from local waters, so catch one near Armoroad. That is all you are having to do! The deep blue sea calls you! Do not keep her waiting! Oh, I am being all excitable about this! Get out of here so I can calm down! The game forces a Tanniyn spawn near Armoroad. Other Tanniyns do not count for this quest. 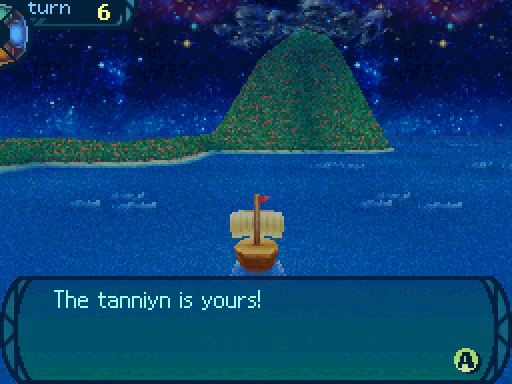  This one didn't put up much of a fight. Hey, makes our jobs easier. This one didn't put up much of a fight. Hey, makes our jobs easier.It's really easy, and this quest is more of a minor tutorial on Tanniyn hunting. 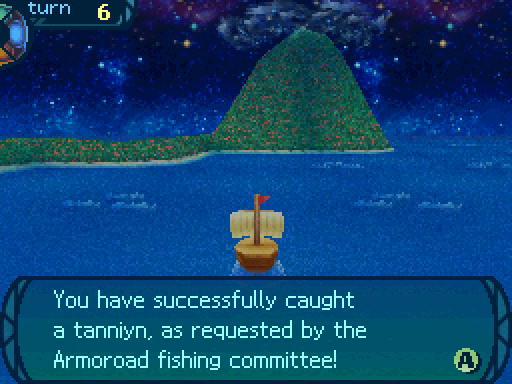 All you need to do now is return to the city and report back to the bar.  Welcome back! It is good to be seeing you once more! The fishing committee sent the word to me. Well done, as always. I cannot believe you caught a tanniyn! That makes you experts in the ways of fishing! The way of the fisher is long and arduous! Do not give up! Go on to greater fishy glory! Well, here is the reward for this request. Come any time, explor--I mean, fishers! Welcome back! It is good to be seeing you once more! The fishing committee sent the word to me. Well done, as always. I cannot believe you caught a tanniyn! That makes you experts in the ways of fishing! The way of the fisher is long and arduous! Do not give up! Go on to greater fishy glory! Well, here is the reward for this request. Come any time, explor--I mean, fishers!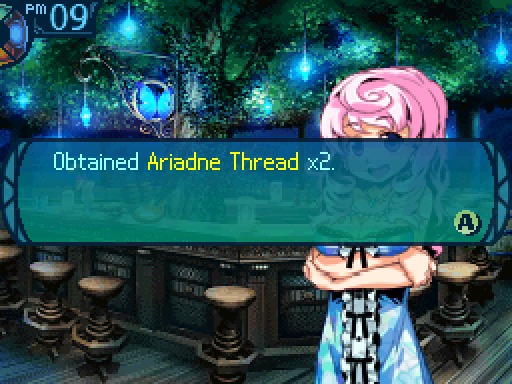 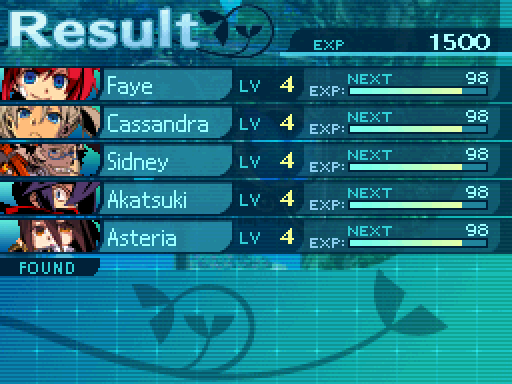 And despite the quest being really easy, it gives us the same amount of exp the map making mission gave us. Since the party's so close to a level up, I'll finish up the other quest. DS Version Remember that spot I talked about earlier? This is where you need to go to complete the quest, however it has to be daytime so you can complete the quest. Otherwise, you can't check this tile and you'll have to wait until morning. You suddenly recall the request you accepted about finding a place to sunbathe safely. Since you sense there are no monsters nearby, this would be a perfect place for sunbathing. You can return to the bar and report your findings whenever you feel like it. You sure that guy won't get his face bit off by those huge cats? Positive! It seems unlikely that monsters will tread into this territory. He has nothing to worry about. Except for his job. Well there is that. Psst! Guys! Look at this! I see some frogs over there. But I don't think they see us. Why don't we- AAAAAAHHHHH!   Let's see how you like having a taste of your own medicine, you sneaky little amphibians! Let's see how you like having a taste of your own medicine, you sneaky little amphibians!Sometimes you'll get a preemptive strike when you get into battle, which has a visual indicator of green leaves moving outwards. Like blindsides, your party will get a free turn to wail on their enemies.  Nothing interesting really happened aside from getting a preemptive strike. All the monsters, Great Lynx included, are just cannon fodder for the team now.  Ah, you are back, and alive, too! This is good! So, you have found a safe place for Bill to sunbathe in? He will be happy to hear it! If he gets fired for napping when he is supposed to be working, it is not my concern. Well... Regardless, here is the reward. I look forward to further dealings with you! Ah, you are back, and alive, too! This is good! So, you have found a safe place for Bill to sunbathe in? He will be happy to hear it! If he gets fired for napping when he is supposed to be working, it is not my concern. Well... Regardless, here is the reward. I look forward to further dealings with you!  And that quest was enough to give the party a level up! Take one last look at this screen, because that's the last time you'll see all 5 members having synced exp bars.   I level up Healing to 4 to unlock Line Heal. It heals a row, but the healing power is lower than Healing. Anyways, Healing now has a heal power of 85%. I won't be putting anymore points into the skill.  Line Guard now reduces physical damage dealt to the Hoplite's own row by 31%. Otherwise, it reduces the damage dealt by 13%. 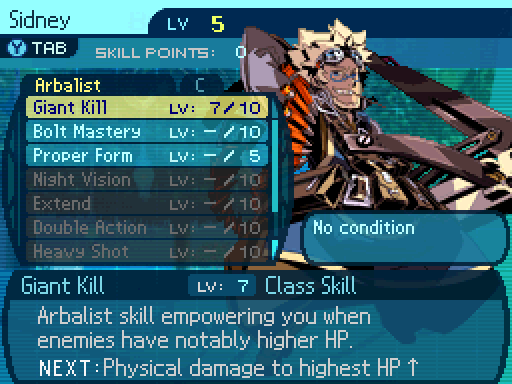 Giant Kill now boosts the Arbalist's damage by 43%. 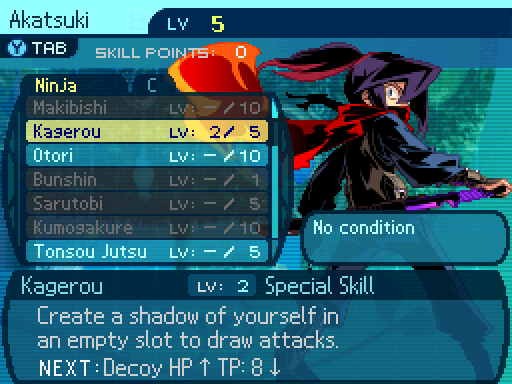 I'm not leveling up Kagenui at the moment. Instead I want to go for a different skill, which requires 3 points in Kagerou. Leveling up Kagerou makes the decoy more durable and lowers the TP cost of the skill. At this point, the decoy now has 10 HP and TP and costs 9 TP to cast. Do not max out this skill, because it is worthless past the early-game. You only want it to unlock Otori and Bunshin. 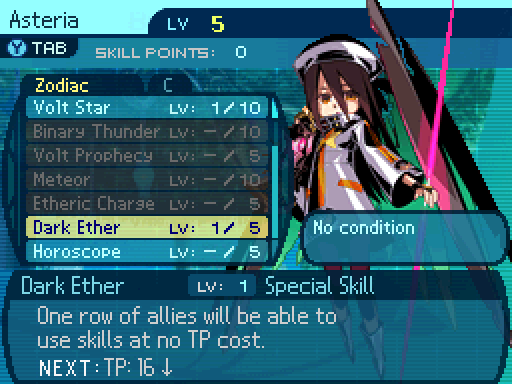 A relaxing wave of energy. A relaxing wave of energy.Dark Ether is a very powerful support skill. What it does is stop a row from using up any TP when they use any skills. So if Faye tries to use Healing, which normally costs 7 TP at this point, she'll still cast it, but she won't spend any TP while she heals someone. Very handy, and this skill has an action speed of +30, so most of the time it'll go before your allies make a move. All leveling this skill up does is lower the TP cost, which can be handy because spamming this skill can run the Zodiac dry. But there is an actual reason to level it up other than using up less TP. 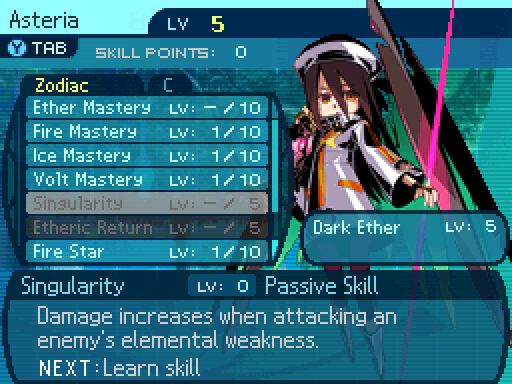 Because maxing out Dark Ether unlocks 2 very powerful skills. I'll be going for this one first, because it's a free damage boost to the Zodiac, while the other skill costs TP to use. Now, here's a little warning. Before you get to the end of the 1st Stratum, you want to make sure that someone in your party knows an AOE damage move. It doesn't matter how strong it is or what element, just that it hits all enemies. Either that, or a Ninja that knows the Bunshin skill. Kagerou will not cut it. Anyways, with that said, let's tackle the Sea Quests. DS Version At the port, you have the option of selecting either Solo or Co-op. Sadly, the latter will not be seen in action.  You'll be asked to save your game, which is convenient in case you wipe. You don't have to save while doing solo, but you do have to before you start up co-op.  Each major landmark you reach will have some Sea Quests available.  There's 4 Sea Quests to choose from at each landmark, but the 4th one isn't accessible in single player, while all 4 are accessible in co-op. You can repeat Sea Quests as many times as you want. There are some restrictions you have to fight under while doing Sea Quests. For one, you have to fight with AI controlled NPCs, and they do take up party slots, so you can't use your full party for these. I'll be doing this one first. 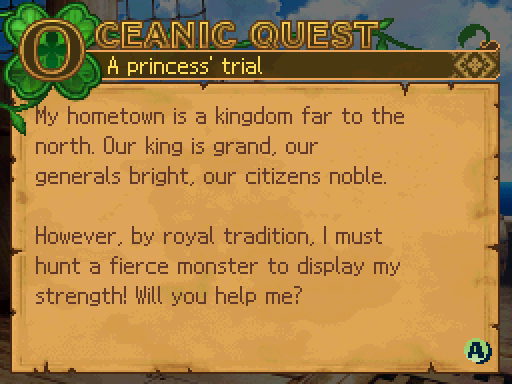 There's a short blurb on why these NPCs are fighting with you, or why they're heading toward this location (and end up fighting with you). 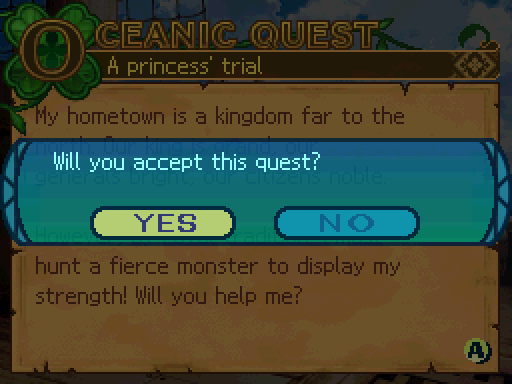  After accepting, you need to set up your party. Each Sea Quest has a different number of NPCs to work with. The 1st Sea Quest on the list has you working with 1, the 2nd has you fighting alongside 2, the 3rd Sea Quest has you fighting with 3, and the 4th Sea Quest doesn't have any NPCs to fight with. But that's only available in Co-op. 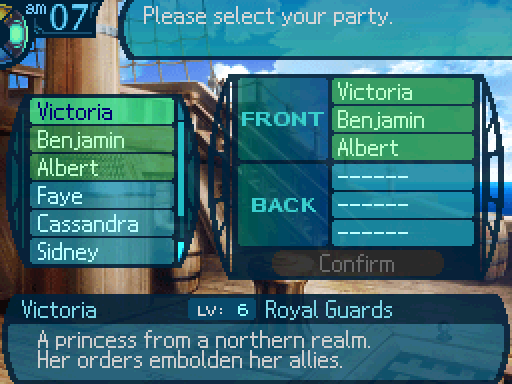 Victoria Class: Princess Stats:
So each NPC has a specific skillset they'll use, and they bring some of their own items. They won't use your items. Also, you may have noticed that Victoria has a completely impossible skillset. Yeah, sometimes the NPCs cheat, but they're on your side. Victoria will work on buffing her own row. Don't expect her to help your row out. But Royal Veil helps out the whole party, so try to keep her HP topped off.  Benjamin Class: Hoplite Stats:
Unlike Victoria, Benjamin will help out your party if he feels like they're in danger. He won't use Bodyguard if his HP is too low, and instead opts to defend, so it's important to keep his HP topped off. 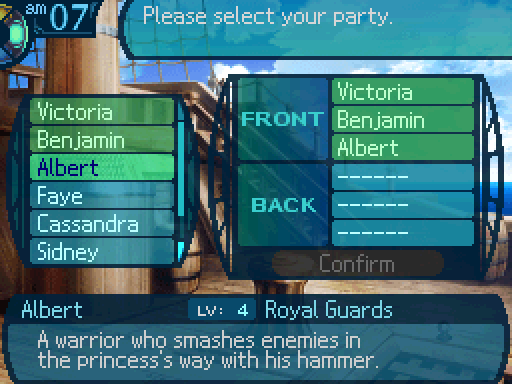 Albert Class: Gladiator Stats:
All Albert will do is deal damage. He'll just spam Crushing Blow most of the time, and won't use Wolf Howl unless he inflicts Confusion on the enemy, or someone else hits it with an ailment.  This is the party I'll be going with.   And from here you can set up your Limits. Here's another restriction, NPCs can't be equipped with Limits, nor do they bring some to use themselves, so you're coming into these fights with a pretty big handicap. But enough of that, time to take down that bird. DS Version  Atop the lighthouse, the bird monster spreads its wings and adopts a menacing stance! The client�s vassals quickly step before the princess, forming a defensive phalanx before her! For the good of Armoroad, you'll leave this lighthouse! Especially if you know what's good for you! Mmm, I don't think it's listening. Then are you ready to take it down, Faye? Do you really have to ask? Let's go!In response, you draw your weapons as well! The princess�s valiant command echoes over the commotion and the battle ensues! Video: Meregho Saeno DS Version DS VersionI really suggest you click on that link, since it's probably one of the best tracks in the game. It's not my personal favorite track, but The End of Raging Waves is a really great song. Also, it got a pretty rocking remix in EO4!  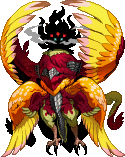 Meregho Saeno Level: 8 HP: 736 STR: 14 VIT: 11 AGI: 26 LUC: 14 TEC: 13 Attack Type: Pierce Exp: 1989 Item Drops: -Normal: Slashing Nail - 100% Drop Rate. 1 needed for Cirius's Blade (Sword. Must be restocked.) --Used for a single, desperate strike before escaping. -Gold: Eastern Nest - Kill while arms are bound. 100% Drop Rate. Prevents normal drops. 1 needed for Boldrons (Gloves. Must be restocked.) --Made from the branches of a rare, ancient tree. Description: A monster bird that rests on Skandalia Lighthouse. It has troubled research teams for many years. Damage Resistances: Slash: 100% Strike: 100% Pierce: 150% Fire: 100% Ice: 150% Volt: 50% Ailment Resistances: Sleep: 10% Confusion: 10% Plague: 20% Poison: 20% Blind: 40% Curse: 10% Paralysis: 10% Bind Resistances: Head: 25% Arm: 25% Leg: 25% Other Resistances: Death: LR - 50% Petrification: LR - 50% Stun: 10% Skills: Godly Flash: Uses the Arms. A single target Slash attack that deals 150% damage. Thunder Feather: Uses the Head. A row target Volt attack that deals 50% damage. Something to keep in mind is that whenever an enemy uses an elemental attack, it usually runs off of the TEC stat, so that 50% modifier does not mean Thunder Feather deals a low amount of damage at all. I really can't give any exact strategies for this boss, or any of the Sea Quest boss fights since the tactics you have to employ differ from Sea Quest to Sea Quest. You either have to have your party do the heavy lifting and the NPCs will support you, or it'll be the other way around, where your party has to support the NPCs. This quest is the latter. You want to bring some firepower, but you also want to keep the NPCs alive for as long as you can. 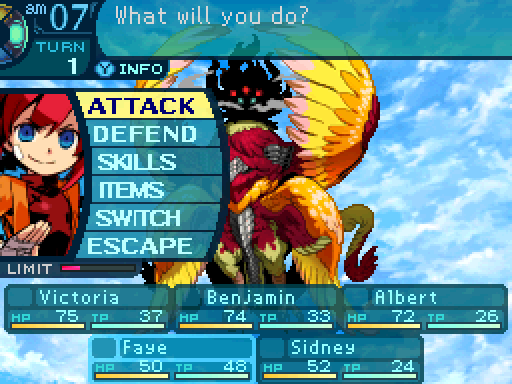  Nothing much we can do at the moment but attack. We can switch spots with the NPCs, but Faye and Sidney will not survive in the front row. 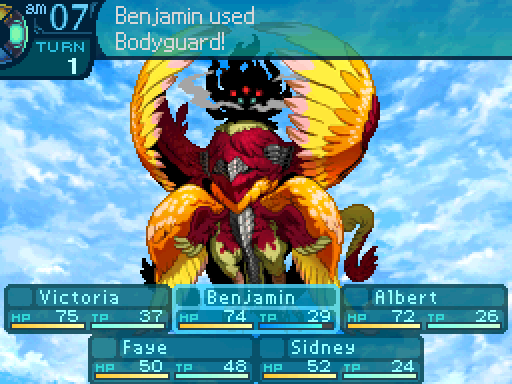 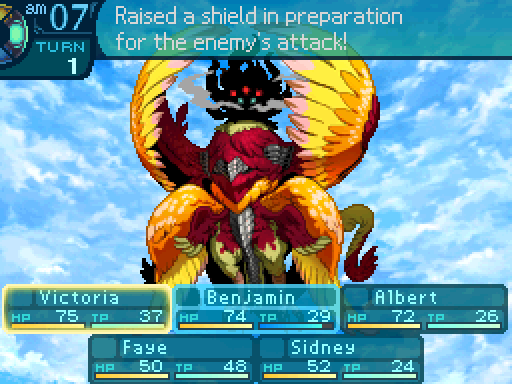 Bodyguard is an ability that has the Hoplite take damage in another party member's place, which is an absolutely fantastic ability. 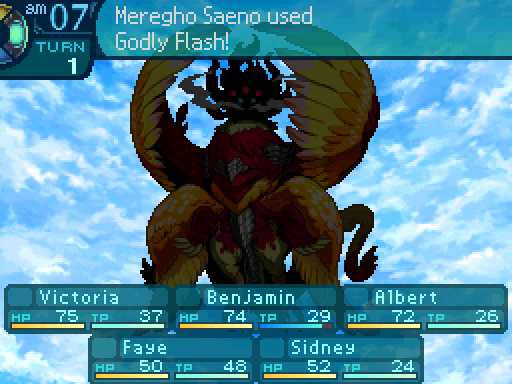   Huh. I wonder if Cassie could learn how to do that. Huh. I wonder if Cassie could learn how to do that.Remember what I said a few updates ago about the AI cheating? This also applies to your AI controlled party members. Benjamin will always use Bodyguard on a character that will be attacked, including your party members. But like I said before, Benjamin only use that ability when he has enough HP, and knows that he's going to survive the attack 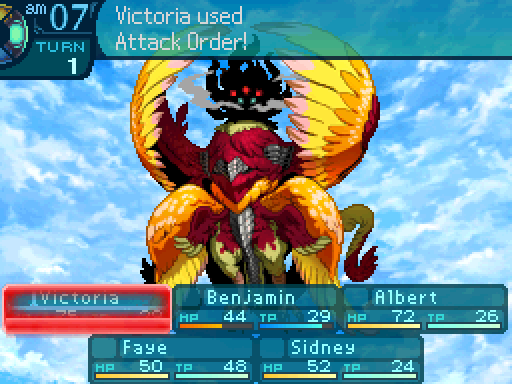 Attack Order boosts damage output of a row's physical attacks for 4 turns. Oh, and Victoria has a passive that heals everyone that she buffs. Handy, since she's the only source of healing in her party, so it's essential to keep her alive.  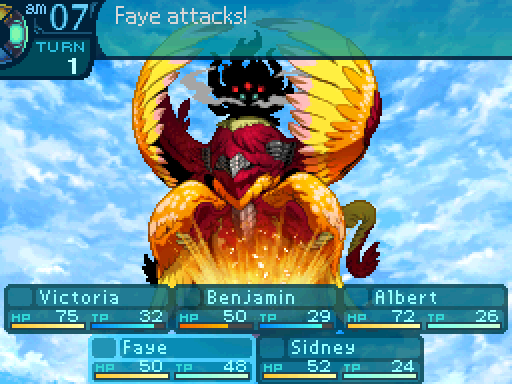 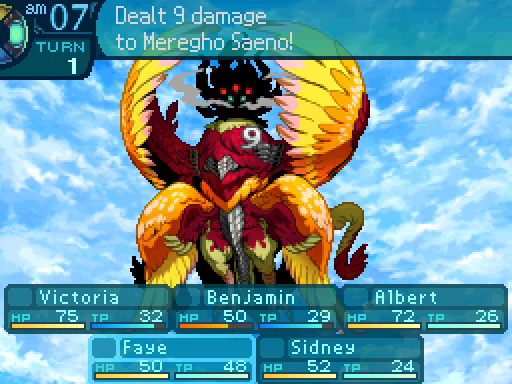 Ugh! I can't do much from back here! Why don't you work on keeping all of us alive, and I'll handle the firepower? Ugh! I can't do much from back here! Why don't you work on keeping all of us alive, and I'll handle the firepower?Melee attacks have a 50% damage penalty applied to them when used from the back row. I only had Faye attack because I didn't want her to use up any TP just yet. 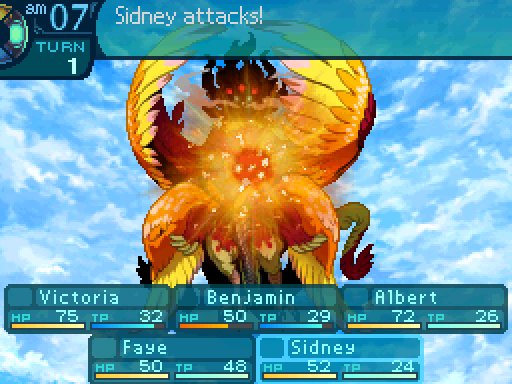 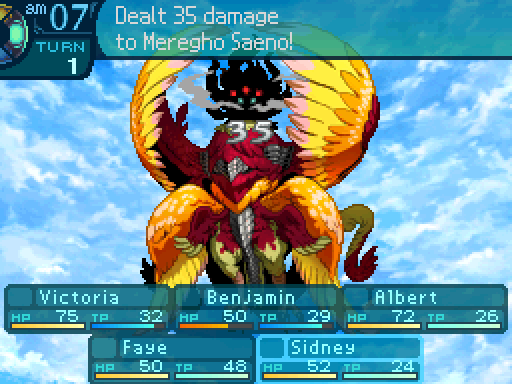 Pegged it! Pegged it! 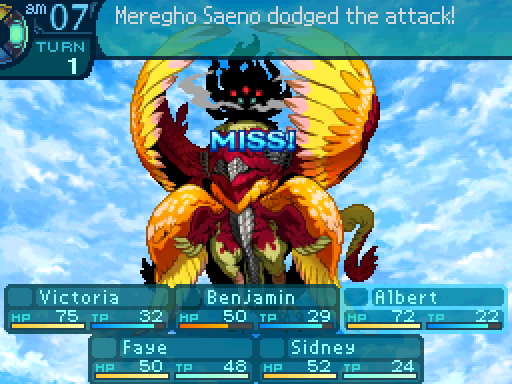  Somehow I feel good just by being near her. Same here. Somehow I feel good just by being near her. Same here.Royal Veil in action. As long as Victoria's HP is full, the entire party will be healed by 7 HP at the end of the turn. 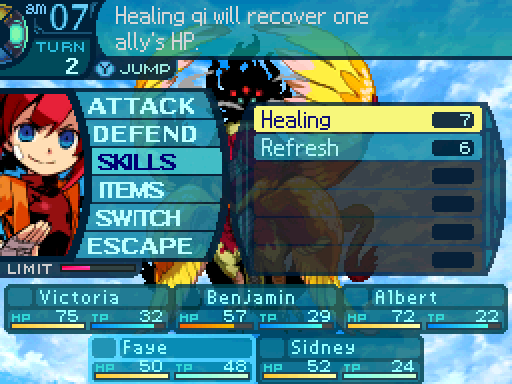 Now I'm gonna have Faye on healing duty to make sure Benjamin can keep using Bodyguard, and that Royal Veil will always kick in at the end of the turn. 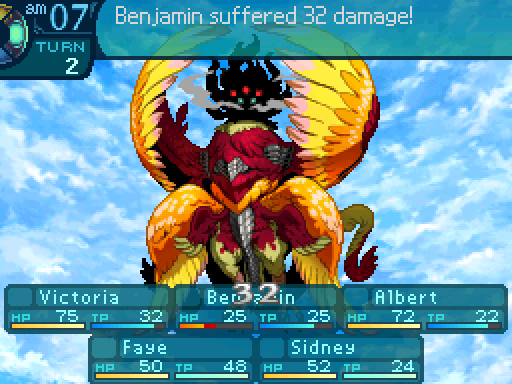  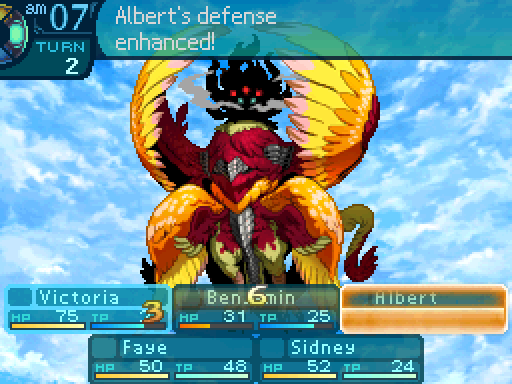 Guard Order increases a row's defense against physical attacks for 4 turns. Defense buffs are denoted by an orange overlay.  What!? I never miss! There there, Sid. It'll be okay. What!? I never miss! There there, Sid. It'll be okay.Unfortunately, Meregho Saeno has a really high AGI stat, which means it'll avoid our attacks fairly often. 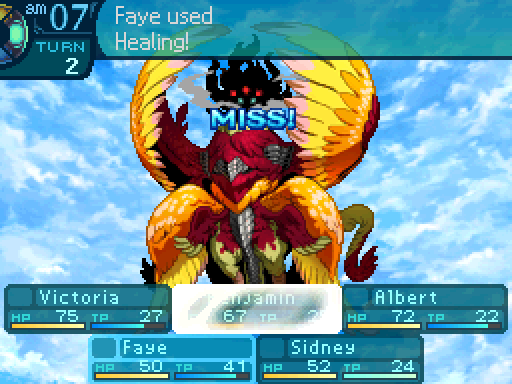 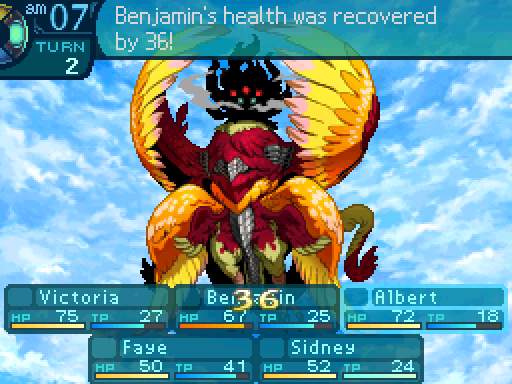 Purification! Purification!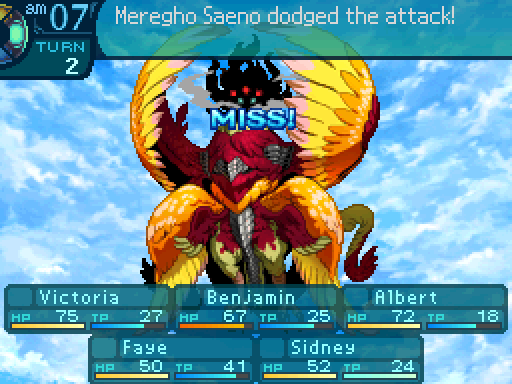   Prevent Order blocks a Status Ailment from hitting a party member for 4 turns. Once it blocks an ailment, the buff will immediately be dispelled, so it has to be recasted in order to protect that party member. As for why Victoria's using this, you'll see later.    Crushing blow deals a decent amount of damage. But don't ever expect Albert to actually confuse the thing. Because of Albert's low stats and Meregho Saeno's resistances, Crushing Blow actually has less than a 2% chance to inflict Confusion. 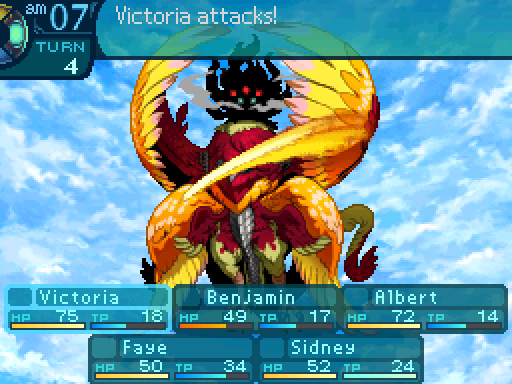  Once Victoria has all her buffs set up, she'll just start attacking. She won't even use them on your row. Thanks for the help. 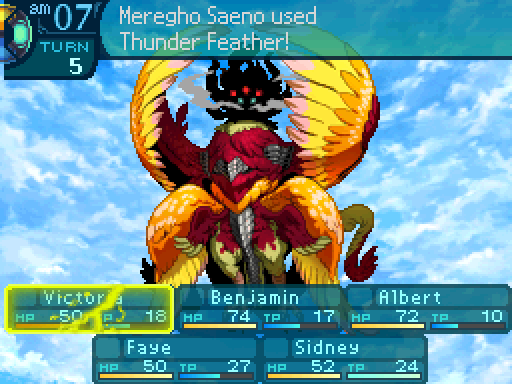 This is Meregho Saeno's other attack, and not something you want to see often. Oh, and Volt attacks are visually indicated by that yellow lightning overlay. 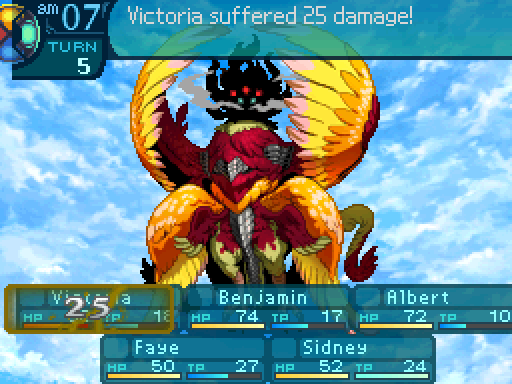 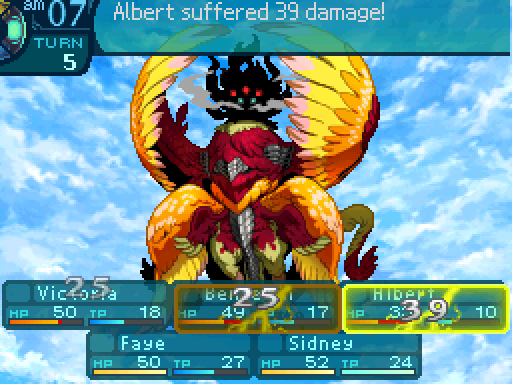 Yeah, deals a huge amount of damage to the row. 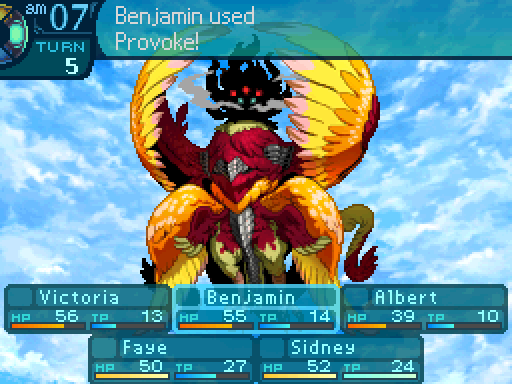 And Benjamin didn't use Bodyguard there because he wanted to Provoke it. Even though his AI cheats and knows who to use Bodyguard on.   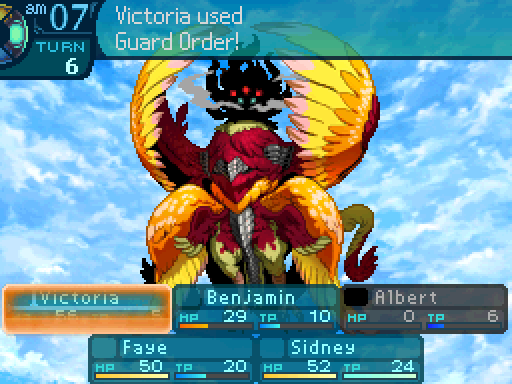  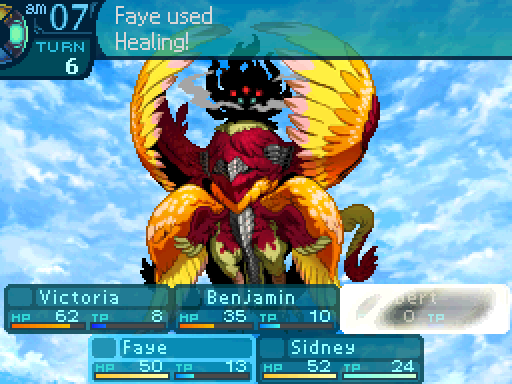 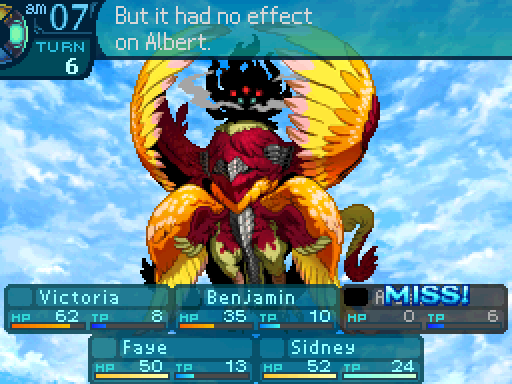 Oh crap! I was too slow! Is he gonna be alright? Oh crap! I was too slow! Is he gonna be alright?And here's the first death in the LP, although it wasn't any of the Guild members that bit it. So yeah, when someone dies, buffs and healing have no effect on them, and they can't do anything until they're revived. I do have a revival item, but I only have one, and I don't want to use it up right now. 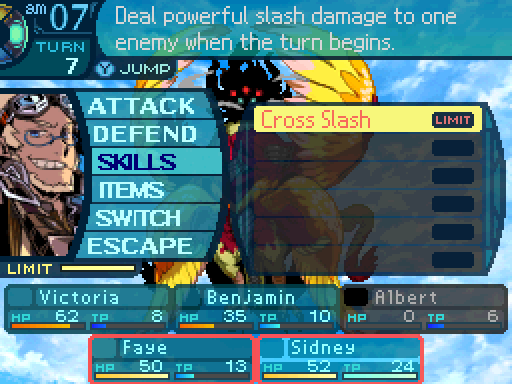 At this point, Sidney's Limit gauge filled up. 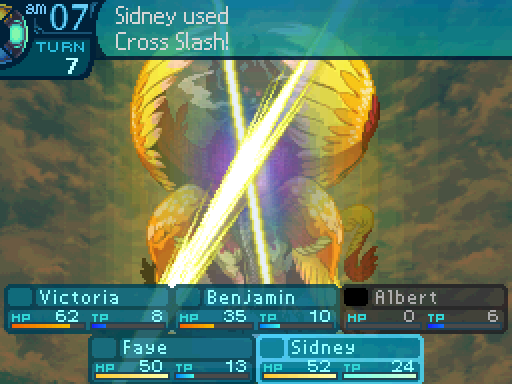 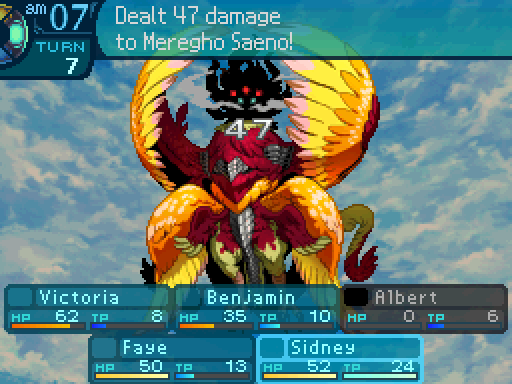 Cut you down to size! Cut you down to size! 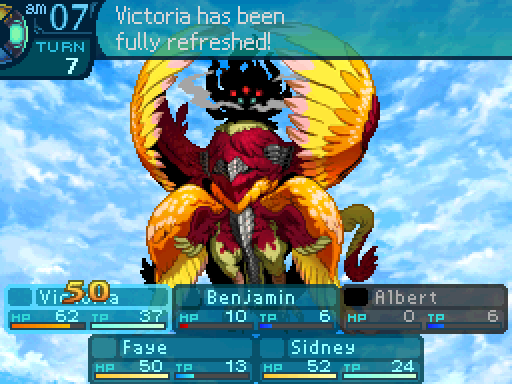 Like I said before, NPCs have their own items to use up in case things start getting hairy. If they run out, your party is probably too weak because the fight lasted for too long.  And this is where the fight starts getting more difficult. 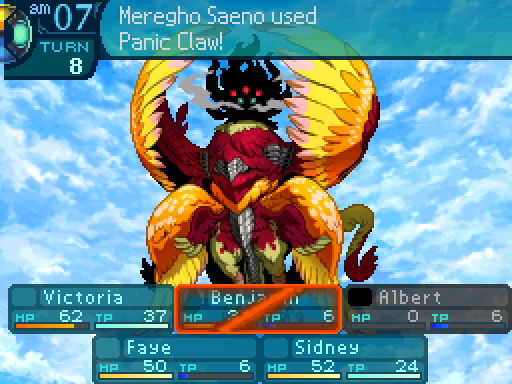 Because once Meregho Saeno gets down to 50% of its HP, it starts using this move. Slash attacks are visually indicated by a diagonal line. 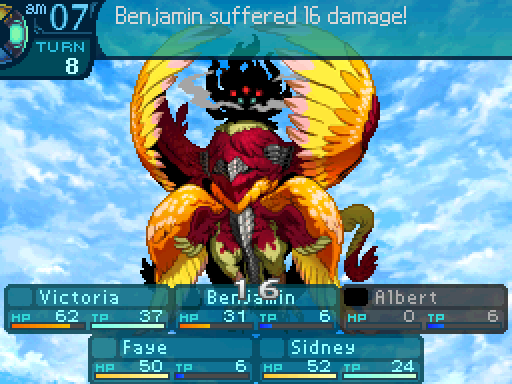 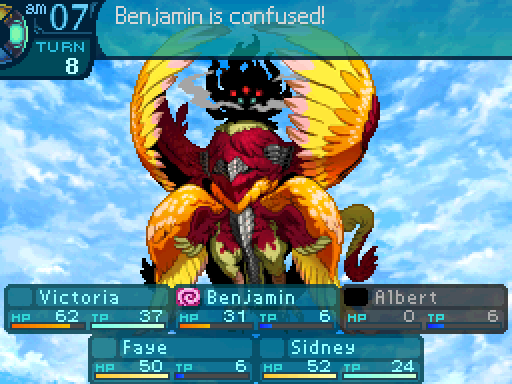 Panic Claw: Uses the Arms. A single target Slash attack that deals 80% damage and has a 60% chance to inflict Confusion. The damage itself isn't too much, but the Confusion component is what you really need to worry about. Confusion (known as Panic in the later games) is the most deadly ailment in the game because anyone who gets inflicted with it will just attack anyone randomly. You have absolutely no control over anyone that's confused, so they can't even use items or skills at all. And as a kicker, they can't dodge any attacks, which can be awful in certain situations. Okay, not good! What do we do!?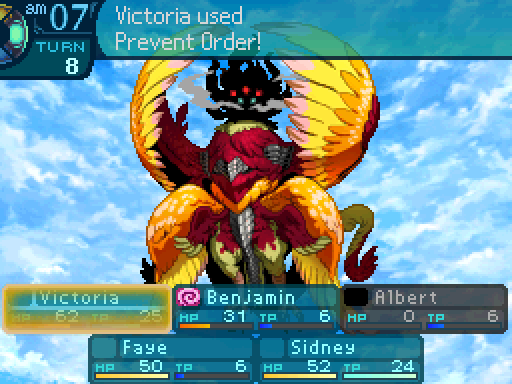 This is why Victoria was casting Prevent Order earlier. Unfortunately, she cast it too late and it only prevents ailments, it doesn't dispel them.  Pow pow! Nailed him where it hurts! Pow pow! Nailed him where it hurts!Crits give a 50% boost to damage, but they only affect regular attacks, not skills. 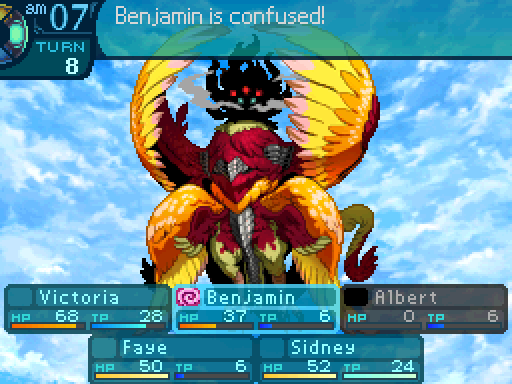 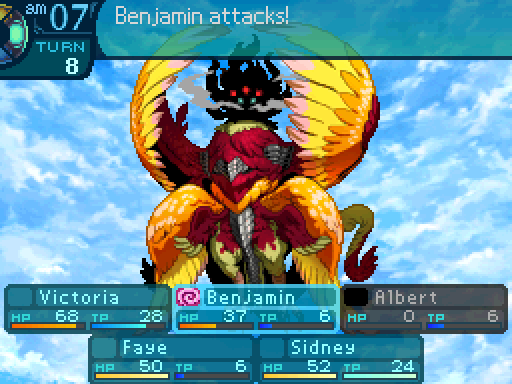 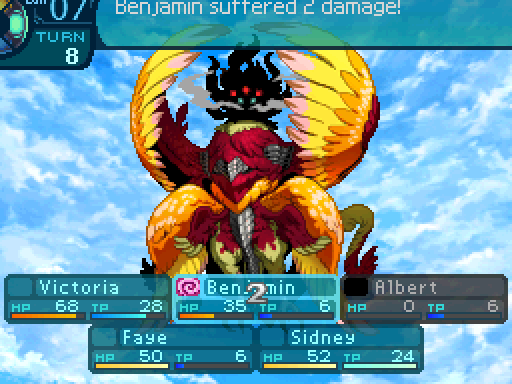  Don't worry, I got this. Don't worry, I got this.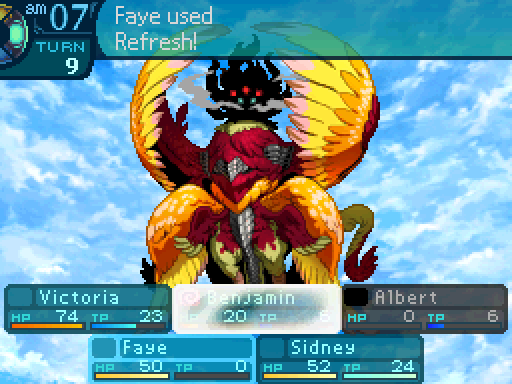  Hey, calm down. We're your allies, not your enemies. Hey, calm down. We're your allies, not your enemies.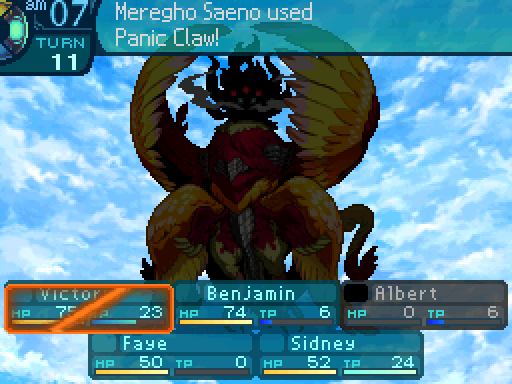 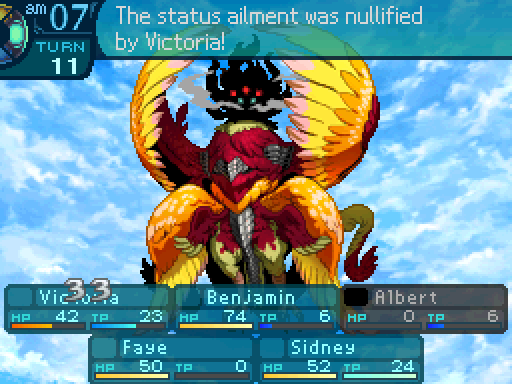 Prevent Order in action. 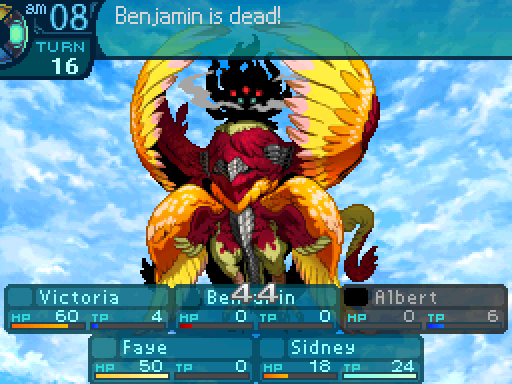 Crap! Sorry, Victoria! Crap! Sorry, Victoria!Benjamin died here, but that's actually a good thing for me. 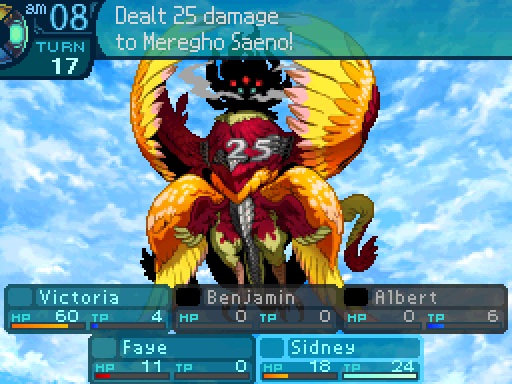 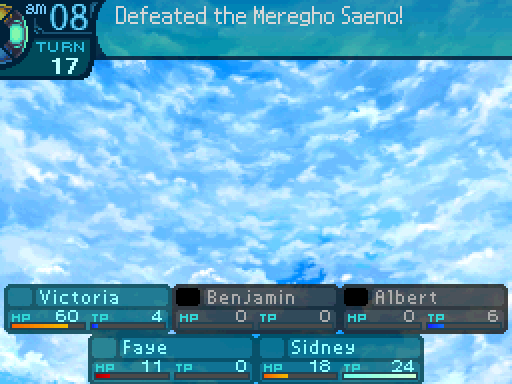 Scram, birdbrain!DS Version Scram, birdbrain!DS Version Now, something to know is that the exp isn't split among just Faye and Sidney. For balancing reasons, it's actually split among the NPCs too, even though they can't make use of it. So if everyone's alive at the end, each of your party members only get 20% of the share. However, since Benjamin and Albert were dead at the end of the fight, Faye and Sidney actually get 33% of the cut. DS Version As you confirm that the sea has swallowed the beast, the princess rewards you all with her smile. To report your victory, you leave the lighthouse and set sail. DS Version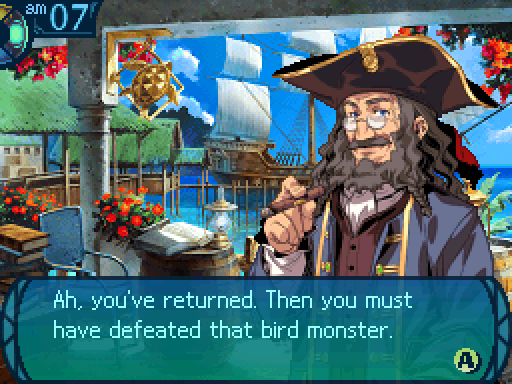 Thanks to you, the marines can continue investigating that lighthouse without fear. If all goes well, the lighthouse will be on its way to serving its purpose soon! Well done, everyone! ...Oh by the way, this was found on one of the previous investigations. I�d like you to have it. Thanks to you, the marines can continue investigating that lighthouse without fear. If all goes well, the lighthouse will be on its way to serving its purpose soon! Well done, everyone! ...Oh by the way, this was found on one of the previous investigations. I�d like you to have it. 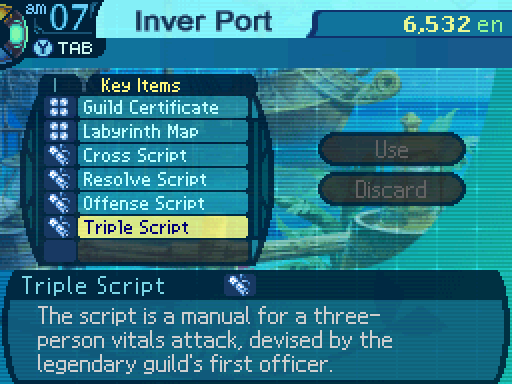  When you beat a Sea Boss for the first time, you'll always be rewarded with a Limit. Afterwards, each Sea Quest will give you a piece of equipment. However, this means that the Sea Quest you cleared first has to be beaten again to get its equipment reward, so let's go do that.   The fight went a lot better, and no one died this time. Sidney and Faye got a level up. 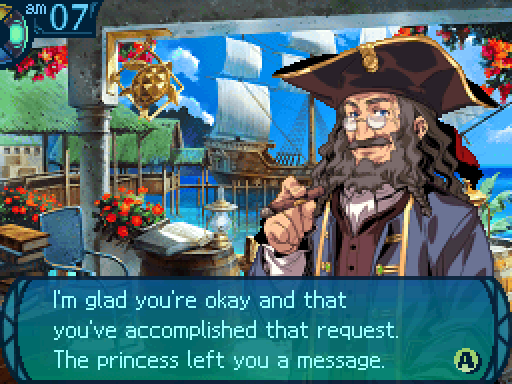  Quite a valiant princess, eh? But I guess she�ll be leading a kingdom someday. She�ll need her energy. Oh, her vassals asked me to give this to you. They hoped you�d be able to make use of it. Quite a valiant princess, eh? But I guess she�ll be leading a kingdom someday. She�ll need her energy. Oh, her vassals asked me to give this to you. They hoped you�d be able to make use of it. 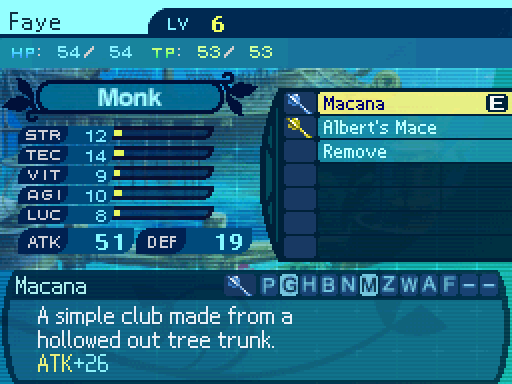  Albert's Mace is a nice upgrade over the initial mace, coming with 2 Ice forges. Each elemental forge provides an extra 10% boost to damage. Now here's something I wanna bring up. Those numbers next to ATK and DEF? Complete and utter nonsense. Those numbers aren't used in any formulas at all, and are just an estimate of how much damage you'll do and take. Except the Defense �stat� is completely meaningless due to how armor is used in calculations in this game, and the Attack �stat� does not take weapon forges into account at all. Oh, and one last bit of nonsense. Albert's Mace just has 4 more points of attack than Faye's initial mace, but the game is telling us that it increases her attack �stat� by 8 points. What's up with that? Oh and it's just an arbitrary amount, there's no real pattern to it. The only reliable numbers are the ones that are actually on the equipment themselves. Now if you already got Albert's Mace, the Harbormaster's last line changes to this: ...You all truly outdid yourselves on this request. I hope you keep up the good work.Oh, and when you complete a Sea Quest, everyone that participated gets a full heal in regards to HP and TP. Araxxor fucked around with this message at 02:21 on Feb 1, 2016 |
|
#
¿
May 27, 2015 04:42
|
|
|
Update 8: Meregho Saeno, Part 2 GeneralYeti has some educational words on the boss we just took down. And are about to take down again. GeneralYeti posted:
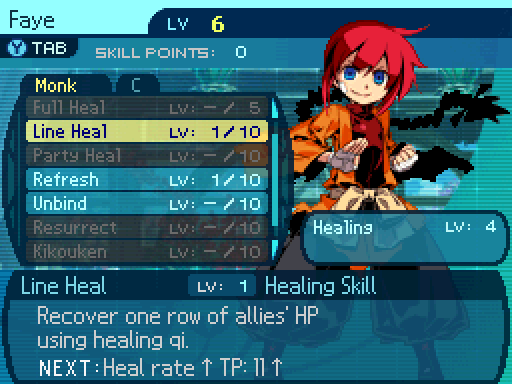 Multi heals! This oughta make us last longer. Multi heals! This oughta make us last longer.Line Heal heals a row, but as a tradeoff, it's weaker than Healing. At level 1, it starts off with 60% healing power. 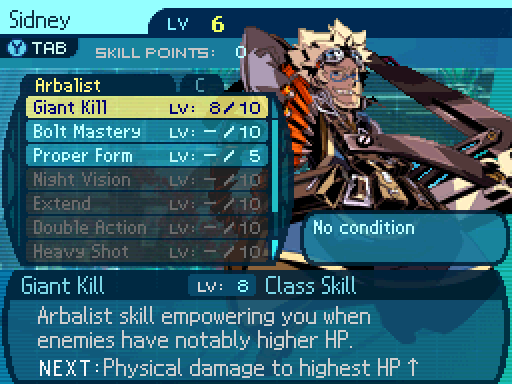 Giant Kill now provides a 47% damage boost. Hmm, now what should we do with all this money? How about we shop for new equipment and supplies? The Labyrinth is sure to have more ferocious beasts living in there. I was thinking about buying some drinks, but uh okay. 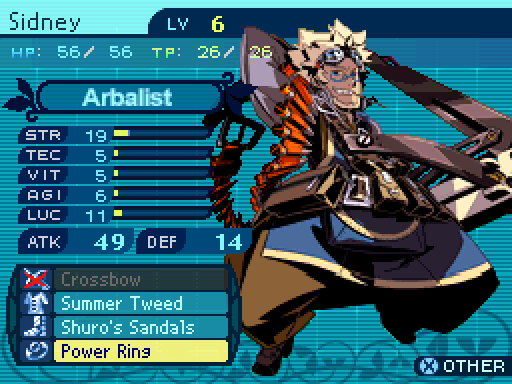 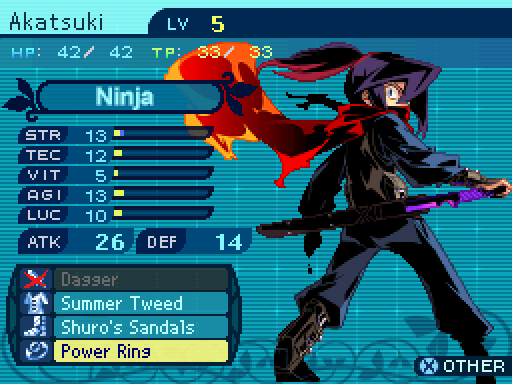  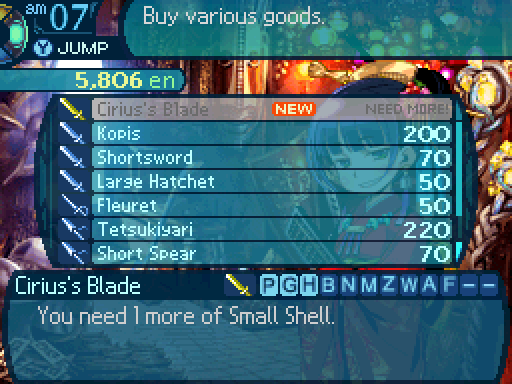 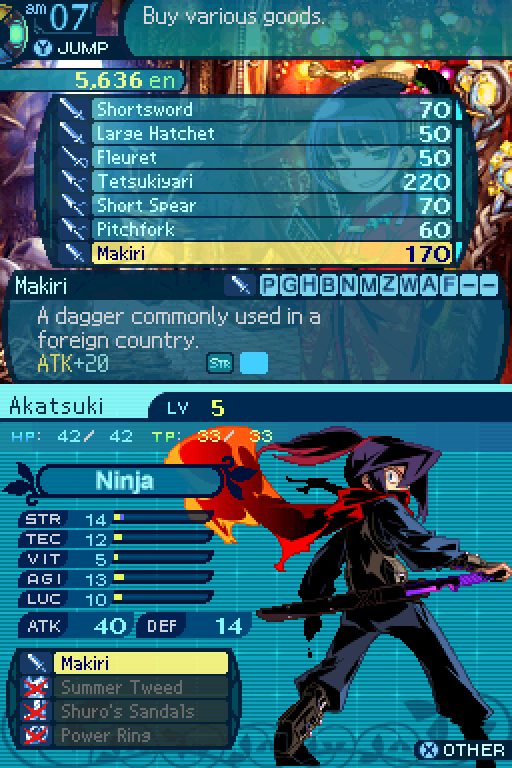 Now since I have enough money, I equip most of my party with new stuff and upgrade Akatsuki's dagger. Time for another Sea Quest! DS Version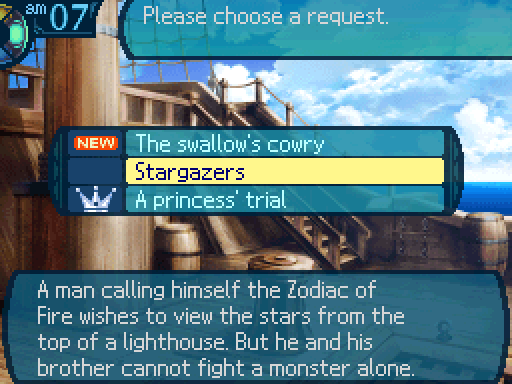 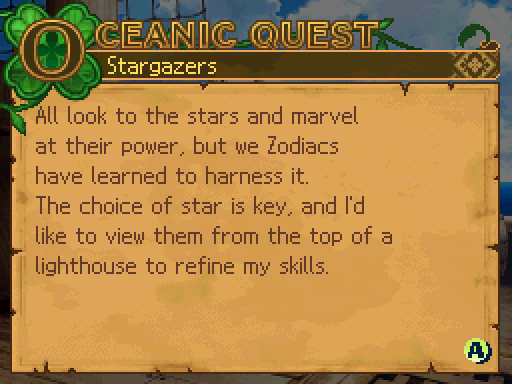 This one is easier for a couple of reasons.  Castor Class: Zodiac Weapon: Book Skillset: -Etheric Return: Level 1 -Fire Star: Level 2 Supplies: -1 Amrita All Castor will do is use Fire Star. Etheric Return is just a passive that restores some TP if he gets the killing blow. Nothing important. 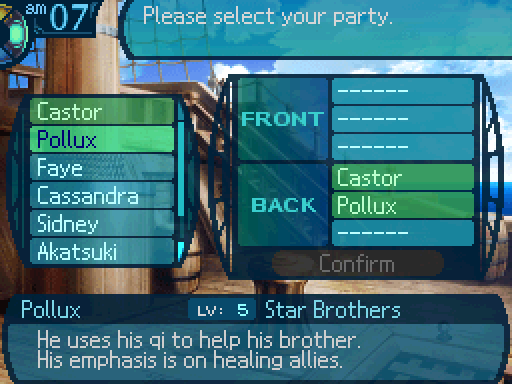 Pollux Class: Monk Weapon: Book Skillset: -Ascetic Deeds: Level 1 -Healing: Level 2 -Refresh: Level 1 Supplies: -1 Amrita Pollux will work on healing your party and keeping them alive, as well as dispelling Confusion if anyone gets hit with it. 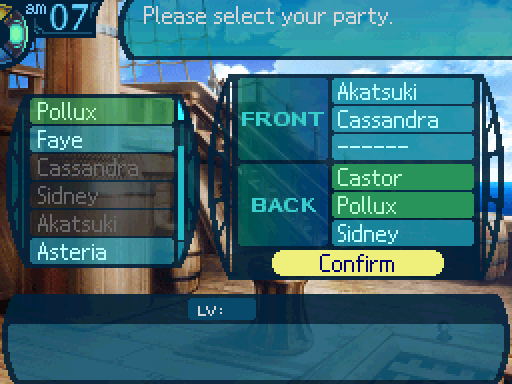 You wanna bring some support, but not too much since Pollux will be doing a lot of heavy lifting on that front. You're gonna wanna bring some firepower though. This is the party I'll be going with. 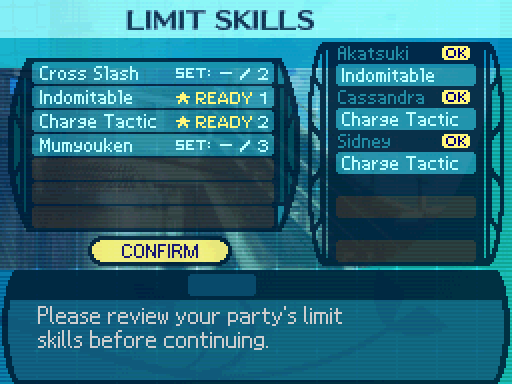 And the Limits I'll be using. DS Version 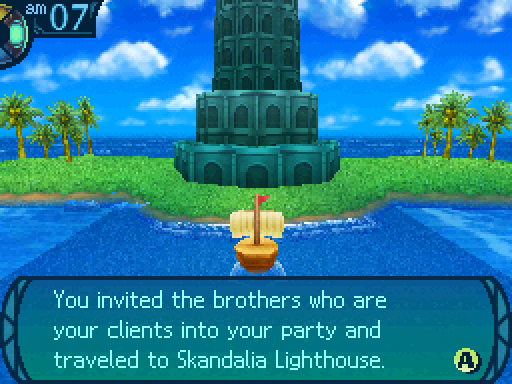 As you reach the top of the ruined lighthouse, you find a giant bird monster glaring down at you! This must be why the brothers requested your protection. Now, bravely take your weapons in hand to challenge the nightmare beating its wings above you! Sidney, I thought you said you killed it? So did I, but I guess it's back for round two! We'll just take it down again! Let's rock!Video: Meregho SaenoDS Version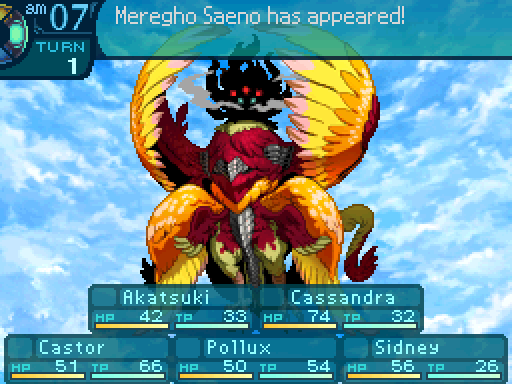  Akatsuki is just gonna be dealing damage and doing his share of the supporting throughout the fight. If the leg bind from Kagenui lands, that'll be nice, but it won't help out that much.  Cassandra is gonna try to tank most of the hits. 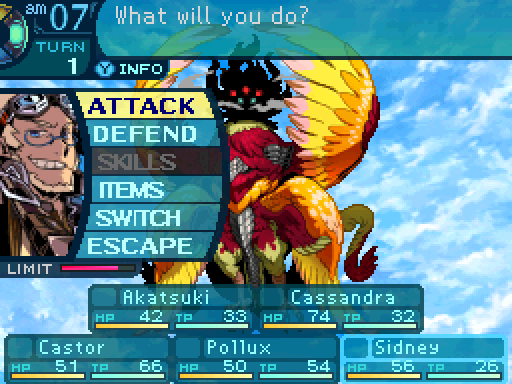 And Sidney is our main form of offense. 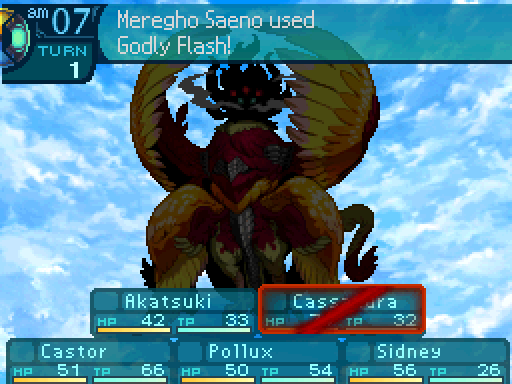 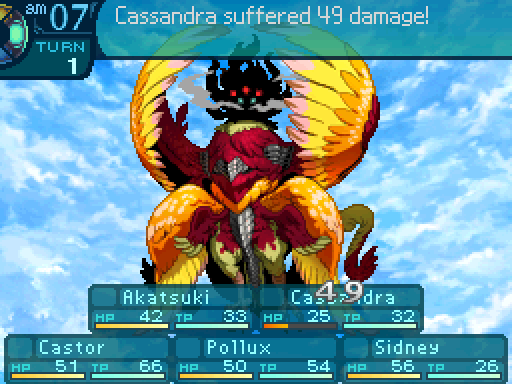 Good god, that hurts! Sometimes I wonder why I became a Hoplite. So Miss Faye wouldn't get herself killed? Ah yes, that's right. Good god, that hurts! Sometimes I wonder why I became a Hoplite. So Miss Faye wouldn't get herself killed? Ah yes, that's right.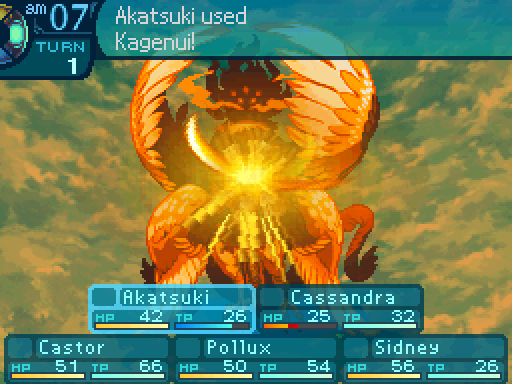 Here's knives in your legs! Here's knives in your legs!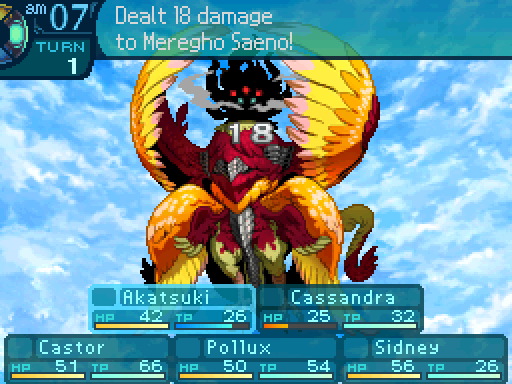 Not much, but every little bit helps. 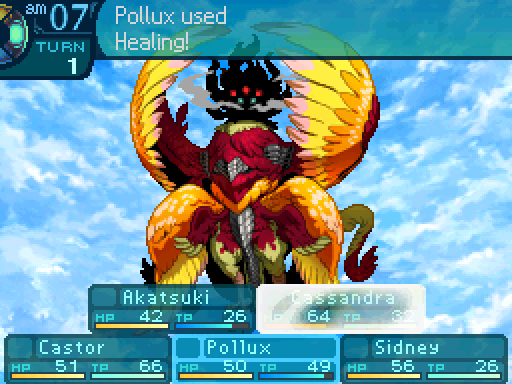 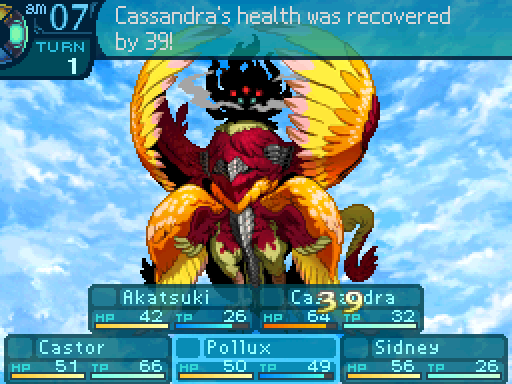 Why thank you, Pollux. I do appreciate the help. Why thank you, Pollux. I do appreciate the help.And here's why this is one of the easier Sea Quests. Pollux is a massive cheater and will heal up anyone who gets injured, instead of preemptively guessing who needs a heal, like you have to sometimes.  You're a stupid dumb bird brain! Hey! Don't steal my insults! You're a stupid dumb bird brain! Hey! Don't steal my insults!What you see happening to Pollux is Ascetic Deeds kicking in. Every time he casts a skill, any skill, he'll restore some of his own HP. 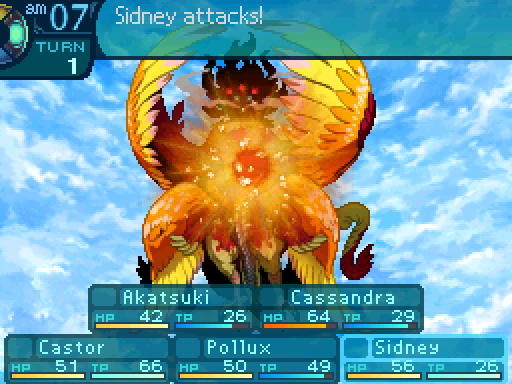 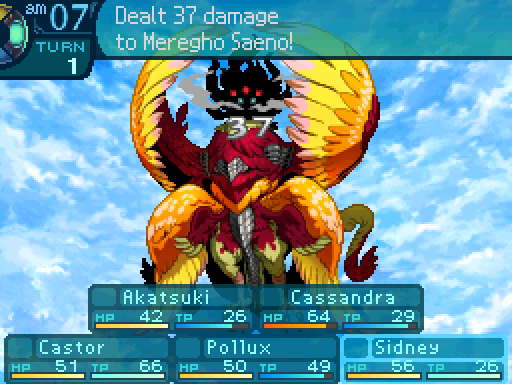 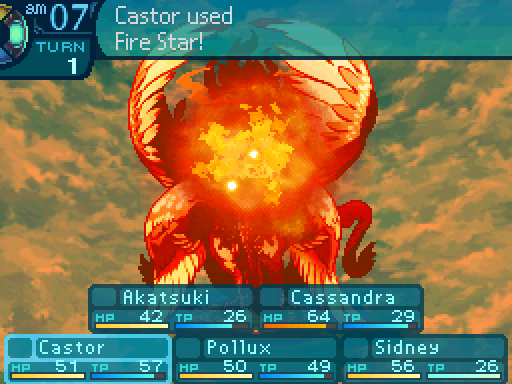 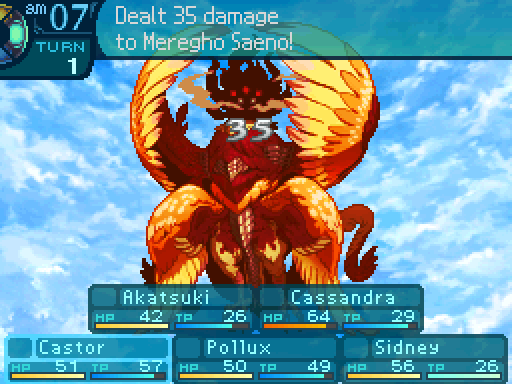 And we're really not lacking in offense for this fight. 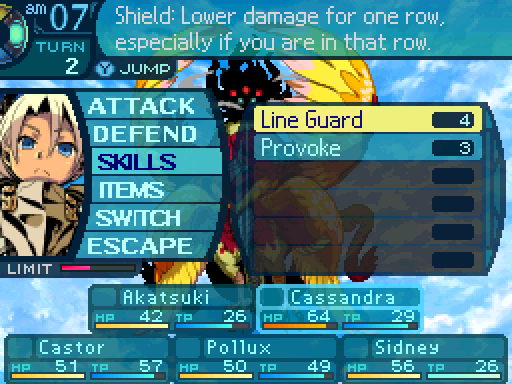 Cassandra will alternate between spamming Line Guard, in case Akatsuki gets targeted, and refreshing Provoke's duration.  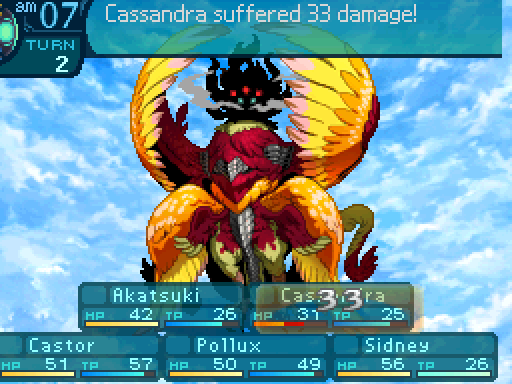 Okay, I'm starting to learn how to use this thing better. Okay, I'm starting to learn how to use this thing better. Sidney has Charge Tactic ready to go. Fortunately, only one person needs their Limit gauge full in order to use it. Unfortunately, I do something dumb. 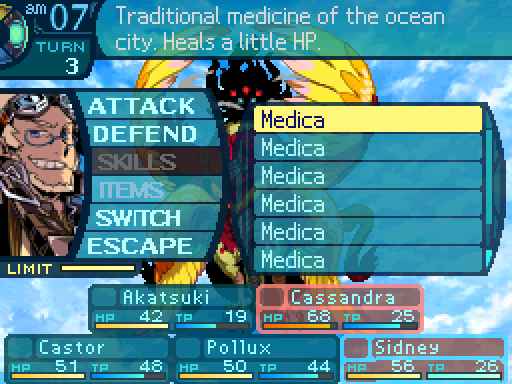 So here's the thing, Etrian Odyssey doesn't have a confirmation screen or anything when you're deciding what to do for the last party member, even though you can change what you want to do with the other ones. So you can't take back the decision you make with your last party member. 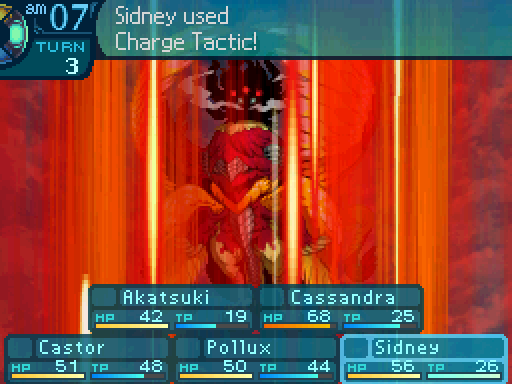 Give em hell, guys! Give em hell, guys!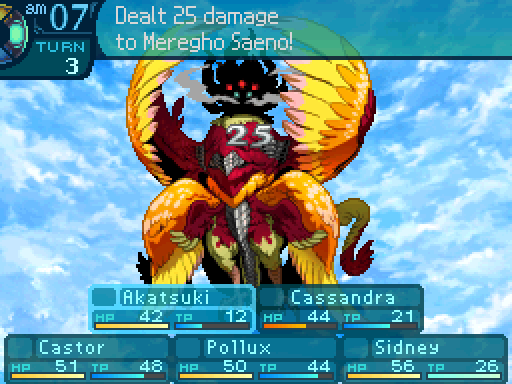 Such power! Such power!A minor increase in damage for Akatsuki.  I did not need healing, you fool! Sorry! I thought I was grabbing my crossbow. I did not need healing, you fool! Sorry! I thought I was grabbing my crossbow.So about what I said about the lack of a confirmation screen, I ended up fat fingering and had Sidney use a Medica on Akatsuki when I meant for him to attack.  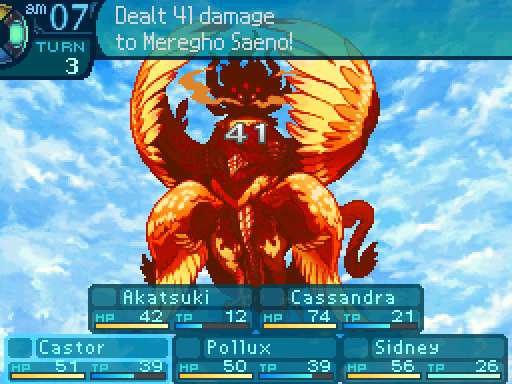 A minor damage increase for Castor. 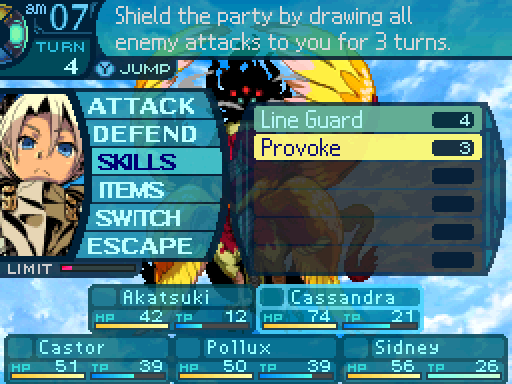 Provoke is about to wear off in 1 turn, so I have Cassandra recast it. 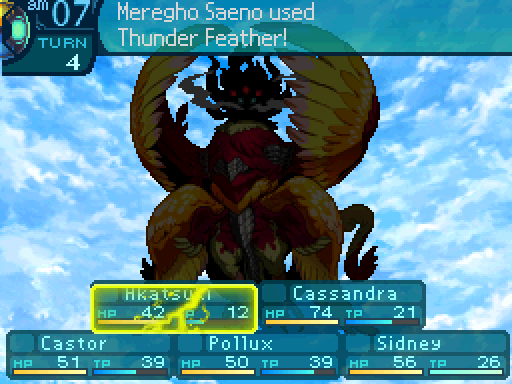  AUGH! AUGH! Sadly Cassandra can't do a thing about elemental attacks. Not yet at least. 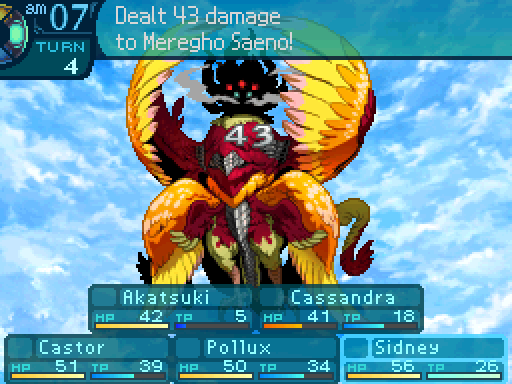 A nice increase in damage for Sidney. 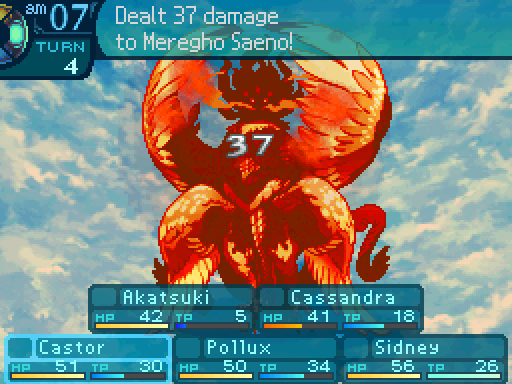   Quit spamming Thunder Feather you jerk.  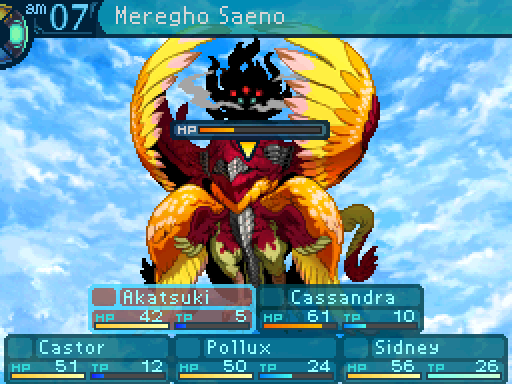 Meregho Saeno is on the ropes, so this is where the fight gets really dangerous since Panic Claw enters the equation. And bad things will happen if Cassandra gets confused. 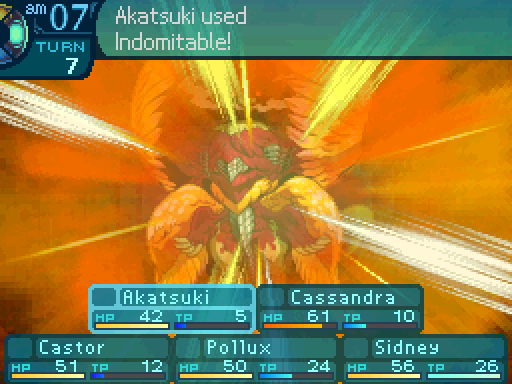 I shall endure! I shall endure!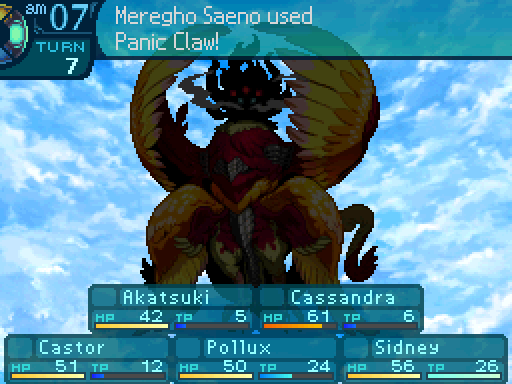  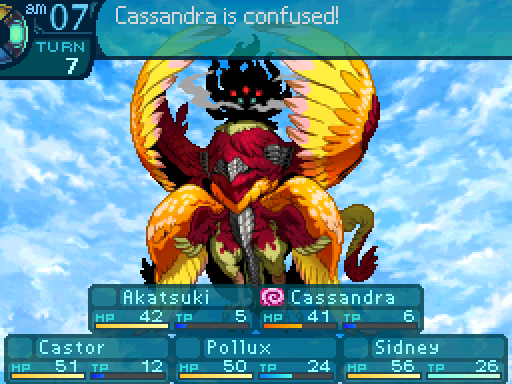 G-G-Get away fr-fr-from m-me! G-G-Get away fr-fr-from m-me!Well at least Provoke is staying up for one more turn.  Unfortunately, Pollux prioritizes healing over dispelling ailments.  My mistake was not throwing a Medica at her so Pollux would cast Refresh instead.  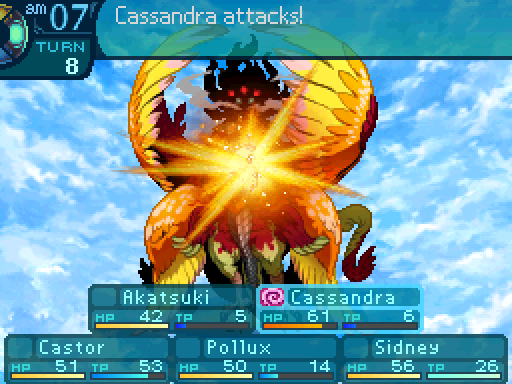 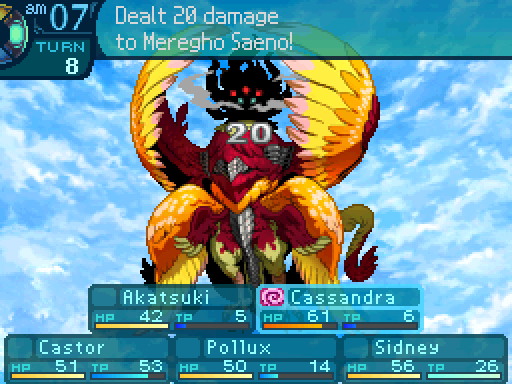 Stay away! Stay away!Fortunately, Cassandra opted to attack Meregho Saeno instead of my own party. But eventually... 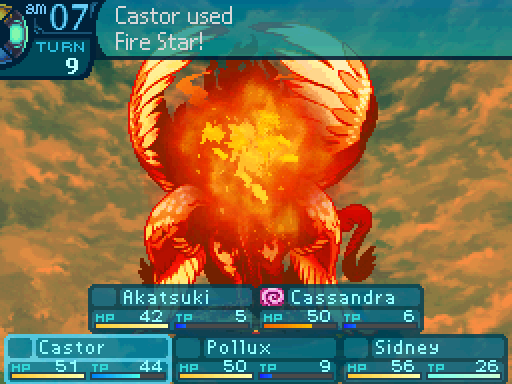 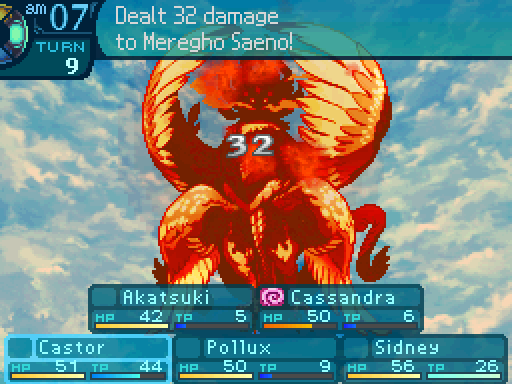 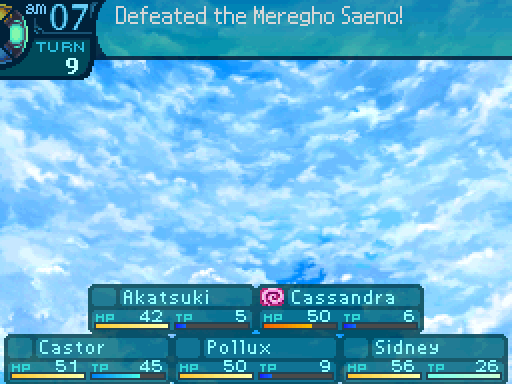 The fight is over. DS Version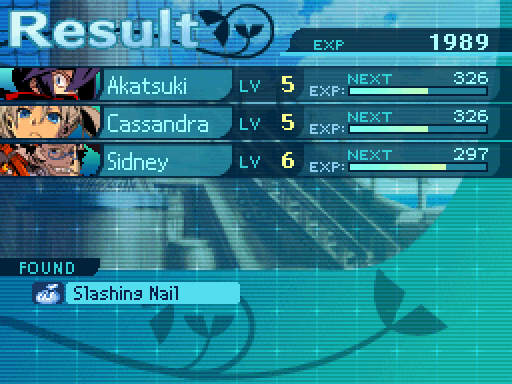 DS Version DS Version Now the clients will be able to observe the heavens from here with peace of mind. They thank you as you wave goodbye. You return to your ship to report back to the ocean city. DS Version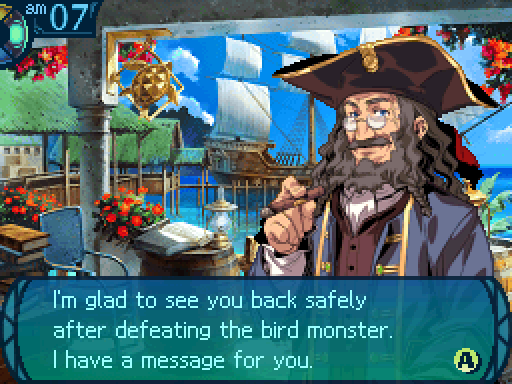 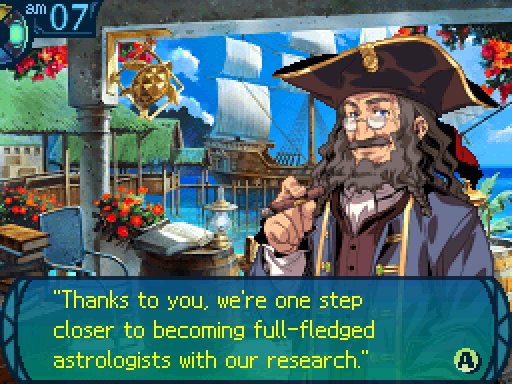 There you have it. It�s nice to see young people so driven by their goals. Haha, hopefully you are too. Oh, and this is also for you. The younger of the brothers left it as a token of his gratitude. There you have it. It�s nice to see young people so driven by their goals. Haha, hopefully you are too. Oh, and this is also for you. The younger of the brothers left it as a token of his gratitude. His last line changes to this if you already have Pollux's Records: ...You all did well to bring down that bird this time. Good work.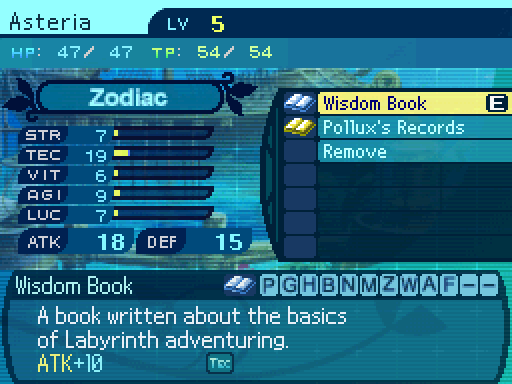 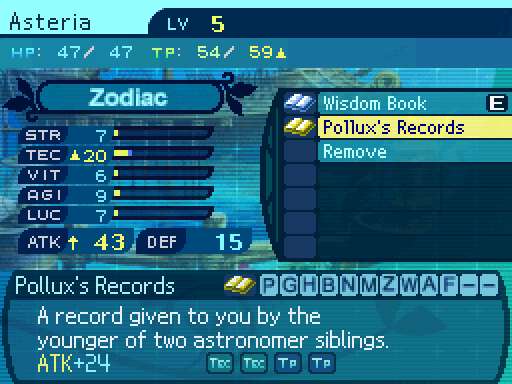 Pollux's Records is a pretty huge upgrade for Asteria, providing a nice increase to her most important stats. The increase in attack is unimportant. 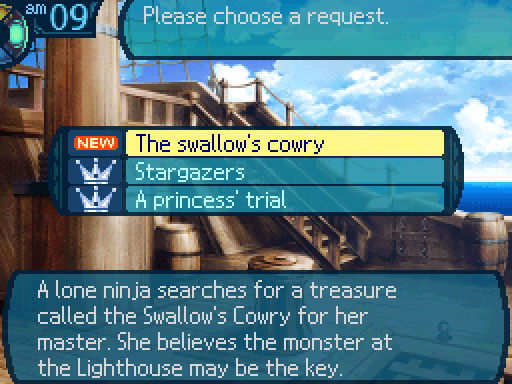 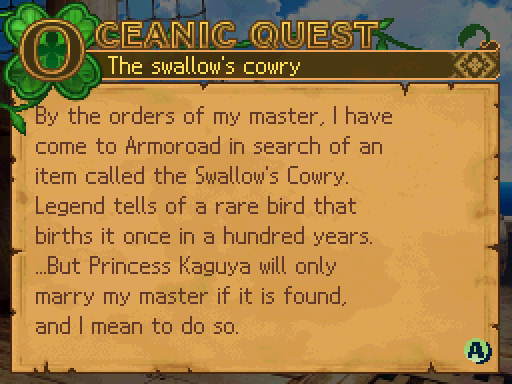 Now for the final Sea Quest. 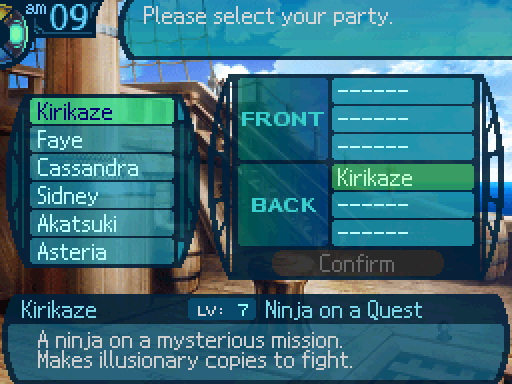 Kirikaze Class: Ninja Weapon: Dagger Skillset: -Keburi no Sue: Level 4 -Kagenui: Level 1 -Bunshin: Level 1 Supplies: -2 Medicas Kirikaze is the only NPC that's coming along. She'll just be dealing a slight amount of damage to Meregho Saeno.  For quests like these, just make sure to leave out the least important member, or someone who won't be able to contribute much in a fight like this. 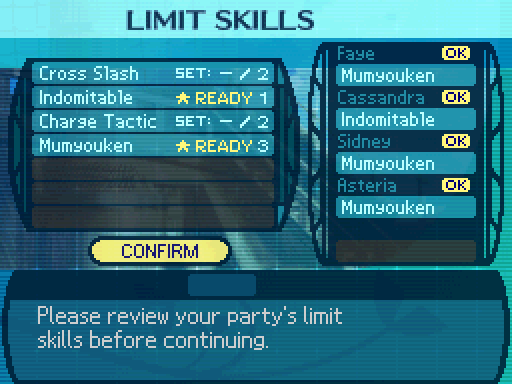 My Limit setup. I'm actually going to use Mumyouken this time. DS Version  After cautiously proceeding through the ruined lighthouse, you find a gigantic bird monster at the top! How persistent is this bird!? I dunno, but I don't think it can take one more fight. Come on! For the good of Armoroad!Your party and the ninja take weapons in hand as the bird spreads its wings in challenge! The monster lets loose a blood-curdling shriek as you dart toward the threat before you! Video: Meregho SaenoDS Version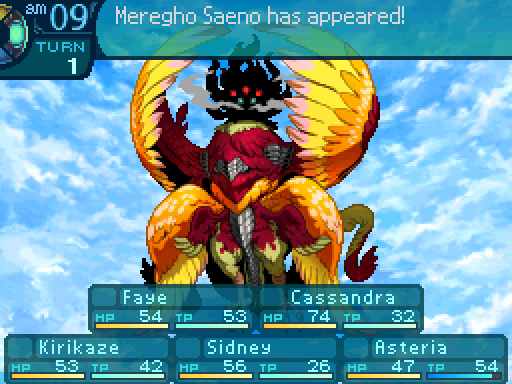 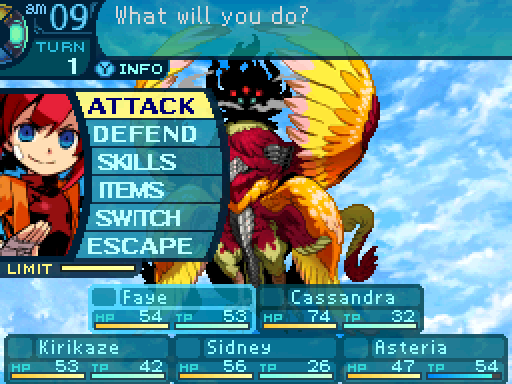 Starting off, Faye will just attack. 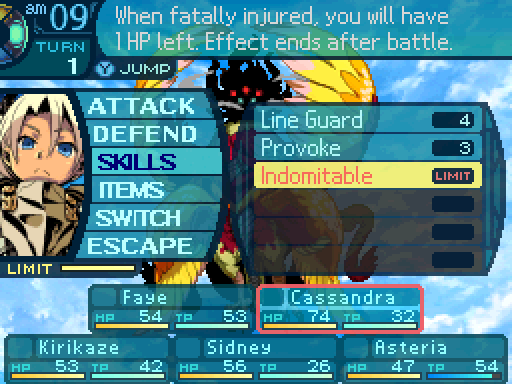 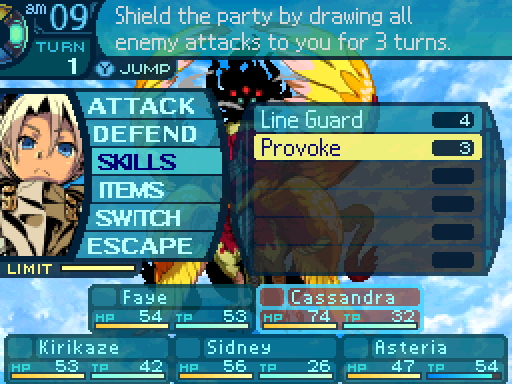 Cassandra will tank.  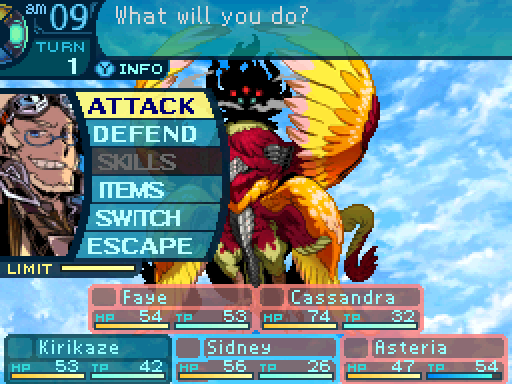  Sidney and Asteria are going all out with offense. Ready everyone? Just do it! Ha ha! How do you like that!? Ha ha! How do you like that!?Mumyouken is a random target skill that dishes out 140% damage Pierce attacks 3 times. When there's only one target to use it on, it's pretty powerful.   Whoa! I'm seeing double! Whoa! I'm seeing double!Bunshin creates a clone of the person that used that ability, at the cost of halving their HP and TP. The clone can do everything the original person can do, from using skills, items, and even running away. Also when there's a clone on the field, the Ninja isn't considered dead until every single Ninja on the field is dead. And the Ninja can create multiple copies of themselves. Oh and here's a funny little quirk about Kirikaze. Normally, she has a limited amount of supplies, but when she uses Bunshin, her clones start out with a full stock. 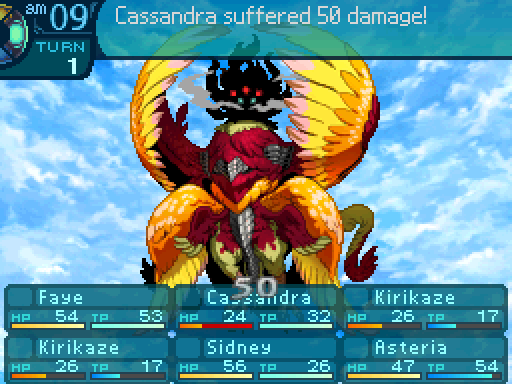 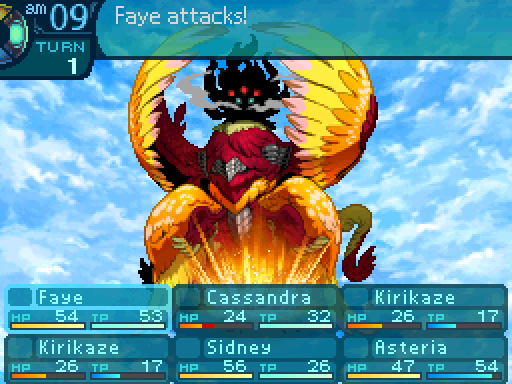 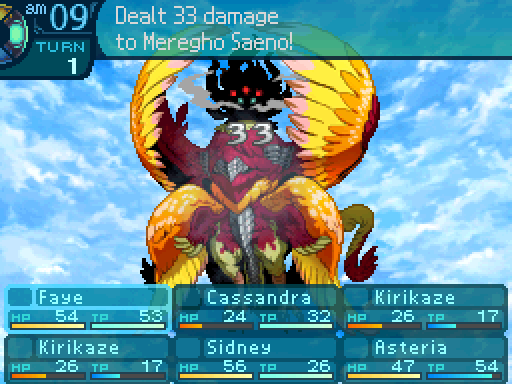 Bashy bashy! Bashy bashy!A decent amount of damage from Faye. 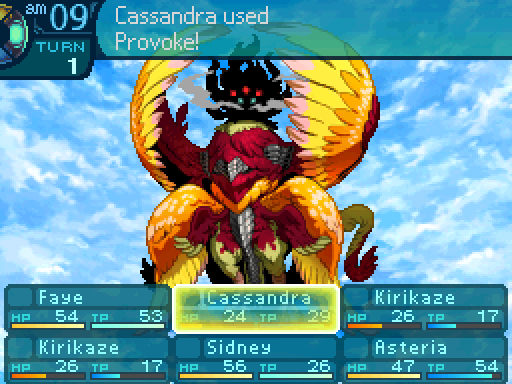  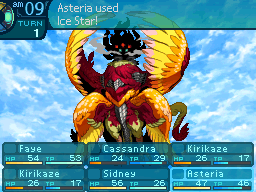 It's ice to meet you! It's ice to meet you! Asteria is a wrecking ball in this fight. We're really not lacking in offense for this one.  But even though Faye can dish out a lot of damage, she needs to work on supporting the team. 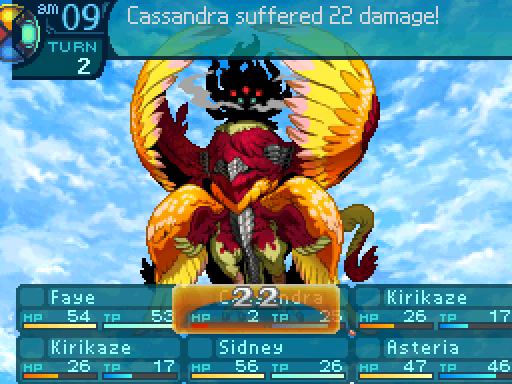  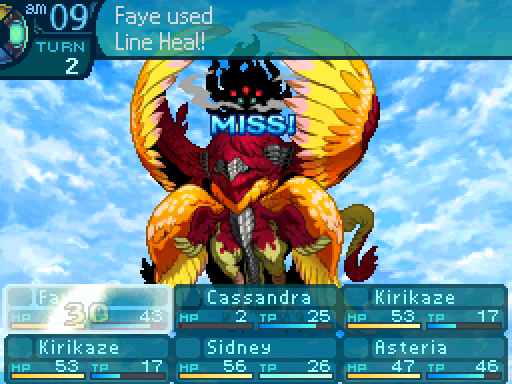  Spreading the love! Spreading the love!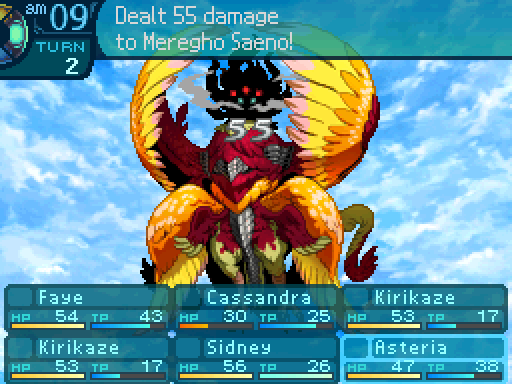 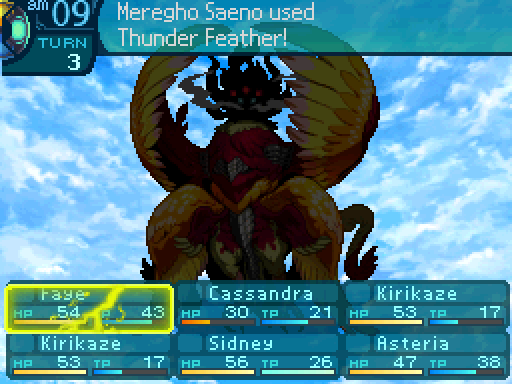  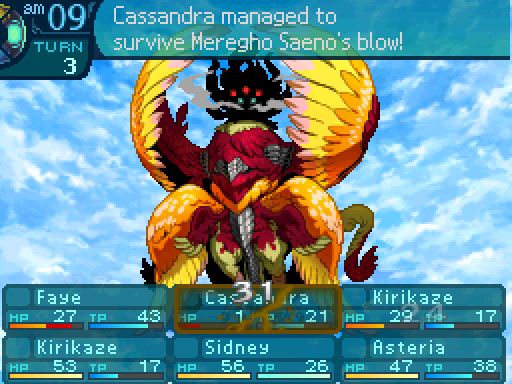 ARGH! Okay, I'm fine. I'm fine... ARGH! Okay, I'm fine. I'm fine...Indomitable kicking in. Once it activates, it has to be recasted if you want to keep the endure effect. 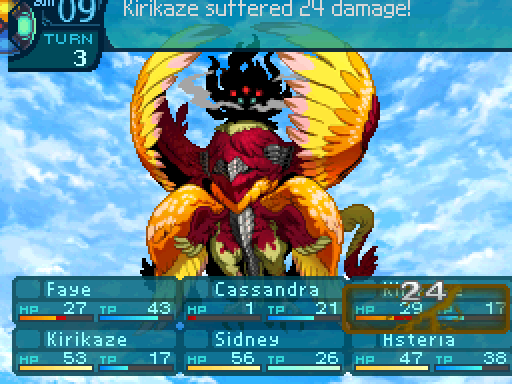  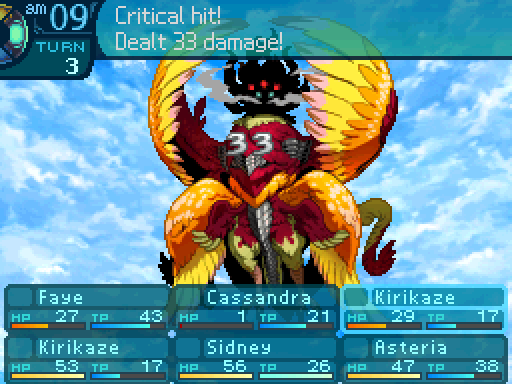 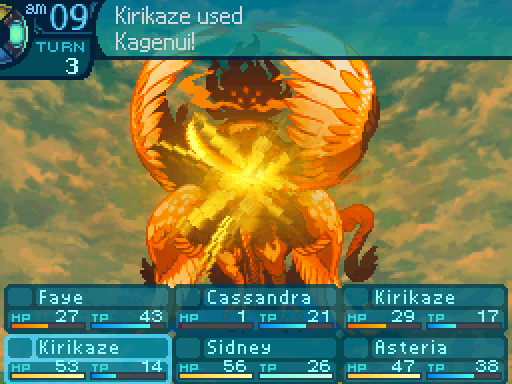 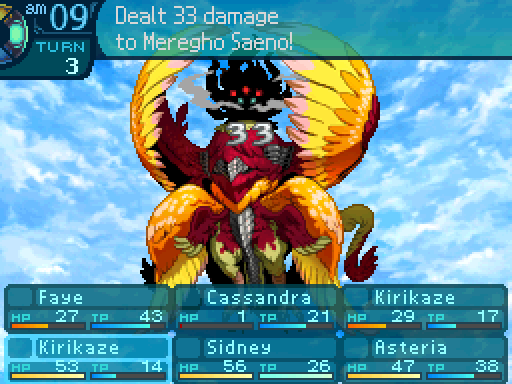 Kirikaze isn't lacking in damage, so you can whittle Meregho Saeno down pretty fast in this fight.   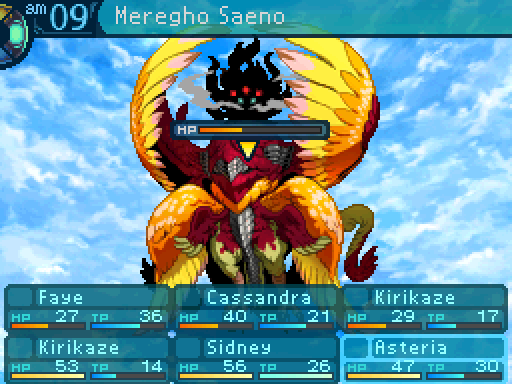 See? Turn 3, and it's already getting pretty low. Although now it means it's Panic Claw time. 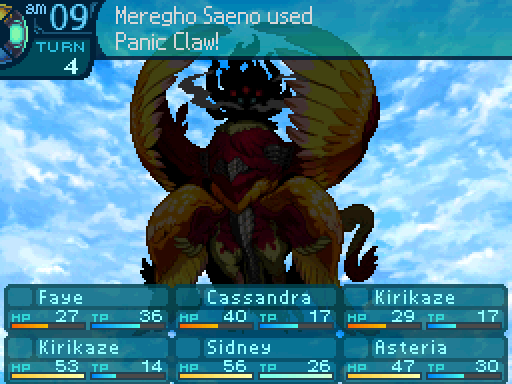  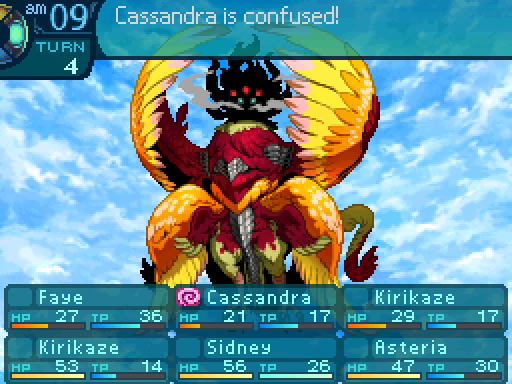 No! No! Get away! No! No! Get away!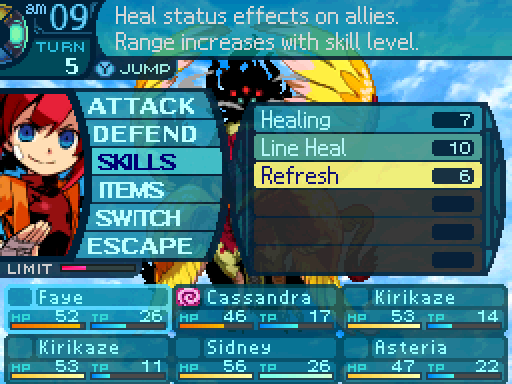   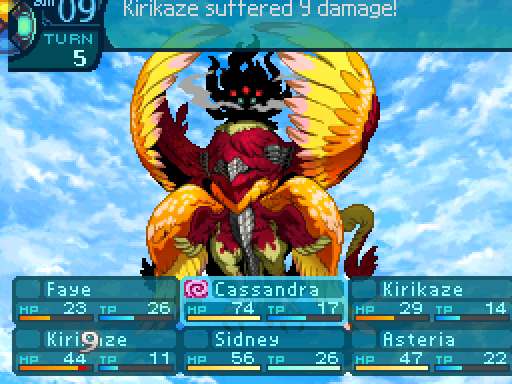 Ah! But she's on our side! Ah! But she's on our side! 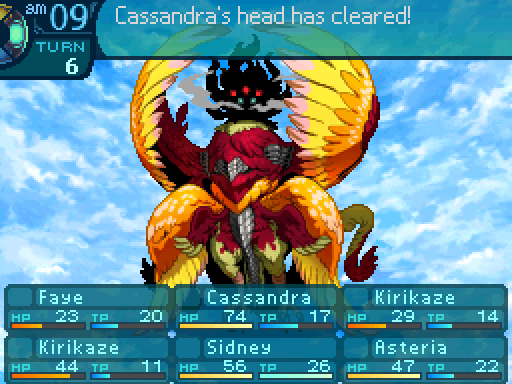 Cassie! Snap out of it! Oh, sorry. I'm not sure what got into me. Again. Cassie! Snap out of it! Oh, sorry. I'm not sure what got into me. Again. 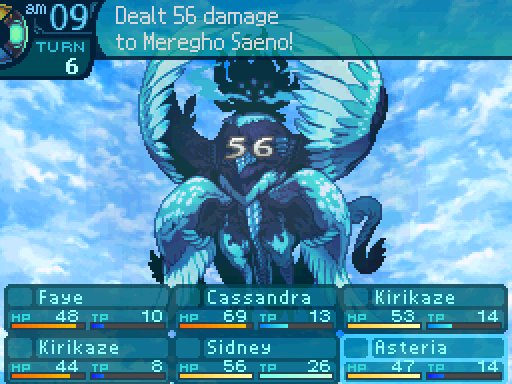 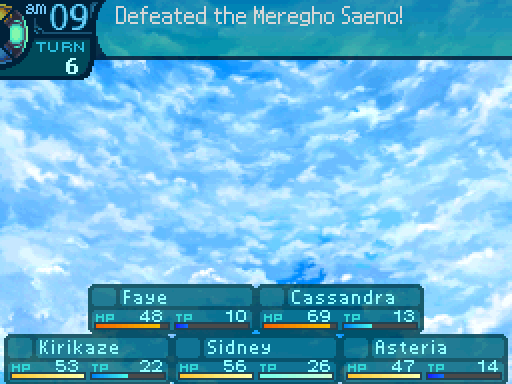 I'll be honest, I'm not really a fan of birds. I prefer reptiles, like blizzards! Ahahaha! Aster, stop. Your request has been denied, oh humorless one. I thought it was funny.DS Version I'll be honest, I'm not really a fan of birds. I prefer reptiles, like blizzards! Ahahaha! Aster, stop. Your request has been denied, oh humorless one. I thought it was funny.DS Version A fairly easy Sea Quest, although I don't recommend going straight for the 1 person Sea Quests first. DS Version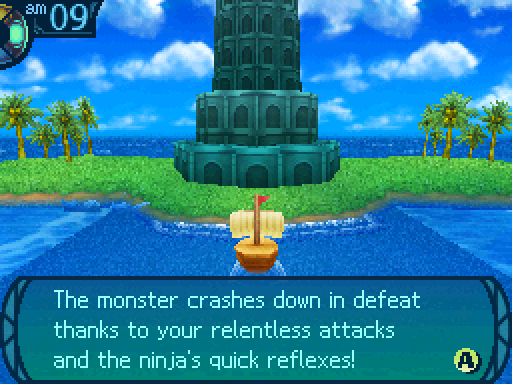 As you celebrate your victory, the client dashes off to examine the monster�s nest! But judging from her gloomy expression, it seems she hasn�t found what she came for. In any case, you have defeated the bird monster and must now set sail to report back to the ocean city. DS Version 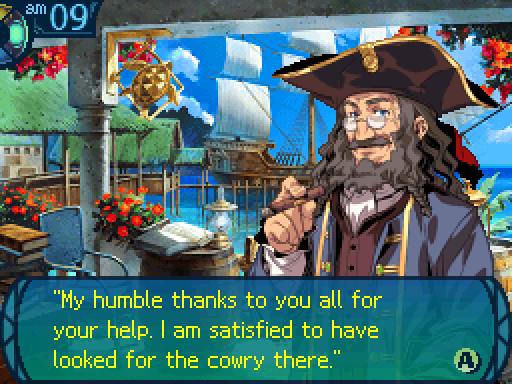 Don�t worry, the sea is vast and the forest is deep. I�m sure she�ll find what she seeks eventually. Oh, and take this with you. The client left it for you. Don�t worry, the sea is vast and the forest is deep. I�m sure she�ll find what she seeks eventually. Oh, and take this with you. The client left it for you.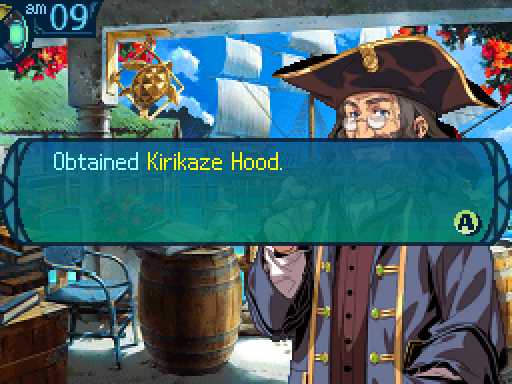 If you already have the hood, instead of giving you the Kirikaze Hood, he says this instead: You did well this time too. Keep up the hard work. It's a nice helmet, but I don't have anyone equip it for now. Next time, we'll go back into the Labyrinth and possibly run into a deadly enemy. Araxxor fucked around with this message at 17:58 on Jun 21, 2015 |
|
#
¿
May 27, 2015 04:42
|
|

|
Update 9: Formido Oppugnatura Exsequens loving green... augh... I'll take a moment to talk about how Co-op Sea Quests work before going on with the rest of the update. You can play co-op Sea Quests with 2 to 5 players, and it's with a wireless connection, no Wi-Fi. So when everyone chooses the co-op option, one person gets to be the leader, while everyone else has to join in on their voyage. Once everyone's ready, the leader gets to decide which Sea Quest they get to go on. You can't participate in a Sea Quest if it has NPCs and there's more players than available party slots. Once that's done, everyone sends a party member from their own guild to participate in the voyage, so if you have less than 5 people in the room, you can't fight with a full party. Afterward, the leader decides what the formation will be, and who equips what Limit. Then you get into the fight, and everyone decides what their own party member will do, and then waits for everyone else to input their commands. It's pretty fun, and if you do the co-op exclusive Sea Quest, you can completely break the difficulty of the fight. Even if you come in with an evenly matched party, since the bosses were mostly balanced around the fact that in most cases you won't be fighting with a full party. The Co-op Sea Quests don't have any rewards for clearing them, other than the Limit you can get on your first clear. And in case you're curious, the �plot� for all the co-op exclusive Sea Quests just amount to, here's a monster at this place, kill it. Anyways, that's enough of that. Back to the update! DS Version When he notices your approach, he hails you with a cheerful expression. Made your report to the Senatus, have you? That means you�ve the right to go on ahead from here. In honor of your accomplishment, I�d like you to have this.The guard pulls a small, metallic hammer from a bag hanging from his waist and offers it to you. Wait, what's this? It�s a forging hammer. Enhancing one�s weapons is common practice for explorers in Armoroad. If you seriously intend to explore the Labyrinth, you should consider doing the same.The guard finishes by giving you not one, but three heavy hammers, which you gracefully accept. 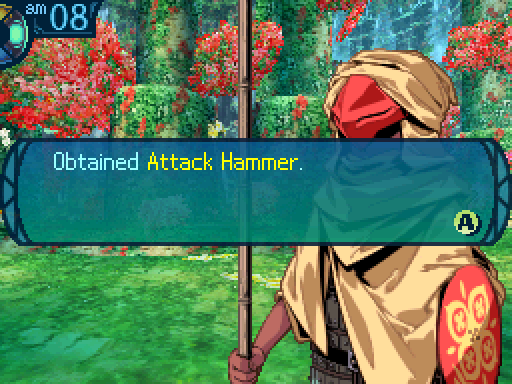   Whoa! Thanks man! Whoa! Thanks man!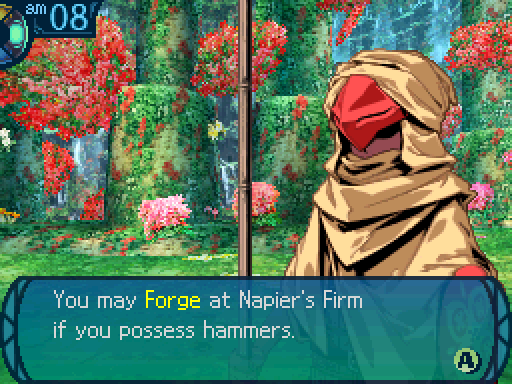 You may forge to confer the innate effects of a hammer onto a weapon to strengthen it. When you get a chance, bring your hammers to Napier�s Firm to try the process out. 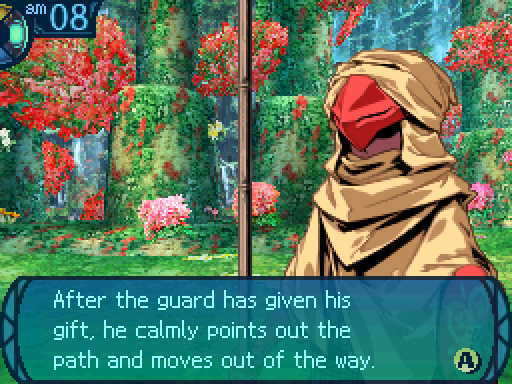 You may proceed apace or return to town and experiment with your new hammers at the Firm.   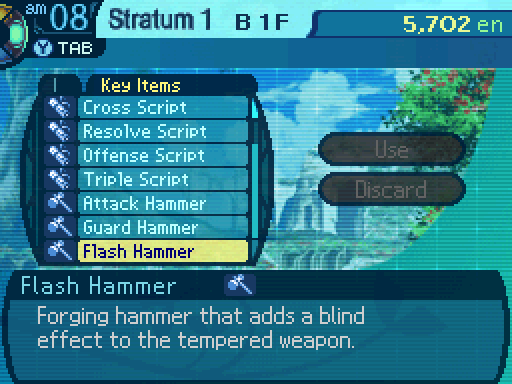 I'm curious to see how these can improve our weapons. Only one way to find out.DS Version I'm curious to see how these can improve our weapons. Only one way to find out.DS Version Well then, allow me to explain the process. You may use these hammers to temper weapons. Ooh! Then let's get star- Not for free, of course. Perish the thought. A nominal fee applies which varies by weapon. Well then, allow me to explain the process. You may use these hammers to temper weapons. Ooh! Then let's get star- Not for free, of course. Perish the thought. A nominal fee applies which varies by weapon.  Secondary materials will also be required, but if I�ve purchased them already, that will suffice. Let�s table any questions for the moment and demonstrate. Secondary materials will also be required, but if I�ve purchased them already, that will suffice. Let�s table any questions for the moment and demonstrate. If you use this intelligently, it will be a powerful advantage in battle. 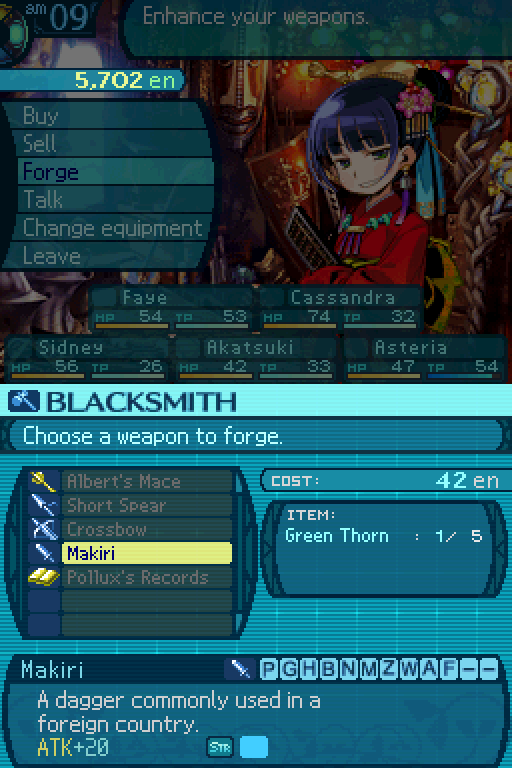 Forging is a minor bit of customization that was added to the game, but it can be ignored for the most part. In order to forge something, you have to have a weapon for this, armor and accessories can't be forged, and the weapon needs an empty forge slot. You also have a limited number of materials to work with, once you run out, you can't forge anymore stuff. 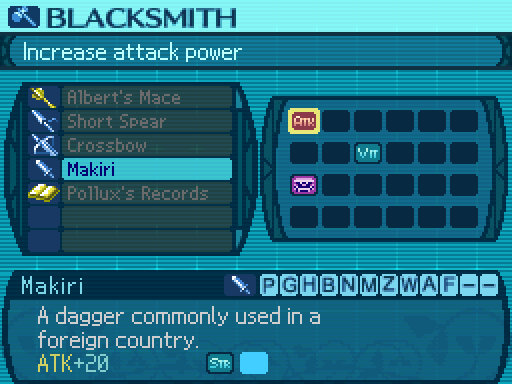 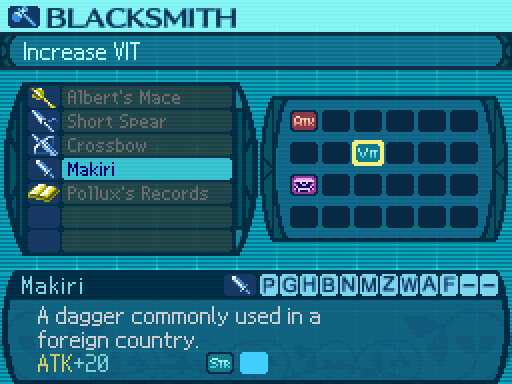 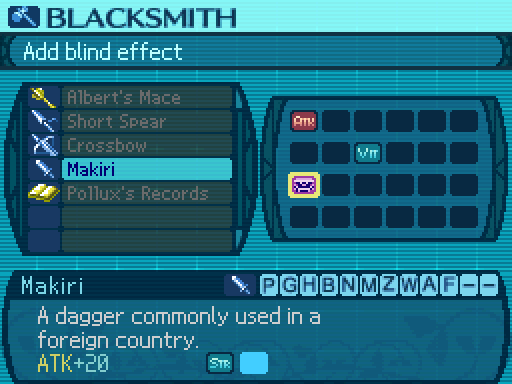 After choosing the weapon you want to forge, you can choose which forge you want to apply. The attack forge increases your damage by 3% per forge. The VIT forge increases the VIT stat by one point. And the Blind forge adds a 6% chance for regular attacks to blind one the first forge, but any extra Blind forges only add a 3% chance per forge. The Blind chance only applies to regular attacks, not skills, so I don't find that to be worth it. 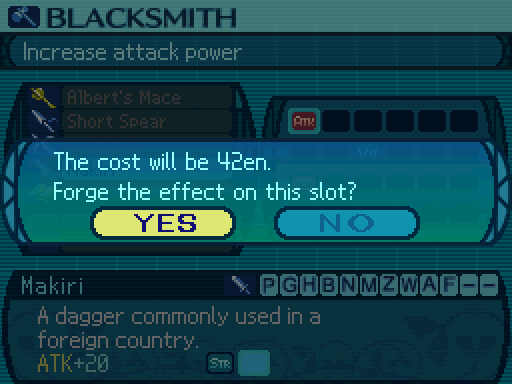 Also you have to pay a fee to forge stuff. Each forge costs 1/4th of the weapon's cost. This really brings down forging for me, since it's a minor upgrade at best, and you're gonna be switching weapons fairly often. EO4 made forging free, which made it a lot more worthwhile in my opinion. For what it's worth, forging does raise the value of your weapon a bit, so you get a bit more money back from selling a forged weapon.  Anyways, I just put an attack forge on Akatsuki's weapon. 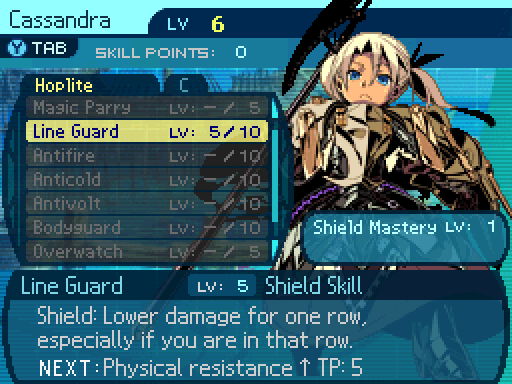 I didn't level up skills in the last update, so let's do that right now. Line Guard now decreases physical damage by 34% if used on the Hoplite's own row, and 14% otherwise. 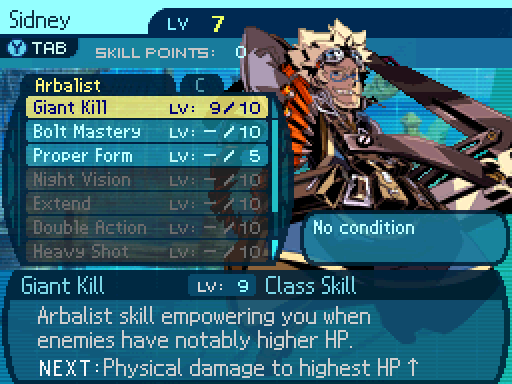 Giant Kill now provides a whopping 51% damage boost to all attacks.  Attack them, not me! Attack them, not me!I took the time to do another Sea Quest and level up Akatsuki and Asteria, because that power deficit was bugging me. I have Akatsuki level up Otori, which works just like Provoke, except it can be used on allies, not just yourself. Handy if you want your enemies to focus on your Hoplite, but they don't have time to cast Provoke. Otori has the exact same scaling as Provoke in terms of aggro values.  Dark Ether is cheaper to cast. And now, back to the Labyrinth. DS Version Huh? What's with that moon handle? ...Hey! It's not opening! Oh, I see a hole of some sort. Perhaps we need a key before we can open this. Awww... Huh? What's with that moon handle? ...Hey! It's not opening! Oh, I see a hole of some sort. Perhaps we need a key before we can open this. Awww...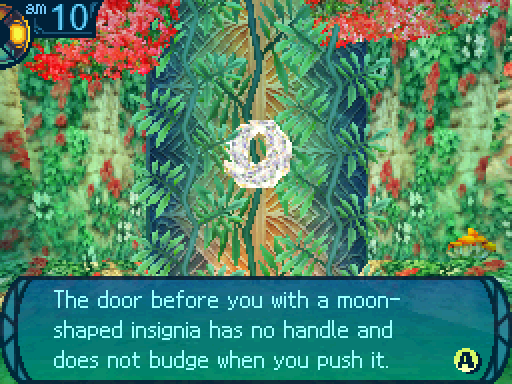 You seem to have no way to open this door at the moment. You leave it be for the moment to explore elsewhere. I can't open these right now, so I'm going to mark this door. But this game doesn't have a locked door icon like EO2 did. 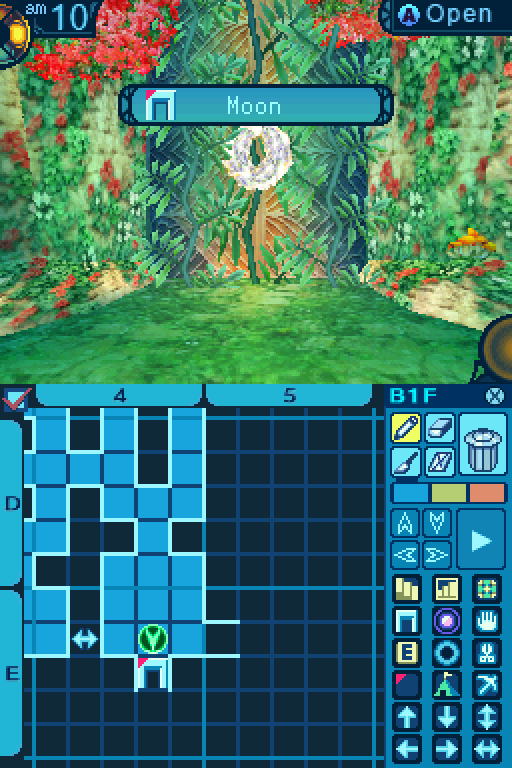 So I leave a memo instead. 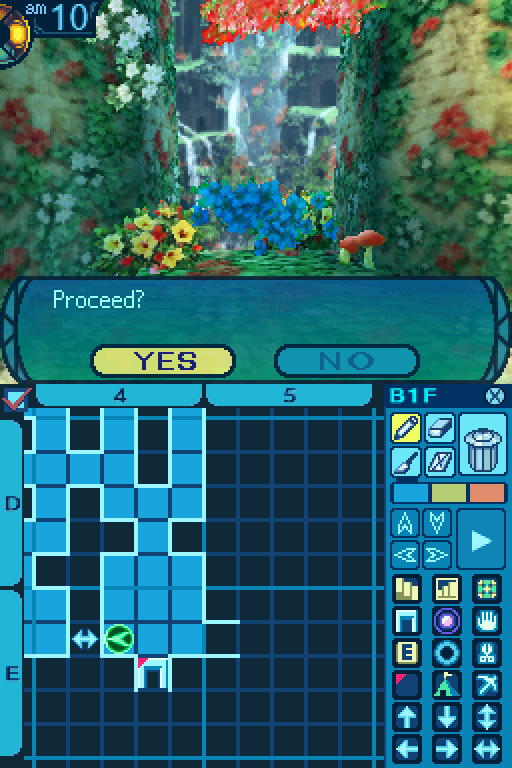 A quick shortcut back.  But one that's inaccessible for now. 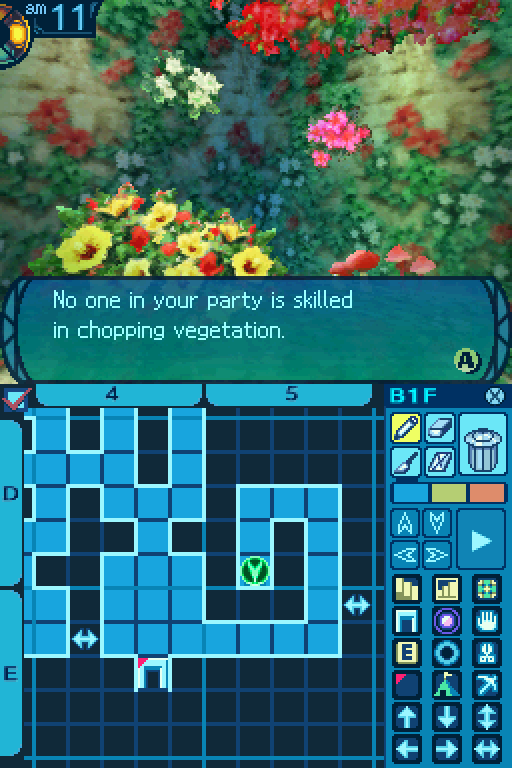 Here's another Chop Point. D5 Chop Point: Soft Bark: 70% Gather Rate. Supple Branch: 30% Gather Rate. Palm Trunk: Rare. Common Gather Periods: 1 to 12. Rare Gather Periods: 2 to 5. The Chop Points within a Stratum all give out the same items. They just give out certain items at different rates. 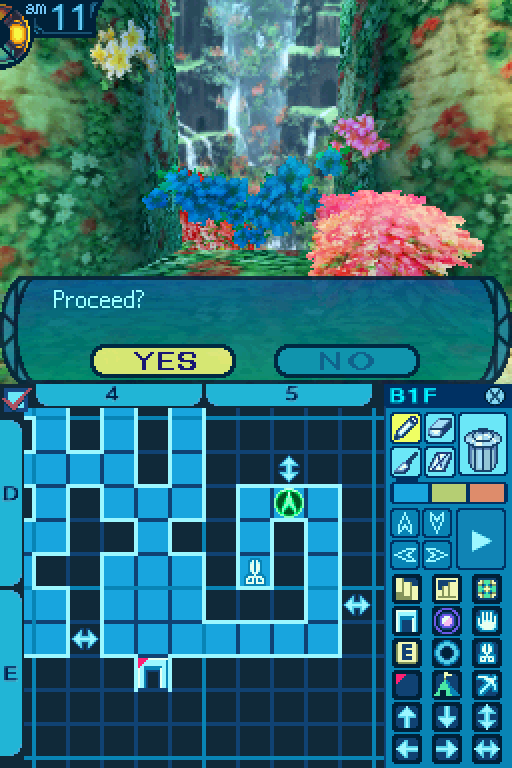 Oh, but here's a shortcut we can go through immediately.  Huh, must lead deeper into the Labyrinth. But why are there stairs in the Labyrinth? And for that matter, doors? I dunno, and who cares? Let's go. But we still haven't seen all of the floor yet. I must admit, an incomplete map makes me a bit uneasy. And who knows what's down there. It would be best to prepare ourselves first. Fine, we'll keep looking around. Party poopers. Huh, must lead deeper into the Labyrinth. But why are there stairs in the Labyrinth? And for that matter, doors? I dunno, and who cares? Let's go. But we still haven't seen all of the floor yet. I must admit, an incomplete map makes me a bit uneasy. And who knows what's down there. It would be best to prepare ourselves first. Fine, we'll keep looking around. Party poopers. The sprouts look as if they might be edible... Will you muster the courage to pluck one and eat it?  Hmm... feeling a bit peckish. Let's try these, they look good. Sidney, I don't think it's a good idea to- Hmm... feeling a bit peckish. Let's try these, they look good. Sidney, I don't think it's a good idea to-Sidney, entranced by its fresh scent, takes a bite of the sprout and swallows... Suddenly, Sidney begins to complain of severe stomach pains! It seems that the sprout, far from being edible, was a species of poisonous plant! 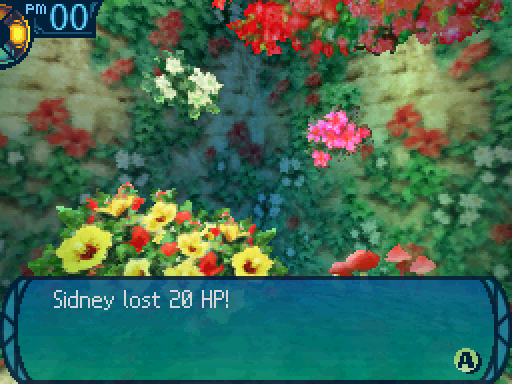 I immediately regret my decision! I immediately regret my decision!  Perhaps eating random plants that grow within this deadly Labyrinth wasn't such a good idea. You don't need to rub it in. Perhaps eating random plants that grow within this deadly Labyrinth wasn't such a good idea. You don't need to rub it in.Regretting your carelessness, you return to your explorations. Some events have minor consequences. In this case, the game chooses a random character to lose some HP. If you say no, this happens instead: Carelessless can lead to certain death within the Labyrinth! You decide the risk is greater than any possible reward and leave the sprouts where they are. Now, this event actually has a couple of different outcomes depending on what classes you have in the party. EO3 has a few events that'll differ if you have the right class for it. These replace the class specific shortcuts that were featured in EO2. Now if you have a Farmer in the party and someone else tries to eat the plant, this happens: I wonder if those flowers'll make a good snack. Wait!You reach out to pluck the sprout, but Alice stops you. Alice, drawing on lifelong experience with plants, explains that the sprout is poisonous. Oh. Well, thanks for the save!You defer to Alice�s expertise and leave the sprouts alone in favor of moving on. Now if the Farmer is chosen to eat the plant, this happens: Oh what a lovely- AH! Alice! What's wrong?Alice reaches for the sprout, but hesitates and then throws it away in alarm. Seeing your confusion, Alice explains that these are poisonous plants which appear edible. You crush the sprout beneath your boot heel and resume exploring the Labyrinth. PAH! What devious tricks will this Labyrinth try next?Now if you don't have a Farmer in the party, but a Gladiator gets chosen to eat the plant, the best outcome happens: Ooh! I could use a bite. Rose! Don't!Rose, entranced by its fresh scent, takes a bite of the sprout and swallows... Suddenly, Rose begins to complain of severe stomach pains! It seems that the sprout, far from being edible, was a species of poisonous plant! Ugh... Hey Rose, you okay!? Yeah... I'm fine. I'm not letting a flower get the best of me!...But Rose is too strong to be daunted by the poison and comes away with renewed resolve! Rose recovered 10 HP! Ah, that was a nice little snack.Typically in class specific events, different classes can cause different outcomes, or a certain group of classes can avert a bad thing. I think it's a nice way to spice up a playthrough instead of resorting to 2's class specific shortcuts, which outright restricted you from exploring part of the Labyrinth if you didn't have the right class. 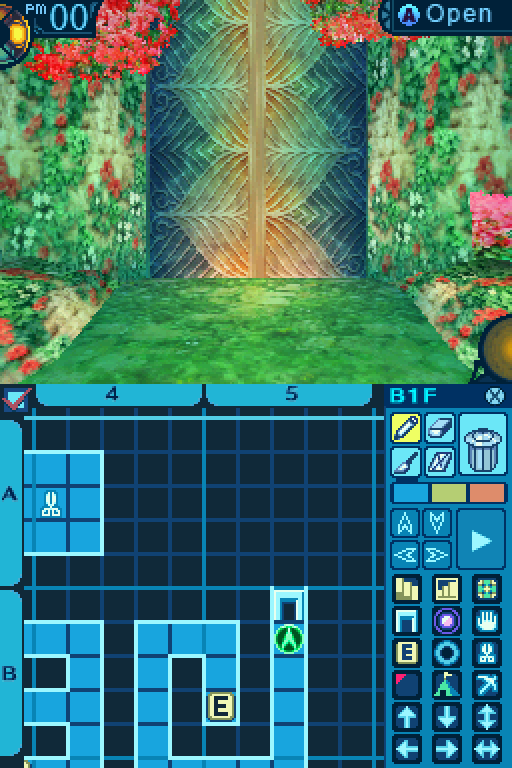 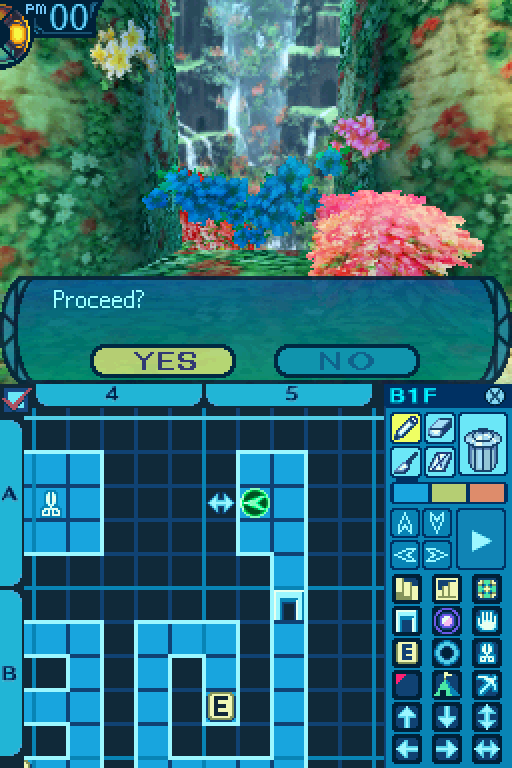 Another shortcut we can go through immediately.  Most of the time, shortcuts like those lead to treasure rooms.   Now I got some light armor for Cassandra. I put this on her for the time being. Now here's something to keep in mind while playing EO3. Armor isn't that important to upgrade. This is because the damage formulas take the total armor value of their equipment and divides it by 3. This means that spending an extra 150 or whatever to upgrade to a piece of armor that provides 2 more points of defense is a massive waste of money because it won't actually mitigate damage that much. Don't ignore armor altogether, only upgrade if you either find it in a treasure chest, or it's a significant upgrade over your current pieces of armor.   Bravants are a very good consumable. They increase the damage output of physical attacks by 45% for 4 turns. Unfortunately, they do not work on elemental or Almighty attacks.  We're done with the 1st floor for now. There's more to it, but that's inaccessible right now.   Faye gets a timely level up from a fight.  Line Heal now has a heal power of 65%.  An inaccessible shortcut. 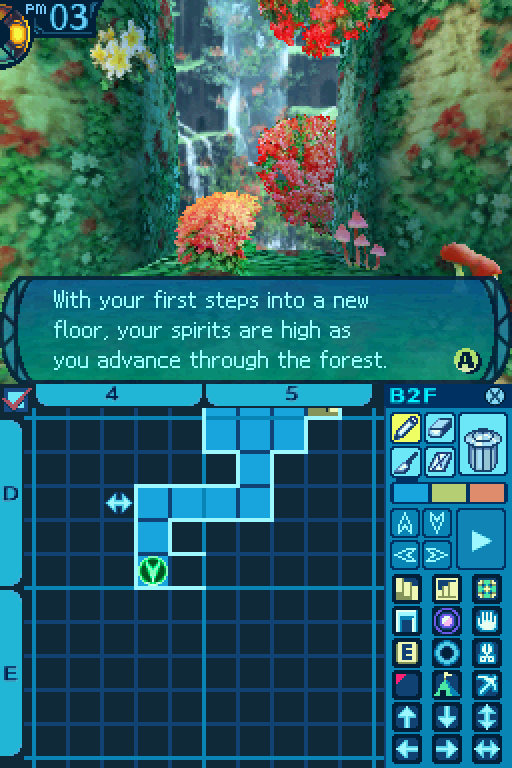 If the first floor was that easy, we shouldn't have any trouble with the rest of this place! If the first floor was that easy, we shouldn't have any trouble with the rest of this place! 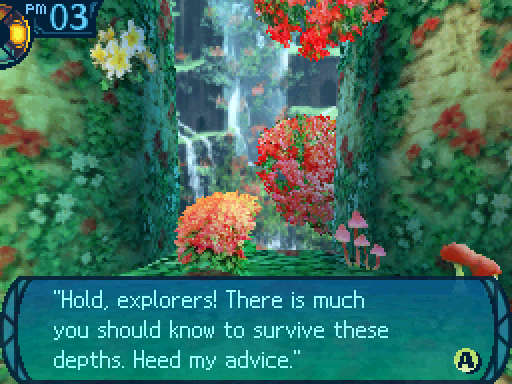 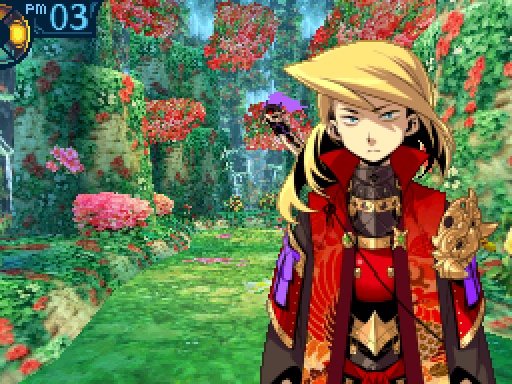 He is blond and has a stern look that hints at greater maturity than his youth would suggest.  Is this your first time on the second floor?� he asks, as if gauging your mettle. Is this your first time on the second floor?� he asks, as if gauging your mettle.Though he is alone, his presence is somewhat fearsome. You wonder how best to respond... 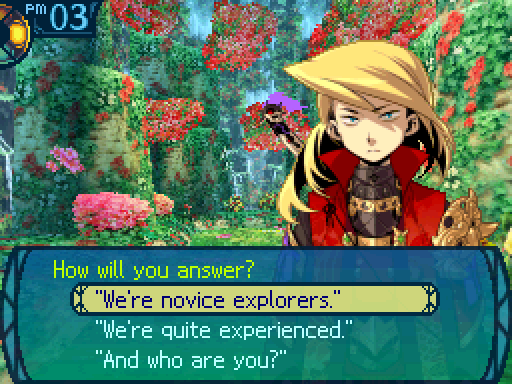 Yes, we just got done with the first floor. Yes, we just got done with the first floor. On hearing your honest answer that you are novice explorers, the man smiles and continues. Welcome, newcomers to Armoroad. By now you must have been to the Senatus, no? Yes. Did they send you?The man, who is clad in a red outfit of foreign design, speaks much more amicably than before. My orders from the Senatus are to give useful advice to novice explorers in this Labyrinth.The man stops for a moment and shifts his gaze toward the dense thicket of trees further in. 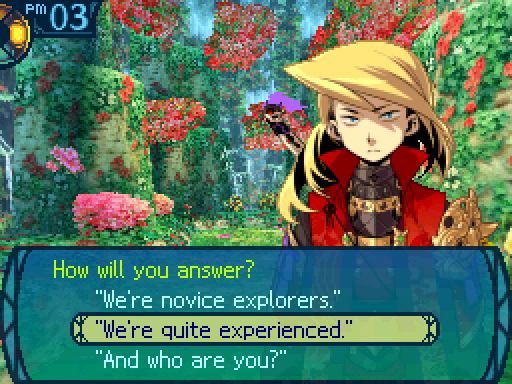 Don't worry about us. We've got a handle on this whole Labyrinth business. Heh, you could even call us veterans! Don't worry about us. We've got a handle on this whole Labyrinth business. Heh, you could even call us veterans!You tell the man that you are experienced explorers, to which he gives a clearly mocking smile. Ah, pardon me. I�m here to give advice to newcomers, advice which you... veterans... wouldn�t need. Excuse me?The man, who is clad in a red outfit of foreign design, shifts his gaze to the forest ahead. 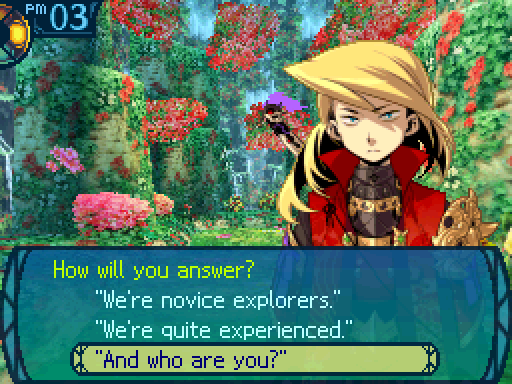 And uh, who are you? And uh, who are you?The man seems surprised and amused to have his question answered with another question. Me? I�m not the one you should concern yourself with right now. The monster ahead is. What monster-whoa nelly!The man, who is clad in a red outfit of foreign design, shifts his gaze to the forest ahead. DS Version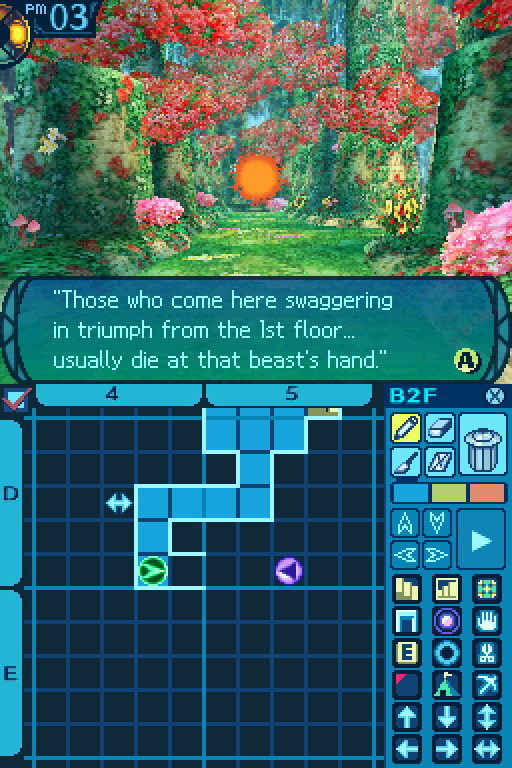 Know that shape well, for we will be seeing it a lot. What you're seeing right now is a core mechanic of the Etrian Odyssey series, the FOE. It's short for Formido Oppugnatura Exsequens. I have no idea what that means, other than it's in Latin and translates to something about a terrible force of nature or something like that. You follow the man�s gaze to a powerful monster, the likes of which you�ve never seen. That... is a big lizard.The rest of the man's dialogue changes depending on the choice you made. If you picked the 1st or 3rd choice, he'll say this: If everyone was smart enough to back away from fights they clearly can�t win, there�d be no issue. But too many novice guilds perish from foolishly charging towards monsters beyond their abilities. ...I must caution you as well. Watch the enemy�s movements before making your own.The man gives a faintly sardonic smile and bow before walking deeper into the forest. I look forward to meeting you again should our paths cross.He calls out as he walks away. The FOE is basically a super strong monster that will usually kill your party when you first come across it. You can take it on later when your guild is stronger. They're basically obstacles to be avoided, not enemies to fight. FOEs are actually field encounters, and running into them will initiate a fight. Learning their movement patterns and avoiding them is a key party of the gameplay. How very helpful of him. Tch. Who does he think he is? My dad? We can totally take that thing. Wait, what? I don't think this is a good idea! ATAAAAAACK! If you chose the 2nd option... But who, save novices, would make such an error? Veterans like you should have no worries.The mocking smile does not leave the man�s face as he disappears from view into the forest. How rude of him.  Oh no. Faye. Please don't do anything rash. So. He thinks we're just rookies that can't do anything. He thinks we can't take on a big dumb stupid lizard. Well. I'll show him! AAAAAAGGGGGHHHHHH! Oh dear god. Sidney! Stop her! CHAAAAAAAARGE! I've had a short youth. YEEEART! Oh no. Faye. Please don't do anything rash. So. He thinks we're just rookies that can't do anything. He thinks we can't take on a big dumb stupid lizard. Well. I'll show him! AAAAAAGGGGGHHHHHH! Oh dear god. Sidney! Stop her! CHAAAAAAAARGE! I've had a short youth. YEEEART! WARNING: DO NOT TRY THIS AT HOME.Video: Greedy Lizard WARNING: DO NOT TRY THIS AT HOME.Video: Greedy Lizard DS Version DS VersionProbably my favorite FOE track in the series. It's pretty frantic and fast paced. 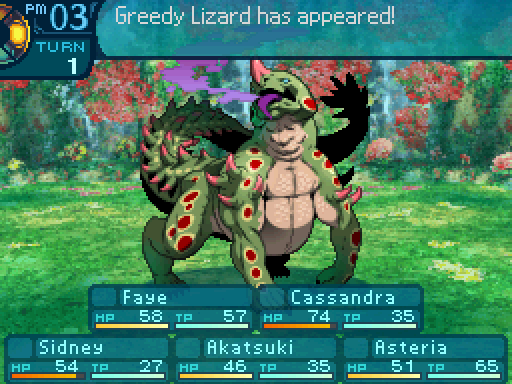  Greedy Lizard Behavior: Patrols a set path. Aggressive: No. HP: 736 TP: 511 STR: 16 VIT: 15 AGI: 14 LUC: 15 TEC: 13 Attack Type: Slash Exp: 2266 Item Drops: -Drop 1: Lizard Crest - 80% Drop Rate. 1 needed for Lance (Spear. Must be restocked.) --Lizard's fin undaunted by fledgling warriors' attacks. -Drop 2: N/A -Gold: N/A Description: Bacteria are rife on this lizard's fangs. Any bite wounds should be treated immediately. Damage Resistances: Slash: 100% Strike: 100% Pierce: 100% Fire: 50% Ice: 150% Volt: 100% Ailment Resistances: Sleep: 10% Confusion: 10% Plague: 10% Poison: IMMUNE Blind: 122% Curse: 10% Paralysis: 10% Bind Resistances: Head: 50% Arm: 50% Leg: 50% Other Resistances: Death: 10% Petrification: 10% Stun: 50% Skills: Greedy Fang: Uses the Head. A single target Slash attack that deals 130% damage and has a 60% chance to inflict Poison. The Poison ticks for 40 damage. Greedy Lizards are very powerful. They have the same amount of HP as the Meregho Saeno, and they actually hit harder. Though they're limited to single target attacks, but they're pretty much guaranteed to kill most classes at this point. They only have one skill, and that's Greedy Fang. It can inflict Poison, so if someone survives the initial hit, they'll probably die from the Poison. 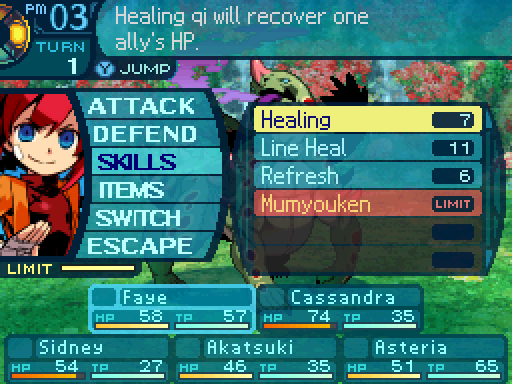 I'm gonna have Faye keep Cassandra's HP high. 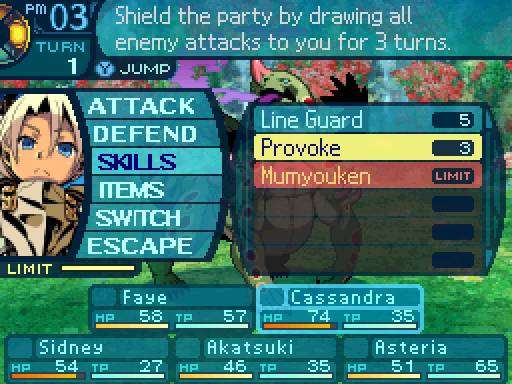 Cassandra will tank. 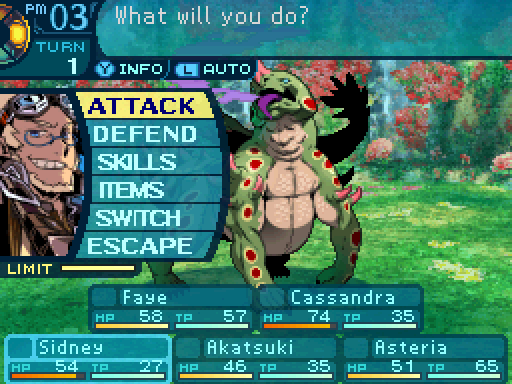 Sidney will deal damage. 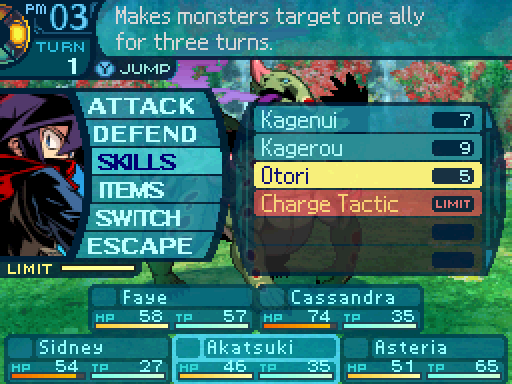 Akatsuki will support and deal damge.   Asteria will deal damage.  MARCH! MARCH!  Hello there. I am Akatsuki. I am here to tell you that this girl will make for a very tasty meal, while the rest of us taste terrible. Wait, what!? Just go with it. You need to distract it. Ugh, fine. Hello there. I am Akatsuki. I am here to tell you that this girl will make for a very tasty meal, while the rest of us taste terrible. Wait, what!? Just go with it. You need to distract it. Ugh, fine.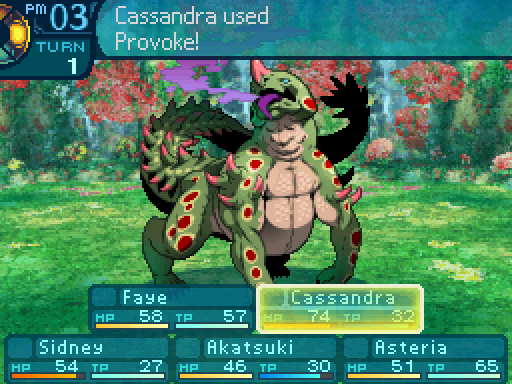 Yoo hoo! Over here! Yoo hoo! Over here!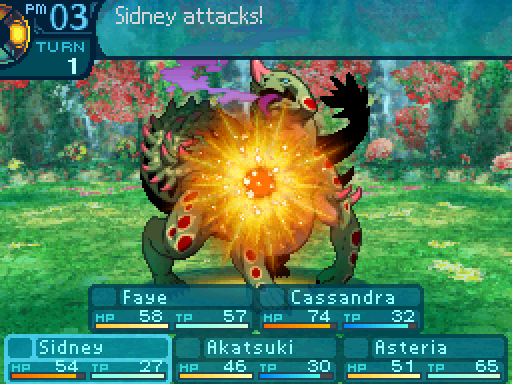 This should put a dent in it! This should put a dent in it!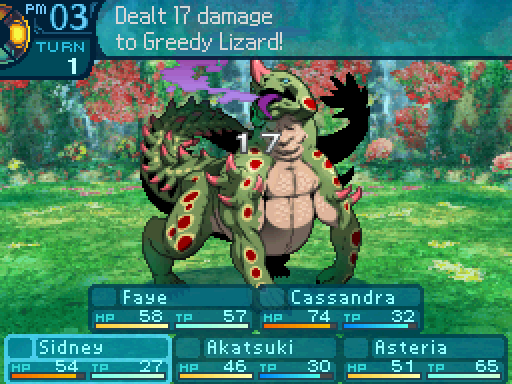  Oh come on! Oh come on!The Greedy Lizard is also way more durable than the Meregho Saeno. 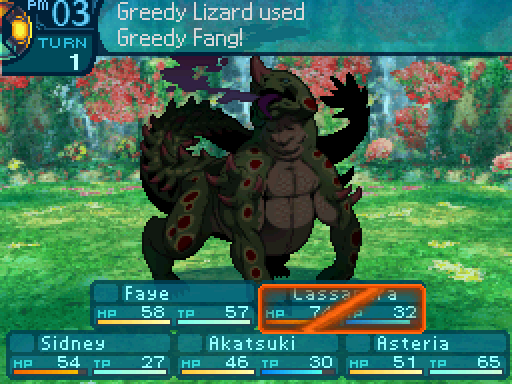 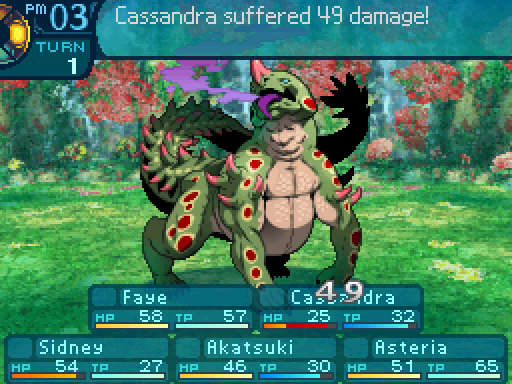 All of you better kill this thing soon! Or we could just do the smart thing and run away. All of you better kill this thing soon! Or we could just do the smart thing and run away.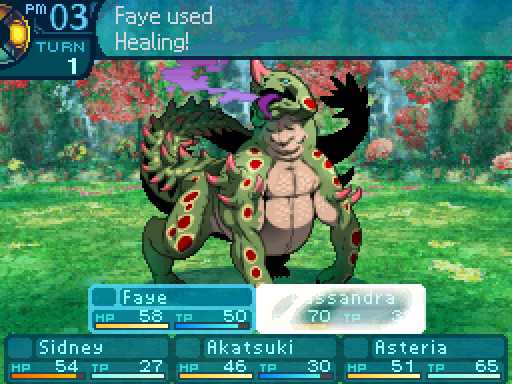  That's quitter talk, and I'm not having any of that here! That's quitter talk, and I'm not having any of that here! 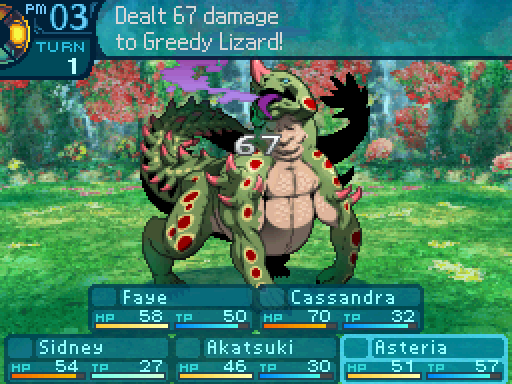 Aha! Found it's weakness! Aha! Found it's weakness!Asteria is my main source of damage, and I'm pretty much relying on her to carry me through this fight. 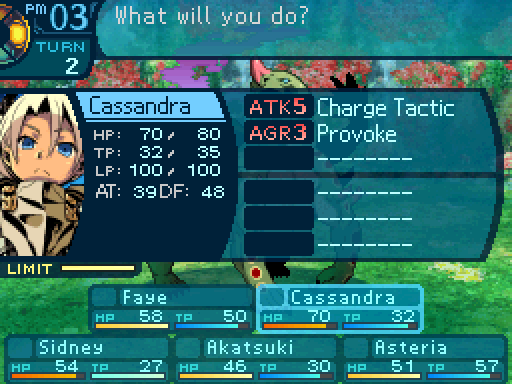 You can also check the current status of a party member, and see what buffs and debuffs they currently have. A new improvement that EO3 made is that you can see how many turns you have left on your buffs and debuffs. Also, I'm showing you this to show that Otori and Provoke don't stack. They'll just overwrite each eother. 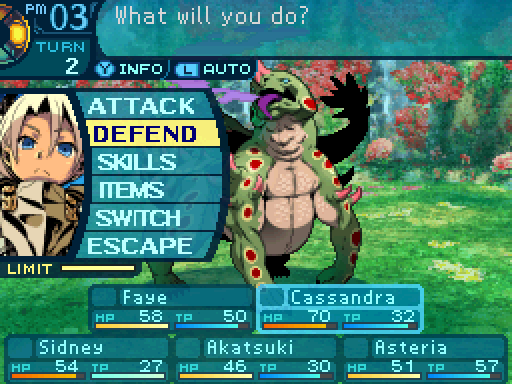 I'll have Cassandra alternate between doing stuff and defending. 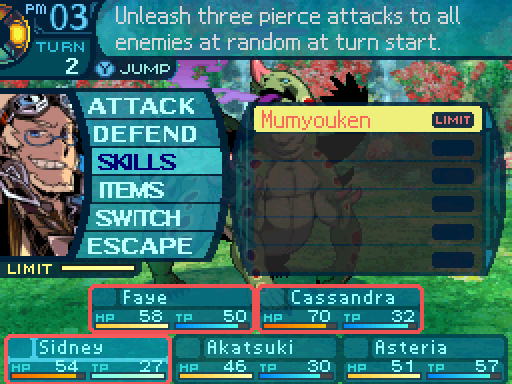 I didn't have Sidney use Mumyouken before, since that would have gone before Charge Tactic went off.  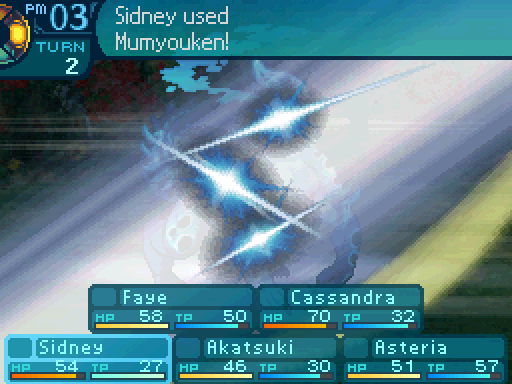 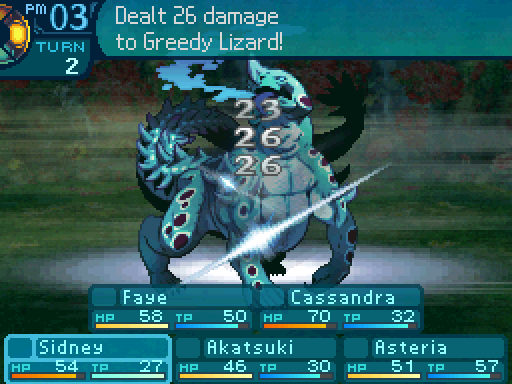 Pa-POW! That's more like it! Pa-POW! That's more like it!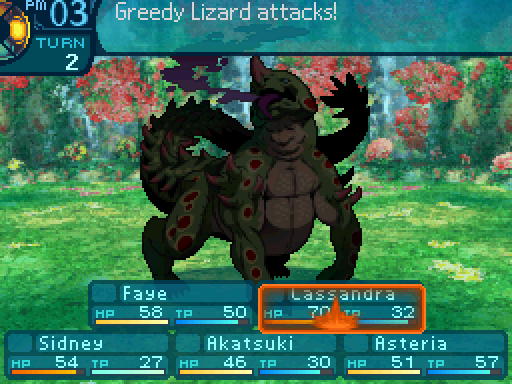 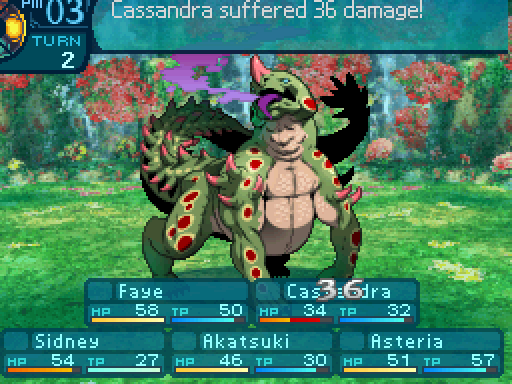 The Greedy Lizard's regular attacks still hurt, but they can't Poison, so I want to see it use that instead of Greedy Fang. 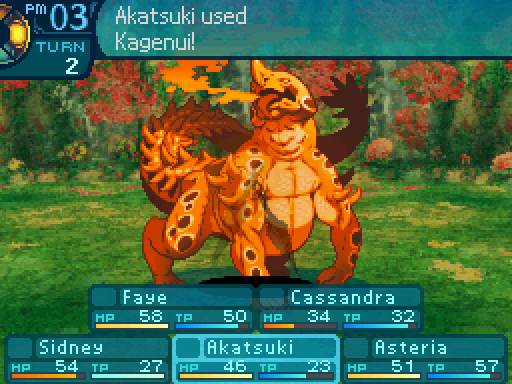 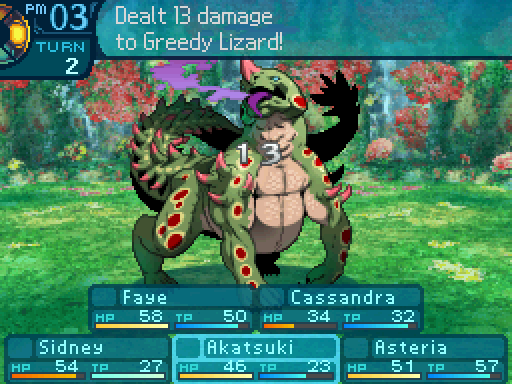   Do not worry, for I shall use my Ninja arts to distract it! Do not worry, for I shall use my Ninja arts to distract it!   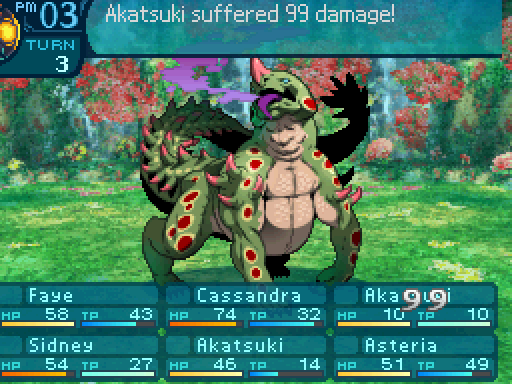 I don't think he liked your, uh, �illusion.� Aww... But I worked so hard on it. I don't think he liked your, uh, �illusion.� Aww... But I worked so hard on it.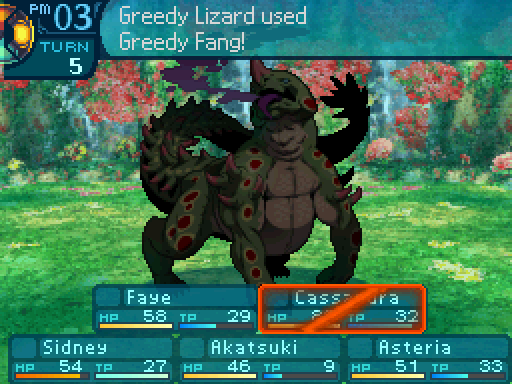  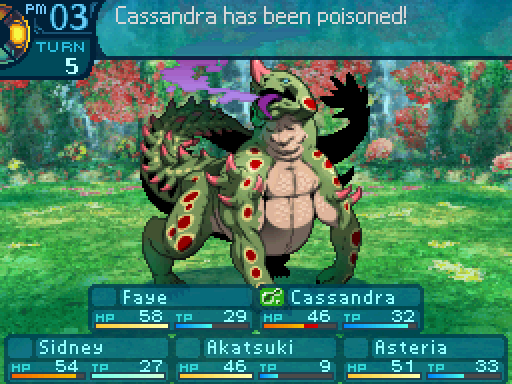 My insides are burning! My insides are burning! 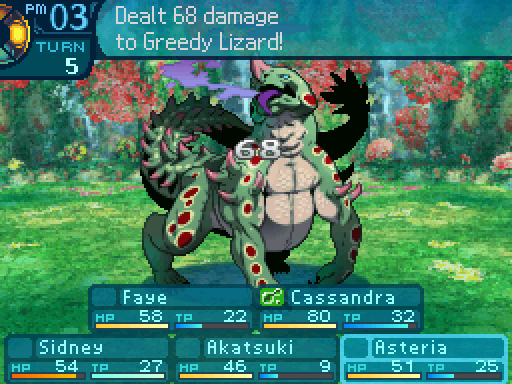  Oh... Oh god! Oh... Oh god! Poison deals damage at the end of every turn. However, the amount of damage the Poison deals depends entirely upon the skill that was used to inflict it.  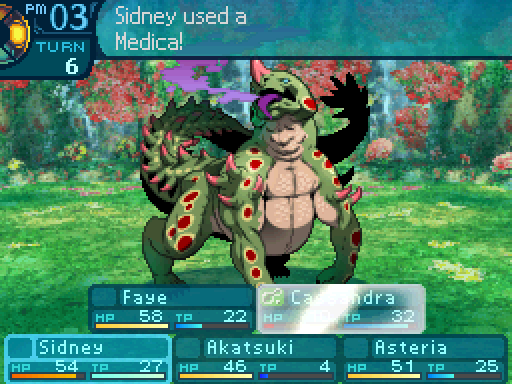 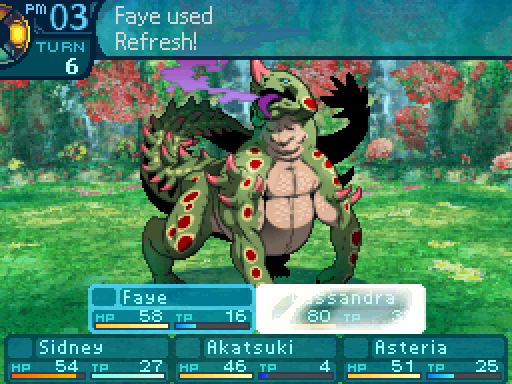  I got your back! Don't you worry! Oh, thank you so much! I got your back! Don't you worry! Oh, thank you so much!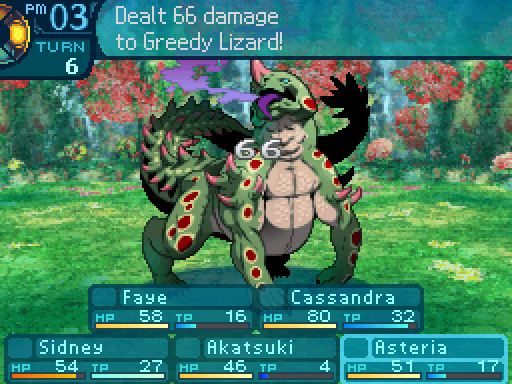 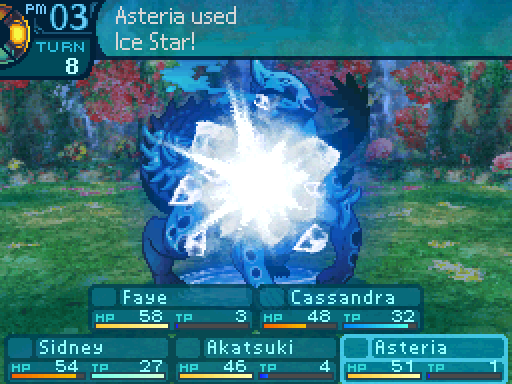 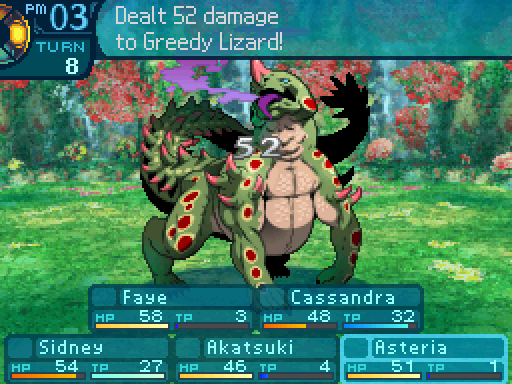 I... I don't know how much longer I can keep this up. Please tell me it's almost dead... I... I don't know how much longer I can keep this up. Please tell me it's almost dead... Don't think... it can last much longer... Don't think... it can last much longer... 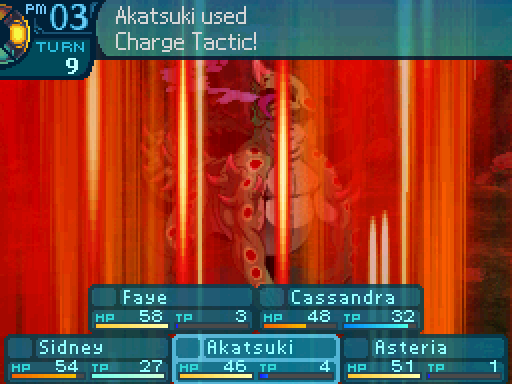 One final... assault... One final... assault... 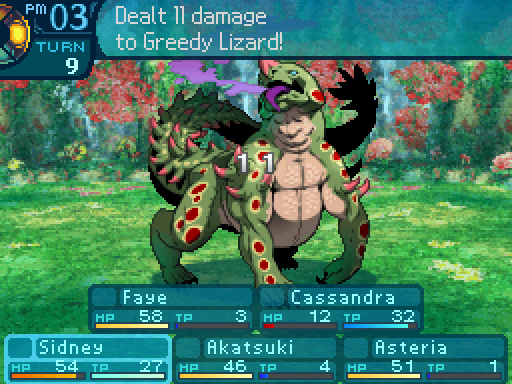 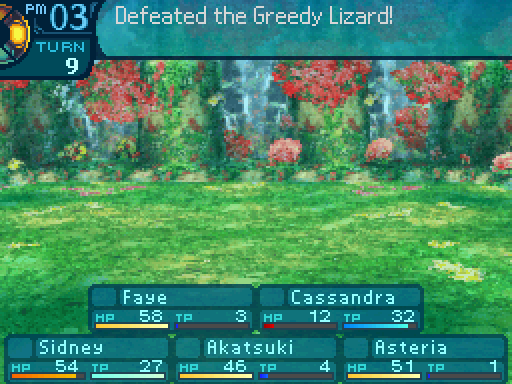 You were loud and ugly and now you're dead!DS Version You were loud and ugly and now you're dead!DS Version Of course, with the right party you can take down FOEs pretty easily. I'll be honest, I personally think that this game has the weakest FOEs in the series. While there are some that are out of your league when you first come across them, you can take down most of them on your first visit as long as you have the right strategy. Oh, and here's something else of note. In EO2, FOEs didn't give out exp, making fighting them not really that worthwhile. Thankfully EO3 reverted that change, so FOEs give out exp again. And they give out a fairly decent amount too. Ha ha! See? That thing was nothing but a chump. That guy was so wrong about us being too weak to take it on. Yes that's nice, but we should never do that aga- You know what that means? We're invincible! Nothing can stop us now!DS Version    AUGH! Goddammit Faye... AUGH! Goddammit Faye...  OH GOD THAT HURTS! OH GOD THAT HURTS!  When the front line dies, the back row automatically moves to the front. All birds must die... So many discoveries left undiscovered. So many puns left unsaid... So many discoveries left undiscovered. So many puns left unsaid... Lousy stupid bird. Lousy stupid bird. D-Dammit... It can't... end like this... D-Dammit... It can't... end like this... DS Version DS Version Here lies Guild Tidehunt. Murdered by a giant green bird. I hope you enjoyed this Let's Play! Thank you for reading! Araxxor fucked around with this message at 18:00 on Jun 21, 2015 |
|
#
¿
May 28, 2015 06:40
|
|
|
RareAcumen posted:Oh god, it's just like a note in a horror story! 'Whatever you do, don't- Oh god they're in! Aaaghhgrhasghhhaaaa!' Whoops. Corrected that. I've had Mumyouken go off before Charge Tactic when I had my party cast those limits, so I don't know what's going on. I do know that the Limits don't have any action speed at all, and are the only skills in the game that will outright go first or last. Not too sure on how they work speedwise yet. Maybe they use the average action speed between the users? I dunno.
|
|
#
¿
May 28, 2015 17:29
|
|
|
Rigged Death Trap posted:Who did you equip the limits to? Judging from that party setup, I would say that his Arbalist has Mumyouken and his Zodiac had Charge Tactic. Rangpur posted:Which is a problem because Kumog's Call Insect has an equally miniscule chance of landing. Greedy Lizards aren't resistant to poison, they're flat out immune. If anyone has a 0% resistance to anything that isn't a damage type, which are ailments, binds, or stuff like instant death, then they're considered to be immune to it. While there are some abilities that ignore resistances, like Wild Mastery, or the Dark Hunter's Climax ability from the first two games, they can't go through immunities at all. Though if the target has a 1% resistance to whatever, they're not considered immune and stuff like Wild Mastery will kick in.
|
|
#
¿
May 28, 2015 22:50
|
|
|
Krumbsthumbs posted:Is there a formula for how long binds last in this game before being shaken off, or is it mostly a dice roll? If there is one, I have no idea what it is. The recovery formula in EO2 was Base Chance * ((10+LUC)/(3*LVL)) = Recover Chance, where the base chance depends on which ailment someone got hit with, but I highly doubt they're using the same formula since so much got changed under the hood from EO2 to EO3. I do know that Monks take an irritatingly long time to recover from ailments or binds if you try to let those wear out on their own. Or forgot to pack ailment and bind dispelling items. Araxxor fucked around with this message at 03:00 on May 29, 2015 |
|
#
¿
May 29, 2015 02:54
|
|
|
Okay, I have no idea what the exact values are, but apparently the exact structure of (Base Chance * Modifier) + Turn Chance is the same. Also, Waking Chakra really isn't worth it. At max level, it takes 2 to 3 turns to dispel any ailments or binds. And later on when being hit with ailments or binds can make or break a fight, you want to dispel those immediately, not wait a few turns for them to wear off.
|
|
#
¿
May 29, 2015 03:15
|
|
|
Okay, I'm going to have to put up a little warning. Apparently the site I got all my EO2 and 3 mp3s from got infected with malware, and I didn't download all of the music beforehand, so the rest of the LP is going to have to remain musicless. Sorry, anyone who was looking forward to hearing EO3's rocking tunes. Oh and another thing, if you're reading the EO2 LP, DO NOT CLICK ON ANY OF THE MUSIC LINKS IN THERE!
|
|
#
¿
May 29, 2015 04:35
|
|
|
Pureauthor posted:Do it without chemicals or it doesn't count. No, I linked directly to said site back in the EO2 LP instead of downloading them and uploading them to Tindeck because I was dumb and lazy. Said site eventually got infected with malware. Like yesterday. The music links in this LP are safe to click on. The ones in the EO2 LP are not. I'm going to have to replace all the links, except I don't have any of the EO2 MP3s. Ugh.
|
|
#
¿
May 29, 2015 04:41
|
|
|
Music situation has been somewhat resolved. EO3 LP will continue with music, but I still have to replace all the music links in the EO2 LP. In all 70+ updates. 
|
|
#
¿
May 29, 2015 05:48
|
|
|
Hobgoblin2099 posted:The only game I've immediately fought an FOE in is Untold on Normal mode, which made me wonder what the big deal about FOEs was when I killed almost all of them effortlessly. Normal mode in Untold is actually easy mode, so most enemies and all that aren't really a huge threat there. Expert though, yeah you can't take on most of the FOEs on your first visit. Glazius posted:I imagine the Famer has a decent number of bad event dodges? Class events are spread out among a lot of the classes except for the last two unlockables. Those classes can't influence any events in any way. Though the Farmer can avert a couple of super nasty events. Rangpur posted:Which is a problem because Kumog's Call Insect has an equally miniscule chance of landing. Something else I forgot to mention, the Wildling's animals are basically copies of the Wildling, with some key differences. Statwise, they're all the same, except the stats are multiplied by a certain amount depending on the animal that was summoned. In the Insect's case, all stats are multiplied by 70%, so they actually have an even lower chance to land their Poison (On something that isn't immune to it, like the Greedy Lizard.) than normal. Oh, and there's a bunch of other stuff to take into consideration too, like their HP. For one thing, the amount of HP the beasts have when summoned actually depend upon the Wildling's current HP upon cast. Also, their class skill has a weird interaction with he animals. I don't know if it's an actual bug, but the HP boost from Beast Soul is actually applied twice. Which means that even though a level 10 Beast Soul would give a 50% boost to the beast's HP, that weird interaction actually makes it give a 125% boost. I don't know if that actually is a bug, since it could be intentional to make the animals more durable. There's also a bunch of other stuff about them, but I'll save that for later. (The Wildling class showcase is gonna be a mess.) By the way, I'm not posting any of those until after the 2nd Stratum.
|
|
#
¿
May 29, 2015 20:34
|
|

|
Update 10: Try, Try AgainDS Version This a screen that you will see a lot when playing an Etrian Odyssey game. Don't fret, it's part of the experience.  As tempting as it would be to turn off your Nintendo DS immediately after losing a lot of progress, refrain from doing so, because that means you can't save your map progress, which is will be helpful in making sure that you don't succumb to the same mistakes again.  DS Version DS Version Failure is a big part of these games. You must learn to accept your mistakes and move on. 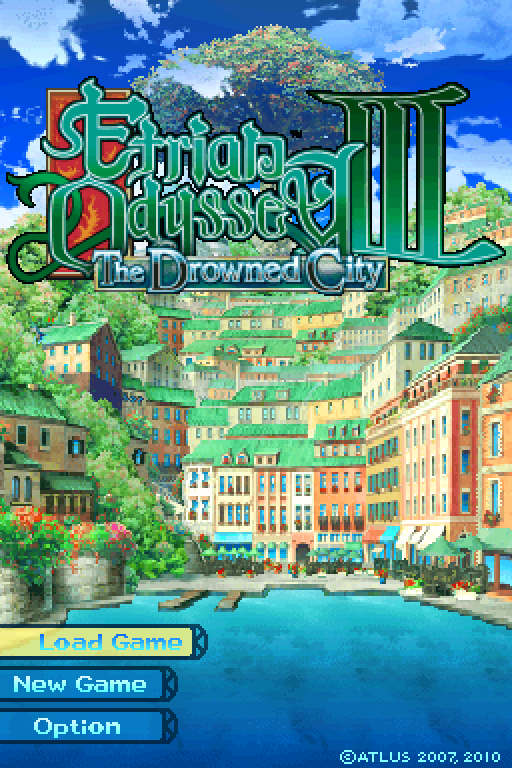  And try again. DS Version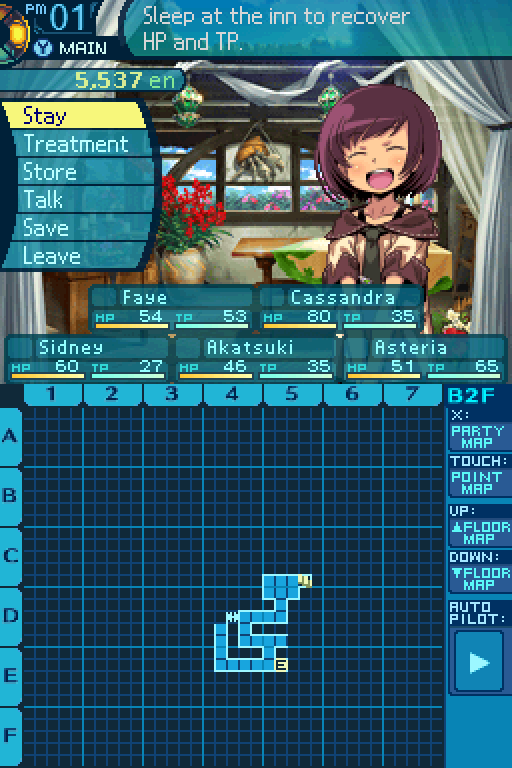 D-Dammit... It can't... end like this... Huh? What? What happened? Well, we got mauled by a giant green bird. And then we died. Thanks a lot, Faye. Wait, that actually happened!? And hey, not my fault that bird blindsided us. Yep, it happened. No idea how we ended up back here though. Curiously enough, time seems to have rewound to the point just before we made that particular trip. And we appear to have the same amount of money and supplies we had at that time. Despite losing all that, we kept anything that we drew on our maps. So we didn't lose everything. Huh, weird. Whatever, no time to think about it now. Let's go back in! I'll teach that stupid bird a lesson! Not without preparing first! I will not be bird chow again! D-Dammit... It can't... end like this... Huh? What? What happened? Well, we got mauled by a giant green bird. And then we died. Thanks a lot, Faye. Wait, that actually happened!? And hey, not my fault that bird blindsided us. Yep, it happened. No idea how we ended up back here though. Curiously enough, time seems to have rewound to the point just before we made that particular trip. And we appear to have the same amount of money and supplies we had at that time. Despite losing all that, we kept anything that we drew on our maps. So we didn't lose everything. Huh, weird. Whatever, no time to think about it now. Let's go back in! I'll teach that stupid bird a lesson! Not without preparing first! I will not be bird chow again!Now saving your map data means that any changes you've made to the map will be saved. There's other things that it saves, but I'll get to that a bit later. I have the party take a nap here for a reason that will become shortly evident. I actually left the floor and saved after killing the Greedy Lizard, so the 2nd floor dialogue is ready to go. 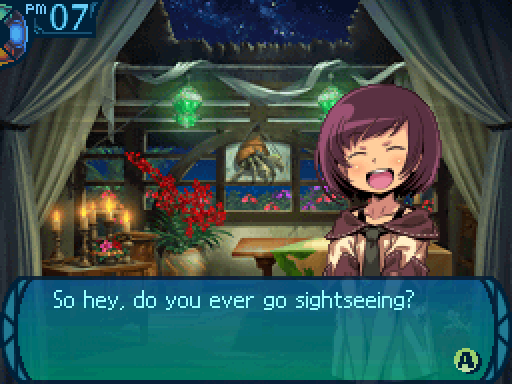 The weather in Armoroad is warm all year round, so we get a lot of tourists here. It might be a good idea to take a break and have a walk around the town.DS Version The weather in Armoroad is warm all year round, so we get a lot of tourists here. It might be a good idea to take a break and have a walk around the town.DS Version  ...What�s with that look? Do you take me for a tedious woman who cares only about money? Not so... In truth, I... have an ill sister. I need money to pay for her treatment... Oh. I didn't know that. Sorry- ...What�s with that look? Do you take me for a tedious woman who cares only about money? Not so... In truth, I... have an ill sister. I need money to pay for her treatment... Oh. I didn't know that. Sorry- 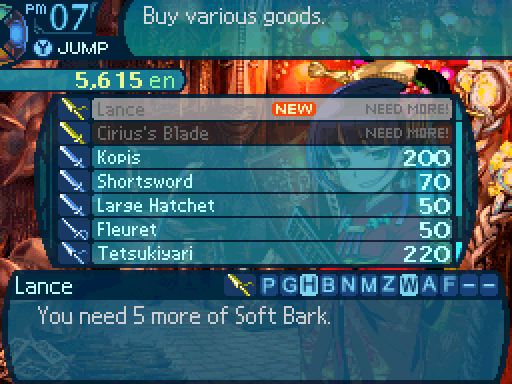 I sold off the Lizard Crest, which unlocked this weapon. Unfortunately, I can't get this just yet.  Wait. I mean, �information.� Hey, listen. If you go above and beyond on requests, some clients will give you a bonus. Be thinking about what the client really wants instead of what is being asked for! Wait. I mean, �information.� Hey, listen. If you go above and beyond on requests, some clients will give you a bonus. Be thinking about what the client really wants instead of what is being asked for!Certain quests have a hidden extra objective you can accomplish to get an even bigger reward.  ...Hm? Whaddaya want? Curious about this one, are ya? Or maybe this one? Huh? I tell ya what... I�m really thirsty. I could go for a nice drink about now. ...Hm? Whaddaya want? Curious about this one, are ya? Or maybe this one? Huh? I tell ya what... I�m really thirsty. I could go for a nice drink about now.  ...Ahhhh! That hit the spot! Armoroad�s water is so clear... So good! ...Ahhhh! That hit the spot! Armoroad�s water is so clear... So good! Okay, I guess he wants a real drink. Here's a good one. ...Ahhhh! That hit the spot! This is called a Red Tail. It�s a rarity that�s highly sought after for its bright coloring. When you put the freeze on a Claw Shrimp, its tail turns all red. Don�t tell anyone else about this, okay? It�s our secret. Okay, I guess he wants a real drink. Here's a good one. ...Ahhhh! That hit the spot! This is called a Red Tail. It�s a rarity that�s highly sought after for its bright coloring. When you put the freeze on a Claw Shrimp, its tail turns all red. Don�t tell anyone else about this, okay? It�s our secret.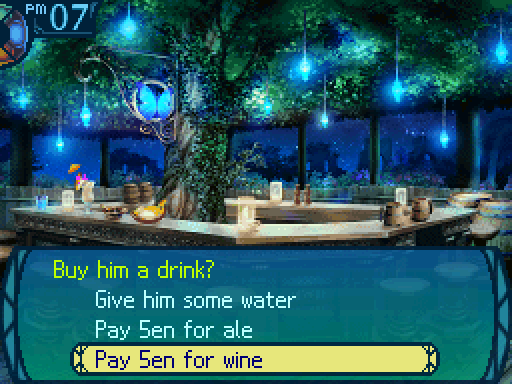 Hmm, I'll have to try that sometime. Got any more advice for us? Here's another drink. Now that�s the stuff... This thing here�s a Gigapede�s jaw. On the market, they call it a Large Jaw. I�m a knife man, myself. When I�m looking for a weapon, I want one I can slash with. These are easy pickings for me. I just gotta cut down one of those Gigapedes at night, see? Don�t tell anyone else about this, okay? It�s our secret. Thank you. I will keep that in mind. Hmm, I'll have to try that sometime. Got any more advice for us? Here's another drink. Now that�s the stuff... This thing here�s a Gigapede�s jaw. On the market, they call it a Large Jaw. I�m a knife man, myself. When I�m looking for a weapon, I want one I can slash with. These are easy pickings for me. I just gotta cut down one of those Gigapedes at night, see? Don�t tell anyone else about this, okay? It�s our secret. Thank you. I will keep that in mind.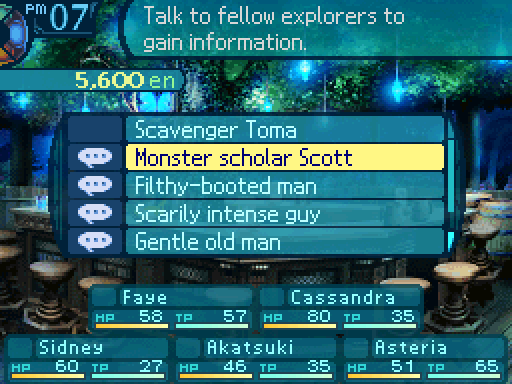 That's all well and good, but I would really like to know how to deal with those giant green birds before heading back in there. That's all well and good, but I would really like to know how to deal with those giant green birds before heading back in there. Encountered any Largebills yet? Those monstrous birds with the green bodies and huge beaks... They�re so strong that you might have no idea how to take one, but here�s the secret: They sleep at night. If you don�t want to tangle with one, try doing your exploring at night. Though at night you gotta watch out for those nocturnal Gigapedes... Nature�s got you coming and going! Ha! So that's how we deal with them. Thanks a lot! Encountered any Largebills yet? Those monstrous birds with the green bodies and huge beaks... They�re so strong that you might have no idea how to take one, but here�s the secret: They sleep at night. If you don�t want to tangle with one, try doing your exploring at night. Though at night you gotta watch out for those nocturnal Gigapedes... Nature�s got you coming and going! Ha! So that's how we deal with them. Thanks a lot!  Ugh... They�re ruined! Hm? What, can�t you tell? I�m trying to get the mud off of these things. I should never have wandered into that muddy patch on B2F... I got chased all the way through it! It was terrible! You lose your balance in that mud, and you�ll be some awful monster�s snack. Dammit! I paid a fortune for this anklet at Napier�s, and now look at it! Ugh... They�re ruined! Hm? What, can�t you tell? I�m trying to get the mud off of these things. I should never have wandered into that muddy patch on B2F... I got chased all the way through it! It was terrible! You lose your balance in that mud, and you�ll be some awful monster�s snack. Dammit! I paid a fortune for this anklet at Napier�s, and now look at it!Some NPCs will warn you about future hazards and enemies, It's worth it to check in every time you reach a new floor. 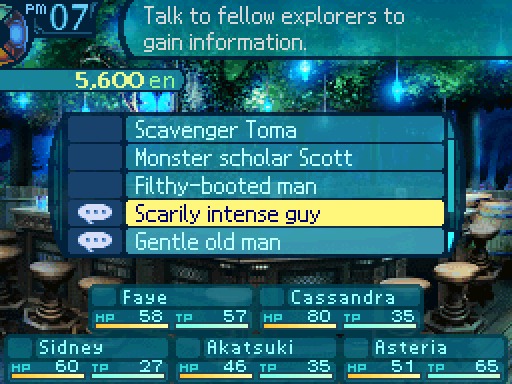  .........Don�t push your luck in the forest. If a monster seems too strong for you, steer clear. .........Don�t push your luck in the forest. If a monster seems too strong for you, steer clear. Whatcha eating there? Whatcha eating there? ...This? It�s Deadly Durian sashimi. The Butterfly Bistro is famous for it. Deadly Durian is quite tasty, but you need to watch yourself if they appear alongside Titan Arums. Titan Arums may look like vibrant flowers, but every rose has its thorns... plus a nasty smell. Between the two of them, the stench will be so terrible that you�ll have a nasty time of it. ...Excuse me, miss! Are my pickled Titan Arums ready yet? ...This? It�s Deadly Durian sashimi. The Butterfly Bistro is famous for it. Deadly Durian is quite tasty, but you need to watch yourself if they appear alongside Titan Arums. Titan Arums may look like vibrant flowers, but every rose has its thorns... plus a nasty smell. Between the two of them, the stench will be so terrible that you�ll have a nasty time of it. ...Excuse me, miss! Are my pickled Titan Arums ready yet?  Do you know of the Great Platypus? Its tail has a strong toxin, so you�d better watch out for it. Interesting. How do you know about it? Why do I know so much about it? B... Because my husband died from that poison! *sob* Oh, I'm very sorry to he- Do you know of the Great Platypus? Its tail has a strong toxin, so you�d better watch out for it. Interesting. How do you know about it? Why do I know so much about it? B... Because my husband died from that poison! *sob* Oh, I'm very sorry to he- ...And goodbye! ...And goodbye!  Hey, do you know about that clump of mushrooms growing on B2F? They�re really tasty! If you come across them, you should try one! Aura tells me not to, but I say if you�re going into the forest, you might as well have a tasty snack! Hey, do you know about that clump of mushrooms growing on B2F? They�re really tasty! If you come across them, you should try one! Aura tells me not to, but I say if you�re going into the forest, you might as well have a tasty snack!  ...Do you know about the patch of mushrooms growing on B2F? ...Don�t let your hunger tempt you into going near them... You�ll regret it, make no mistake... ...Nerona never thinks twice about approaching anything suspicious... Honestly, that girl... I guess we'll just have to be careful if we see any mushrooms. ...Do you know about the patch of mushrooms growing on B2F? ...Don�t let your hunger tempt you into going near them... You�ll regret it, make no mistake... ...Nerona never thinks twice about approaching anything suspicious... Honestly, that girl... I guess we'll just have to be careful if we see any mushrooms. Let's check out quests. Alright, so what's this one about? Ah, accepting this quest, are you? It seems you are finally accustoming to the Labyrinth. The fishers in the city have asked for a Gigapede Leg. Gigapede Legs are used as fishing bait. Armoroad does do a lot of fishing, you know! Of course, you must be fighting Gigapedes to get Gigapede Legs. They only appear at night. The Labyrinth becomes a very dangerous place at night. Keep your guardings high! I am counting on you once again, adventurers! Off you go, to victory!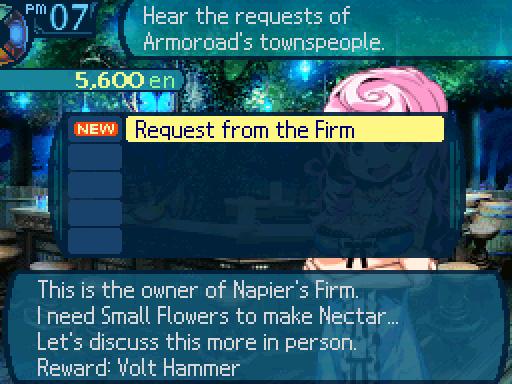 That money grubbing woman wants something? Ah, hello! Are you accepting this request? The girl at the shop made it. I am remembering that she said she wanted to speak about details in person. You go to Napier�s Firm and learn more about this request, yes? Yes! Off you go! Goodbye! That money grubbing woman wants something? Ah, hello! Are you accepting this request? The girl at the shop made it. I am remembering that she said she wanted to speak about details in person. You go to Napier�s Firm and learn more about this request, yes? Yes! Off you go! Goodbye!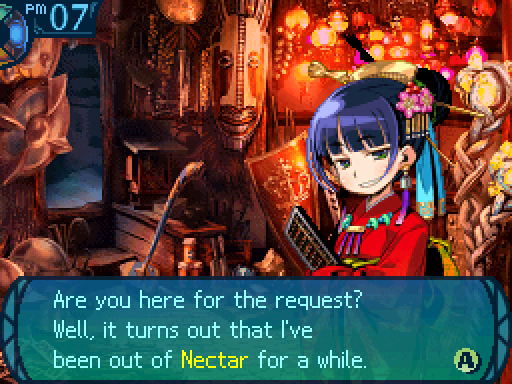 Demand is high, but my supply�s too low to maximize my profits! I can�t let this chance slip! That�s why I�ve been gathering Small Flowers, so I can make Nectar out of them. You can gather Small Flowers on B2F. When you find one, come back here and sell it to me. I�ll give you a little bonus on top of the standard asking price for the flower. We'll keep an eye out. Don't we need a Farmer to get those...? DS Version Demand is high, but my supply�s too low to maximize my profits! I can�t let this chance slip! That�s why I�ve been gathering Small Flowers, so I can make Nectar out of them. You can gather Small Flowers on B2F. When you find one, come back here and sell it to me. I�ll give you a little bonus on top of the standard asking price for the flower. We'll keep an eye out. Don't we need a Farmer to get those...? DS Version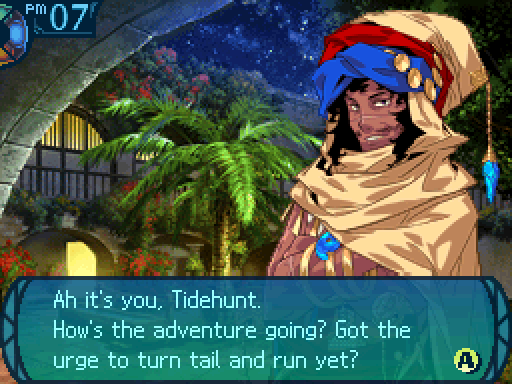 Ha! As if! Make sure you�re fully stocked on medicine. If you rely only on your skills, you�re in for a shock. Most people think the number one cause of death in the Labyrinth is running low on supplies.DS Version Ha! As if! Make sure you�re fully stocked on medicine. If you rely only on your skills, you�re in for a shock. Most people think the number one cause of death in the Labyrinth is running low on supplies.DS Version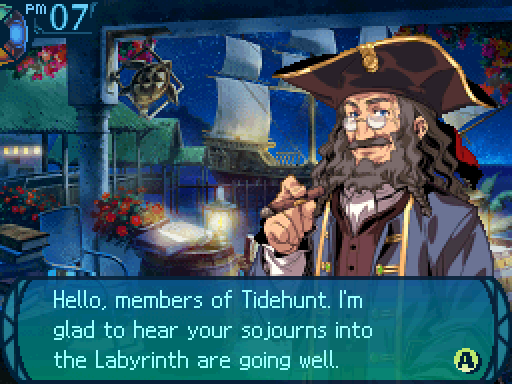 But if you get stuck in there, give the mother ocean a shot to clear your heads. The ocean accepts all. She�ll share her joys, sorrows, hopes, and frustrations with all who sail her. ...Haha, but I suppose waxing poetical won�t do much to coax you in. All in good time. But if you get stuck in there, give the mother ocean a shot to clear your heads. The ocean accepts all. She�ll share her joys, sorrows, hopes, and frustrations with all who sail her. ...Haha, but I suppose waxing poetical won�t do much to coax you in. All in good time.Good idea. Let's go do that.  Occasionally you'll see some golden arrow icons on the map. These are trade ships. The other ship has noticed you as well, and one of the sailors waves as you approach. 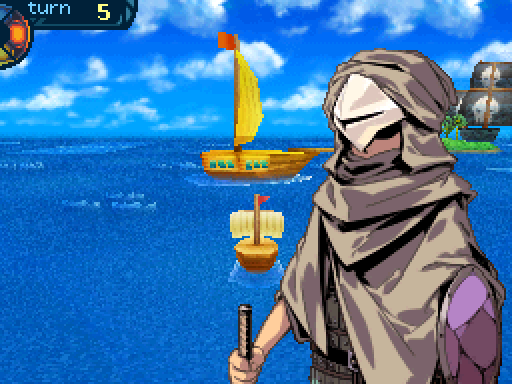  Ahoy there! We�re merchants who make our livings by doing trade along this route. You�re adventurers from Armoroad, right? I bet you�d have pretty rare stuff. Why not trade some of those goods you only get in the maze? I�ll make it worth your while. I could really use some Topaz right now. If you�ve got any, how about a trade? Ahoy there! We�re merchants who make our livings by doing trade along this route. You�re adventurers from Armoroad, right? I bet you�d have pretty rare stuff. Why not trade some of those goods you only get in the maze? I�ll make it worth your while. I could really use some Topaz right now. If you�ve got any, how about a trade?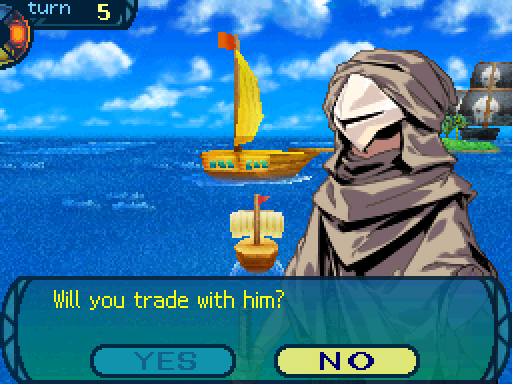 Topaz is an item you can get from Mining. Which we can't do right now. But you can trade items with trade ships to get good stuff. Don�t want to trade, eh? No worries. Let�s do business next time, then.The sailor returns to his cabin and sets sail for the next trading post on his itinerary. You get back to your task and resume your voyage. 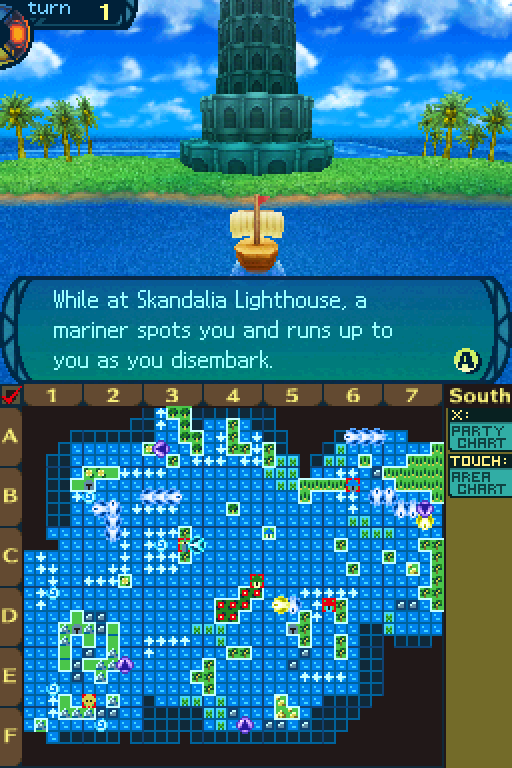 Now that Meregho Saeno is dead (Until you go on another Sea Quest,) the lighthouse can now be apporached safely from the east side. 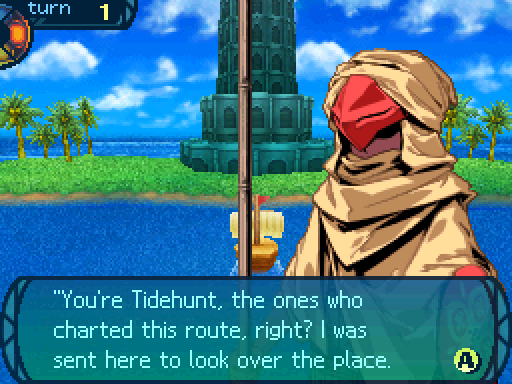 You came at a good time... I�m out of the clay I need to mend the walls. There�s an island to the west with red soil called Terra Rossa. Think you can get some for me? Sure! We'll grab some while we're out here. You came at a good time... I�m out of the clay I need to mend the walls. There�s an island to the west with red soil called Terra Rossa. Think you can get some for me? Sure! We'll grab some while we're out here.The mariner thanks you and then returns to the lighthouse for further investigation. It�s up to you whether to search for the mariner�s terra rossa or simply go on with the voyage. So once you liberate a landmark, which is accomplished by killing the Sea Boss there once, most of the time there's something to do there. You can either get a minor sidequest, or an item if you revisit the place.  To get to the island with Terra Rosa, you'll need these ship parts.  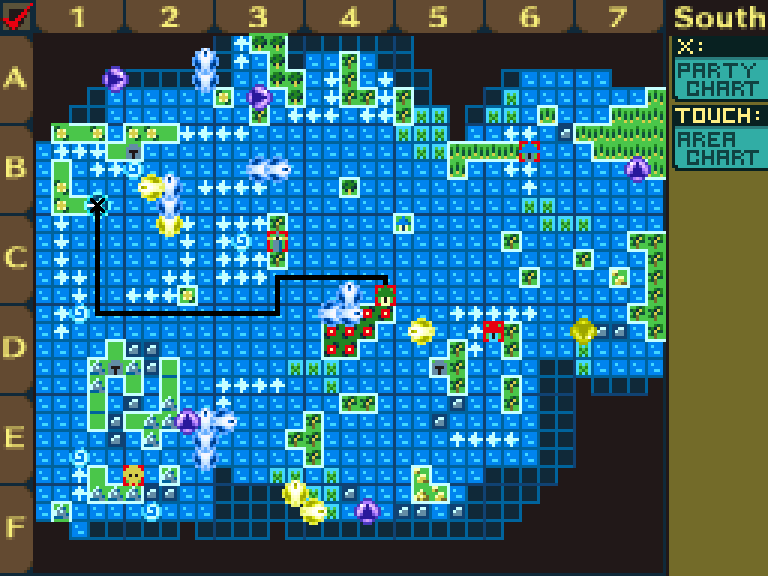 The route I took to get here. On the cliff, you see a type of soil known as Terra Rossa, often used in baking bricks. If you wish, you are free to land here and take some of the soil.  You anchor your ship near the cliffs, pass out shovels, and start digging. After collecting a barrelful, you raise anchor and return to your voyage.   Now let's head back to the lighthouse.  Here ya go! Here ya go!By way of answering, you unload the barrel of terra rossa and hand it to the mariner. You�ll give this to me? Thanks! Now I can get back to mending the walls!The mariner then gives you a copper coin and a book. Consider this my thanks. The book is something I found in the tower... I don�t know if that or the coin will be of any use to you, but I want you to have them anyway. The mariner then disappears into the tower, rolling the barrel of clay as he goes. 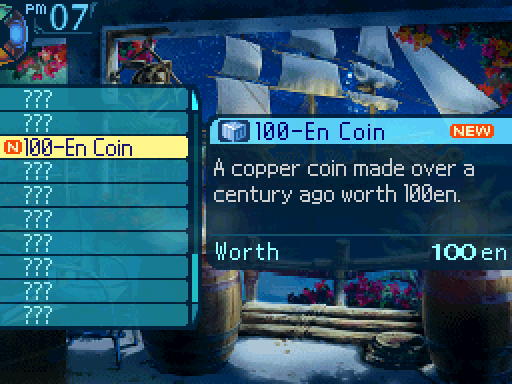  After seeing to that, you board your ship and set sail for new horizons.  Sometimes you'll find a book or something you can read on voyages. They provide bits of lore, and forshadowing about future stuff. Let's see what this has to say.   Spooky. Those of you that have played EO1 may recognize the name... 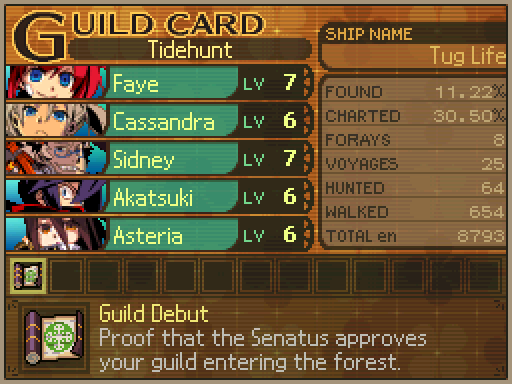 Also, after accomplishing something major, like advancing the story, you'll get an icon for your Guild Card. I should also note the Charted stat on the Guild Card. While Labyrinth maps don't count for 100% completion, ocean maps do, which is what the Charted stat keeps track of. What the game counts in that instance is checking to see if ocean and land tiles are in the right places, and if you drew the land borders right. The game doesn't really care about much else. But one single mistake will prevent you from getting 100% completion. DS Version The First Stratum�s been thoroughly picked over at this point. How unfortunate for you, mm? Better hurry and shape up so you can reach an unexplored Stratum. That�s where all the fun is! The First Stratum�s been thoroughly picked over at this point. How unfortunate for you, mm? Better hurry and shape up so you can reach an unexplored Stratum. That�s where all the fun is!Our Guild is pretty much nothing but regular explorers at this point. Who knows if that will change or not. The only way to do that is to go through the Labyrinth ourselves, so let's go do that. DS Version The nighttime splash screen. 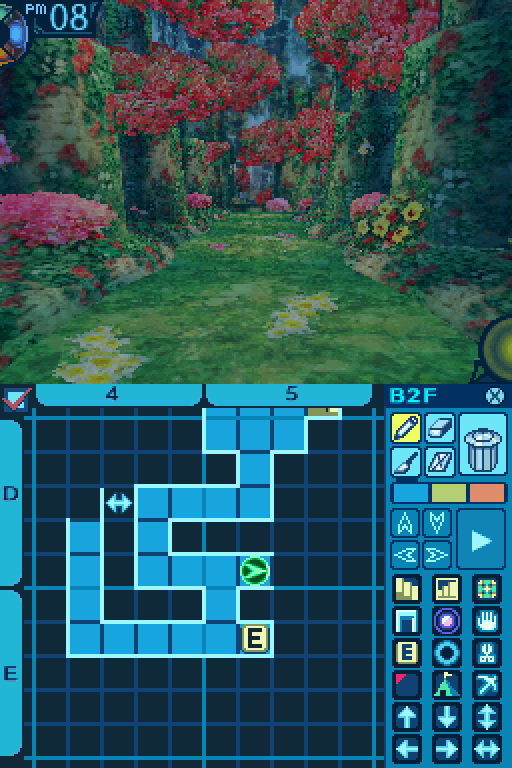 You know, we never saw what was down this path. You know, we never saw what was down this path. Throughout the LP, I'll be showing each FOE's movement patterns, which differ from FOE to FOE. The Greedy Lizard that used to be here patrolled this hallway. Now, FOEs appear on the map if they step on a tile you've stepped on, not painted in. However, they'll also appear on the map if they step on a tile adjacent to any tile you've stepped on, which is handy for keeping track of them. 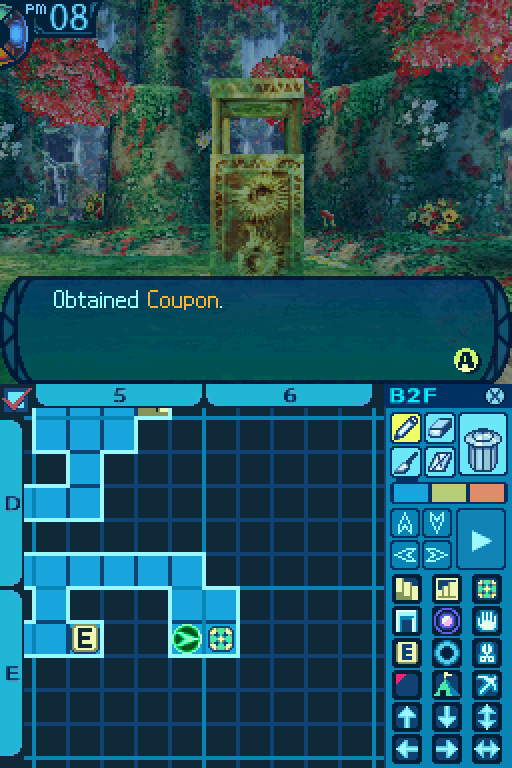 What's that? It's... Come on. Out with it! It's... a coupon for Napier's Firm. It cuts the price of our next purchase by half. What's that? It's... Come on. Out with it! It's... a coupon for Napier's Firm. It cuts the price of our next purchase by half.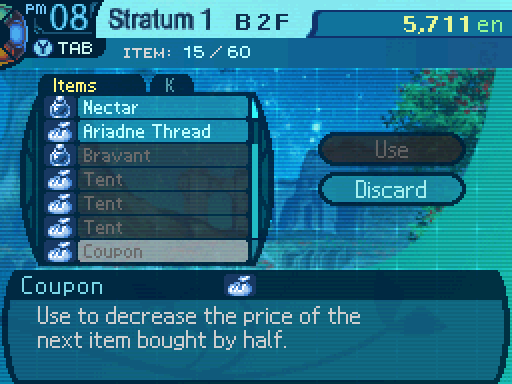 WHAT!? Th-that can't be right! WHAT!? Th-that can't be right!I'll show these off later. DS Version  Claw Shrimp HP: 88 TP: 21 STR: 10 VIT: 5 AGI: 1 LUC: 1 TEC: 5 Attack Type: Slash Exp: 133 Item Drops: -Drop 1: Small Shell - 35% Drop Rate. 1 needed for Culnerin (Gun) and Cirius's Blade (Sword. Must be restocked.) 3 needed for Round Shield. (Shield.) 8 needed for Tauret Hammer (Mace. Must be restocked.) --Shrimp's shell that's resistant to cracking. -Drop 2: N/A -Gold: Red Tail - 80% Drop Rate. Kill with Ice. 1 needed for Tale Gloves (Gloves.) 3 needed for Pallasch (Rapier.) --Shrimp's tail that shrunk and hardened after being cooled. Description: Denizen of the forest's outer Stratum. Its claws are its primary weapons, but it is easily handled. Damage Resistances: Slash: 100% Strike: 100% Pierce: 100% Fire: 50% Ice: 150% Volt: 50% Ailment Resistances: Sleep: 100% Confusion: 100% Plague: 100% Poison: 100% Blind: 100% Curse: 100% Paralysis: 122% Bind Resistances: Head: 100% Arm: 100% Leg: 100% Other Resistances: Death: 100% Petrification: 100% Stun: 100% Skills: Claw Cut: Uses the Arms. A single target Slash attack that deals 200% damage. Trash mob. Incredibly low stats aside from STR. It uses Claw Cut once it's not at full HP anymore, but really this thing is nothing.' 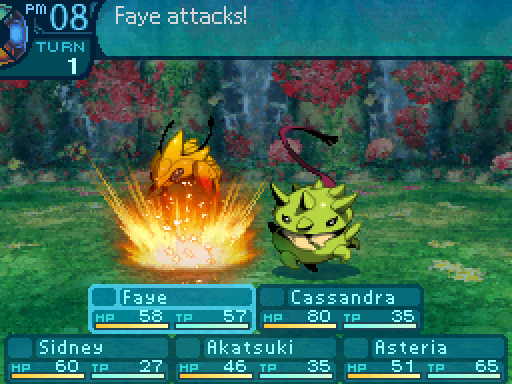  Remember, if we freeze it, we can harvest its tail for money. Heh, don't worry. I got this. Remember, if we freeze it, we can harvest its tail for money. Heh, don't worry. I got this. 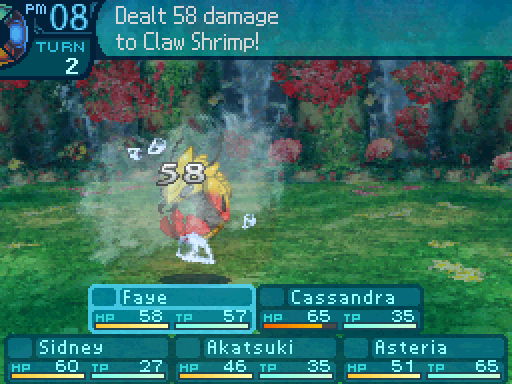 Glad we could meet, mace to face! Glad we could meet, mace to face!  Oh, I'm so glad that you finally discovered the joy of puns! Wha? ...Dammit! Oh, I'm so glad that you finally discovered the joy of puns! Wha? ...Dammit!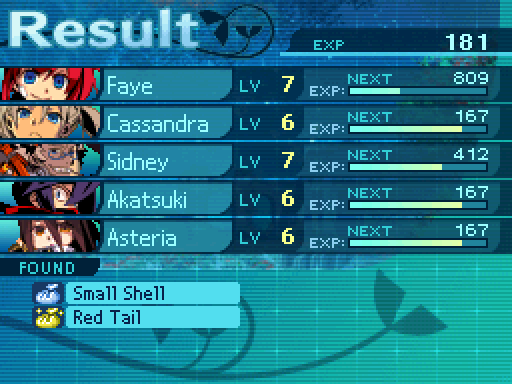 Hey, he was right! I guess that drink payed off. I wonder what other unusual methods we can employ to get these special materials. Hey, he was right! I guess that drink payed off. I wonder what other unusual methods we can employ to get these special materials.If you kill an enemy in a certain way during a fight, you'll have a chance at getting a Gold drop. But even if you qualify for one, you aren't guaranteed to get them. I should note that if you need to kill an enemy with a certain element, a dual elemental attack such as Strike/Ice will still qualify you for the Gold drop. However, dual elemental attacks can disqualify you if the condition was to not kill them with a certain element, so keep that in mind. DS Version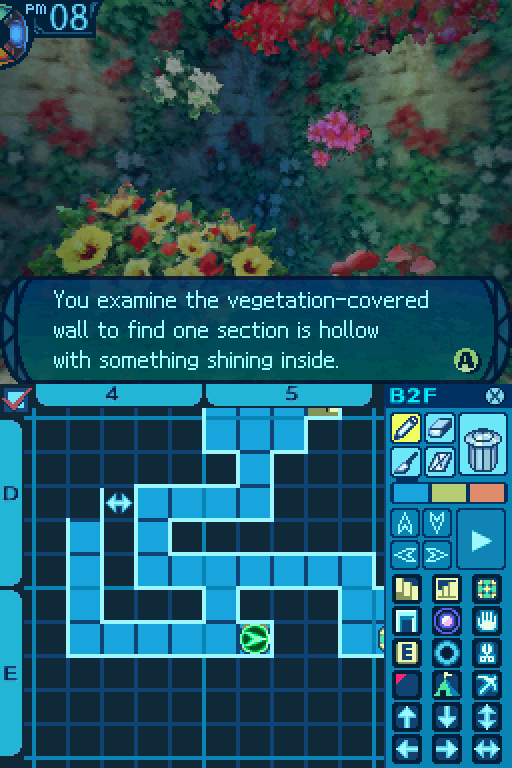 Now when you save your map data, only the map data gets saved. Any shortcuts you've unlocked or events you've triggered go back to the way it was just after your last save. You try peering inside, but it�s too dark to make out whatever is glistening within. It probably wouldn�t be hard to reach if you tried, but is that the best idea...?  Shiny! Let's grab it! Shiny! Let's grab it!If you say no: Have you learned nothing from eating that flower? Sticking your hand into everything is hardly a good idea in a place as dangerous as this!Anticipating danger and avoiding it preemptively is often a wise choice when in the Labyrinth. Caution seems to dictate that you should leave the area and return to your explorations. If you say yes, two different things can happen because this is a class specific event. If you don't have a Prince, Ninja, Monk, or a Zodiac, the following happens: As Sidney prepares to stick one hand into the hole, an eerie growl emanates from within it! In an instant, a monster with slime-encrusted hide jumps out before your eyes. Having sensed danger, the monster attacks faster than you can draw your weapons! Dammit, Sidney!And then your party gets blindsided. Now if you have one of those classes in your party, this happens instead: You are about to approach the hole when Faye suddenly stops you! Whoa! Calm down there! You were about to grab something pretty nasty.You shift to Faye�s vantage point and see that in fact, a monster was hiding inside! What you saw before was the monster�s hide, glistening with viscous fluids! The beast that had hoped to catch you unawares rushes out in a blur! Draw your weapons and fight! DS Version  Spotted Frog HP: 136 TP: 32 STR: 13 VIT: 7 AGI: 15 LUC: 8 TEC: 14 Attack Type: Strike Exp: 202 Item Drops: -Drop 1: Elastic Tongue - 35% Drop Rate. 1 needed for Hakenbuechse (Gun.) 2 needed for Hobblegeon. (Light Armor.) 4 needed for Caetra (Shield.) --Tongue that stretches about 30 times its original length. -Drop 2: N/A -Gold: N/A Description: Larger than a normal Forest Frog, its jumping kick is given greater heft by its larger body. Damage Resistances: Slash: 100% Strike: 100% Pierce: 100% Fire: 100% Ice: 150% Volt: 100% Ailment Resistances: Sleep: 100% Confusion: 100% Plague: 100% Poison: 100% Blind: 25% Curse: 100% Paralysis: 100% Bind Resistances: Head: 100% Arm: 100% Leg: 100% Other Resistances: Death: 100% Petrification: 100% Stun: 100% Skills: Jump: Uses the Legs. A single target Pierce attack that deals 120% damage. Spotted Frogs are enemies from the 3rd floor. If they catch you by surprise, they'll probably kill a party member or two. But when you fight them normally, they're trash mobs. They're just stronger versions of the Forest Frogs. 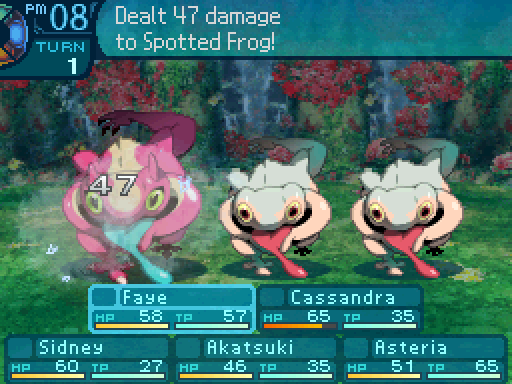 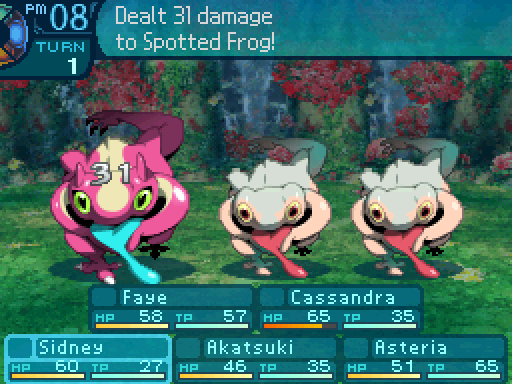 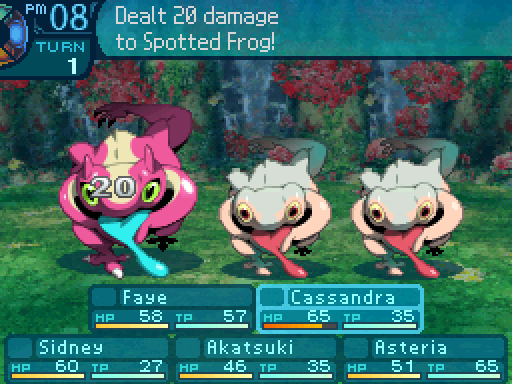 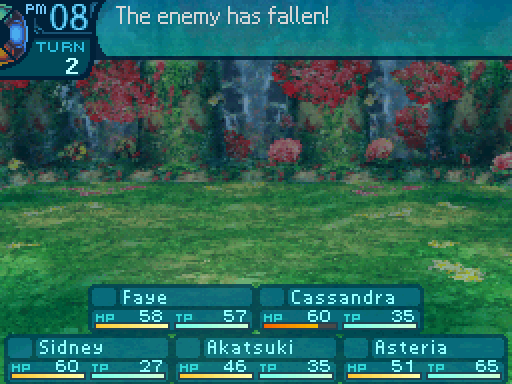 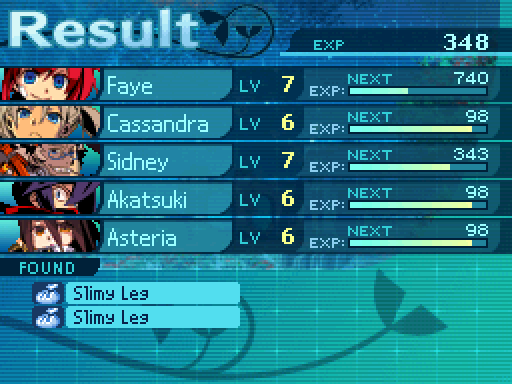 They don't last long.   Shortcuts! Now the first one might seem like it was placed too soon, but the floors are designed in such a way that it's very easy to get back to the floor you left off at. If you look at the map for the 1st floor, you'll find that there's a clear-cut path to the stairs leading to the 2nd floor.   Great Platypus HP: 76 TP: 22 STR: 7 VIT: 6 AGI: 9 LUC: 13 TEC: 8 Attack Type: Pierce Exp: 145 Item Drops: -Drop 1: Poisonous Tail - 35% Drop Rate. 1 needed for Light Muffs (Gloves.) 4 needed for Panzerstecher. (Rapier.) 6 needed for Pallasch (Rapier.) 10 needed for Poison Charm (Accessory.) 15 needed for Poison Gas (Item.) --Tail that injects secreted toxins into its targets. -Drop 2: N/A -Gold: N/A Description: A gigantic platypus monster. Novice explorers must be wary of the toxins in its tail. Damage Resistances: Slash: 100% Strike: 100% Pierce: 100% Fire: 150% Ice: 100% Volt: 100% Ailment Resistances: Sleep: 100% Confusion: 100% Plague: 100% Poison: IMMUNE Blind: 100% Curse: 100% Paralysis: 100% Bind Resistances: Head: 100% Arm: 100% Leg: 100% Other Resistances: Death: 100% Petrification: 100% Stun: 100% Skills: Poison Tail: Uses the Legs. Attempts to inflict Poison on a single target, and has a 60% chance of succeeding. The Poison ticks for 20 damage. Now these things are actually pretty dangerous. They can be encountered on the first floor if you get unlucky with an event. They don't hit too hard, but the Poison is the real worry here. Of course, it's not too much of a problem on the 2nd floor, but it's still something to watch out for. 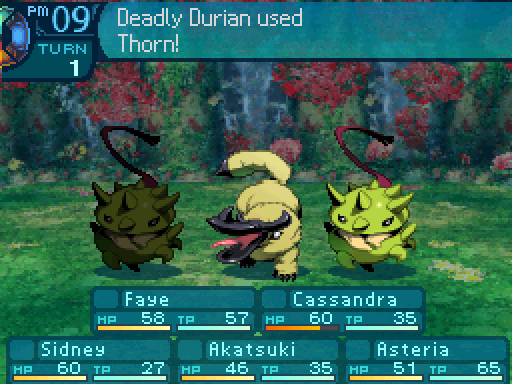  MY EYES! MY EYES!Blind is a really annoying status effect. It reduces your accuracy by 66%, so most of your attacks will miss.  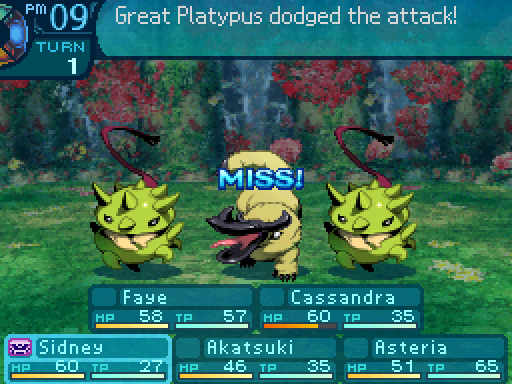  In all honesty, the only thing on the floor that is a threat is the Greedy Lizard. 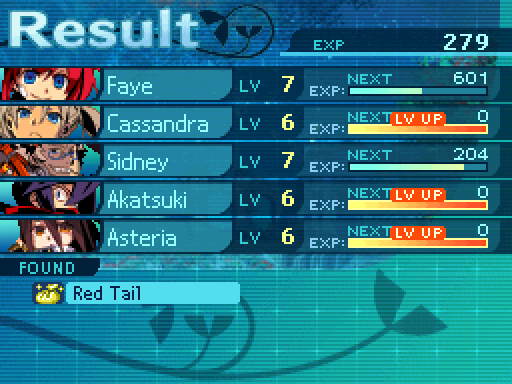 Eventually, 3 of my party members get level ups! DS Version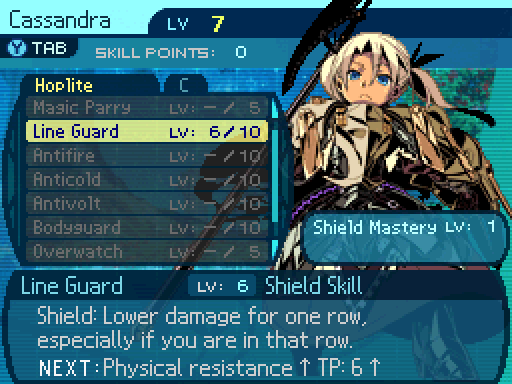 Line Guard reduces physical damage taken by 37% if casted on the Hoplite's own row. Otherwise ti reduces it by 16%.   The decoy now has 20 HP and 20 TP. Leveling Kagerou up to 3 unlocks Bunshin. I will not be putting anymore points into Kagerou. All maxing it out does is give the decoy 80 HP and TP, which falls off fast. 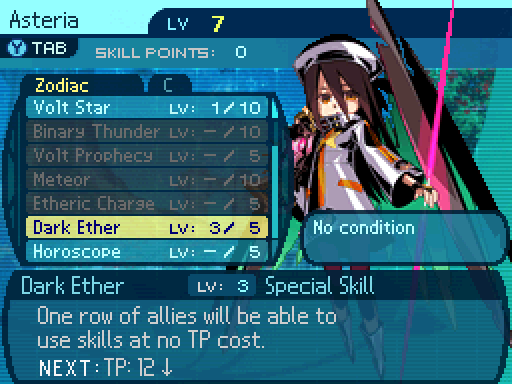 Dark Ether costs less TP to cast.   More inaccessible shortcuts.  Hey, didn't that shopkeeper say we could find some Small Flowers on this floor? Let's grab some from here. Great idea! But you're forgetting something. Hey, didn't that shopkeeper say we could find some Small Flowers on this floor? Let's grab some from here. Great idea! But you're forgetting something. Oh. Right. Uh, who usually knows how to do stuff like that? Well, Farmers do. But they're usually in high demand because of their gathering skills. So it's difficult to find any to hire. Ugh, what are we gonna do? Wait for one to just fall into our laps? Oh. Right. Uh, who usually knows how to do stuff like that? Well, Farmers do. But they're usually in high demand because of their gathering skills. So it's difficult to find any to hire. Ugh, what are we gonna do? Wait for one to just fall into our laps?C4 Take Point: Anra Fruit: 60% Gather Rate. 1 needed for Therica B (Item. Must be restocked.) -Popular fruit with a pleasant texture and sour taste. Small Flower: 40% Gather Rate. 1 needed for Nectar (Item. Must be restocked.) 1 needed for the quest Request from the firm. -Often found growing near the Labyrinth's entrance. Hibiscus: Rare. 1 needed for Blaze Oil, Freeze Oil, and Shock Oil (Item. Must be restocked.) -Red flower famed in Armoroad for its tonic effects. Common Gather Periods: 2 to 12. Rare Gather Periods: 2 to 5. I'll go over gathering in the next update, so just hang tight, okay?  Here's another Greedy Lizard. But even though the party is capable of killing one, I'm not gonna fight every single one I come across. That just takes up too many resources.  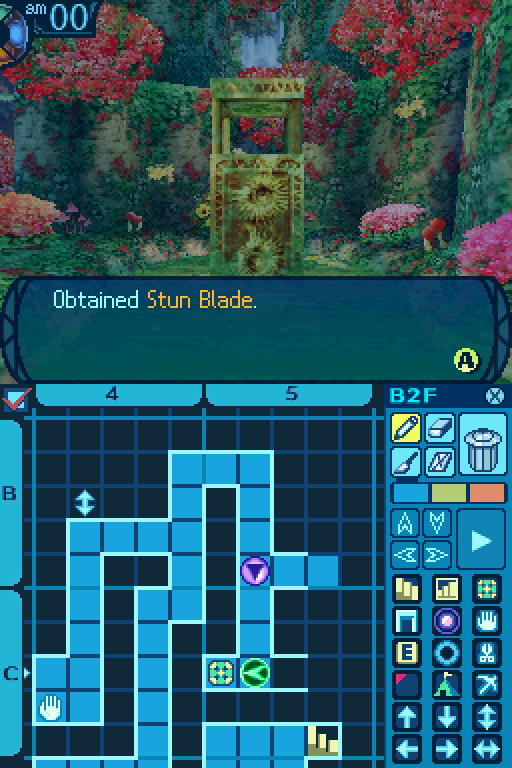 If you slip past the Greedy Lizard, there's some treasure you can get. And there's a little alcove where you can walk back and forth to wait for a chance to sneak out. 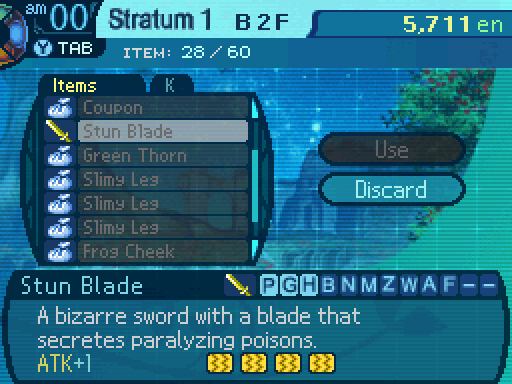 There are a couple of weapons in the game where their job is to inflict ailments, not deal damage. The Stun Blade here has a 15% chance of inflicting Paralysis (The 1st forge adds a 6% chance, while the rest only add 3% to that.) I don't really find ailment weapons to be that great, although you could give them to a class that doesn't rely on attacking too much to give them something to do. 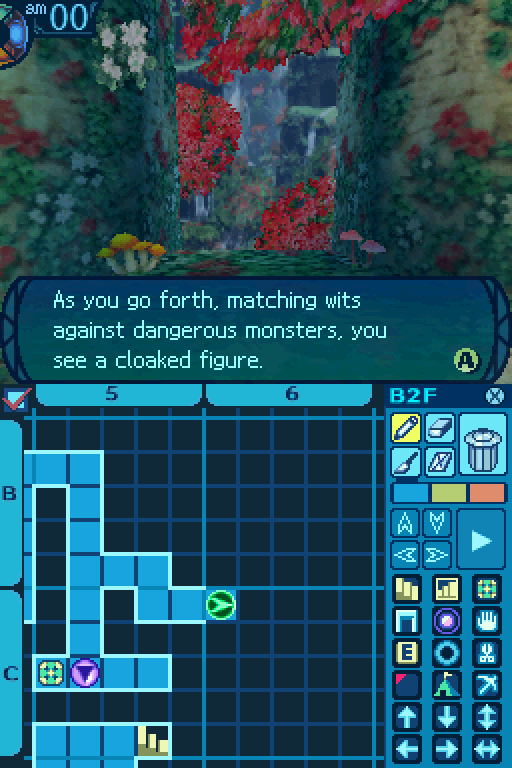 Noticing you, the figure comes near. You can see it is female, and what�s more, she is smiling. 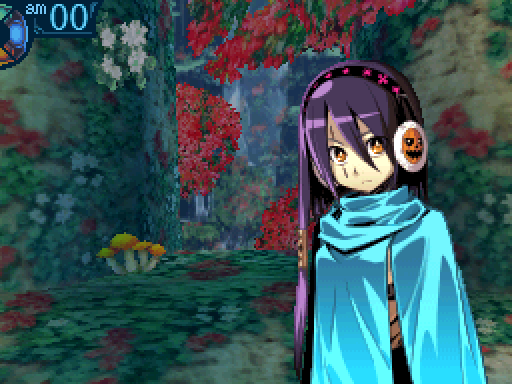 Those are some nice headphones. I want those.  Hello. It is nice to meet you. You must be explorers from Armoroad. Hello. It is nice to meet you. You must be explorers from Armoroad.An incongruously cheerful voice comes from the girl, who ignores your bewilderment and continues. You needn�t be frightened. My name is Olympia. I am active in helping explorers like you.The girl smiles again and hands you one of the backpacks she is holding. This is a camping tent. It is practically a necessity here. You may have it if you like.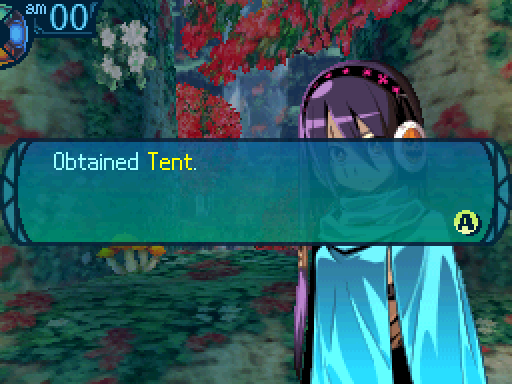 Um. Thanks. We're the Tidehunt Guild. Um. Thanks. We're the Tidehunt Guild.The girl called Olympia points to the right fork of the road ahead before continuing. 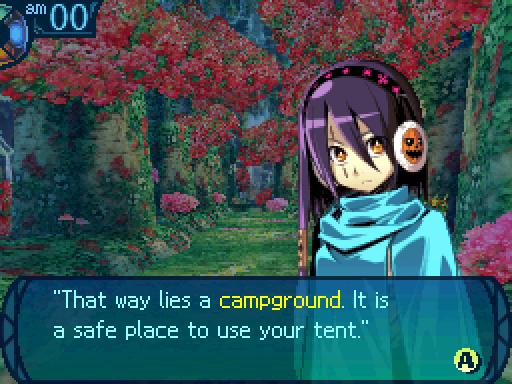 Olympia looks again at the tent in your hands. Many explorers use tents to rest during their travels. You should make use of that spot as well.Though she has said little, the girl turns to leave as if there is no more for her to say. I will rest at the campground myself for a while. If you would like to talk more, come see me.The choice is yours: investigate the campground Olympia spoke of or continue on your way. Should we investigate this campground? Might as well check it out.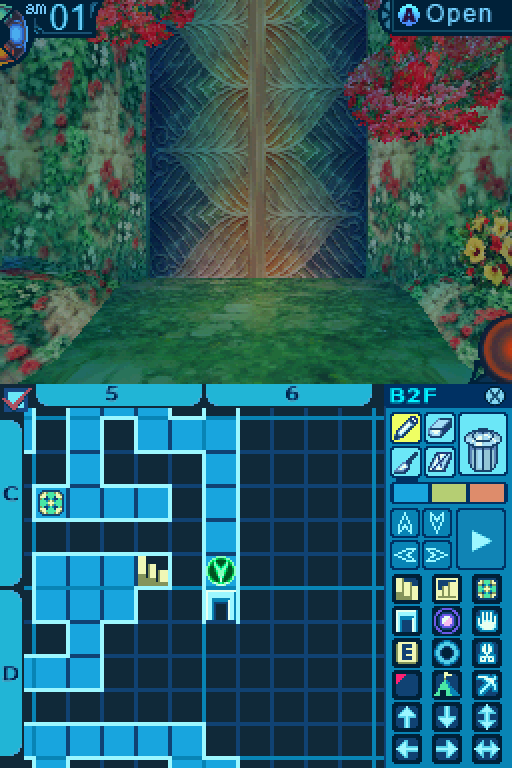  It is spacious enough to camp; you can see traces of countless others who have been here. Near the trees further in, you see a lone girl resting against one of the pines. 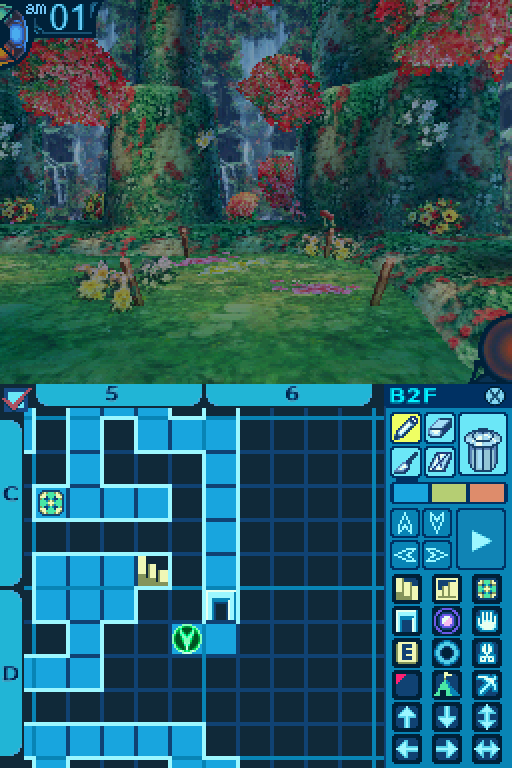 Those poles mark campgrounds. 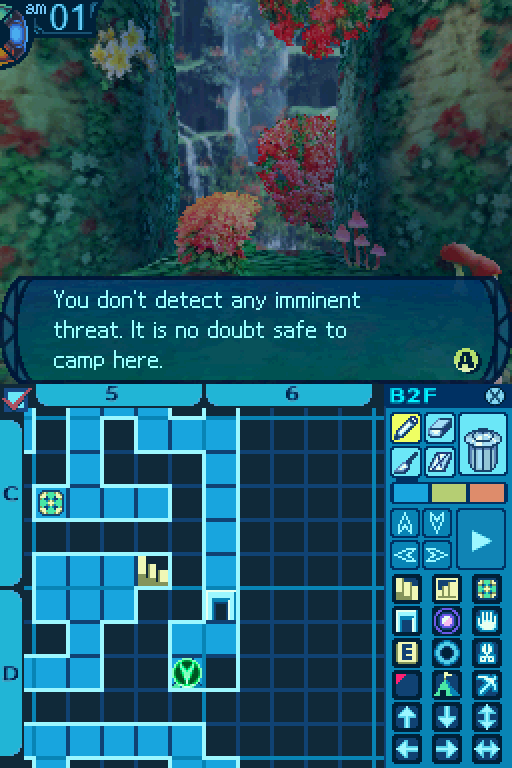 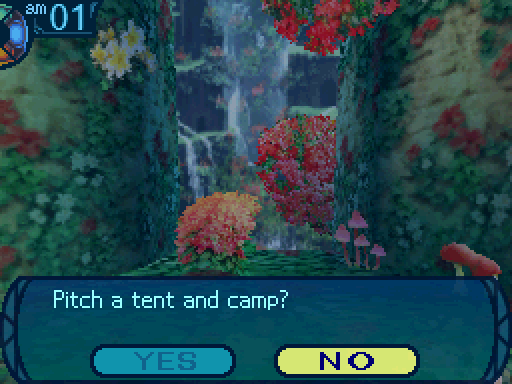 You can use up a tent at these spots to restore 100 HP and 50 TP for your party. 3 hours will pass by when you use one. I personally don't find tents that useful, aside from like one instance early on. The heal falls off really fast, and I don't want to camp now since that'll make it daytime much faster. They might be worth using if you're using a Farmer in your main party, since they have a passive that can cause tents to restore 500 HP and 125 TP, which is a much better heal. Otherwise, it's just best to use items. 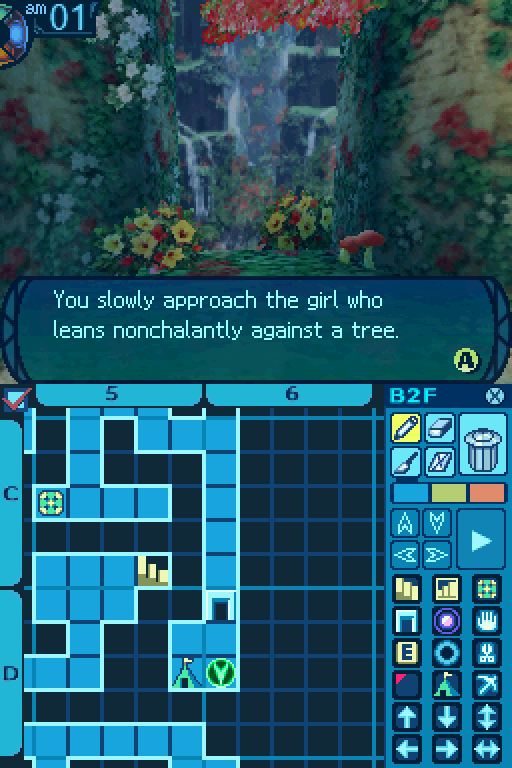 As she notices you, she smiles and addresses the guild. 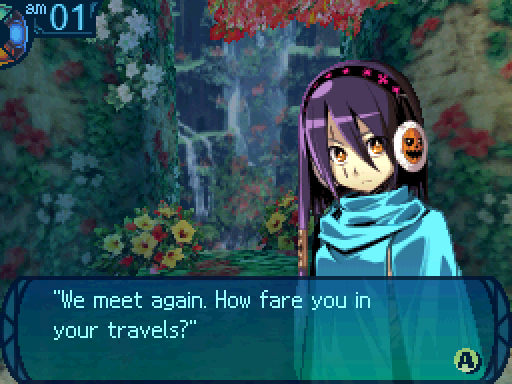 You try to remember if there was anything you wanted to ask the girl... 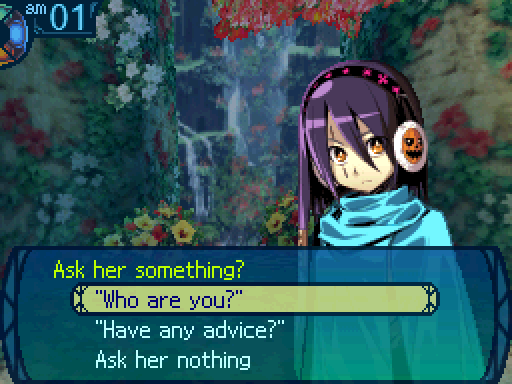 Okay. Who are you, and why are you helping us? Okay. Who are you, and why are you helping us?Would anyone in the Labyrinth really be so free with advice and expect nothing in compensation...? You ask the girl called Olympia who she is and what reason she has to assist other explorers. Despite the suspicion evident in your voice, the girl is cheerful and upbeat as she answers. Don�t worry about that. I have my own reasons. After some time, if you grow as strong as I think you will... I�ll tell you what they are.Olympia then closes her eyes and shakes her head quietly. It seems futile to inquire any further.  You seem to know a lot about this Labyrinth. Do you have any advice for us? You seem to know a lot about this Labyrinth. Do you have any advice for us?As the girl seems to be a veteran of the Labyrinth, you ask her for suggestions on how to proceed. The girl looks up and thinks to herself before answering slowly. Hmmm... listen carefully. Some paths in this forest exist where you�d least expect them to. Even when you think you�ve come up against a wall or dead end, search carefully. If you can find these hidden passages, travelling from town and back will be much easier.The girl looks at you and smiles once again. It looks as though she expects you to ask another question.  I don't think we got any more to ask you right now. I don't think we got any more to ask you right now.You determine that you have nothing to ask her right now and tell her so. I see. I�ll be here for a while longer, then. If you have any other questions, you can find me here.You say your farewells to Olympia and resume your journey. Huh. Wonder why she was so helpful. Hmm.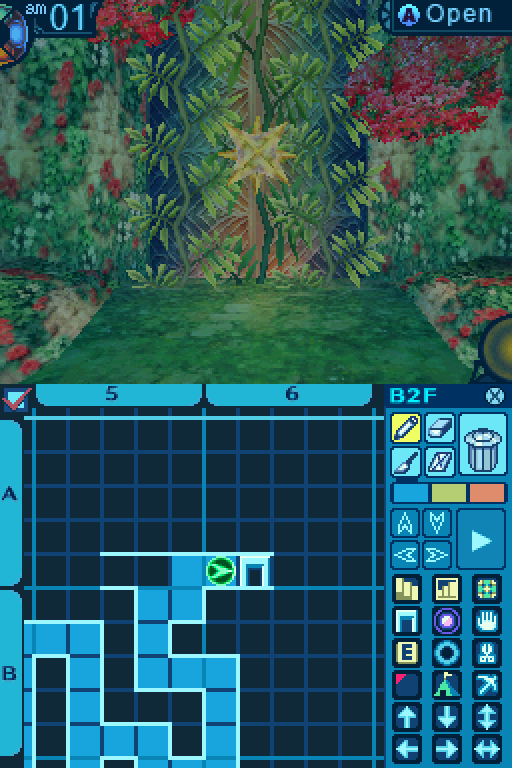 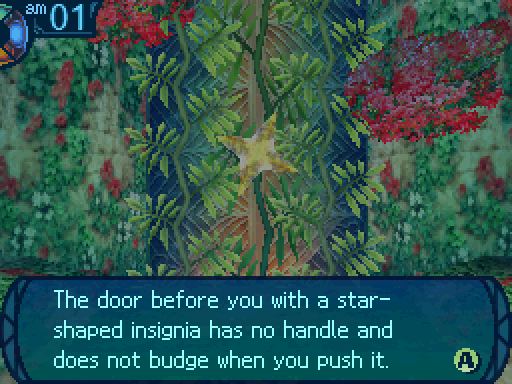 You seem to have no way to open the door at the moment. You leave it be for the moment to explore elsewhere. What's with all the locked stuff? Come on! We're explorers, we need to explore!Another locked door.  Think we can cross that mud? Probably, doesn't look too deep. Think we can cross that mud? Probably, doesn't look too deep.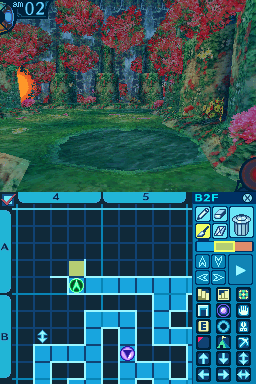 That Greedy Lizard isn't scripted to move until you step on that mud tile, which I'll mark with yellow. As for that little thing in the bottom right corner, that's the FOE radar. That tells you how close you are to an FOE. Handy for trying to determine where you should move next if you can't actually see the FOE. That's also why the random encounter radar is there, so you can avoid getting into a fight in places where an FOE patrols, and yes, FOEs can join random battles. Also, unrelated, but you can actually see the FOEs moving from tile to tile in this game, where in the first two games, they just teleported around. Technological advancements! 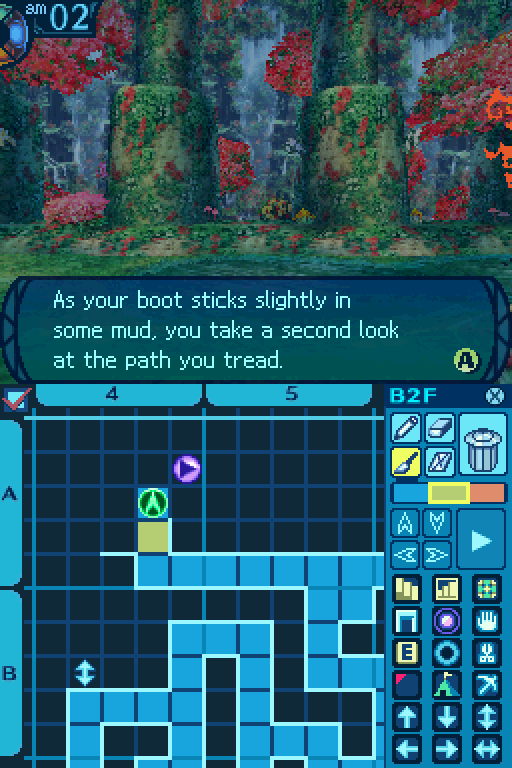 On closer inspections, there are certain areas here that are like a marshy wetland. It doesn�t seem too deep, but the mud does put a noticeable damper on your walking speed. You shudder to think how easily any monster chasing you through this muck would catch you. You make a note to be careful of the mud from this point on. Ugh, it's so sticky! And there's mud all over my shoes now. Forget about your shoes, it doesn't look like those lizards are affected by the mud. Oh dear. If they were to catch up to us while we walked through it...Mud tiles are a new hazard in this game. They eat up 2 turns when you step on them, and FOEs aren't affected by them at all.  Just make sure to plan out your movements carefully. 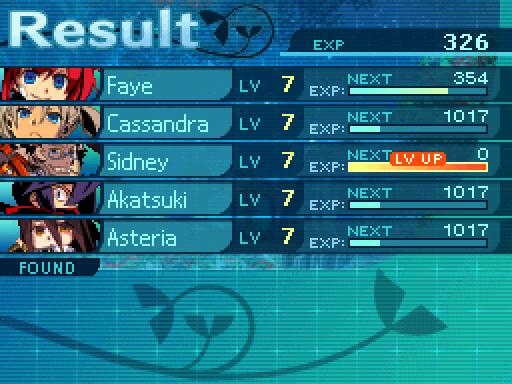 Sidney gets a level up. 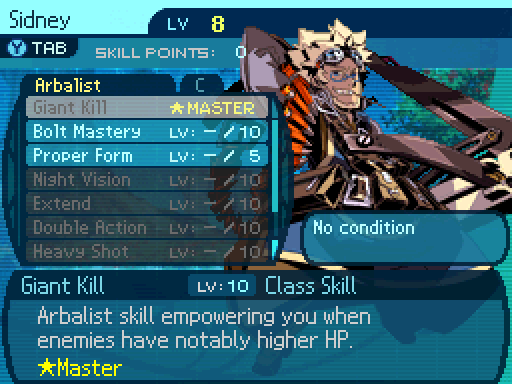 Giant Kill now provides a 55% boost to all damage. Now it's time to get him some damage skills. 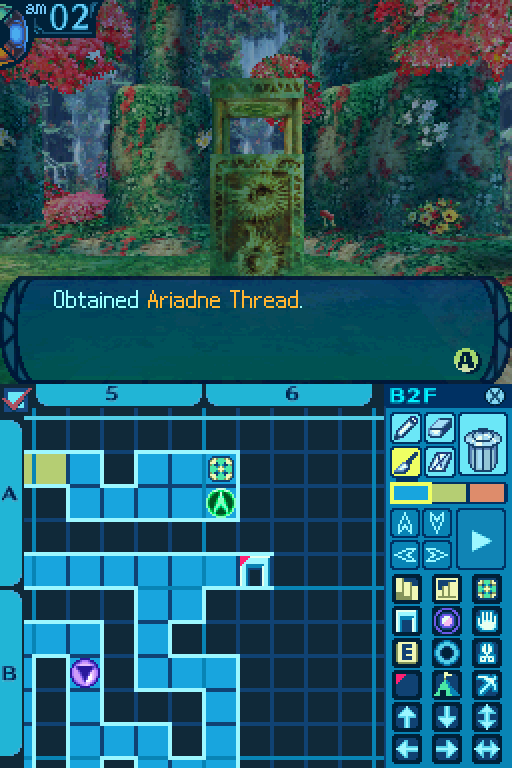 Handy if you forgot to bring one, but otherwise you just saved like a measly 100en. DS Version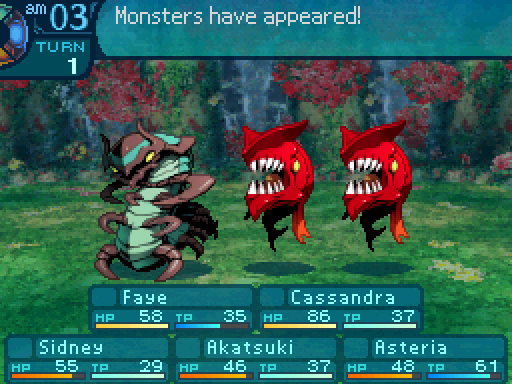  Gigapede HP: 124 TP: 25 STR: 9 VIT: 11 AGI: 5 LUC: 15 TEC: 10 Attack Type: Strike Exp: 247 Item Drops: -Drop 1: Gigapede Leg - 40% Drop Rate. 1 needed for Spiked Club (Mace.) 4 needed for Tale Gloves (Gloves.) 1 needed for the quest Ho! The gigapede! --Centipede leg that tightly grasps its prey. -Drop 2: N/A -Gold: Large Jaw - 80% Drop Rate. Kill with Slash. 1 needed for Leg Guard (Accessory.) 2 needed for Main Gauche (Knife.) --Jaw with the power to fell even the Labyrinth's trees. Description: A gigantic centipede that grew in the forest. It takes its prey at night and consumes it slowly. Damage Resistances: Slash: 100% Strike: 100% Pierce: 100% Fire: 200% Ice: 200% Volt: 200% Ailment Resistances: Sleep: 100% Confusion: 100% Plague: 100% Poison: 100% Blind: 100% Curse: 100% Paralysis: 100% Bind Resistances: Head: 100% Arm: 100% Leg: IMMUNE Other Resistances: Death: 100% Petrification: 100% Stun: 100% Skills: 100-Leg Bind: Uses the Legs. Attempts to inflict Leg Bind on the entire party, and has a 70% chance of succeeding. The Gigapede only appears at night, and it's a pretty rare enemy. It's not really a threat, so elementals will take it down easily. Hello there. I am Akatsuki. Will you please let me cut off your jaw and legs so we can sell them?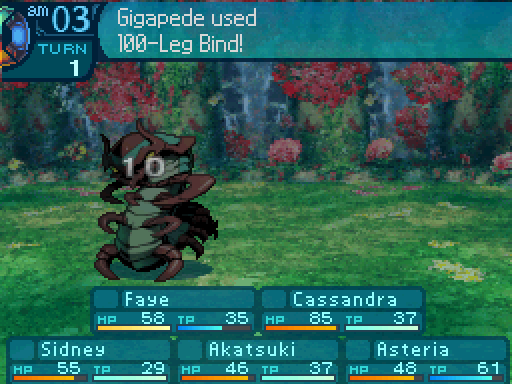  I think that was a no. I think that was a no.Binds are a different type of disable, there's 3 different kinds and they can all disable a body part. Certain skills use body parts, and if that body part is disabled, the skill can't be used. Though some skills don't use any body parts at all. While your party and the enemies can only be inflicted with one status effect at a time, they can be inflicted with all 3 binds at once. Now binds also have a little side effect along with disabling a body part. In the case of leg binds, you can't run away, and they completely disable evasion. Even if your accuracy is extremely low, or if you got hit with Blind, you will always be able to hit an enemy that has their legs bound. Very well. Then I shall have to use force!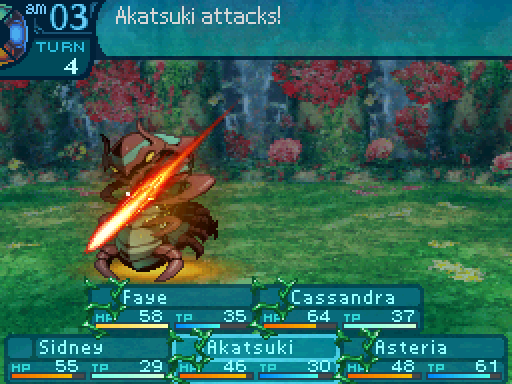  YEEEEART! YEEEEART!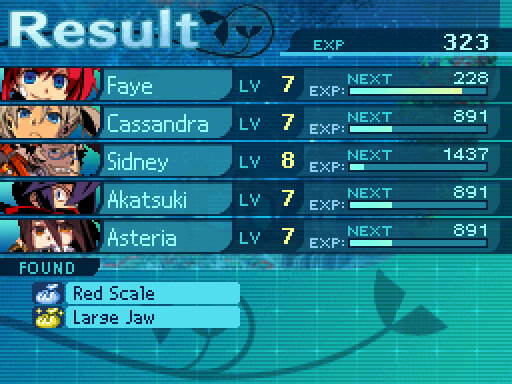 Success! I have acquired its jaw! Uh, that's great, but we also needed its legs. I think you were a little too rough there. Those legs aren't usable in that condition. My apologies. I shall be more gentle in cutting off its limbs next time. Success! I have acquired its jaw! Uh, that's great, but we also needed its legs. I think you were a little too rough there. Those legs aren't usable in that condition. My apologies. I shall be more gentle in cutting off its limbs next time.Ugh. This is a pain because Gigapedes are rare encounters. But they're more common the deeper you get into a floor, and you can still encounter them in the rest of the Stratum. So don't fret if you can't find one at the moment. DS Version The guard nods in response to your hail and raises a hand to acknowledge you. Are you explorers investigating the forest? How goes it?Despite his question, the guard continues speaking without waiting for your answer. I�ve been gathering materials left by monsters for a certain investigation. I�ve found a few... but there are still some I�m missing. I have a proposal for you. If you have any of what I�m looking for, can you spare some for me? I�ll make it worth your while with something I know you�ll find useful in your journeys.Upon saying so, the guard shifts his gaze to you to gauge your reaction. You consider the offer carefully...  Hmm. Sure. What do you want? Hmm. Sure. What do you want?The guard nods happily and clarifies his request. What I need now is... a Sharp Tooth, a Pungent Ivy, and a Purple Scale. Have any of that?The guard�s hand is already out, eager to receive... If you have anything, you can hand it to him. 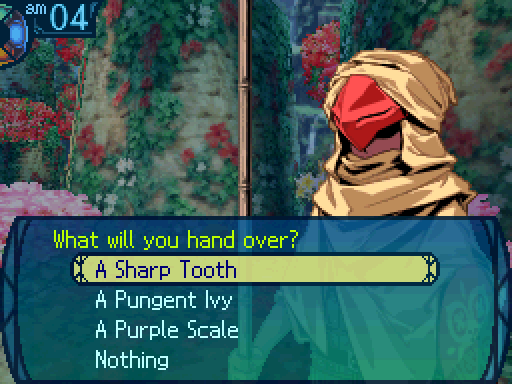 We have none of these right now. The first two can be acquired on this floor, but we can't get the Purple Scale until we reach the 4th floor. If you try to claim that you have something when you don't, this happens: You regret your lie before you speak it, as you know perfectly well you have no such thing. You consider the guard�s requests again to see if there are any that you can fulfill... But since I have none of them, I just tell him that I don't. I'm sorry, but we don't have any of that at the moment. Oh... Too bad. If you do find any of that stuff and you�re willing to part with it, come see me.The guard falls silent and rests himself against a tree trunk. You part with the guard and return to your explorations. 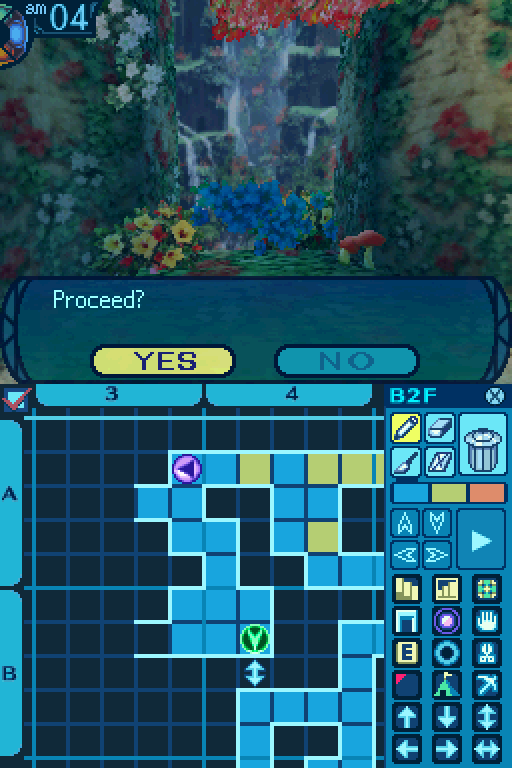 Here's a shortcut back to this point. Now before I do anything else, lemme show off the Coupon I just got. DS Version We'd like to use this coupon please. Where did you get that? I thought I disposed of those a long time ago. We found it in the Labyrinth. drat it. I should have known that someone would find one. Very well. Then what would you like to purchase? We'd like to use this coupon please. Where did you get that? I thought I disposed of those a long time ago. We found it in the Labyrinth. drat it. I should have known that someone would find one. Very well. Then what would you like to purchase?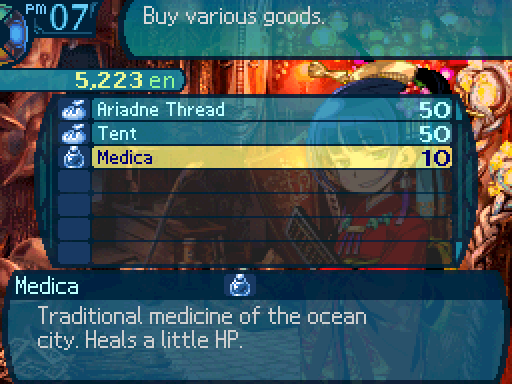 Every single item in the game will have their price cut in half. Every one. So you want to save these for for like the most expensive items.  However, I blow mine on a Medica. There are only 8 Coupons in the entire game, and is no way to get any more of them. NONE. So hoard them until the postgame. 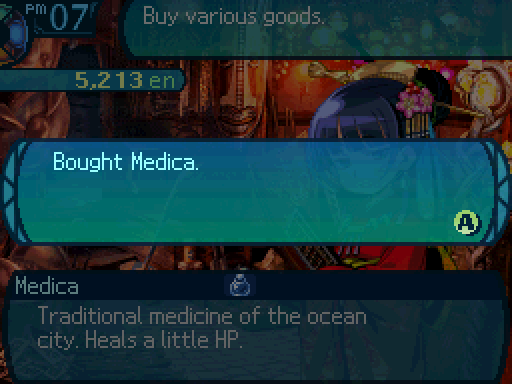 Also, after buying something, the store will go back to regular prices, even if you have multiple Coupons. Araxxor fucked around with this message at 18:05 on Jun 21, 2015 |
|
#
¿
May 30, 2015 21:50
|
|
|
Hivac posted:Every wasted coupon is a hundred stairs I will not draw walls around You realize your terrible cartography skills are why I blew that coupon in the first place, yes? I warned you that I was going to do that. RareAcumen posted:Did anyone else have a problem with half of some of the images loading? Everything looks fine on my end. Though I did have 2 pretty big GIFs in the update, so those might be causing some problems. Anyways, gonna be reaching the 3rd floor on the next update, so I'll probably open up votes if people want to see the party changed up this soon. (You didn't think I was sticking with LPer's Choice for the whole LP, did you?)
|
|
#
¿
May 31, 2015 08:22
|
|
|
Okay, why don't we start the votes for who gets to explore the 2nd half of the 1st Stratum, since there doesn't seem to be any objections to changing up the party.List of Candidates posted:Prince: Vote for up to 3 party members. The top 5 choices will make up the next team. Voting ends when I post the next update. (Which will still use the current team.)
|
|
#
¿
May 31, 2015 18:02
|
|
|
cdyoung posted:Let me amend myself with proper diction. 3 votes per person. Your last 2 choices have been rejected in order to comply with the rules. Current Standings: Rose: 7 Cassandra: 6 Scott: 6 Asteria: 5 Fang: 5 Alice: 4 Sidney: 2 Akatsuki: 2 Faye: 0
|
|
#
¿
May 31, 2015 19:54
|
|
|
Even More Current Standings: Asteria: 12 Rose: 11 Alice: 10 Fang: 9 Scott: 8 Cassandra: 8 Akatsuki: 6 Sidney: 2 Faye: 1 Seems like most of the new guys are fighting over a spot, while MEGAQUEEN is firmly locked into 1st place. Who knows how this vote will turn out.
|
|
#
¿
May 31, 2015 22:37
|
|
|

|
| # ¿ May 14, 2024 16:20 |
|
|
VOTING IS CLOSED! The Final Standings: Asteria: 15 Alice: 15 Rose: 15 Scott: 12 Fang: 12 Cassandra: 9 Akatsuki: 9 Sidney: 3 Faye: 1 My Choice: 4 There's a 2 way tie for 5th place, however, Buccaneers can't do much early, and aren't that interesting in the early-game. So I'll be taking along EDIT: Or rather, on the next page. Araxxor fucked around with this message at 17:34 on Jun 1, 2015 |
|
#
¿
Jun 1, 2015 17:31
|
|